Subject: Aero-Naut Classic Fri Mar 07, 2014 7:08 pm
Well guys this one I might even finish is record time... maybe
As the title says its the Areo-nauts Classic, for those who don't know its a semi scales 1960 representation of a runabout.
By far they are the easiest kits to put together with out any real thought, kinda nice really to not have to think when putting things together.
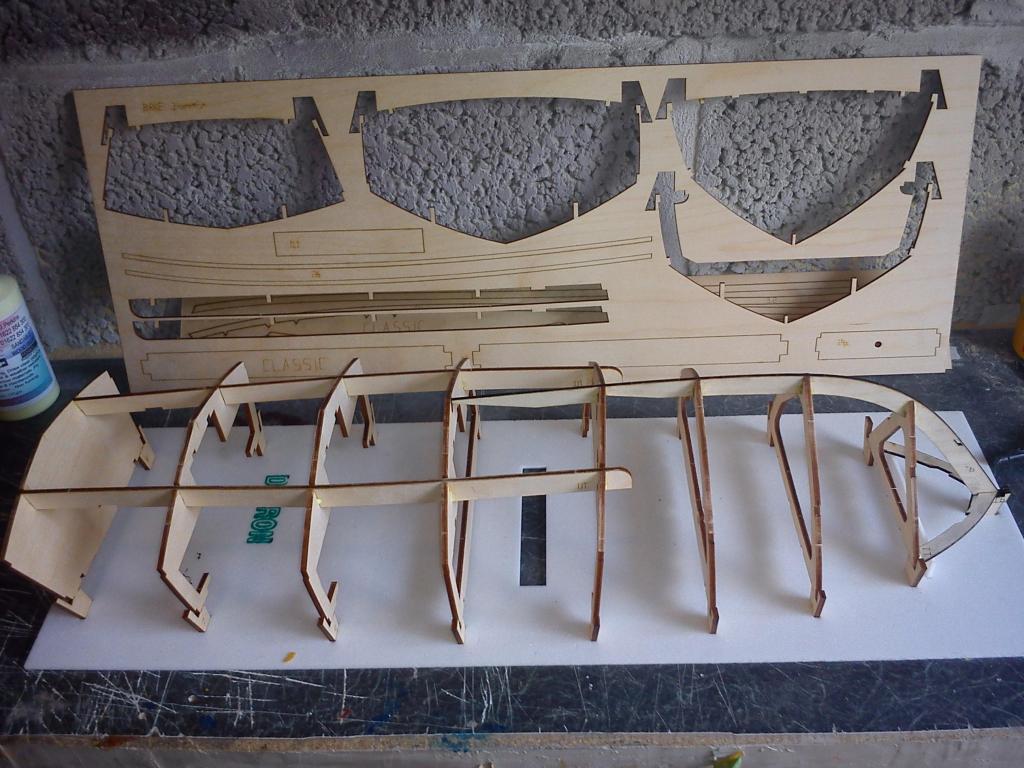
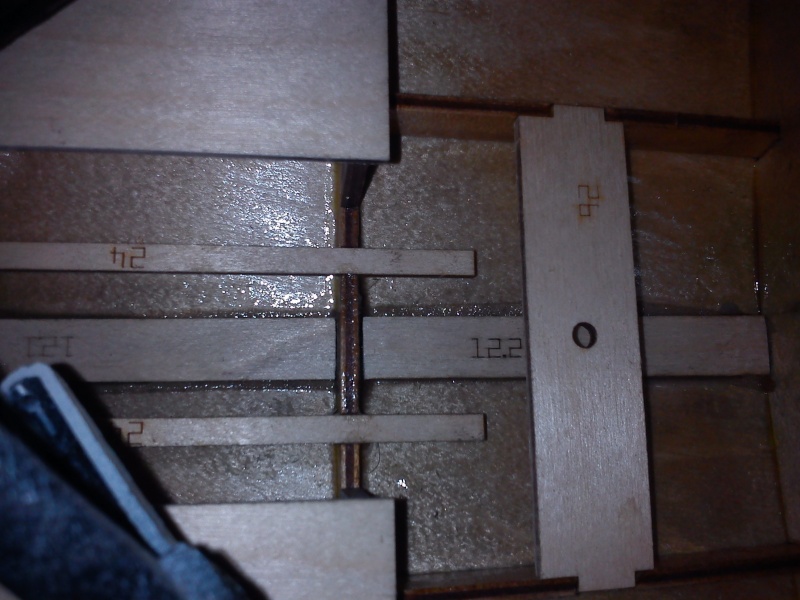
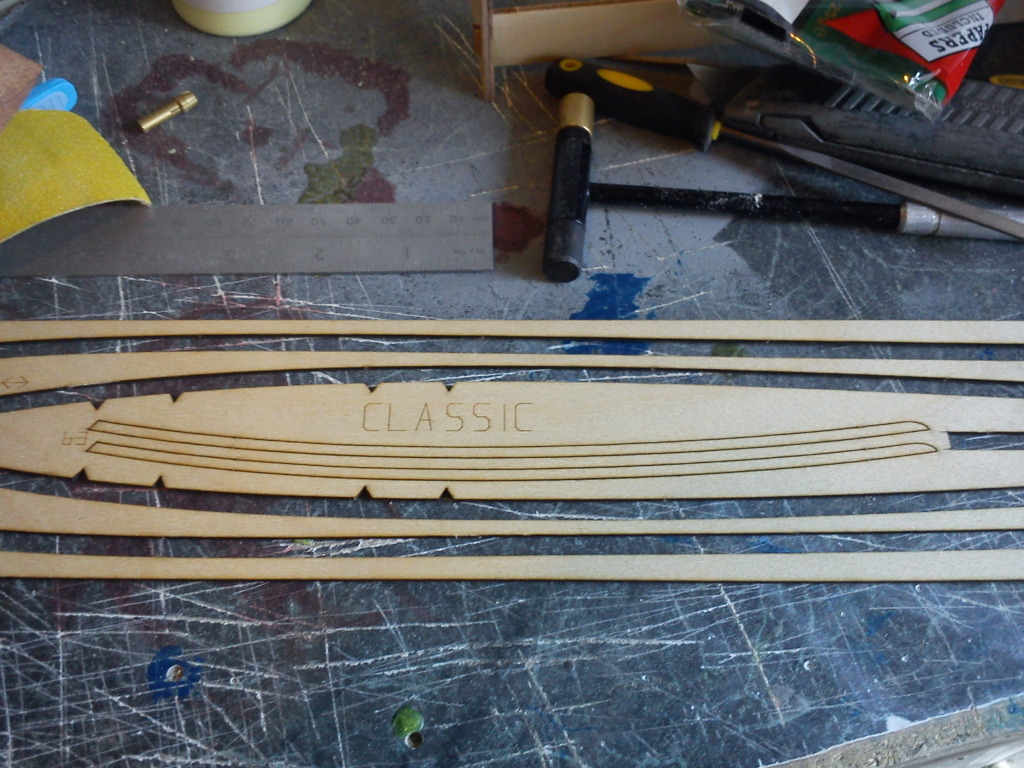
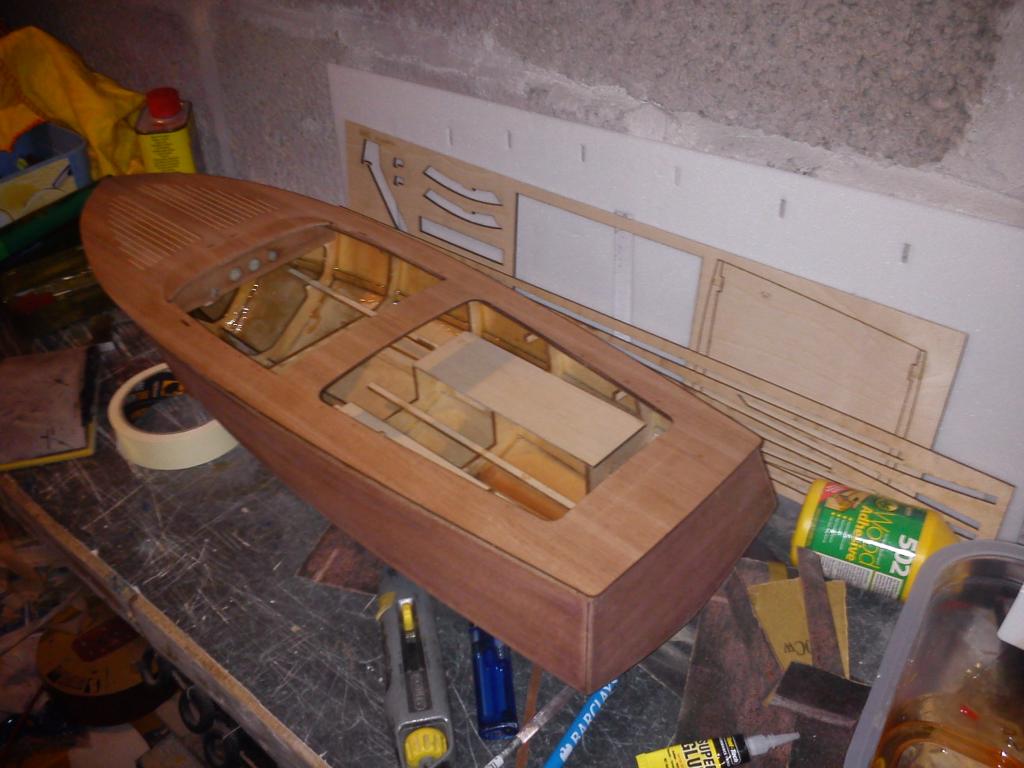
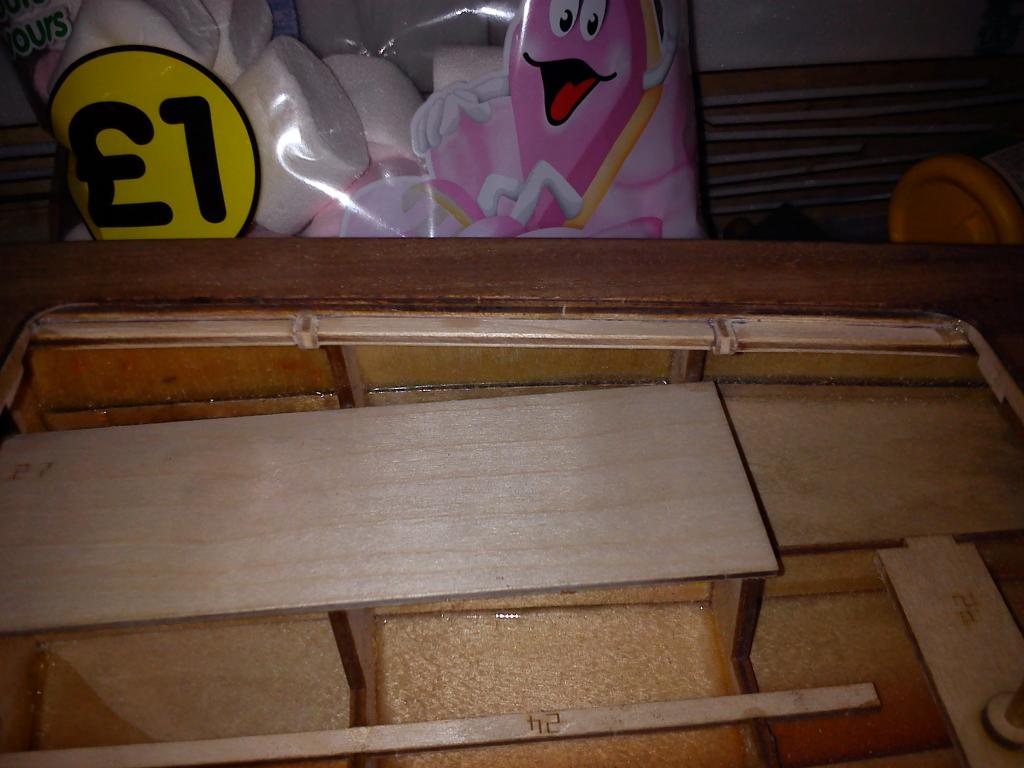
Kit is pretty comprehensive, instructions are in German but mostly pictorial, however you do get a nice set of written in English instructions added to the pack which in no way translate to the official build instructions, eh what ever right cant be that hard to follow the pictures (famous last words now!) Anyhow today I pressed out the bulkheads from the lazer cut ply sheets and fitted the support rails....
Tomorrow I will start to fit the side panels should the kids allow!
_________________ I'm Not Anti-Social, I'm Anti-Stupid.
Last edited by Roadrunner on Fri Mar 28, 2014 7:05 pm; edited 1 time in total
intrepid75 Master
Posts : 271 Join date : 2011-06-11 Age : 68 Location : Bristol, West country
Subject: Re: Aero-Naut Classic Fri Mar 07, 2014 9:01 pm
Will watch this with interest. Have been considering an Aeronaut myself to have a shot but the backlog of still to builds is pretty high and as much as I am the master of my own household and I do what I want, I consider myself to be caring and understanding so I would hate to upset the missus by getting another 'to do later'. Of course if I really wanted one I would get one and just tell her not to interfere and lay down the law.
And note the comments about if the kids allow. At the moment my building is slightly slow as the new dog is taking up a lotta time now she has settled in and is best of mates with the older dog. Both demanding to be walked and played with all the time. I have made some slow progress on my Captain with shafts fitted and rudders made and also bilge keels made and fitted so maybe next week I will be able top post a build update. Only 63 days to retirement so plenty of time soon to build.
Roadrunner Forum Overlord
Posts : 1714 Join date : 2011-06-10
Subject: Re: Aero-Naut Classic Fri Mar 07, 2014 10:56 pm
Hey bud yeah you cant go wrong with a Areo-Nauts kits basically, sometimes you run into a few glitches with panels not quite meeting up etc but nothing you cant fix with some wood filler and a bit of care, these are aimed at the newbies into model boating to be perfectly honest i tend to have more fun knocking these boats out then i do spending 3-4 years on a project!
To be quite honest when your boating you spend maybe 15 mins sailing the other 2 hours yapping so if running 1 or 2, 7.2's down is about it for the Sunday the cost of the boat works out quite effectively!
The classic was £66 add the new prop shaft (one it comes with it basically junk) new prop, ESC, Receiver and a servo your looking around the £120 mark adding the costs of paints/varnishes and any extra bits overall cost around £150 and you really can build these in a few days with relative ease.
My original plan was to make this brushless and make it Zoom across the water much like this nutter!
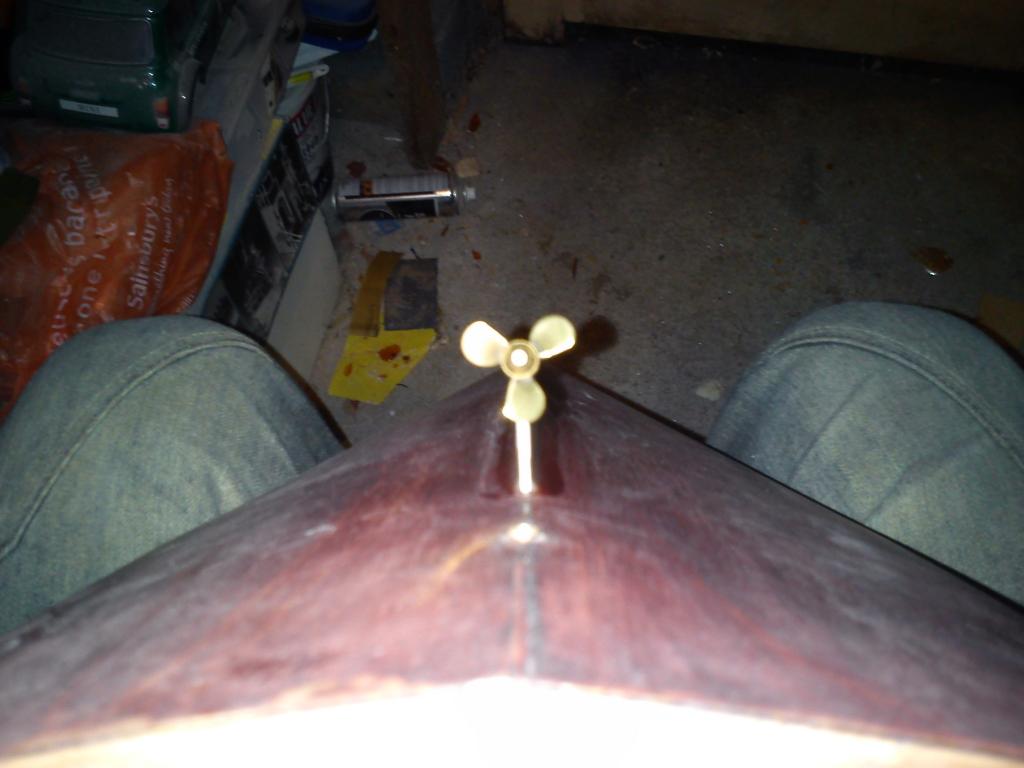
However our lake is way to choppy for a boat that can be a missile, even calm days can be a challenge, so i've opted for the tried method I was planning to put a 400 size motor in, but as luck would have it my dad had a spare mfa 385 motor so free bargain! i'll still get 7000RPM outta her and these little boats don't weight much, so it will go like the clappers, i am downgrading the prop to a 20mm rather then the stated 25, i've found that with the 3 bladed props at this size of model they give the boat a great amount of speed without swapping out to a Xprop, which i may do later should i want the extra boost, but a nice brass prop always looks great on show day
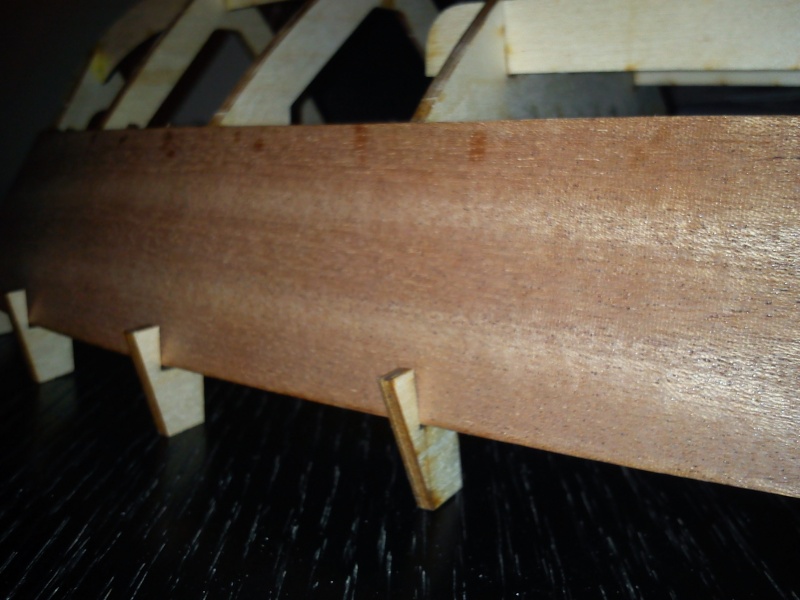
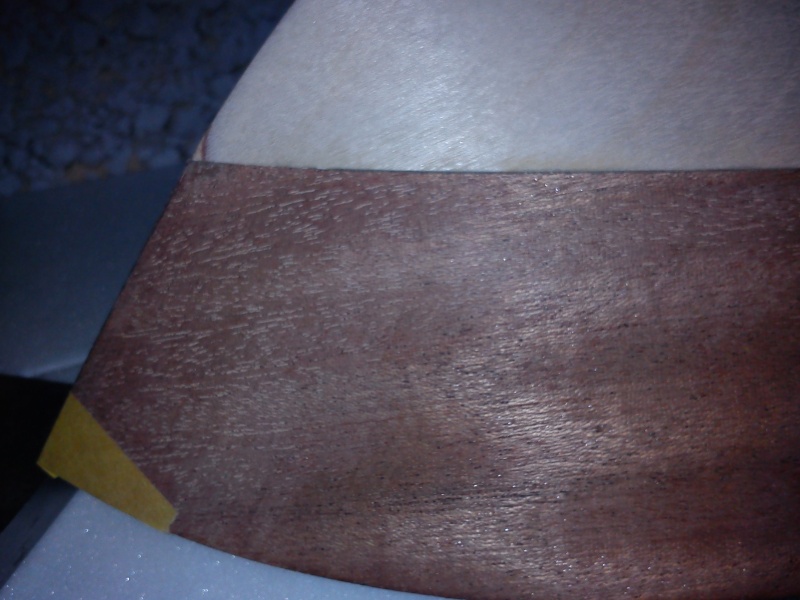
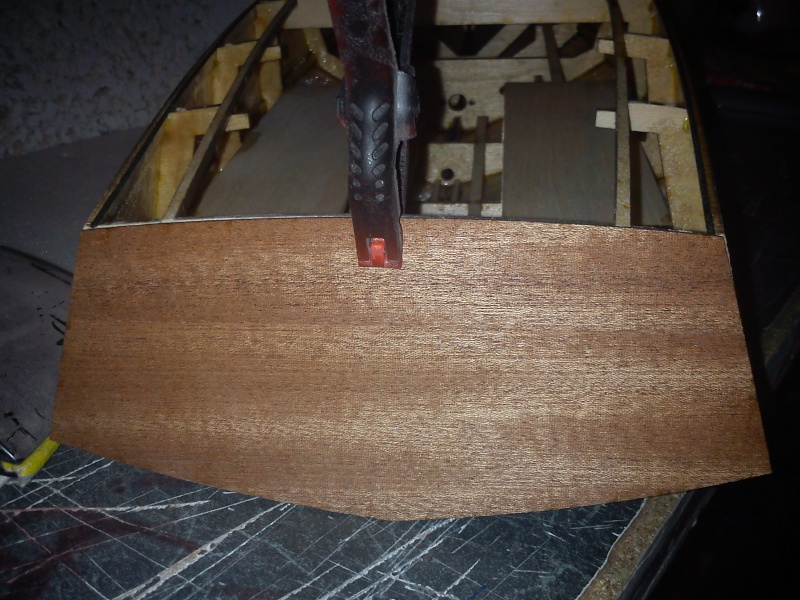
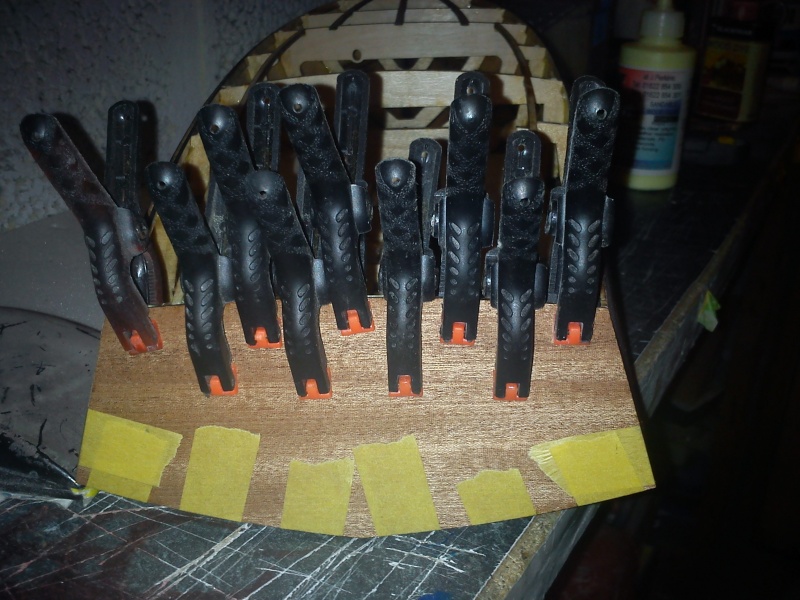
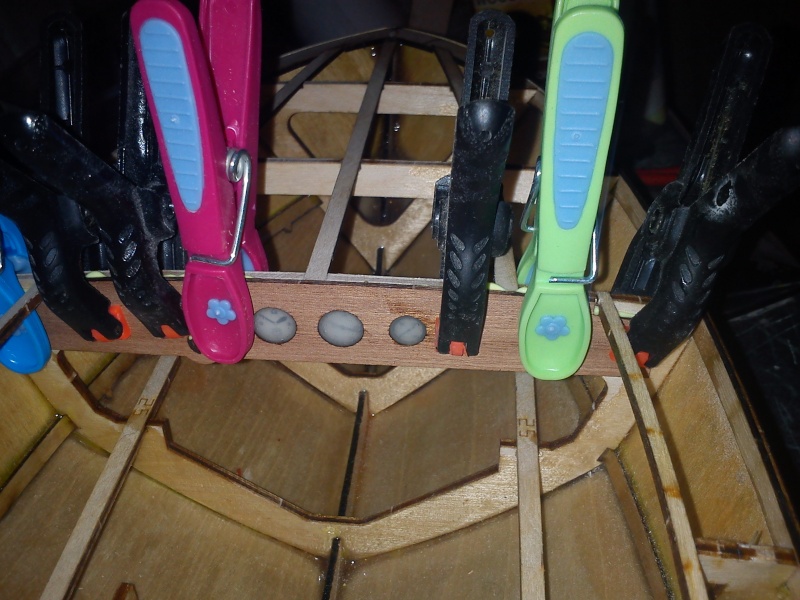
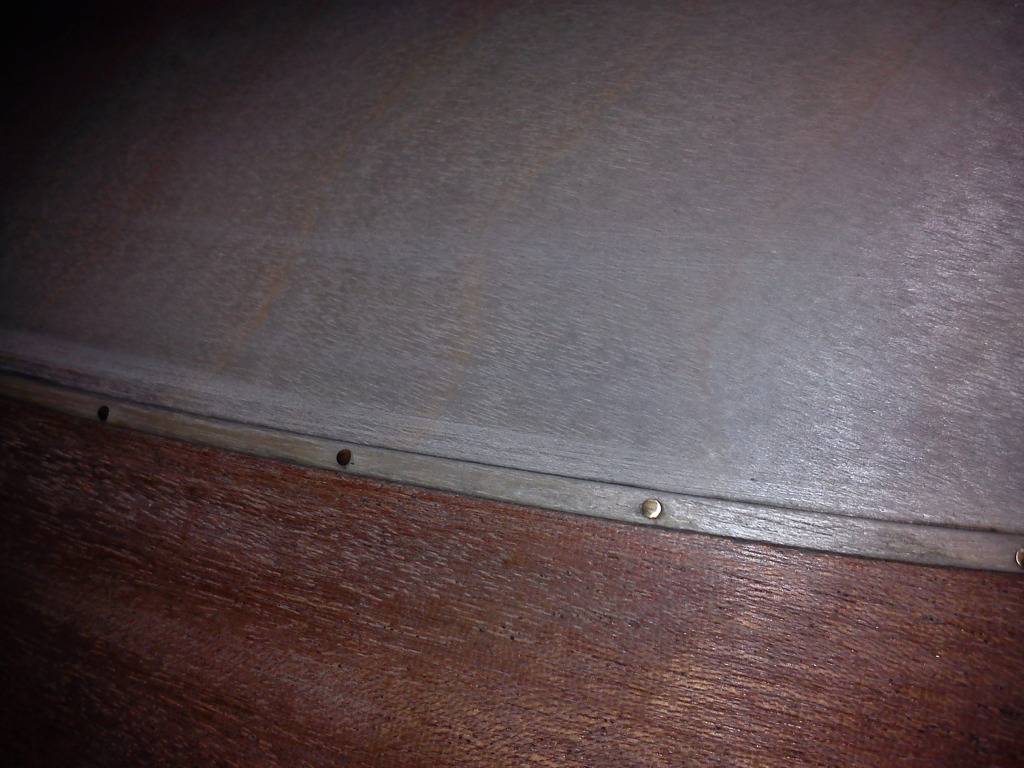
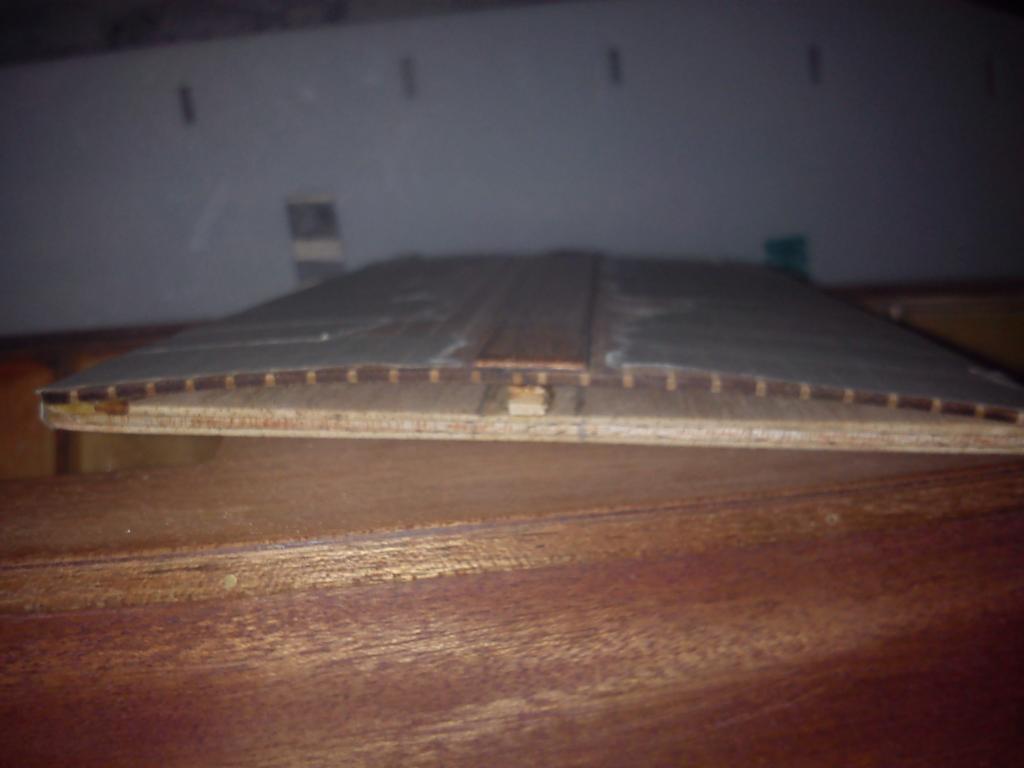
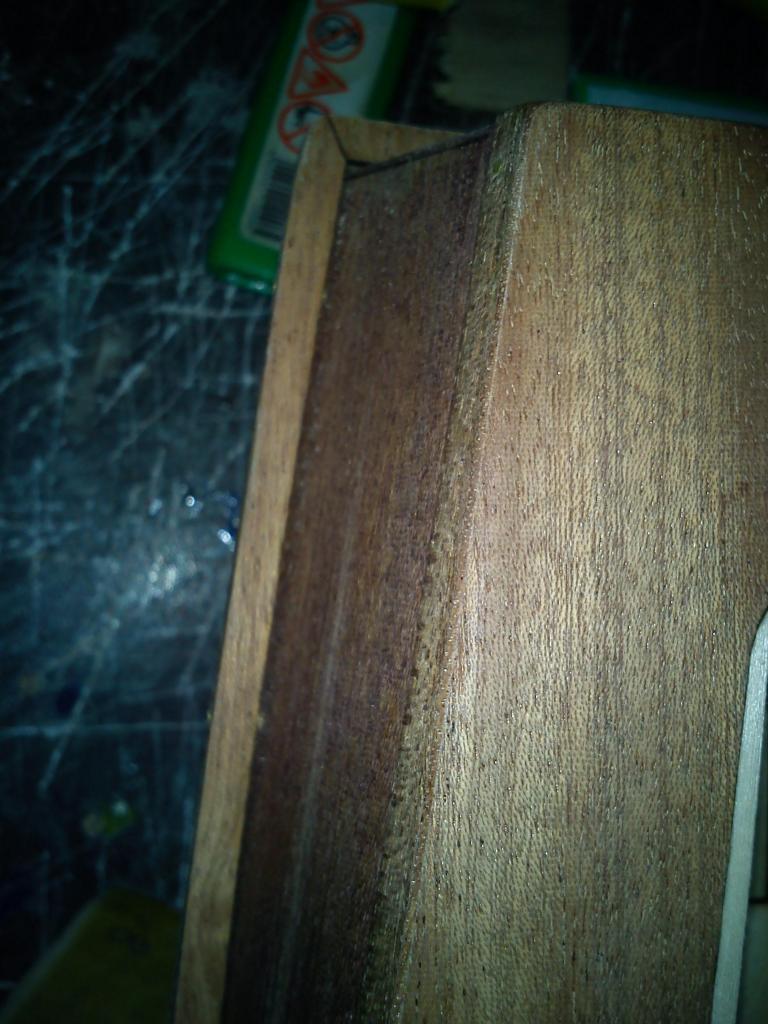
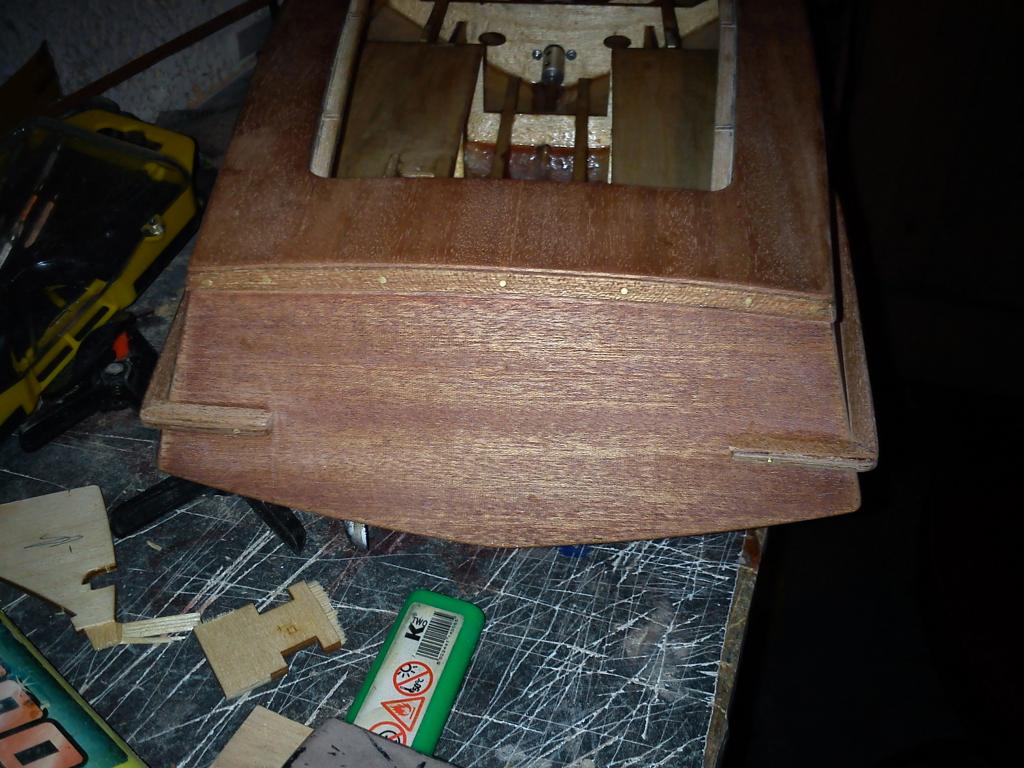
Anyhow since my last post a couple of hour ago i've fitted the mahogany veneer top side panels to the boat, make very easy using the locking bulkhead system this boat incorporates , its literally tuck the sides into the formers and prang it back add glue clamp, its really that easy... However the bottom will be a whole other story, they ALWAYs are!
_________________ I'm Not Anti-Social, I'm Anti-Stupid.
Guest Guest
Subject: Re: Aero-Naut Classic Sat Mar 08, 2014 12:13 am
Looking good.
barriew Captain (moderator)
Posts : 2631 Join date : 2011-11-26 Age : 83 Location : Thaxted, Essex
Subject: Re: Aero-Naut Classic Sat Mar 08, 2014 6:21 am
When I built my Victoria I found the only real issue was ensuring the sides were fitted right down into the the formers. They look good when finished. This weekend I will be collecting a Diva which has been donated to the club. It needs a little work to tidy it up, then we are going to use it as a "loaner" for potential new members without a boat.
Barrie
Roadrunner Forum Overlord
Posts : 1714 Join date : 2011-06-10
Subject: Re: Aero-Naut Classic Sun Mar 09, 2014 5:19 pm
Alright guys looks like were on a winner here an probably will be finished in record time!
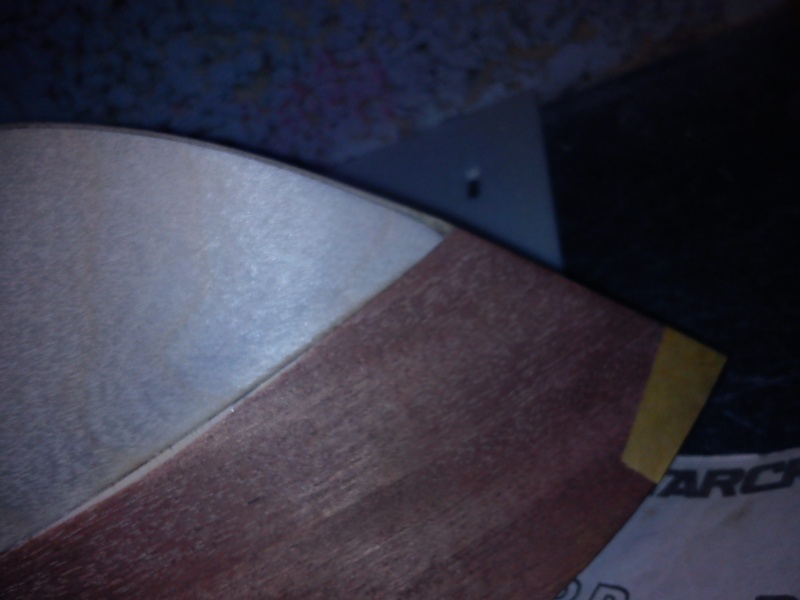
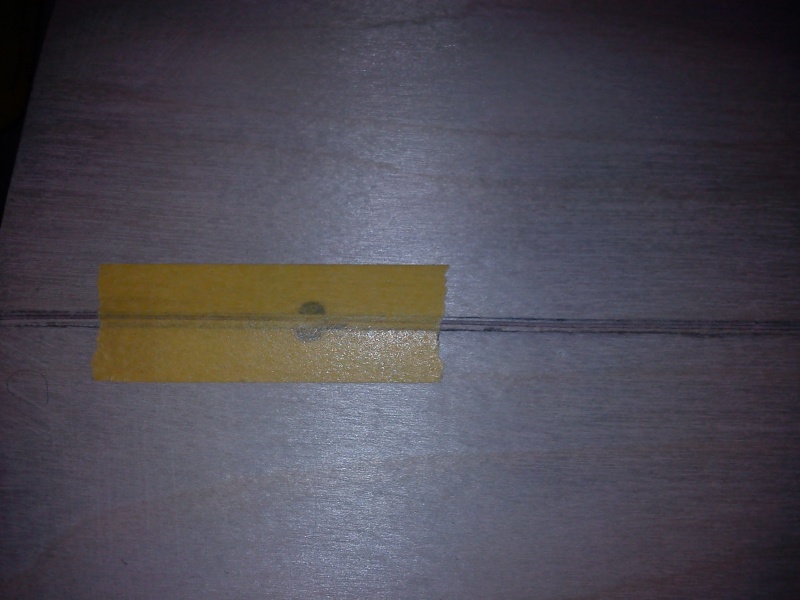
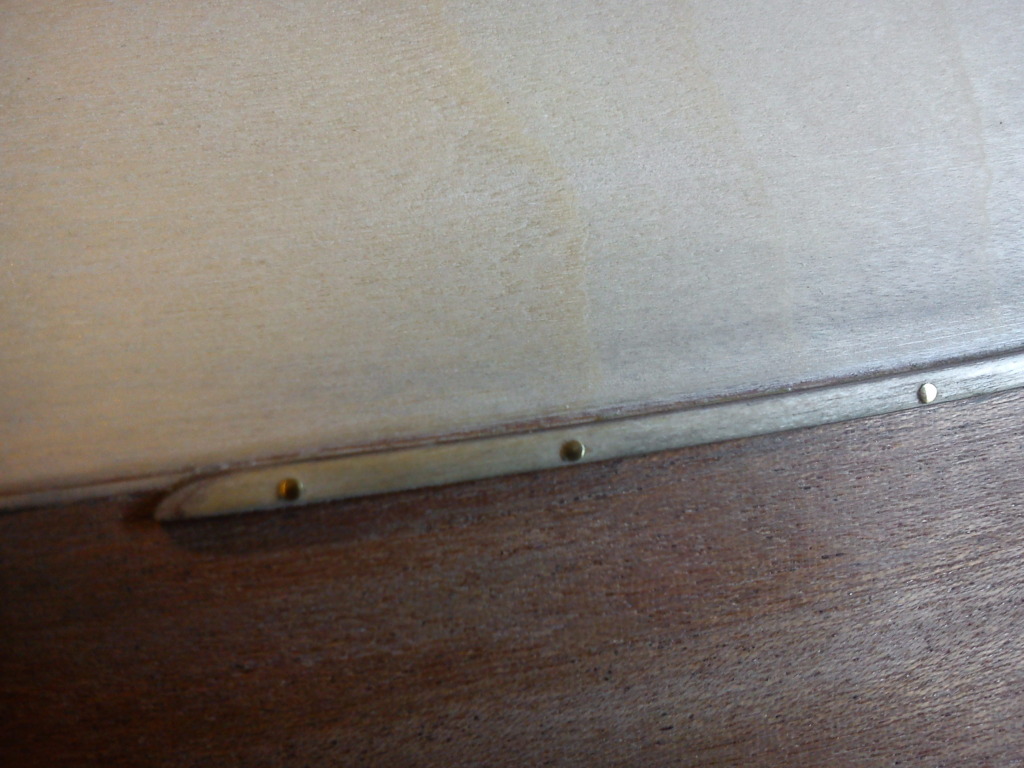
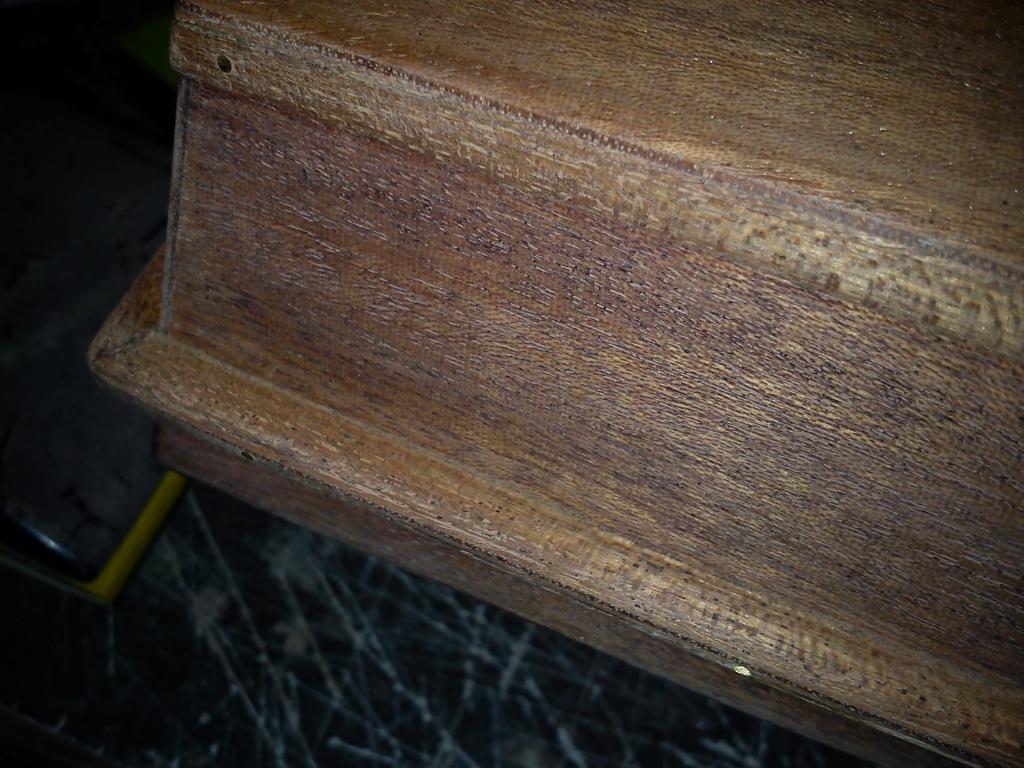
Yesterday I did get the base panels in place, but i had the boat so clamped up to keep the sides down a photo was near impossible! However little hiccup, the panels were a fraction to short at the transom end, so i had to patch it, I achieved this by adding what now looks like a keel strip, but its really a 2mm wide section of ply sanded smooth to the hull shape, this however has effected the servo exit hole that was pre cut in the panels which ill have to get creative to fix,most likely silver soldering a brass washer to the brass rudder tube, once epoxied in will hide the gap, now I know what some of you are thinking at this point.. ''but the base will be painted so use just some filler'' Sorry guys I'm tired of painting and sprays this time I'm going to stain the base with a mahogany wood stain and varnish the boat with my lovely 2pac epoxy varnish . There are a few other reason for doing this, the mahogany top panels are only a veneer, on a ply base, so while sanding the edges smooth the veneer layer vanished to reveal the ply underneath.. this however isn't normally an issue if using the kit properly as the seam line would be covered by a 5mm waterline sticker or for the more professional a painted line, I'm not going this way or all my boats will end up looking the same and its getting boring!!
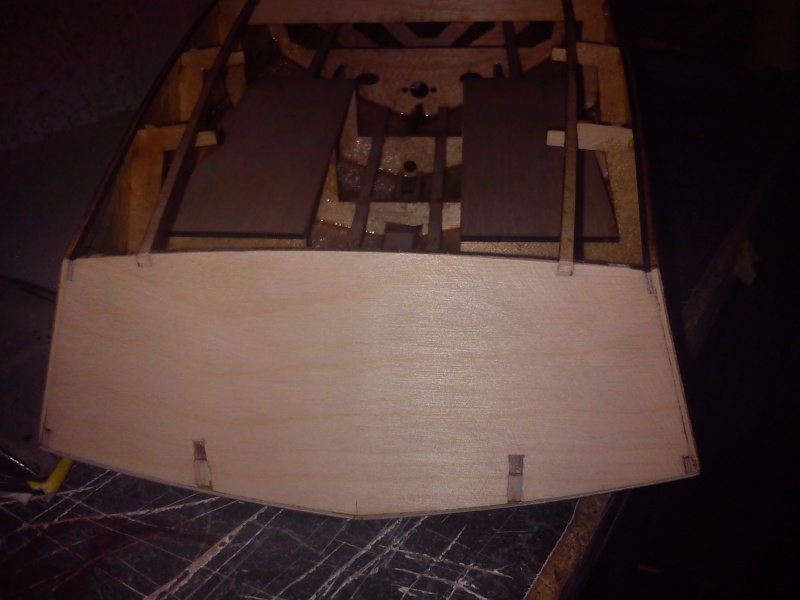
Today I've fitted all the internal remaining frames, the rudder mount the keel strip and the servo & ESC mounting tray then given the boat a coating internally of dope to seal any gaps i may not have seen, making the hull water tight, i would have fiberglassed the inside fully but this would add far to much weight to the boat.
I would have done more today but now I'm stuck waiting for glues and resins to dry hard before i hammer the hell outta the deck supports with some 80 grit to get the deck to sit flush!
RR
_________________ I'm Not Anti-Social, I'm Anti-Stupid.
intrepid75 Master
Posts : 271 Join date : 2011-06-11 Age : 68 Location : Bristol, West country
Subject: Re: Aero-Naut Classic Sun Mar 09, 2014 6:36 pm
Definitely very quick progress and at this rate it will be done in a week!!
barriew Captain (moderator)
Posts : 2631 Join date : 2011-11-26 Age : 83 Location : Thaxted, Essex
Subject: Re: Aero-Naut Classic Sun Mar 09, 2014 8:14 pm
Its the only fault I could find with Aeronaut - they go together too quickly
Barrie
Roadrunner Forum Overlord
Posts : 1714 Join date : 2011-06-10
Subject: Re: Aero-Naut Classic Sun Mar 09, 2014 10:23 pm
I just cant stop on this one!!!!
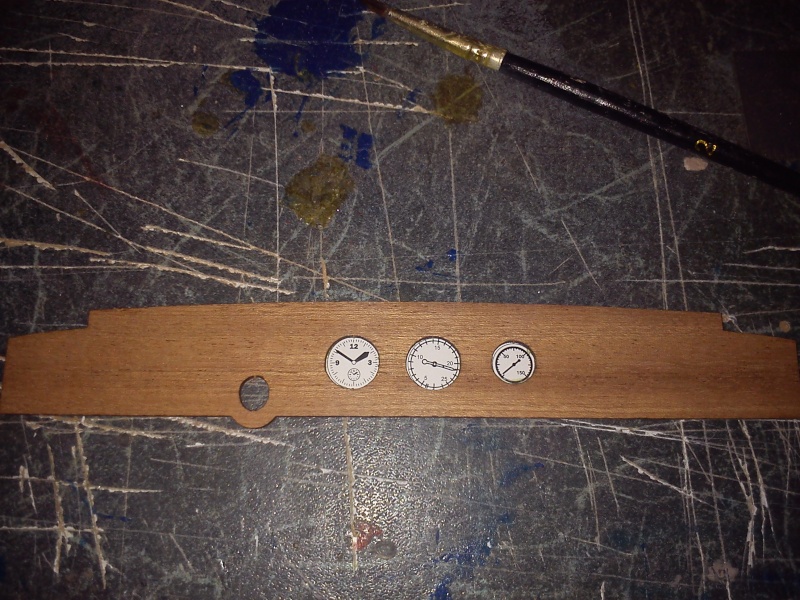
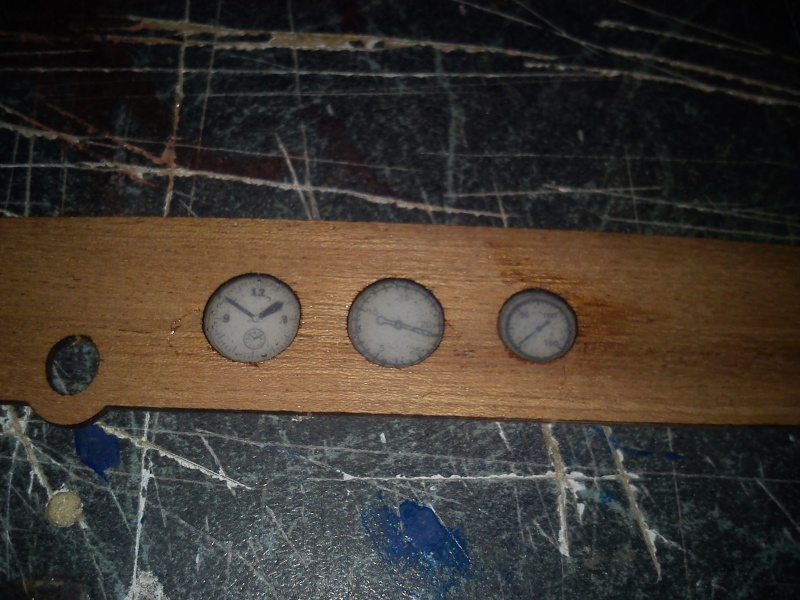
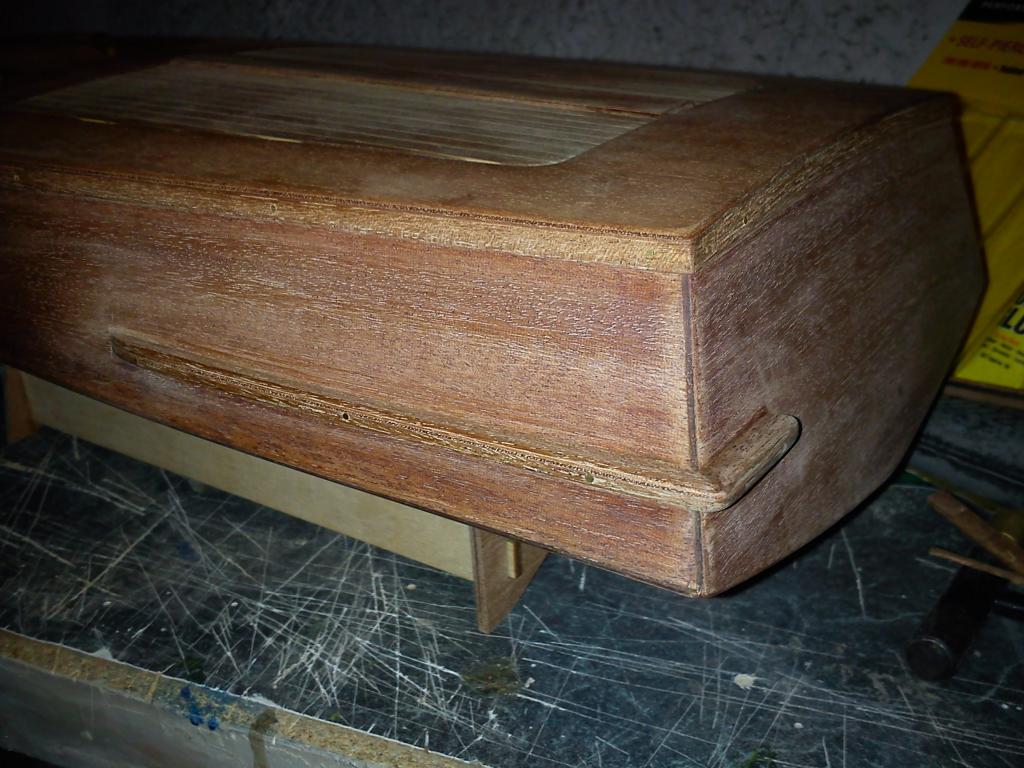
In the Last 2 hours since my last post I've fitted the mahogany transom, and started building up the control panel for the boats steering & dials, the dials are simply a printed set from the kit which I've glued to the rear of the mahogany insert, then i've coated them with epoxy, this isn't the finished look of them by far there is a nice aluminium dial guard for these that gets fitted right at the end to make them look all pretty.
_________________ I'm Not Anti-Social, I'm Anti-Stupid.
Guest Guest
Subject: Re: Aero-Naut Classic Sun Mar 09, 2014 11:33 pm
If I wanted to e picky the only fault I could find is this build is too neat.
Ripper job Aron.
Roadrunner Forum Overlord
Posts : 1714 Join date : 2011-06-10
Subject: Re: Aero-Naut Classic Mon Mar 10, 2014 12:04 am
Hey Bud thx for the comments, i only have a few rules when building..
If you don't know ASK If your gonna do it, do it bloody right FIRST time! Work clean. There is nothing worse then being down the lake or a show and someone says 'how did you do that?, or whats inside?'' and your response is to show them something dirty, messy. or something just thrown in. There are other reasons besides a visual, having the area inside clean and tide helps a great deal when looking for issues with wiring, leaks, bindings, etc etc. I think a lot of people have noticed that the insides of all my boats I've posted are done the same way i am a stickler for it and its one thing my Father taught me that i will always abide by.
_________________ I'm Not Anti-Social, I'm Anti-Stupid.
Guest Guest
Subject: Re: Aero-Naut Classic Mon Mar 10, 2014 12:11 am
Good onya as aussies say.
Roadrunner Forum Overlord
Posts : 1714 Join date : 2011-06-10
Subject: Re: Aero-Naut Classic Mon Mar 10, 2014 10:27 pm
Slow progress today, tired
Only thing I've done this evening is sand the frame rails smooth to take the deck sheet properly with no gaps, cut out the ply and mahogany pre planked inserts, the seating area floor section and glue the seat frames together. I have to stop and think now as the seating area shows the frame work inside once the boats finished so I will probably be making a slight modification and adding a internal wall set to hide all the frames once the seats in place, I'll work on that...
_________________ I'm Not Anti-Social, I'm Anti-Stupid.
Roadrunner Forum Overlord
Posts : 1714 Join date : 2011-06-10
Subject: Re: Aero-Naut Classic Tue Mar 11, 2014 8:41 pm
Bit more today, thought i'ld grab in a quick post while waiting for the Resin on the rudder shaft to set..
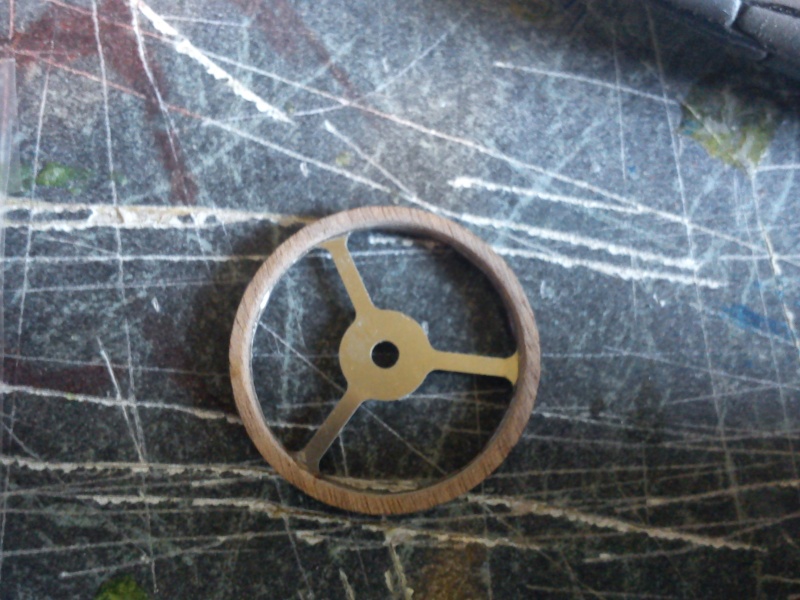
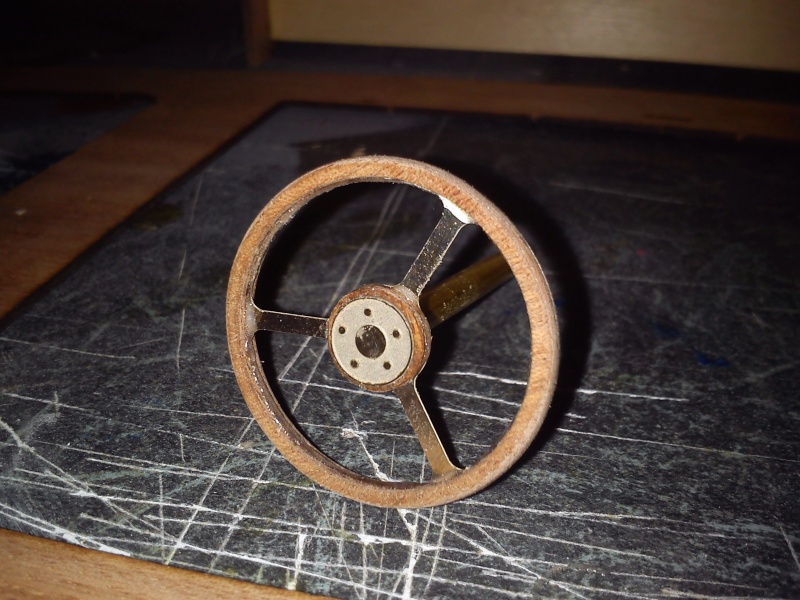
Today I've started to assemble the steering wheel with the aluminium insert..
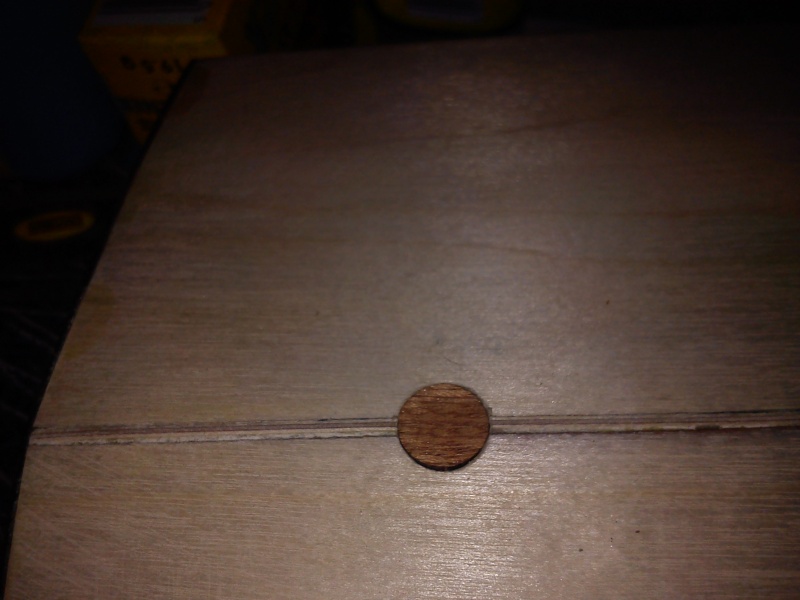
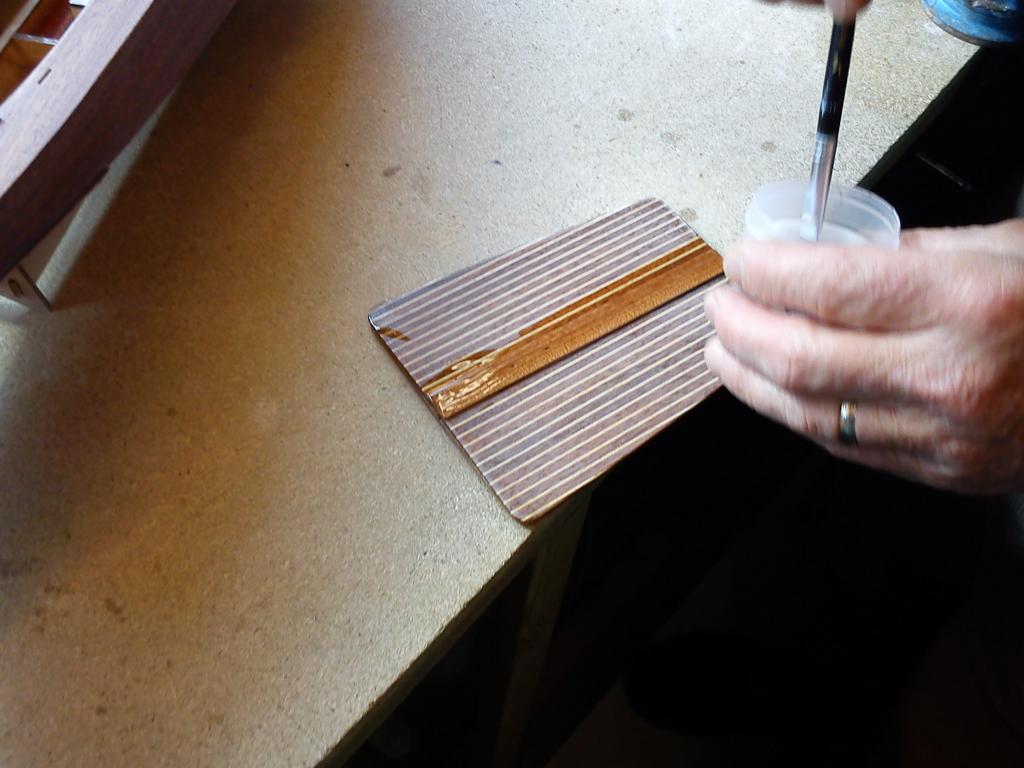
While i'm waiting for the epoxy to set on the wheel components, i've patched the Rudder tube exit hole in the hull, now as you all remeber i when fitting the bottom skin to the boat the pre cut holes were no longer in alignment and they were also elongated, this would cause me a huge issue later when it comes to staining and varnishing the boat as any epoxy resins wont take stains and will no doubt spoil the look of the boat (should i ever turn it upside down)
So heres what I did to patch it
Drilled a 10mm Dia hole into where the old hole should be... i didnt go all the way through i only 'grooved' it
Next took one scrap precut mahogany disks from the dashboard of the boat which was perfectly 10mm in Dia and glued it into the grooved out hole i made ( i had serveral 10mm disk offcut scraps i could have used, i just went with the mahogany piece as when i come to stain the boat, any resins used to hold in the rudder tube wont hinder the staining process
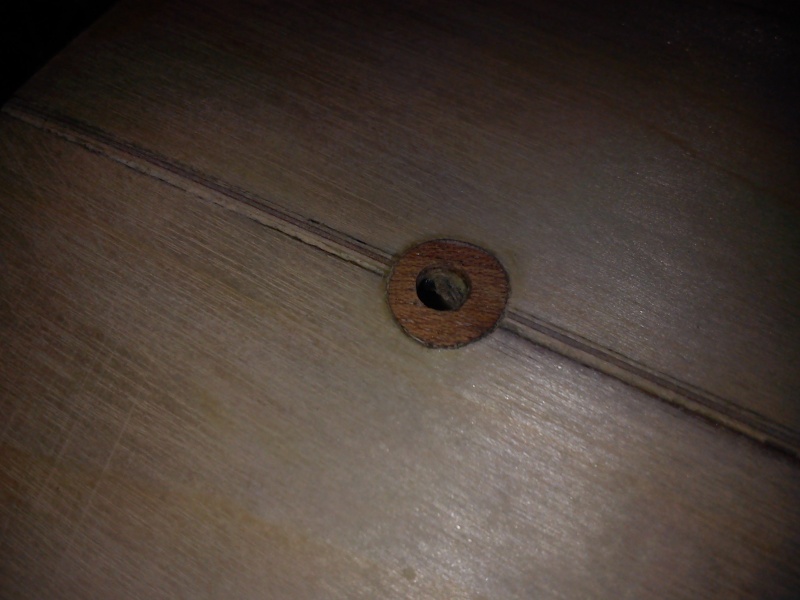
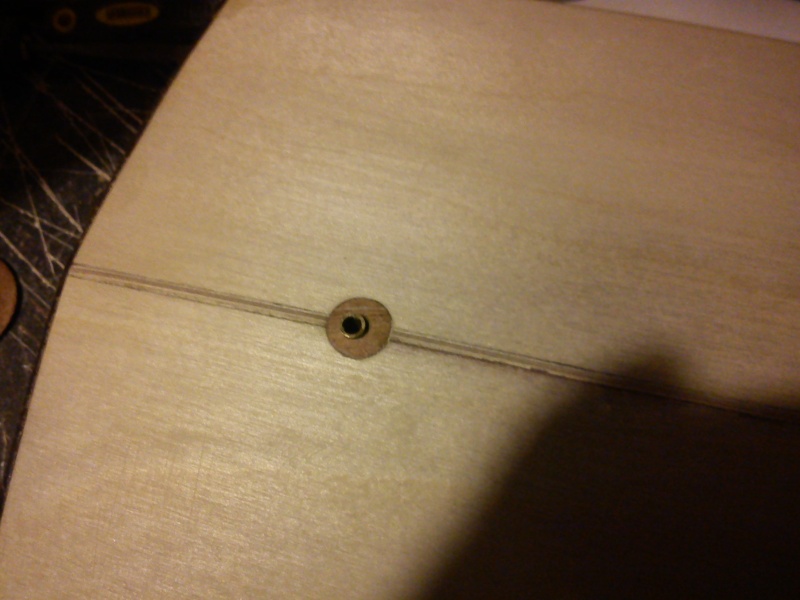
Next drilled out the hole to take the rudder tube
Fitted the rudder post in place .. Tadar all fixed
_________________ I'm Not Anti-Social, I'm Anti-Stupid.
Roadrunner Forum Overlord
Posts : 1714 Join date : 2011-06-10
Subject: Re: Aero-Naut Classic Wed Mar 12, 2014 12:14 am
o.0 a little bit more this evening... think I'm enjoying it a little too much
After letting the rudder post epoxy set this is the outcome.
The near finished steering wheel, ready for final sanding
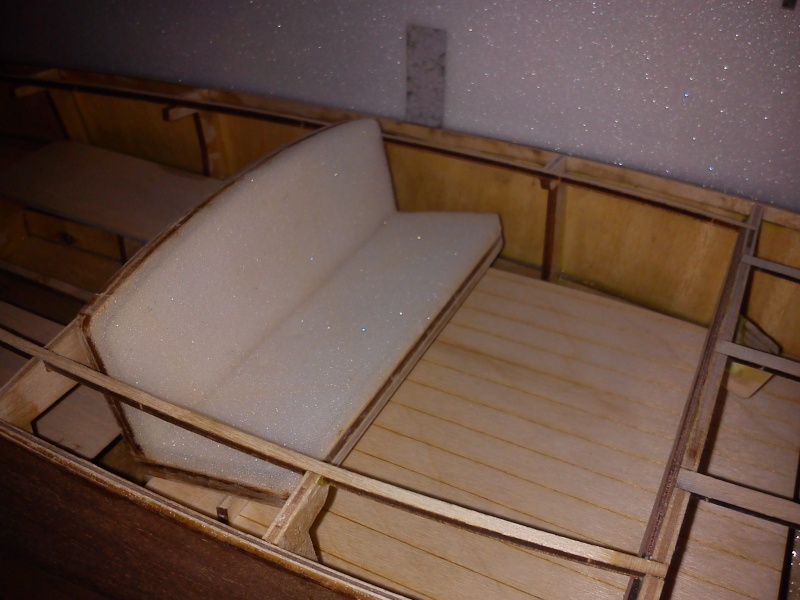
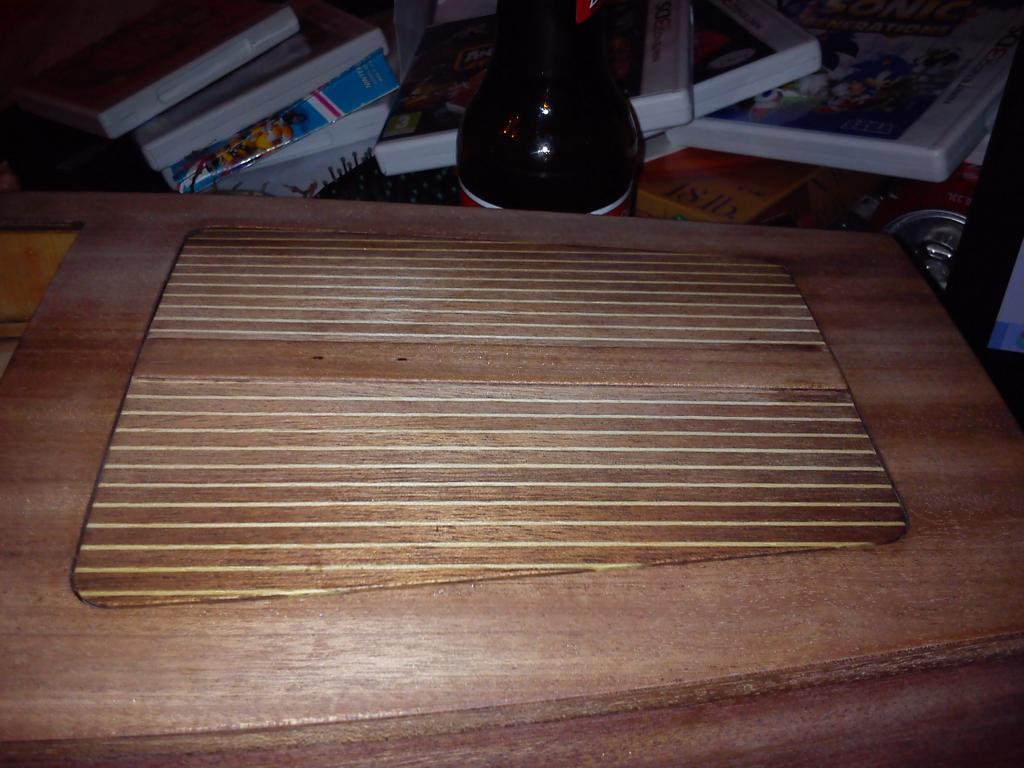
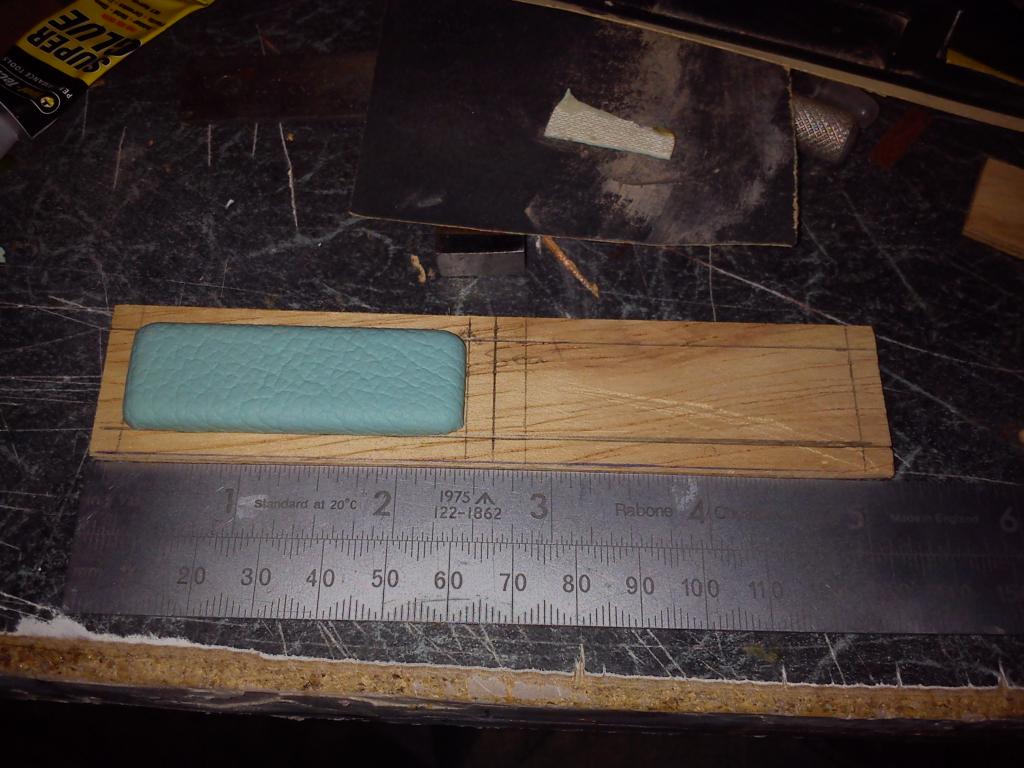
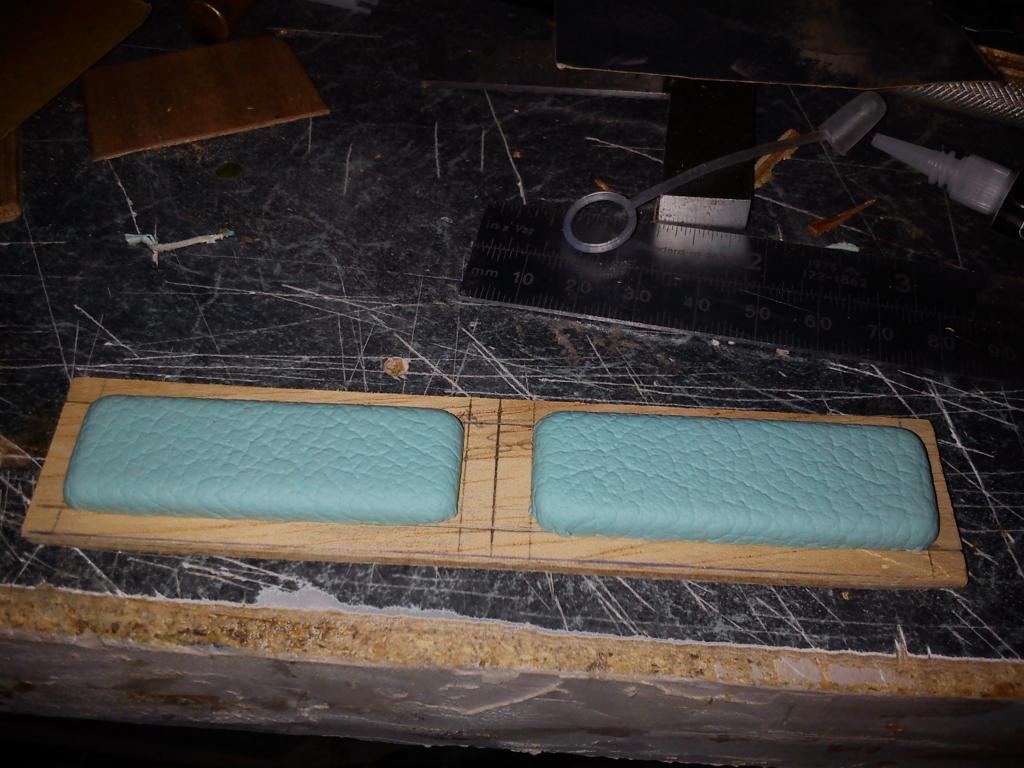
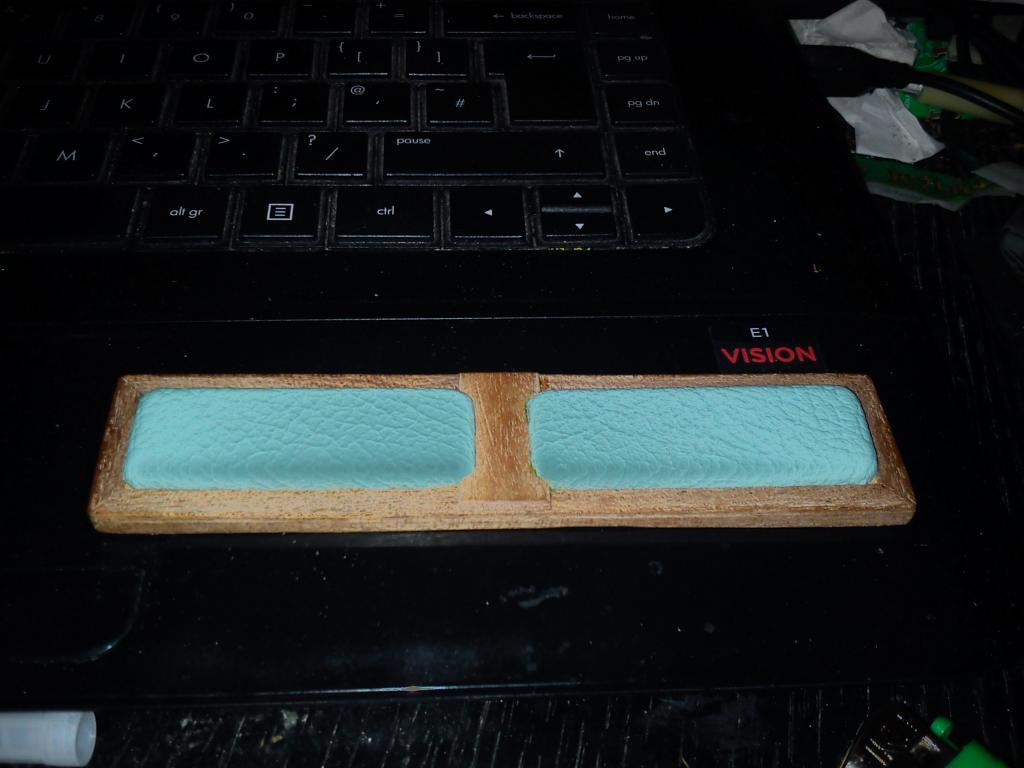
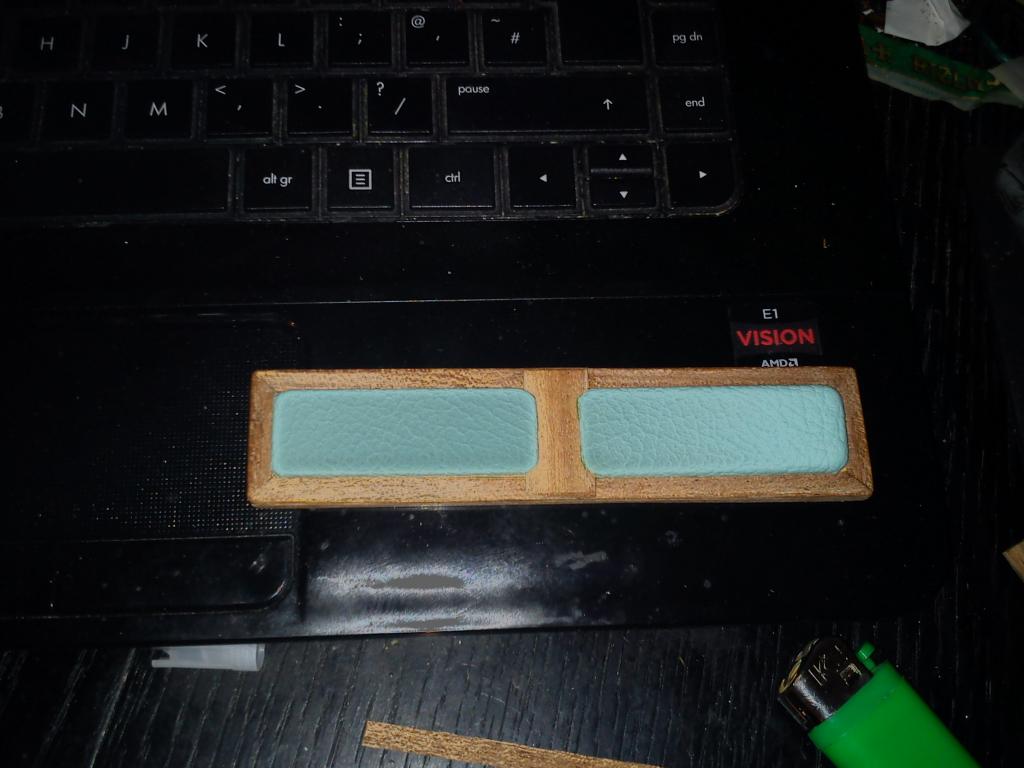
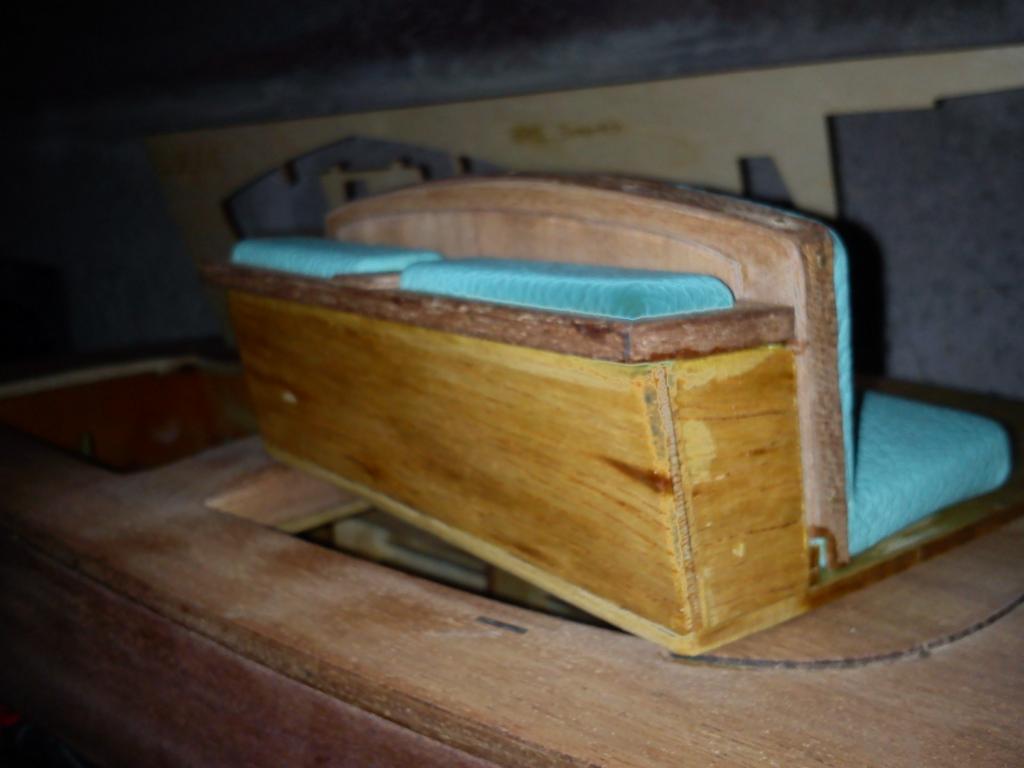
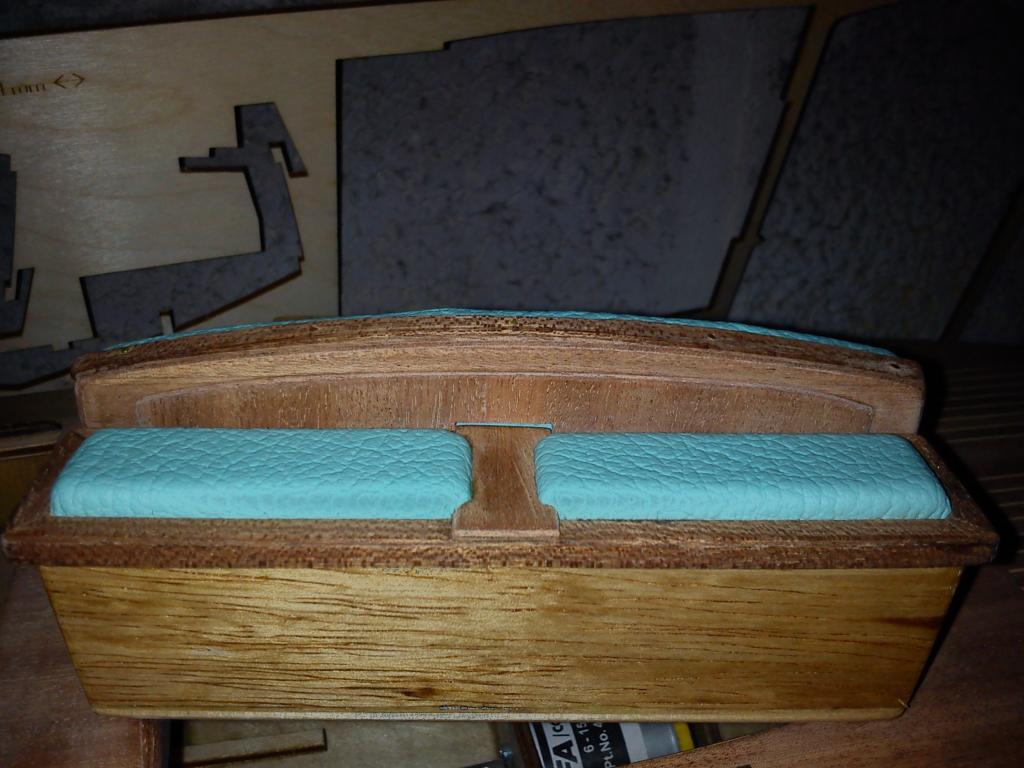
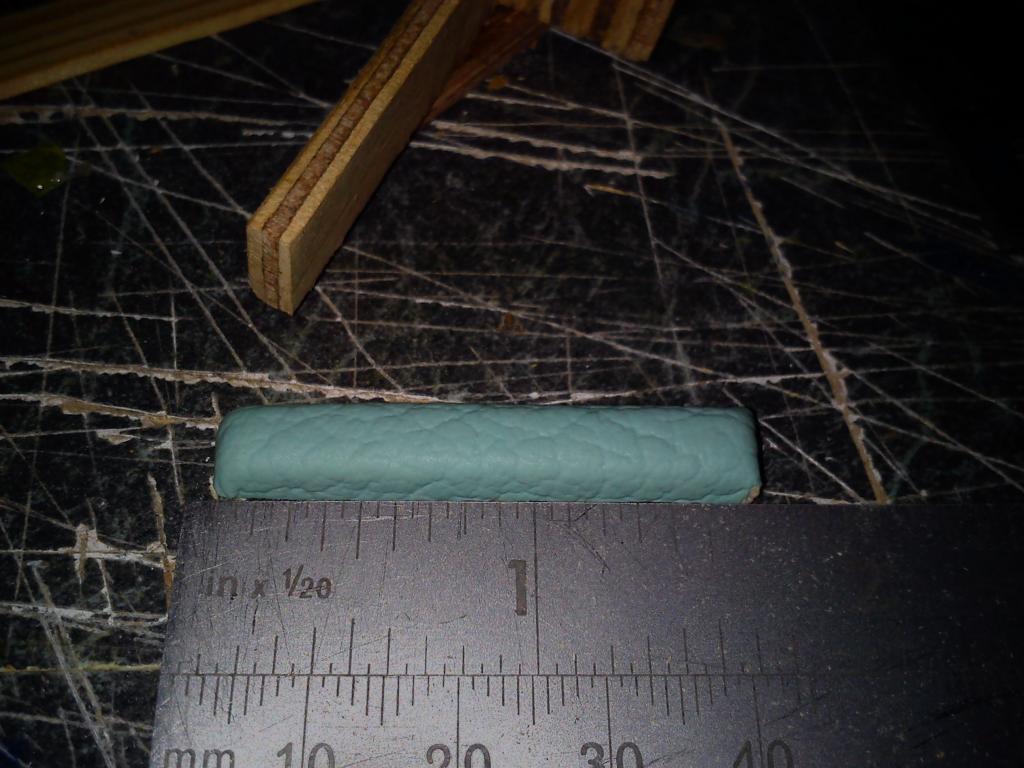
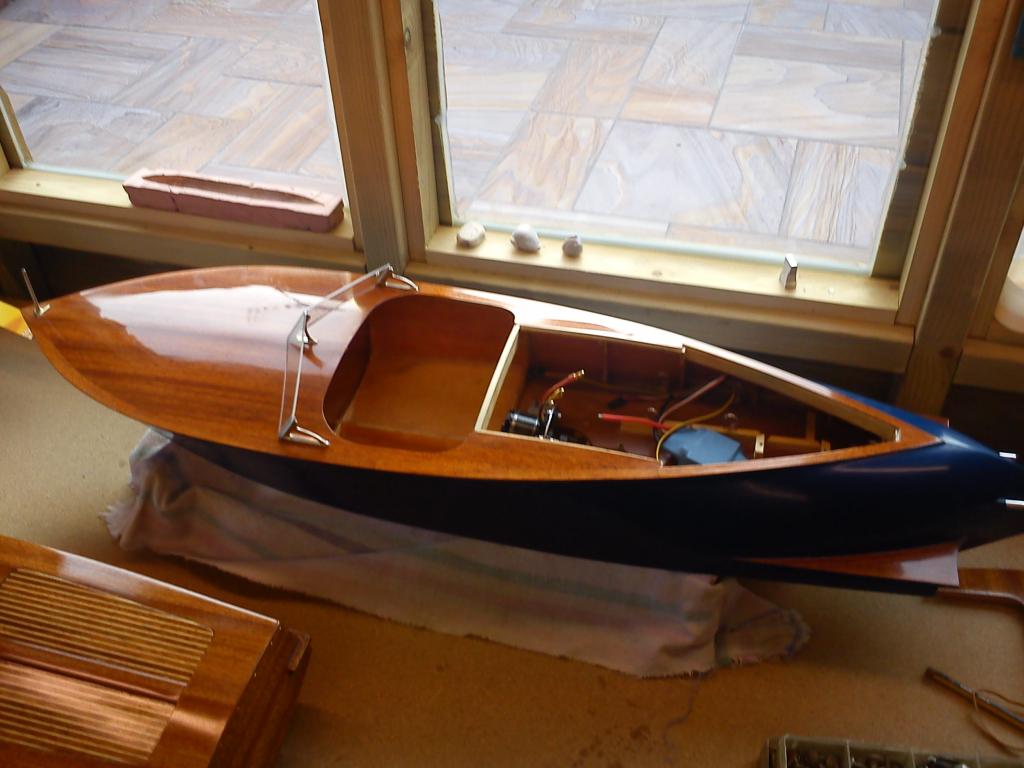
Built up the Seating area floor and continuing with the seat assembly which is a ply structure, layered with foam and then eventually coated with a leather cover.
Both parts test fitted in place.
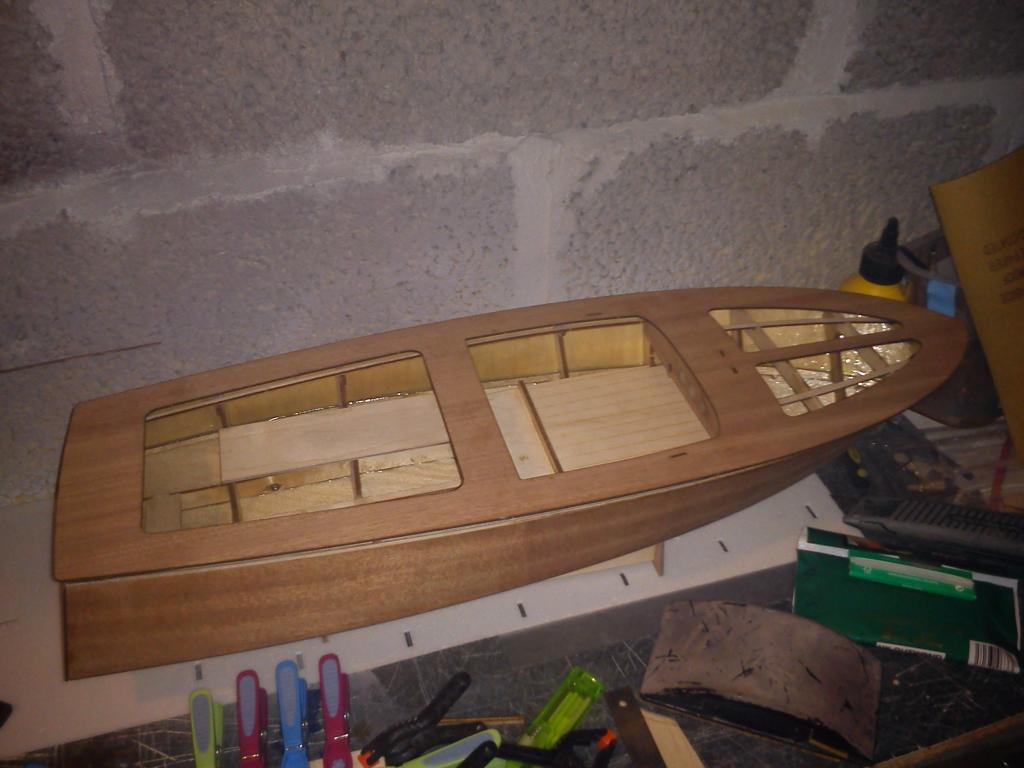
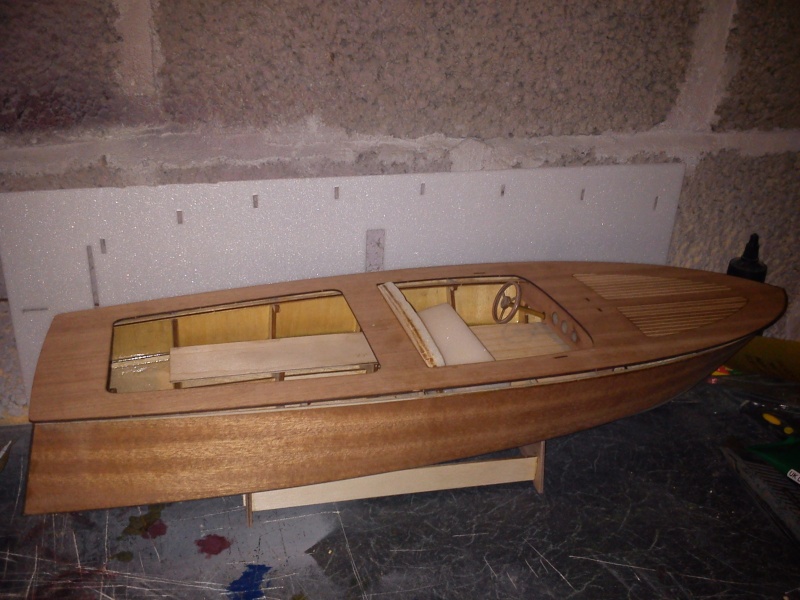
I've also glued in the ply/mahogany inserts into the decks bow section.
And then a sneeky peek of all the parts coming together to give you guys an overall look of the boat up to now..
_________________ I'm Not Anti-Social, I'm Anti-Stupid.
Guest Guest
Subject: Re: Aero-Naut Classic Wed Mar 12, 2014 4:43 am
Roadrunner Forum Overlord
Posts : 1714 Join date : 2011-06-10
Subject: Re: Aero-Naut Classic Wed Mar 12, 2014 11:01 pm
Progress is pretty much come to a crawl while i'm still waiting for my parts to arrive, servo, propshaft, prop & the esc, i cant really go much further until i have the rudder servo mount made up ( which i need the servo for) and the shaft in place, before i can start fixing down the deck, and start looking at the motor/seating area modification ,i don't like to work in restrictive space unless i have to, so today i sprayed up my dads scratch built runabout ready for for him to detail for the upcoming show.
_________________ I'm Not Anti-Social, I'm Anti-Stupid.
Roadrunner Forum Overlord
Posts : 1714 Join date : 2011-06-10
Subject: Re: Aero-Naut Classic Thu Mar 13, 2014 3:34 pm
Spray Rails Spray Rails Spray Rails....
Its one of those jobs most builders tend to 'skip over' and i know the exact reason why, its so bloody hard to get spray rails to stick to the hull and keep shape...
however its even harder when doing it on the boat that the spray rails are only 3mm wide and 5" long..... now to be honest i love doing this, especial when i have the right trick for the job!...
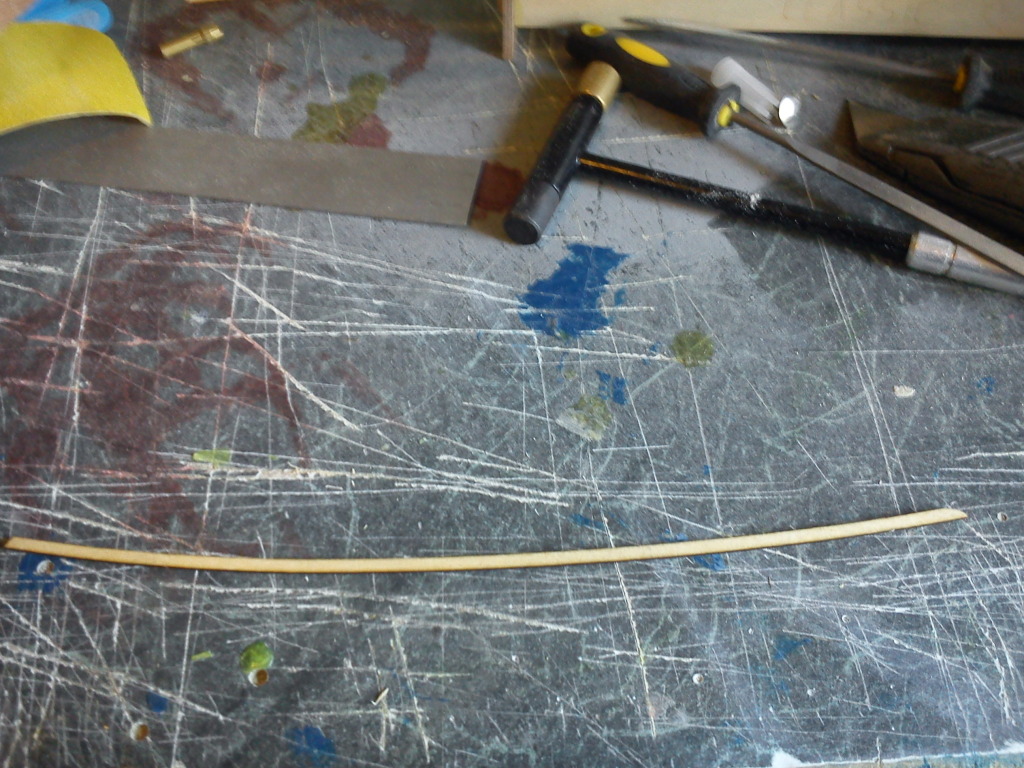
first up cut out the rails and sand then to shape. in this case they are lazer cut from the ply pack, the instructions say to laminated 2, 2mm thick precut parts and sand them to shape, this would make almost 4mm of spray rail on a boat only 500mm long! ERRRR NOOOOO!!!! Use only 1 of the 2mm ply cutouts to make them look to scale (faceplant!)
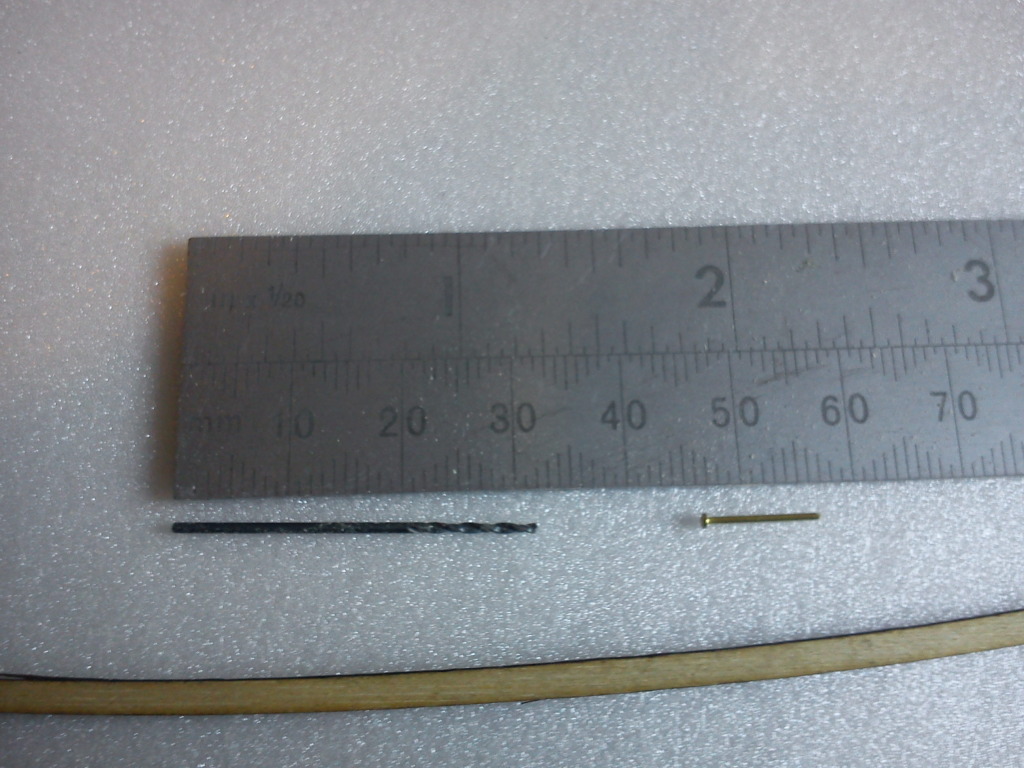
Next mark up some drill holes to make 0.05mm brass pins and drill some holes!
Now heres the trick... get your holes to line up with the bulkheads of the boats internal frames add some glue to the rail and place in on, then smack a few pins in from the bow to the end , if u got your holes lined up right you'll nail right into the bulkheads
If some pop through ( and they always do! just bend the nail over and add some epoxy over the top to seal the gap
Once the glue dries you can be naughty and sand the tips of the rails down to meet the bow shape, or do it properly and add an infill section to the rails so they meet up correctly (photo to come later its still drying)
_________________ I'm Not Anti-Social, I'm Anti-Stupid.
Roadrunner Forum Overlord
Posts : 1714 Join date : 2011-06-10
Subject: Re: Aero-Naut Classic Thu Mar 13, 2014 6:52 pm
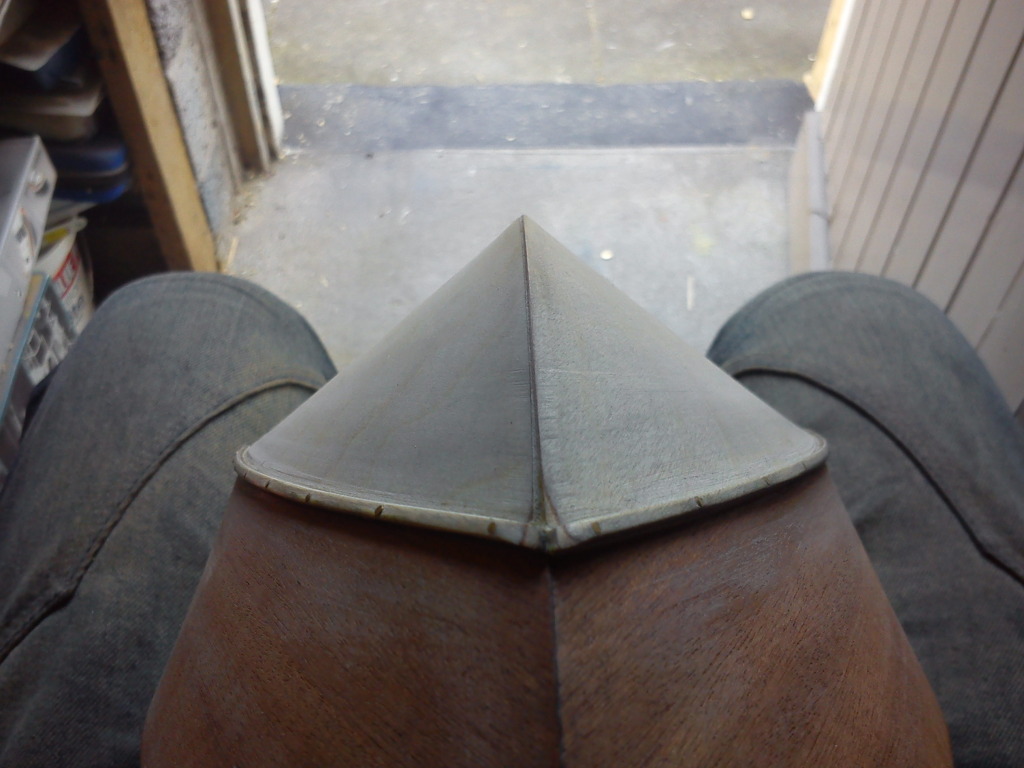
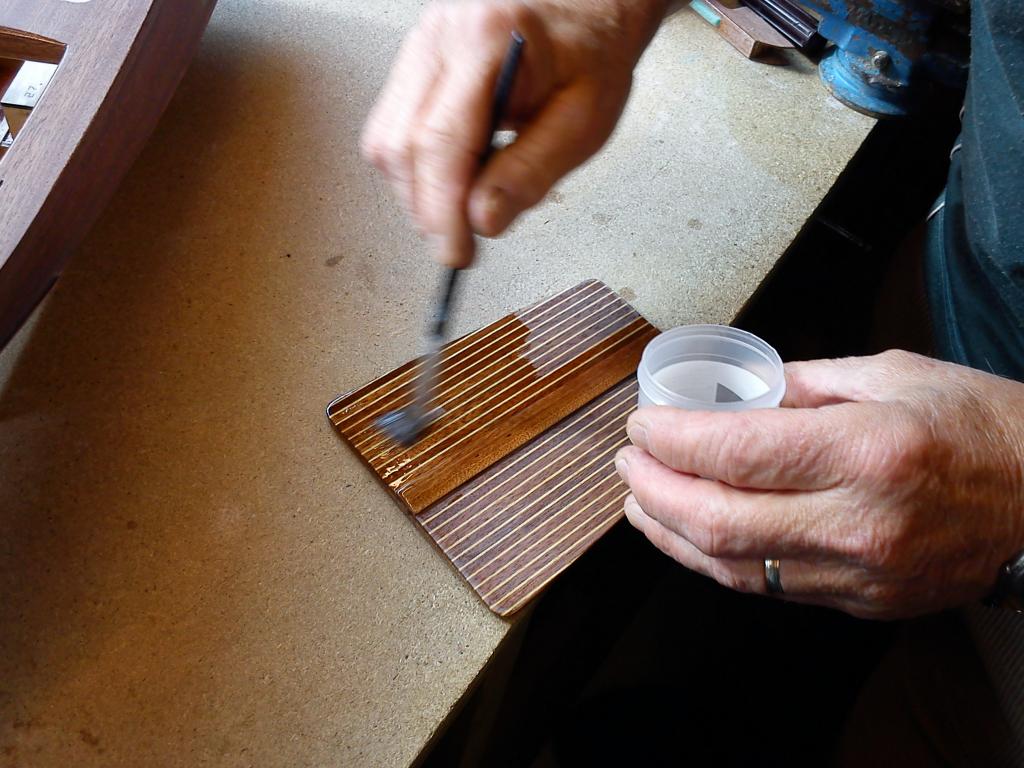
Ok photo as promised of the finished bow inset this little bitty piece is only 2x2mm so was a pig to get in place to stay while the glue set,
After that i gave the boat a quick sand with 600 grit to open the grain a little to take 2 coats of wood stain. it will require final sanding after a few more coats i expect. the wood has come out darker then expected, which is fine, as the deck will have rubbing strakes fitted around the top edge so once the deck edges get sanded in it will look fine as well as designed that way also making this boat a two tone effect after varnishing although i expect it will be hard to tell once the varnish takes hold
_________________ I'm Not Anti-Social, I'm Anti-Stupid.
Guest Guest
Subject: Re: Aero-Naut Classic Thu Mar 13, 2014 9:54 pm
looking brill matey.
intrepid75 Master
Posts : 271 Join date : 2011-06-11 Age : 68 Location : Bristol, West country
Subject: Re: Aero-Naut Classic Thu Mar 13, 2014 10:15 pm
Roadrunner wrote:
Progress is pretty much come to a crawl .......
This build is a crawl?? Going together superfast but even so no loss of quality in the build. Looking absolutely superb turning into a lovely looking craft.
Guest Guest
Subject: Re: Aero-Naut Classic Thu Mar 13, 2014 11:45 pm
Damn that's good Mate.
Roadrunner Forum Overlord
Posts : 1714 Join date : 2011-06-10
Subject: Re: Aero-Naut Classic Fri Mar 14, 2014 8:04 am
Thanks guys for your kind comments, I'm still awaiting delivery of shaft, prop and servo, however yesterday i found out that Steve from model boat bits lost one of his partners in the business last week and there is a funeral is today i'ld like to add my condolences to his family and friends, but i was assured my parts have been sent. My plan today is to rub down the boat and fit the rubbing strakes around the top edge and the rear spray rails with a twist at the rear end, this should get me as far as i can go in regards to hull works, we'll see if i can get that far all good plans of men and mice eh!
_________________ I'm Not Anti-Social, I'm Anti-Stupid.
Roadrunner Forum Overlord
Posts : 1714 Join date : 2011-06-10
Subject: Re: Aero-Naut Classic Sat Mar 15, 2014 12:03 am
Well i fitted the rubbing strakes to the top of the boat today, they came out perfect even with the taper to the bow which normally i struggle to get right, although they took me all day. No photos tonight apology's the boat is still in the jig holding the shape of the rubbing strakes in, i had to pressure fit them to the hull shape, normally i would steam a plank to fit with no hastle but as its only the last 3" of the bow that tapers in i figured it would be 'easy' to apply pressure to the plank to achieve the bend... boy was i wrong!, next time i'll stick to my steaming method and jigs feels like a wasted day for 2 planks!
I'm also not happy with the staining, at the moment, i am now considering spraying the base of the boat, it might just be me in a grump about my planks right now guess we'll see.
Photos tomorrow scouts honour!
_________________ I'm Not Anti-Social, I'm Anti-Stupid.
Roadrunner Forum Overlord
Posts : 1714 Join date : 2011-06-10
Subject: Re: Aero-Naut Classic Sat Mar 15, 2014 7:43 pm
Defiantly Spraying the base of the boat its decided, don't like the stain on the ply so now that causes me little issue I'll just varnish the whole boat first then run back and spray the base once its cured, a little extra work but i think it will be better for it in the long run.
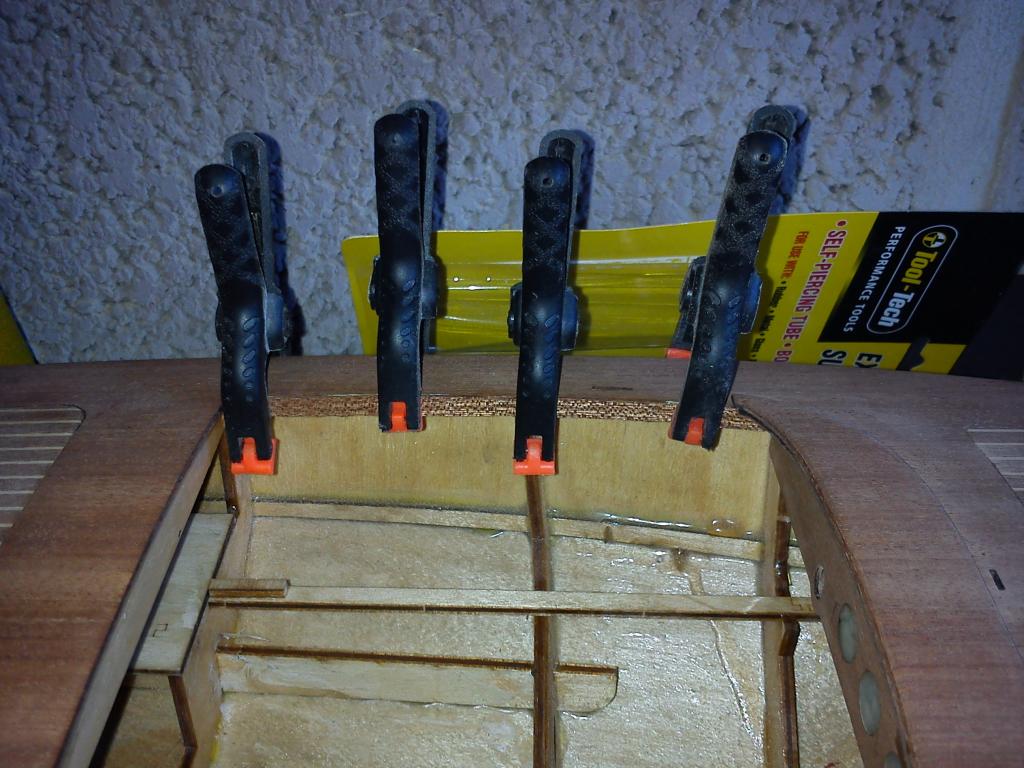
Again today my parts are still not here lets hope they arrive Monday or this project really will grind to a halt but in my head scratching of what to do now with out the right parts i figured sod it, Deck sticky time. I'll worry about making mounting brackets and such later now i hate being slowed when I'm on a roll. So today I've glued the deck down and started to sand it smooth to the rubbing strakes, now I must point out for those who buy the kit the rubbing strakes that sit at deck level are NOT included in the kit this is my own ''addon'' part.. anyhow lots of glue, clamps, sticky tape and a few LA batteries later... one deck!
_________________ I'm Not Anti-Social, I'm Anti-Stupid.
Roadrunner Forum Overlord
Posts : 1714 Join date : 2011-06-10
Subject: Re: Aero-Naut Classic Sun Mar 16, 2014 10:56 pm
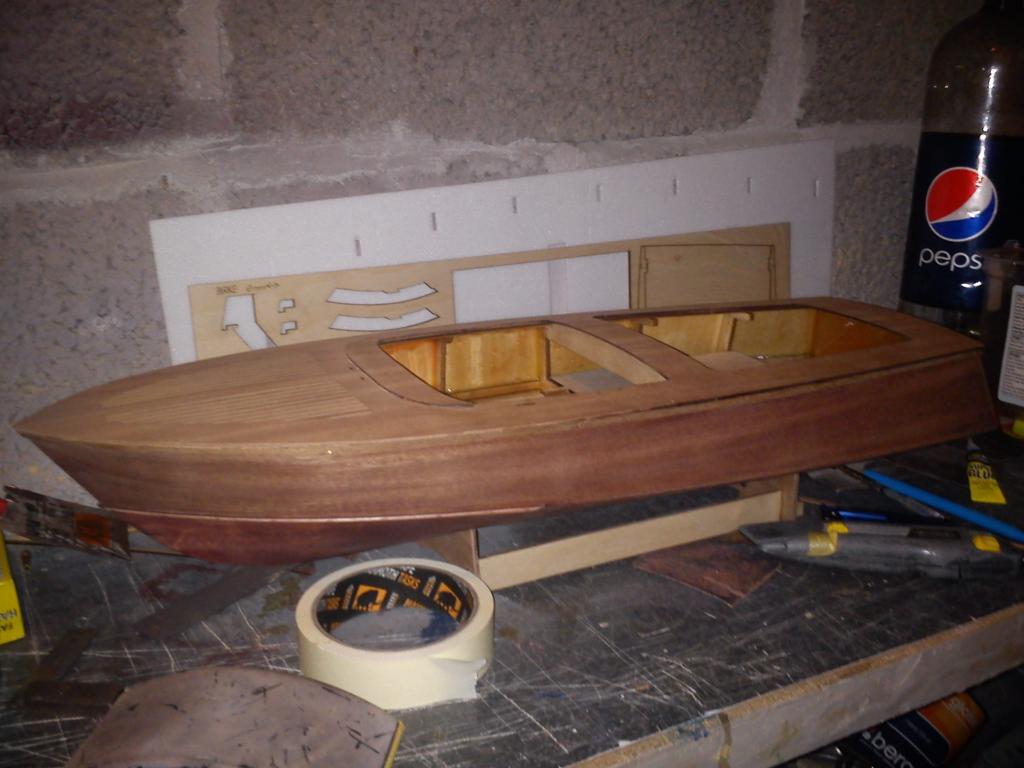
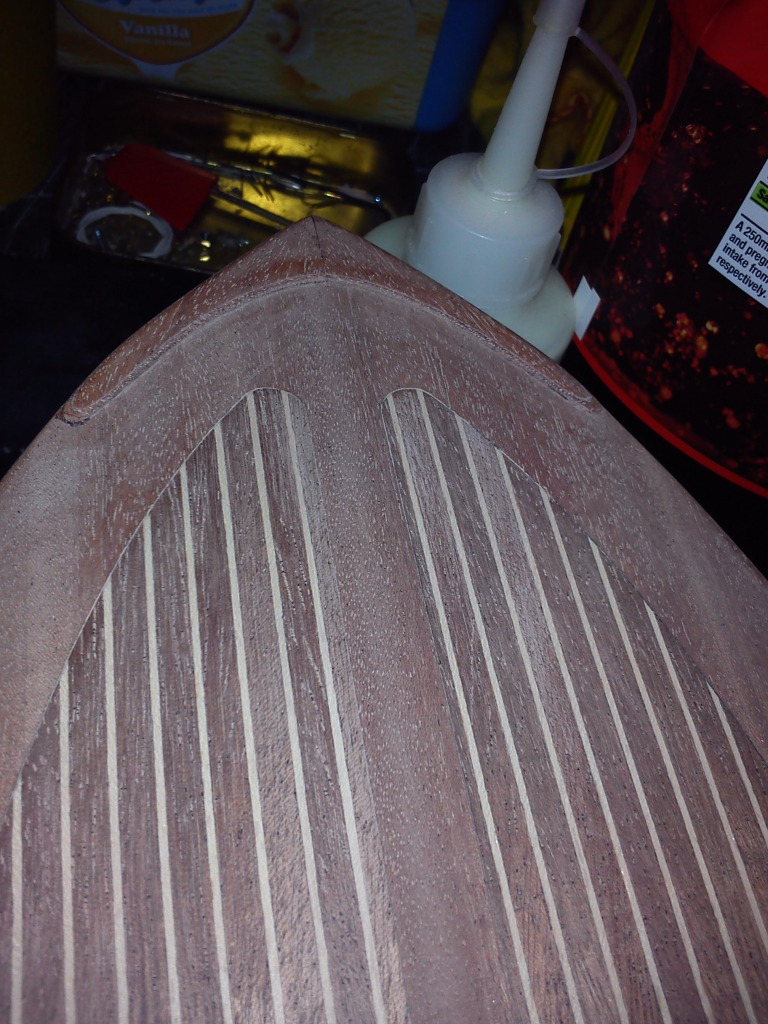
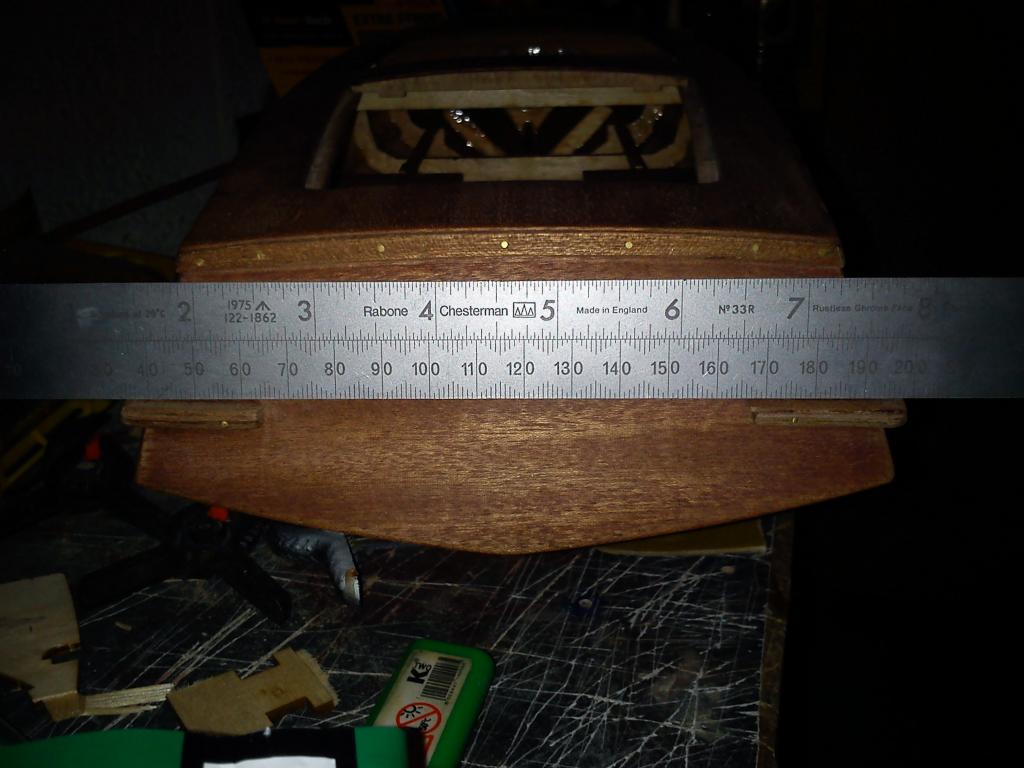
Bit more today, sanded the edges of the deck nice and smooth and fitted the bow section and sanded it to shape, i have to tweek the shape a little on the bow section as the original parts are to fit the deck with a huge 5mm overhang thats not really acceptable on a model this size, so now they are smooth to the hull edge.
I'm hoping my parts arrive tomorrow so i can fit them in, before i start the hatch coving, and the seating modification. i need the parts in place before i can do any of those things to see what space i need to work in at a later date
fingers crossed!
_________________ I'm Not Anti-Social, I'm Anti-Stupid.
Roadrunner Forum Overlord
Posts : 1714 Join date : 2011-06-10
Subject: Re: Aero-Naut Classic Tue Mar 18, 2014 8:28 pm
So ok today i did some stuff... lets start with the fun bits.
MMMMMMMMMMMMMMMMMMMMMMMMMMMM marshmallows
Roast em on a prop shaft
Stick em in mouth and enjoy ....
Ok anyway enough messing around parts arrived today finally..
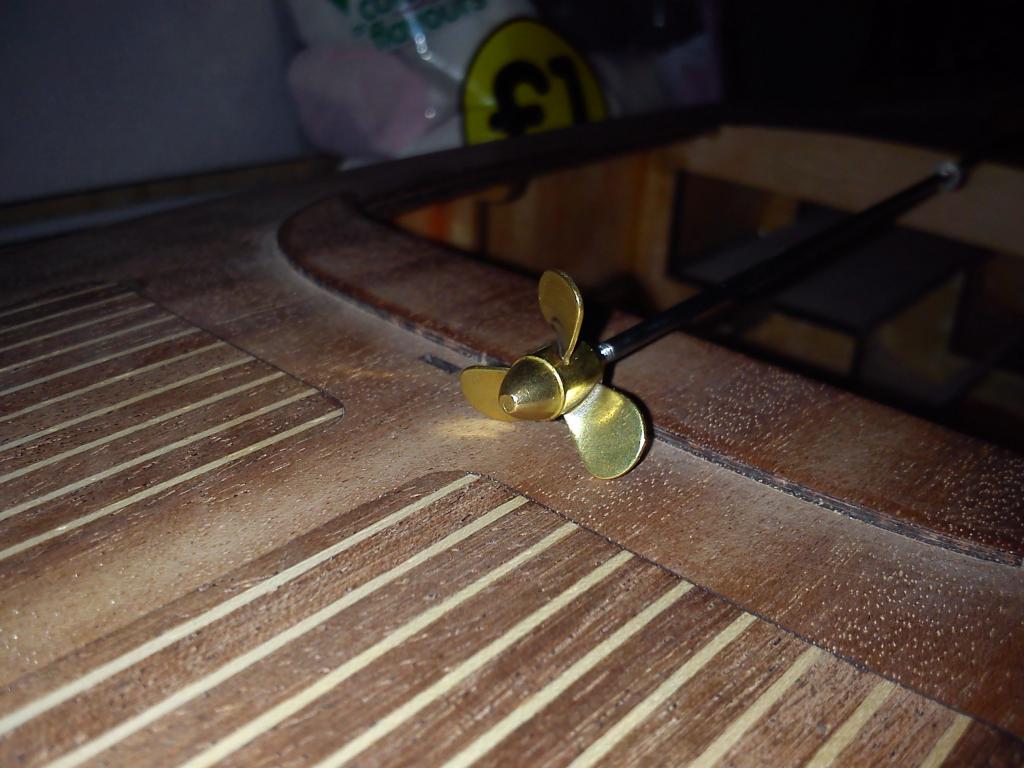
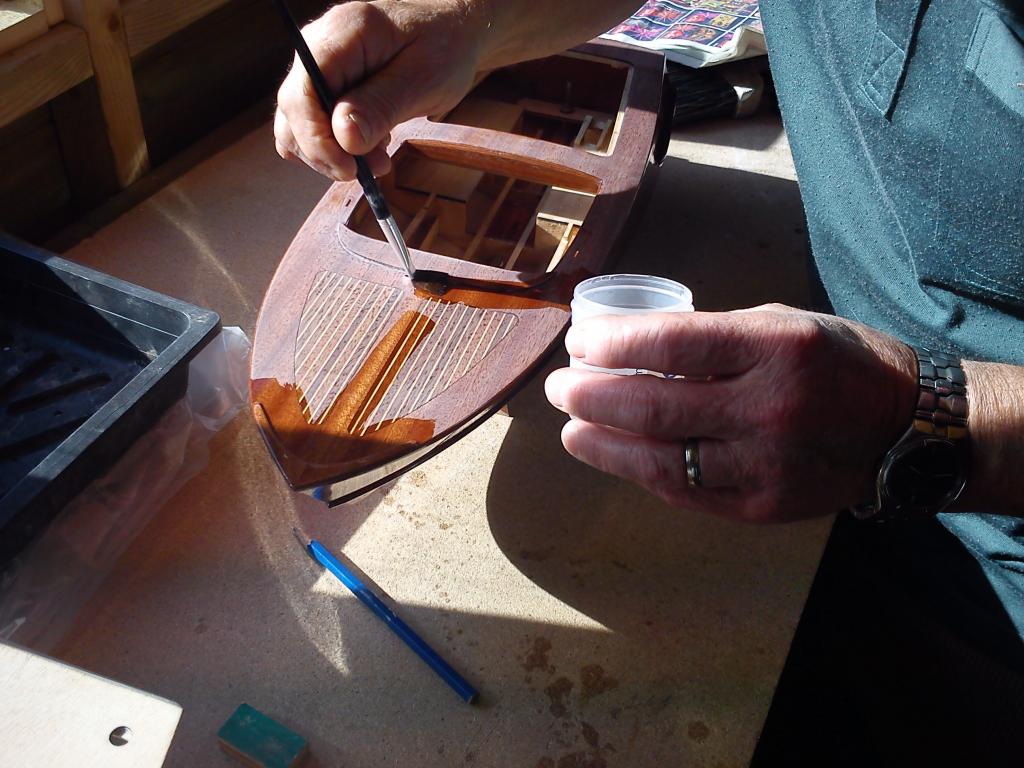
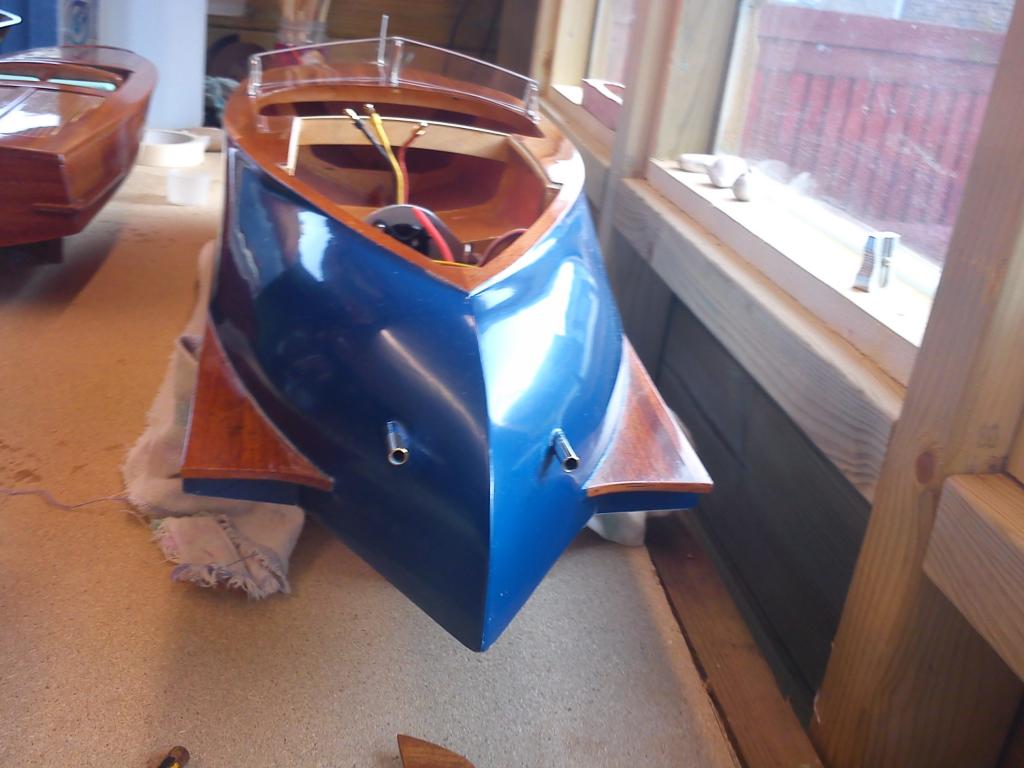
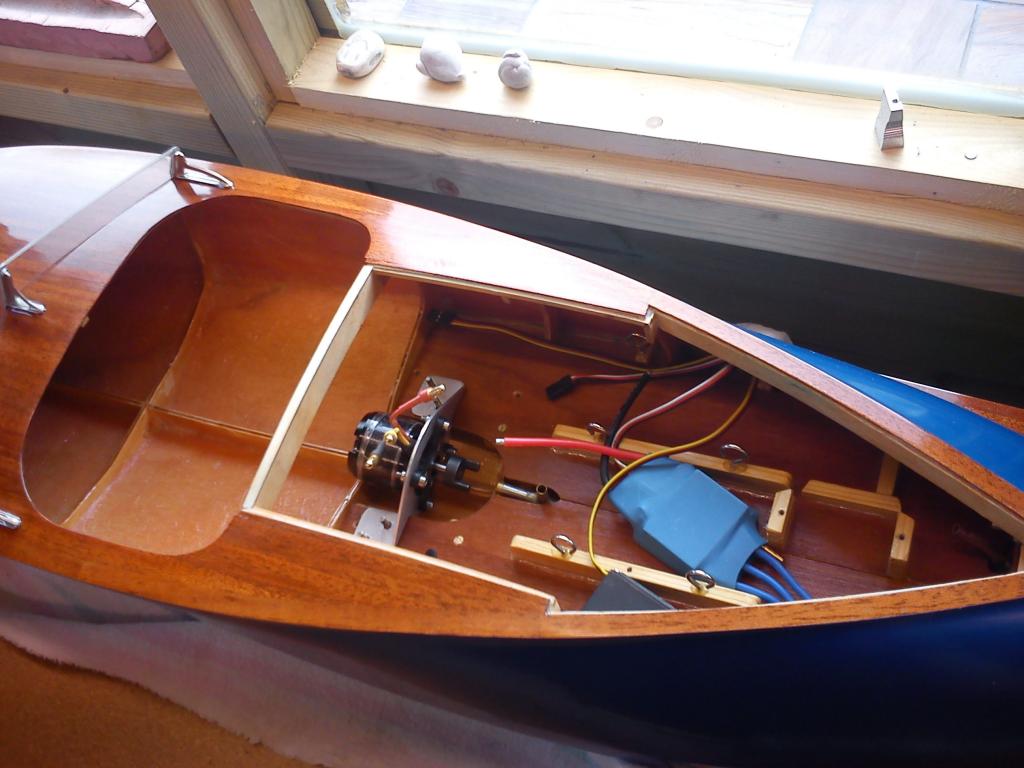
SO today i've fitted the Prop shaft, the props skeg, and started on the hatch coving.
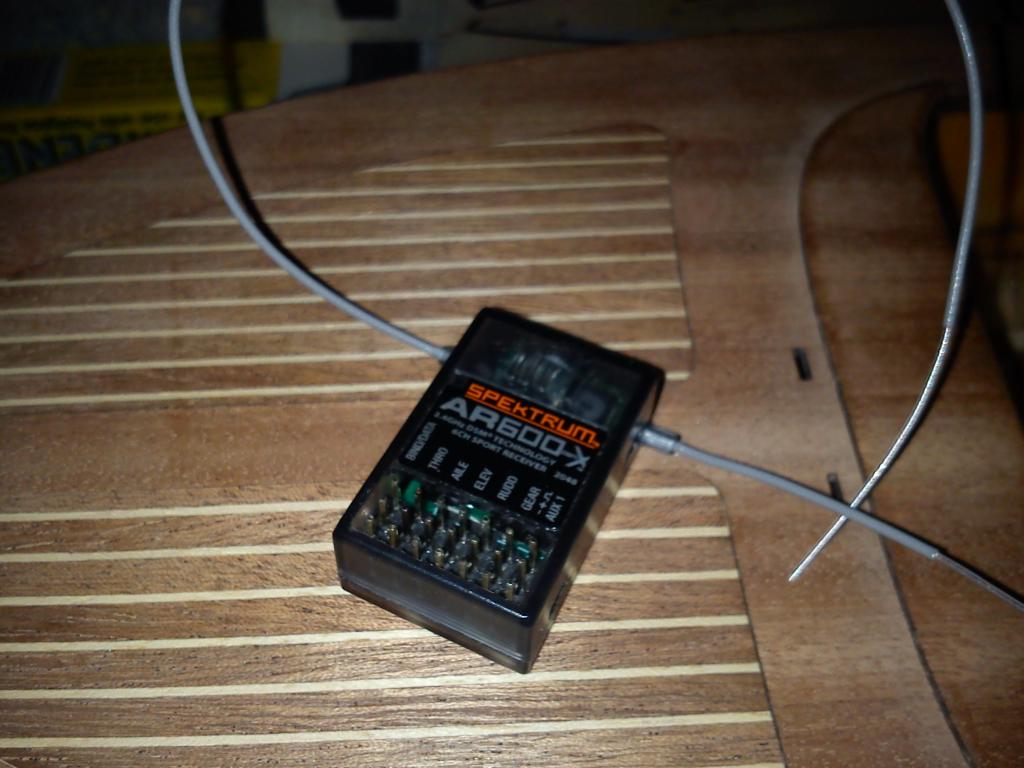
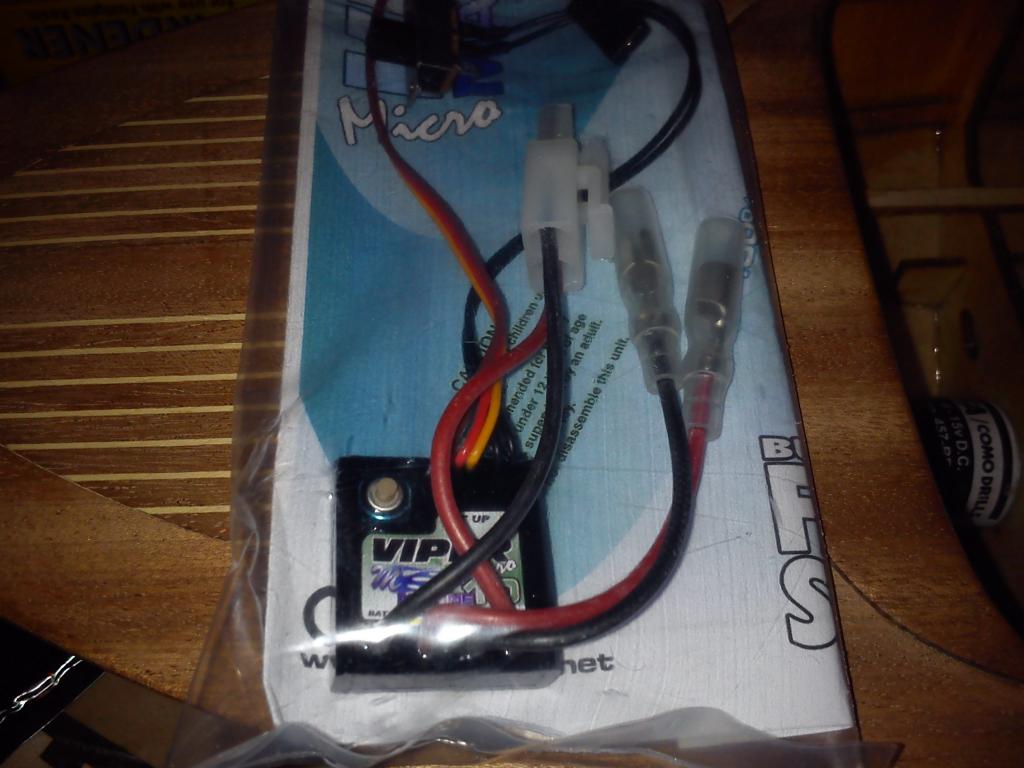
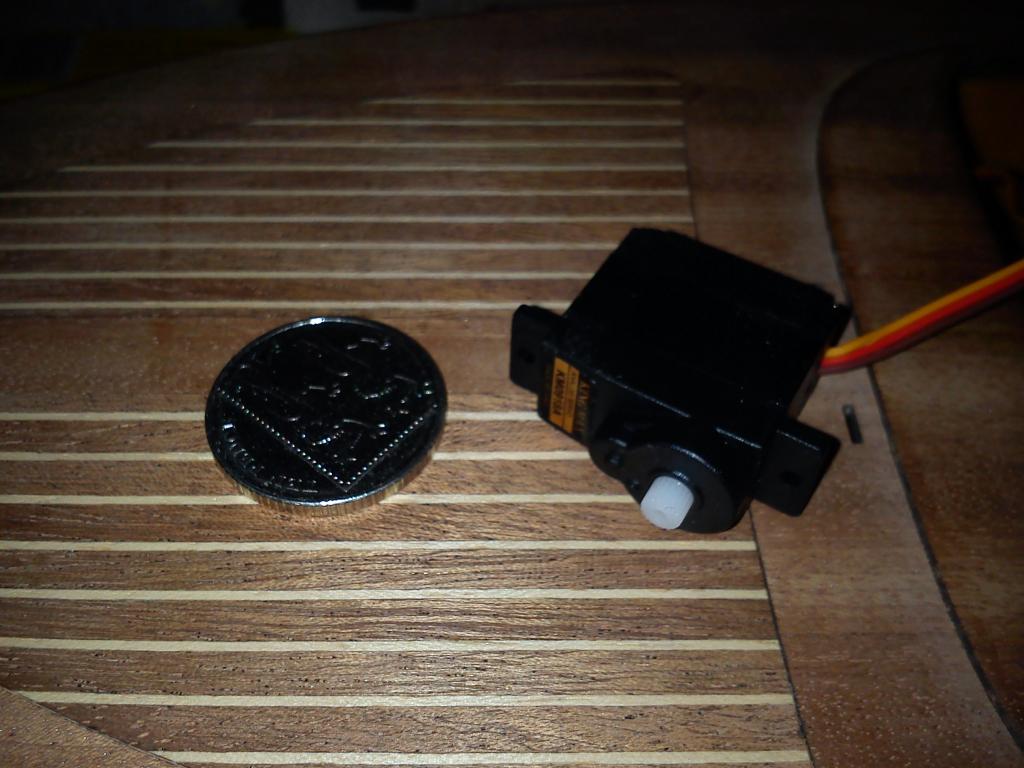
The setup is to run 7.2v, mfa 385 motor for around 8000 rpm with a 10 amp mtronics esc on a M2 Teflon insert prop shaft with 20mm 3 blade brass prop (prop size can be upped should the speed not be what I want right now, always trial and error with props at times)& a Micro Servo all using the 2.4ghz Specktrum set I own.
More tomorrow
_________________ I'm Not Anti-Social, I'm Anti-Stupid.
intrepid75 Master
Posts : 271 Join date : 2011-06-11 Age : 68 Location : Bristol, West country
Subject: Re: Aero-Naut Classic Tue Mar 18, 2014 8:31 pm
Very nice progress..............no sign of a slow down then!!
Roadrunner Forum Overlord
Posts : 1714 Join date : 2011-06-10
Subject: Re: Aero-Naut Classic Tue Mar 18, 2014 8:47 pm
Not for this build bud, only slow time will be once I start to varnish the bugger I'll have to give it a week to harden off then spray, then let that harden off for another week or so before i can start buffing it.
I still have a complex job to do after the electronic install, as the rear hatch needs some attention to keep it in shape as well as making it less flimsy with some type of lock or latch system. After that its all concentration on the seating area, this will be the biggest modification to the kit and one i need to take my time on any rush there will spoil the overall look of the boat.
RR
_________________ I'm Not Anti-Social, I'm Anti-Stupid.
Guest Guest
Subject: Re: Aero-Naut Classic Wed Mar 19, 2014 5:15 am
Very nice
Roadrunner Forum Overlord
Posts : 1714 Join date : 2011-06-10
Subject: Re: Aero-Naut Classic Wed Mar 19, 2014 9:10 pm
Hatch today....
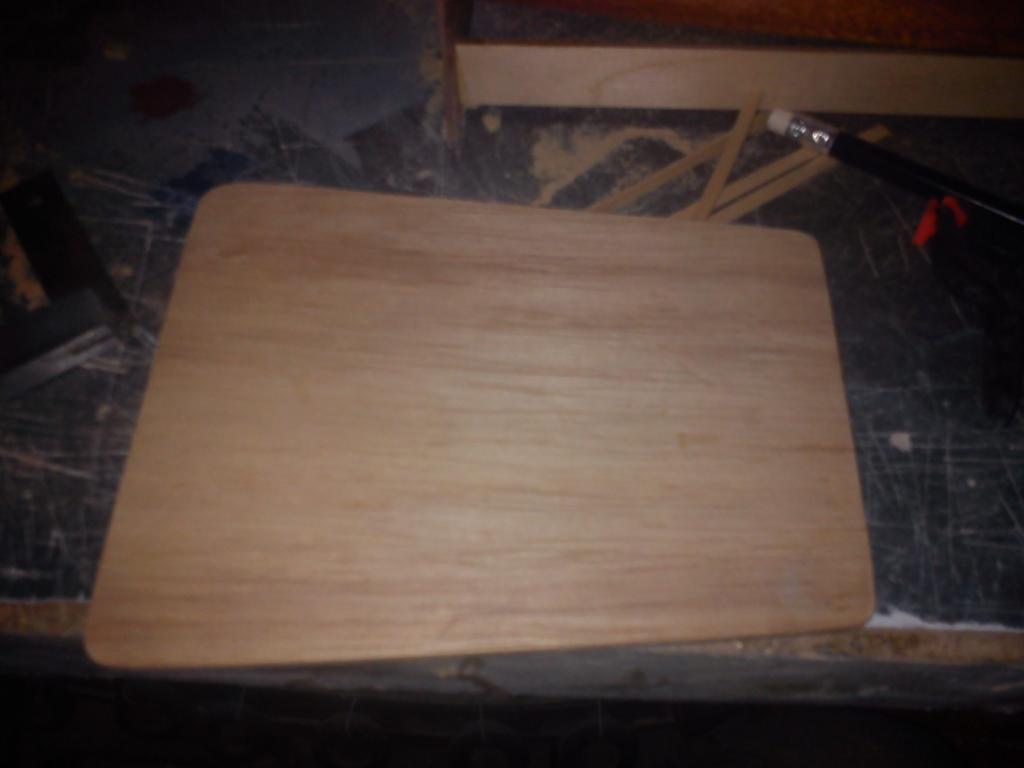
started with a blank
made central spacers for the highest raised areas, and tapers the edges of the blank ..
then glued the insert on
However i decided to use up the last drop or resin i had.,.. and i filled the whole hatch with resin ... and yup it went off fine
until i fitted it back in place and the hatch was flat and no longer tapered.. what i found was the resin had soaked into the base part and warped it making the top of the hatch bloody Flat
So now i'm currently baking at 110C for 5 mins and bending the hatch back to shape and no gents i'm really not joking!
_________________ I'm Not Anti-Social, I'm Anti-Stupid.
Roadrunner Forum Overlord
Posts : 1714 Join date : 2011-06-10
Subject: Re: Aero-Naut Classic Wed Mar 19, 2014 10:18 pm
ok after about 2 hours of bending i have managed to get the shape of the hatch back, i do have a feeling once i get this thing varnished it might bend again, however i may have a solution for this should it be required, only time will tell on this one... fingers crossed it wont come to it but i haven't got the lathe out in a while.. might be a good time
_________________ I'm Not Anti-Social, I'm Anti-Stupid.
Roadrunner Forum Overlord
Posts : 1714 Join date : 2011-06-10
Subject: Re: Aero-Naut Classic Thu Mar 20, 2014 8:23 pm
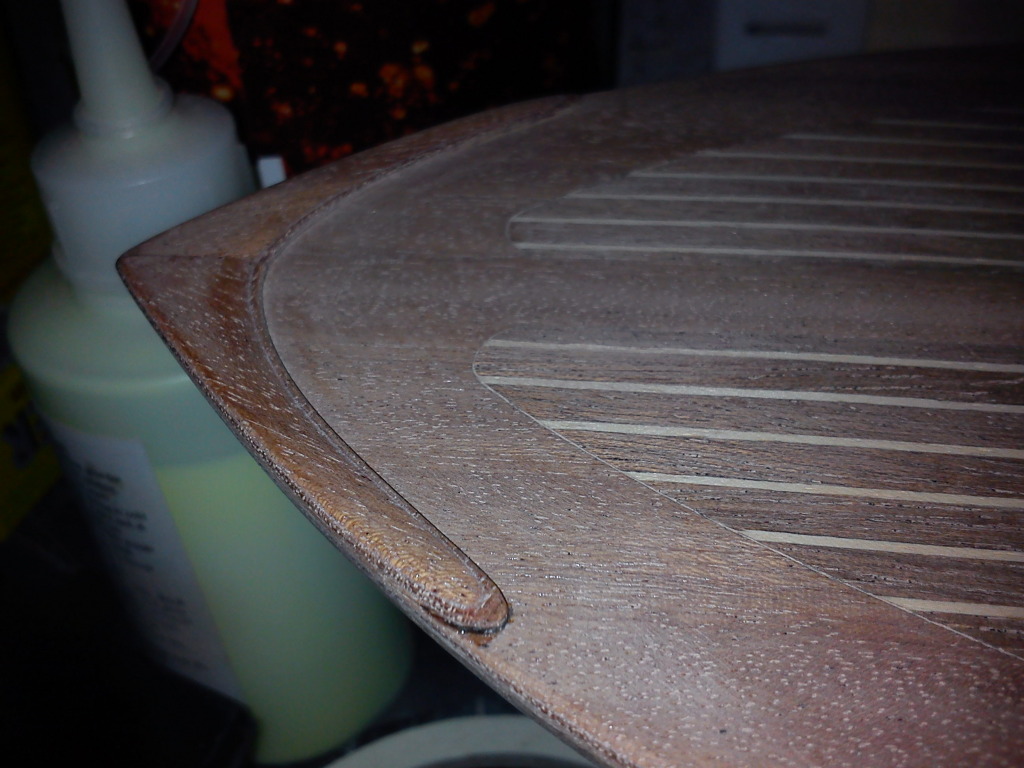
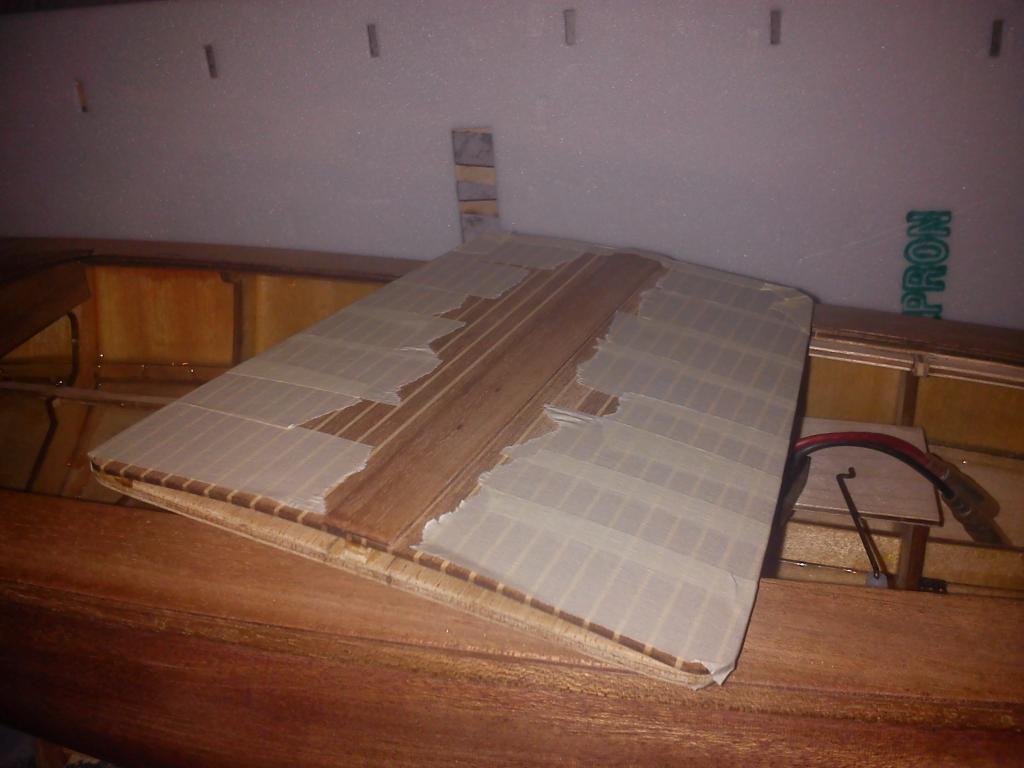
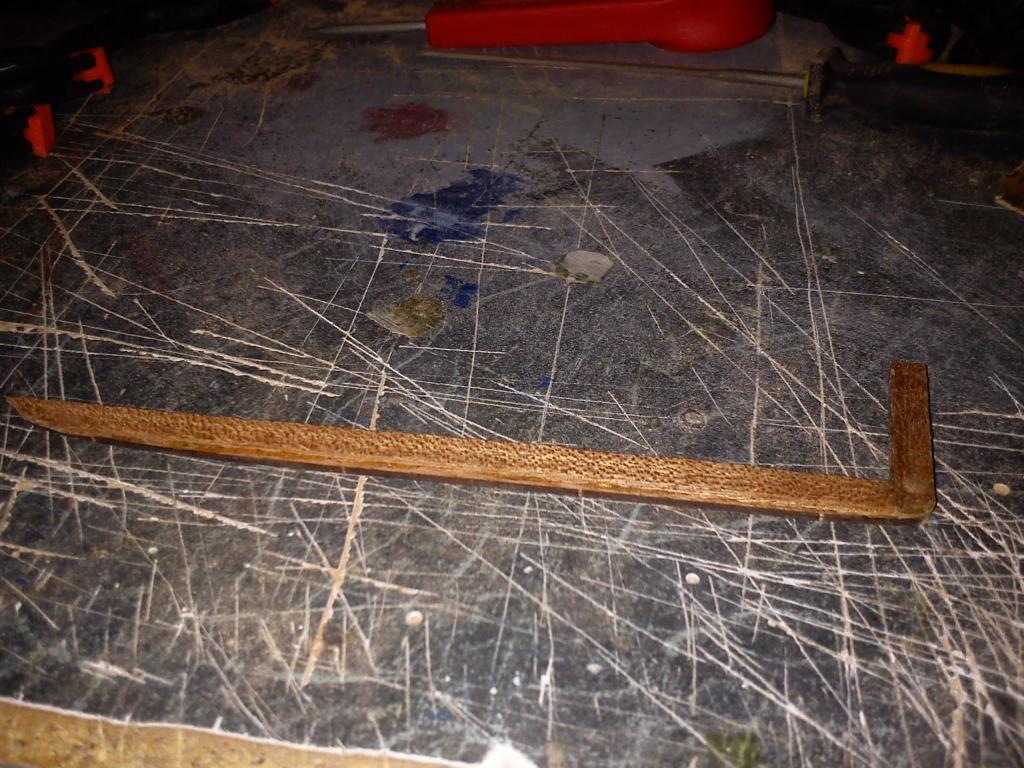
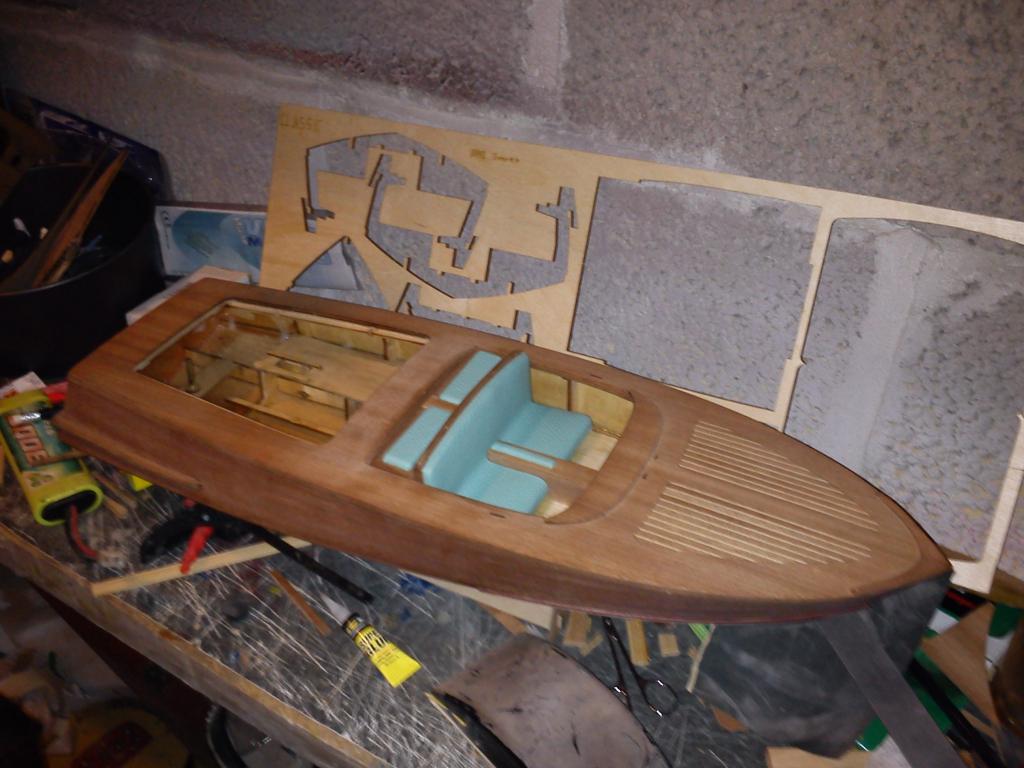
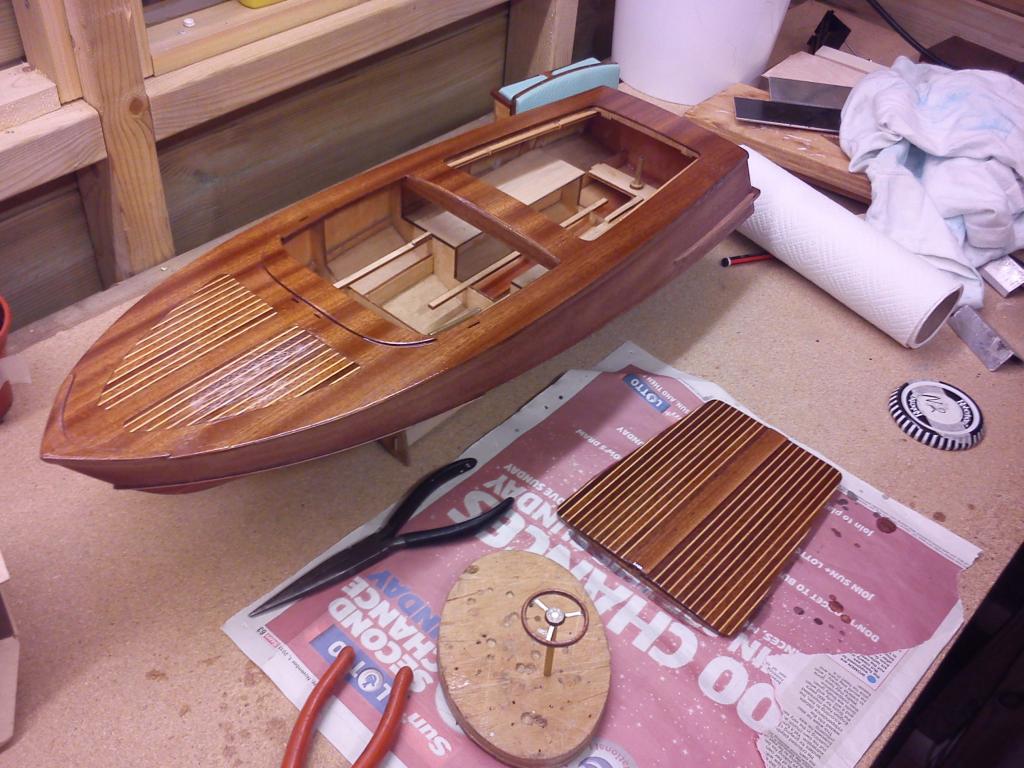
Today I've made up the free boards which is the Last hull part to be fitted for final sanding tomorrow then its off to the varnish/paint shop.
The kit provides you with a 1.5mm pre cut mahogany free board, which to be honest is fine if you don't want to run the boat, but with all knocks and scrapes when running boats regularly as we all know it would get knocked off with in a few runs, and given its thickness the glue just wouldn't hold up.
So today I've rebuild the free boards..
Started with my stock 5x1mm mahogany strip & Laminated 4 strips together to give me a 4mm base to work on...
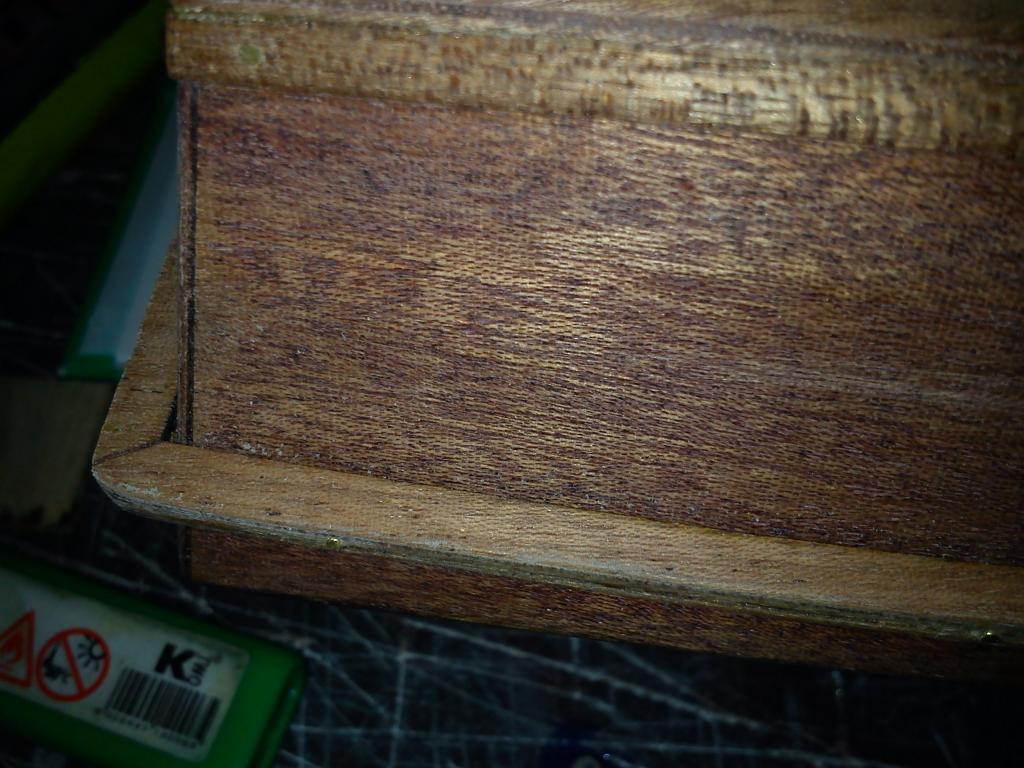
Then created a L section which runs across the transom
Then glued and pinned it into place (remember there are 2 one for each side)
Now at this point there is a gap across the top edge, i did taper the inside as much as possible to avoid the gap but given the piece is curved to the hull shape a gap was bound to happen, however normally i would make much more effort to make the piece fit snuggle with out a gap but as i want the final part to me 5mm in thickness this gap gets covered by the final piece to sit on top
_________________ I'm Not Anti-Social, I'm Anti-Stupid.
davidjt Forum Sponsor
Posts : 534 Join date : 2013-01-08 Age : 72 Location : n wales coast
Subject: Re: Aero-Naut Classic Fri Mar 21, 2014 6:48 am
hi,
very nice build and when varnished should be top class finish . then the fun of sailing begins. well done.
david
Guest Guest
Subject: Re: Aero-Naut Classic Fri Mar 21, 2014 8:20 am
Say's it all.
Roadrunner Forum Overlord
Posts : 1714 Join date : 2011-06-10
Subject: Re: Aero-Naut Classic Fri Mar 21, 2014 8:12 pm
And the Modification Begins..
From this point nothing here is included in the kit this is all scratch built parts for the model.
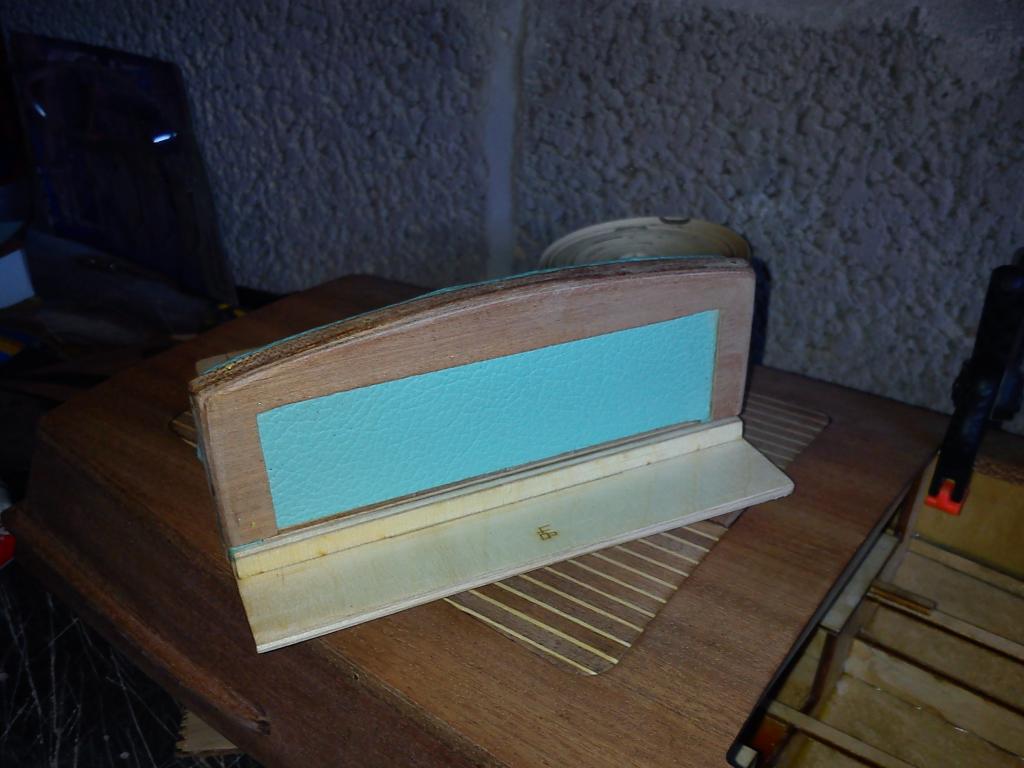
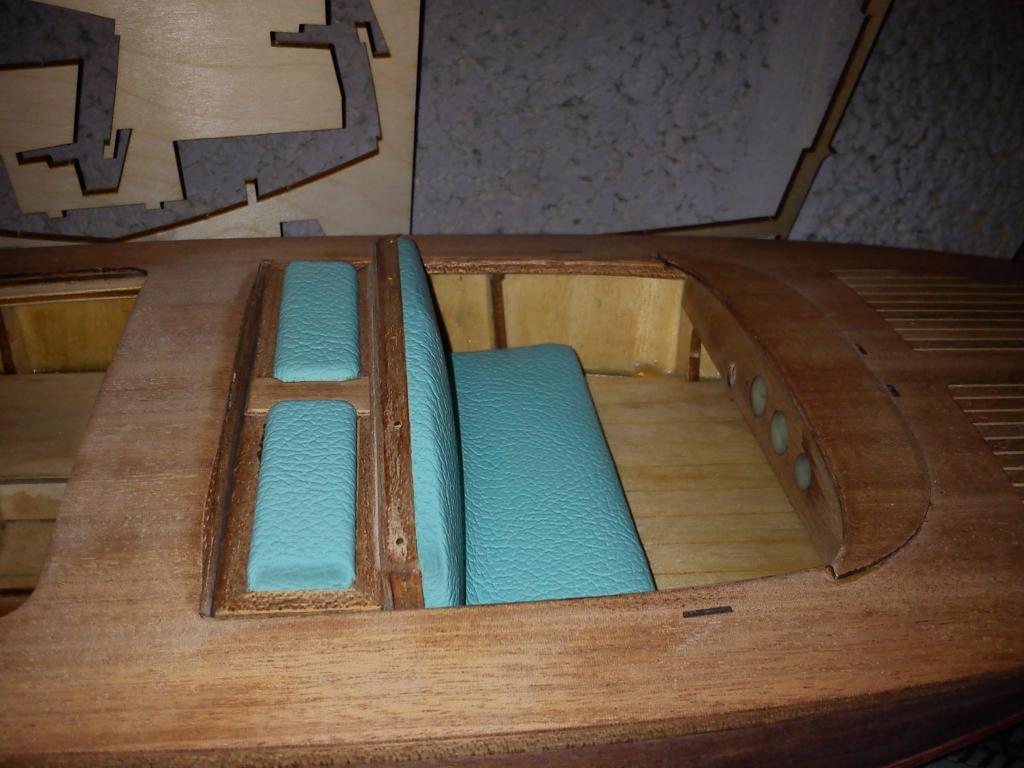
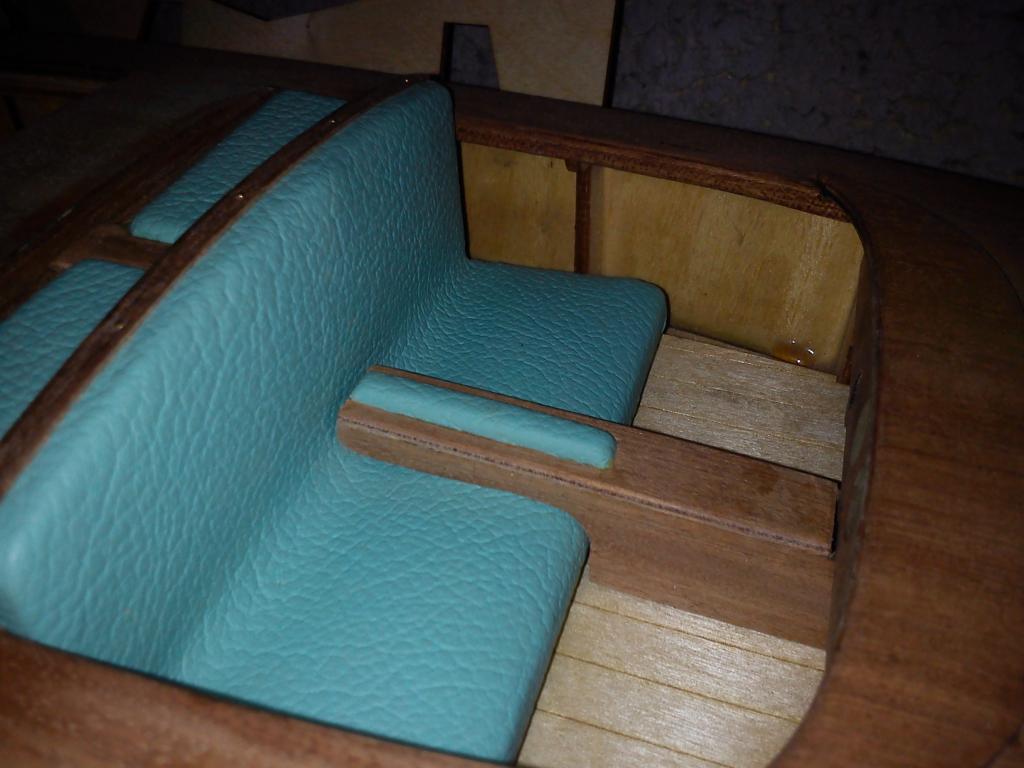
I've always disliked the seating arrangement of this boat, the seat looks way to far back and and 'person' sitting in it would look drunk and couched out to drive, for this reason i've moved the seat forward 1, 1/2" closer to the wheel. I've also decided to stop the viewing of the bulkheads and the boats skin being seen from inside the model, which on the kit is showed as clear and visible, that to me is not acceptable and is also a intake for water, given this is a planing hull boat it will kick a lot of water up as the diva does this is previous experience with theses models talking here, so i know the deck areas will get quite a few splashes.
So for that reason i've started to encase the cockpit first starting with the deck internal edges...
Soon there will be a skinned internal side panel that attaches to the bulkheads sliding down under the seat floor which will become a new combing for the water tight area.
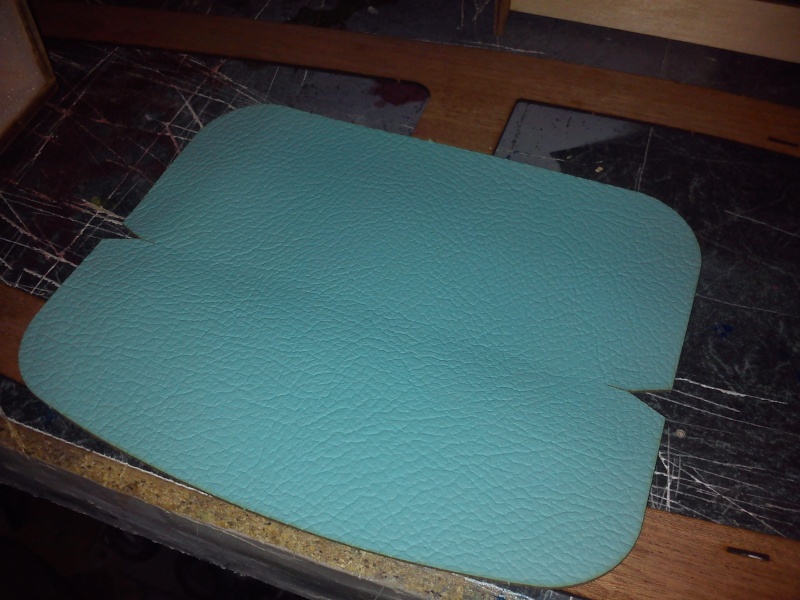
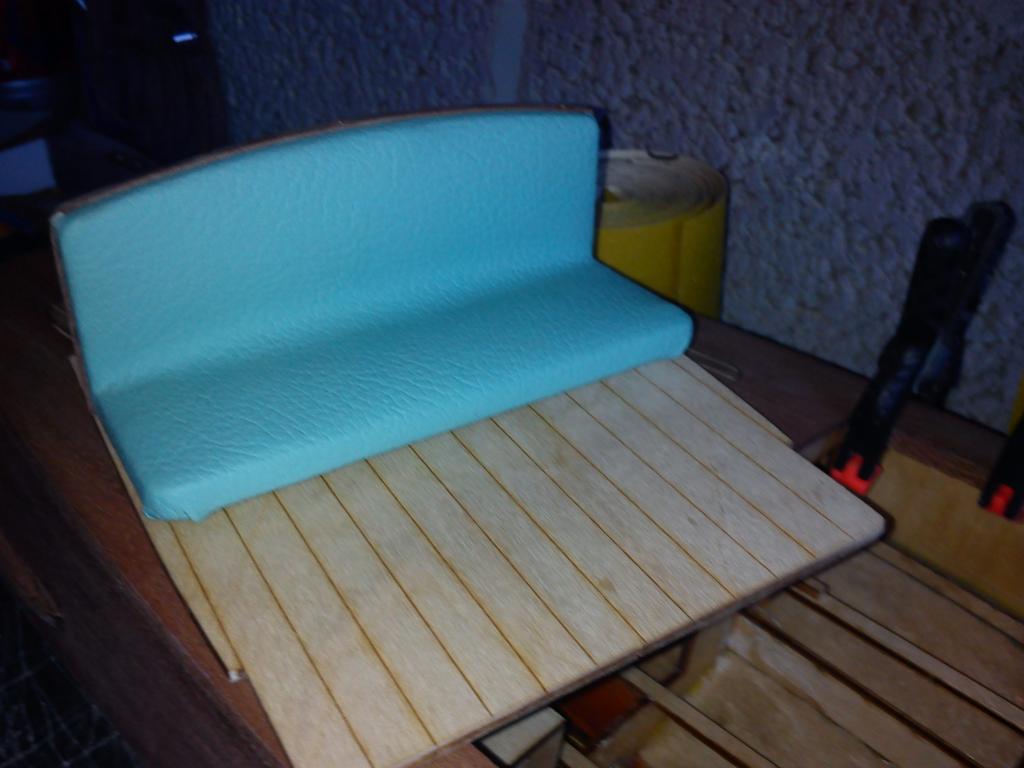
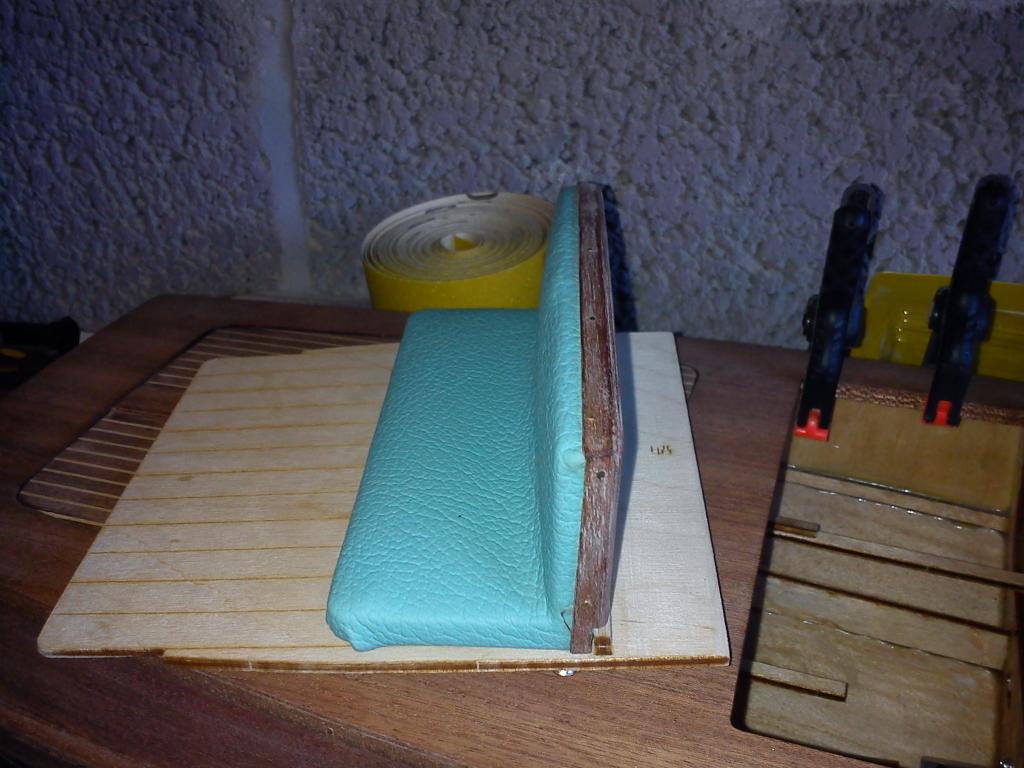
While i waited for the glue to go off on the side of the deck edges, I've glued the seat leatherette to the seat..
Then mounted it on the floor plate 1, 1/2" closer this leaves a gap now behind the seat and the deck.. surprise what will go in there...
But to give you some hints, I've created a decorative seat surround with mahogany strip and a solid part that's cut to shape ...
I would do more tomorrow but I'm at Falmouth for a show, so next update will be Sunday with any luck... see you guys then!
_________________ I'm Not Anti-Social, I'm Anti-Stupid.
intrepid75 Master
Posts : 271 Join date : 2011-06-11 Age : 68 Location : Bristol, West country
Subject: Re: Aero-Naut Classic Fri Mar 21, 2014 8:35 pm
Looking nicer every update
Roadrunner Forum Overlord
Posts : 1714 Join date : 2011-06-10
Subject: Re: Aero-Naut Classic Mon Mar 24, 2014 3:26 am
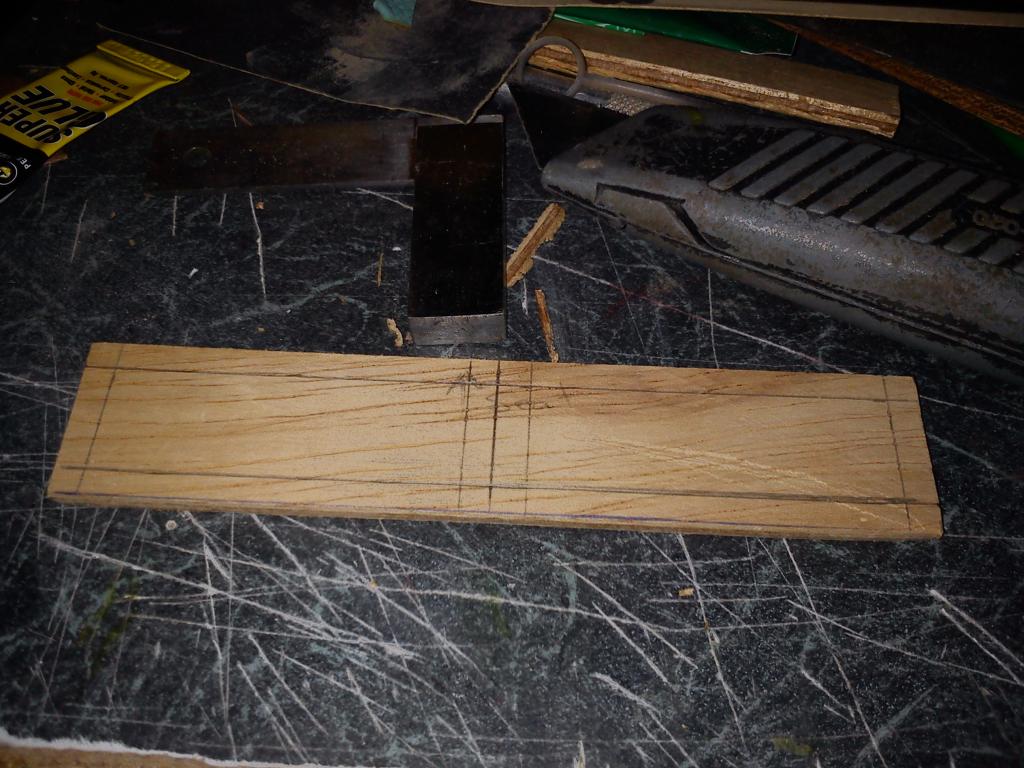
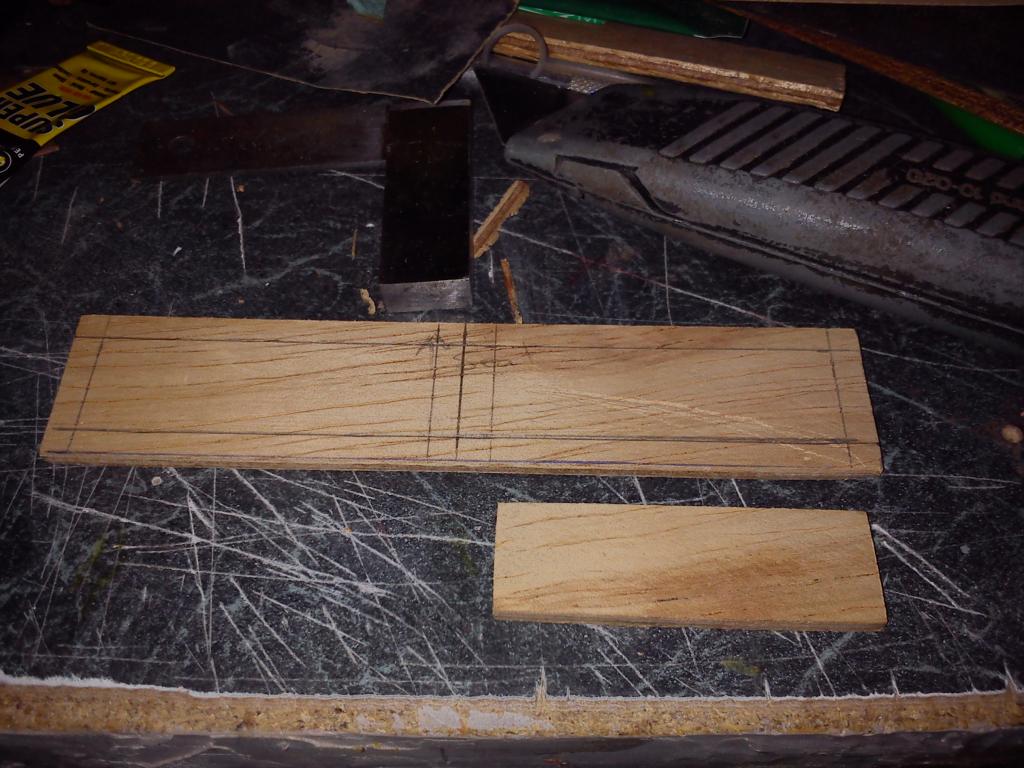
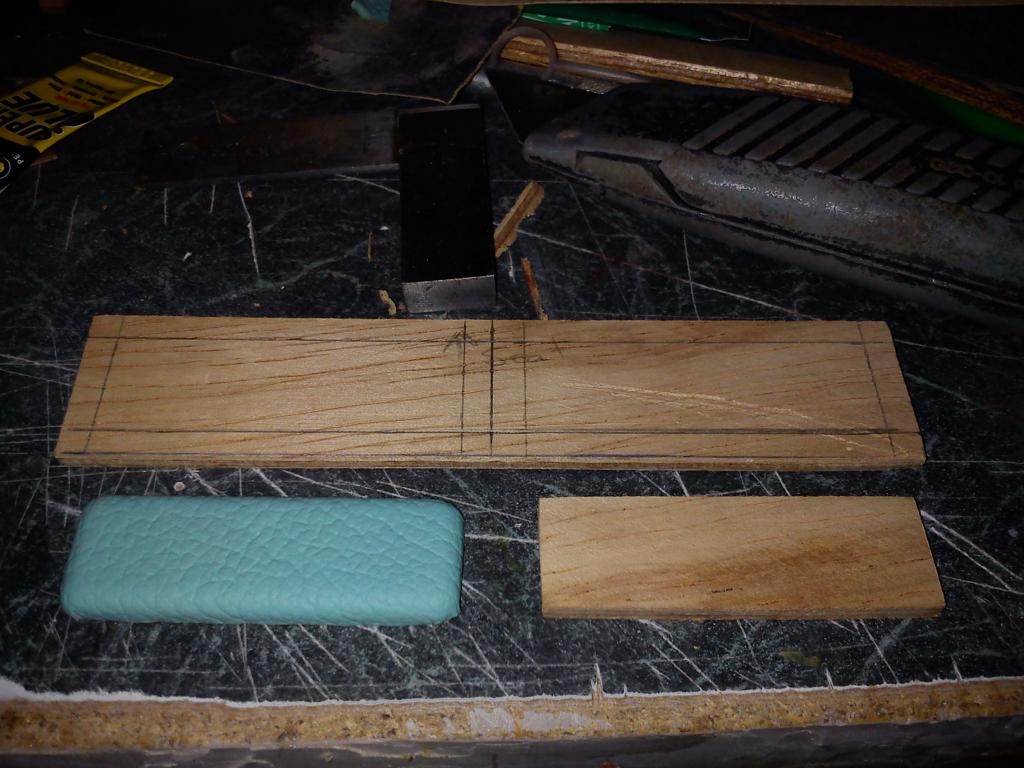
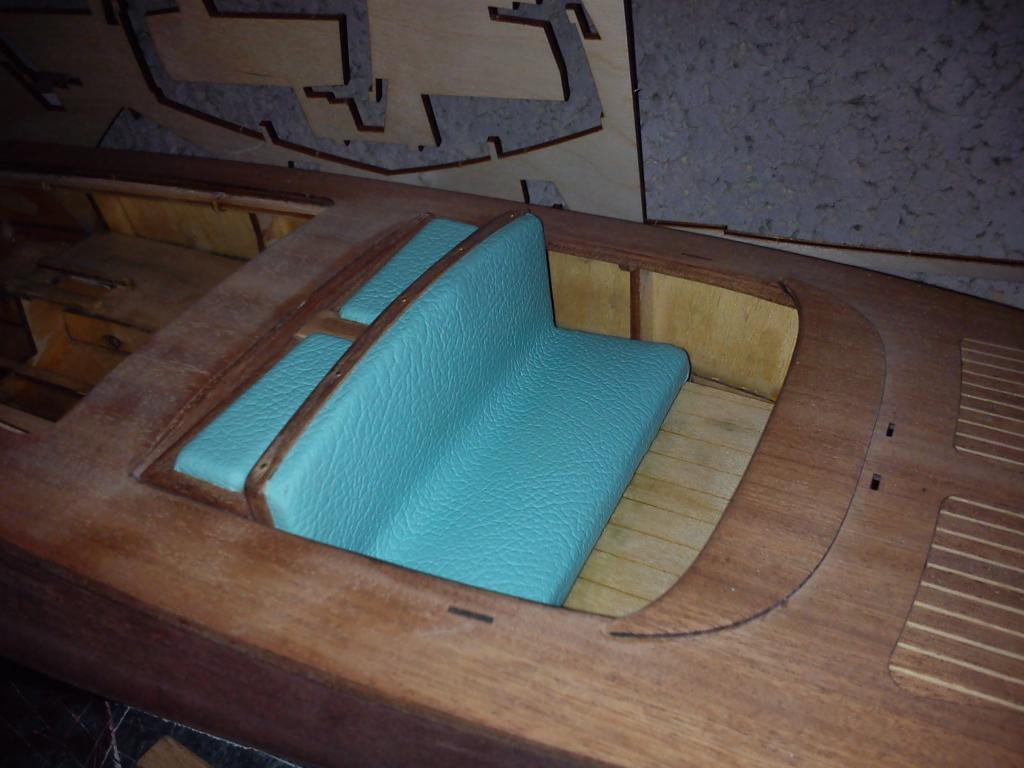
Work continues on filling the gap left behind the new seat position..
Started with a blank, shaped to fit the gap, it has a slight taper on the outside edges, its only 1mm so barely noticeable
Cut out 2 smaller 'pads'
Clad them in matching Leatherette (scraps from the seat section leftovers)
Position them centrally on the base
Clan the remaining base with mahogany strip, and added a central mahogany trim to match the rear hatch and the front 'planking' layout
More tomorrow
_________________ I'm Not Anti-Social, I'm Anti-Stupid.
Roadrunner Forum Overlord
Posts : 1714 Join date : 2011-06-10
Subject: Re: Aero-Naut Classic Mon Mar 24, 2014 7:25 pm
Seating area finish
Tomorrow I start the preparation for varnishing so there won't be any photos for a few days.
So today I mounted the rear pads to the new seat position, and boxed in the area for added support using 3mm light ply.
Then i started to create the centre console / arm rest...
Starting with a base block
Creating the arm rest
Cladding the base block and shaping it to fit around the seat and under the dash board
Then fitting in place...
The internal side panels are going to be clad in cream leather along with the canopy shroud, which attach at the end during final fitting and detailing.
More photos in a few days once the boats been varnished.
_________________ I'm Not Anti-Social, I'm Anti-Stupid.
intrepid75 Master
Posts : 271 Join date : 2011-06-11 Age : 68 Location : Bristol, West country
Subject: Re: Aero-Naut Classic Mon Mar 24, 2014 8:37 pm
Very elegant looking bit of work there.
Roadrunner Forum Overlord
Posts : 1714 Join date : 2011-06-10
Subject: Re: Aero-Naut Classic Tue Mar 25, 2014 8:19 pm
Quick sneaky peaky of the varnishing starting.
Up at dads 'shop' (dads varnishing the boat as he's doing one himself at the same time, saves wasting material!) First coat starting to be applied, this ones a 25% thinned coat before it gets a rub down with 600 grit, this seals the wood as well as giving a good base for the thicker un-thinned layers to go on, i'm guesstimating 8-12 coats to give the finish i require for polishing, this first coat will harden overnight, and be ready for sanding by morning, to which each subsequent coat will require a 3-4 hour dry time at 22 degrees, in the mean time, while dad cracks on with that job, i'll be back on the weenip! next set of photos will be once the varnishings done and prep for painting starts.
Hopefully 3 days time boat will be ready for that stage.
_________________ I'm Not Anti-Social, I'm Anti-Stupid.
Roadrunner Forum Overlord
Posts : 1714 Join date : 2011-06-10
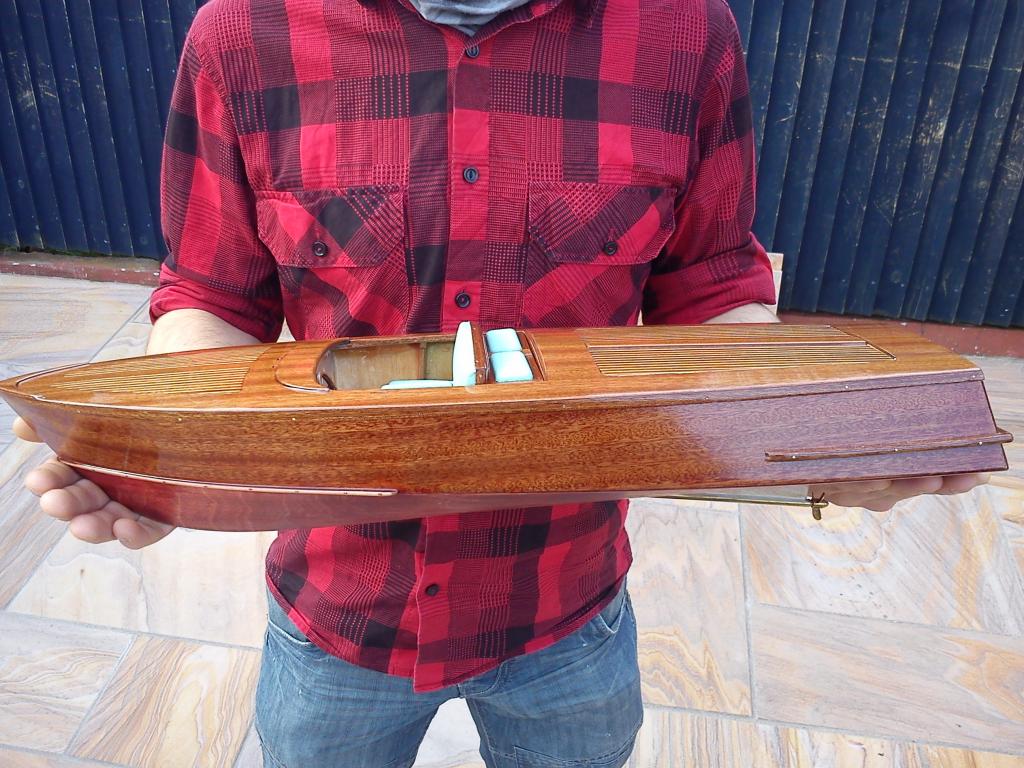
Subject: Re: Aero-Naut Classic Thu Mar 27, 2014 8:49 pm
5th Coat of varnish going on, Dad and i've decided to go up to around 12 coats for this boat, it will allow for a decent polish finish, although this won't go to a full glass finish, it will be nice enough to stand out from a distance, the reason for not being able to get a glass finish with this boat is the thickness of the materials used to build it, much is veneered so there is no thickness to sand down perfectly smooth also some areas like the inserts such as the rear hatch and front inserts in the bow are only mahogany and ply laminations, this effects the finish overall. there are ways around this to get a glass finish which is to apply a lot more coats, anywhere up to 25 would in the end give me a glass like polish but yeah ... that wayyyy to much for such a tiny boat, the Dolphin build had 22 layers to give her the polished deck.
anyhow photos cos i know u guys love them.
Boat is rubbed down every 2nd coat this lets the varnish take to the previous layers, as well as removing hair lines from the brush, and any runs that start to build up using this stuff.
Now to watch my dad at work for a change
Boat will be ready sunday
_________________ I'm Not Anti-Social, I'm Anti-Stupid.
Guest Guest
Subject: Re: Aero-Naut Classic Fri Mar 28, 2014 12:56 am
To you and your Dad Aron
Guest Guest
Subject: Re: Aero-Naut Classic Fri Mar 28, 2014 4:59 pm
that looks absolutely beautiful RR.............I wish I could have got that shine and sheen on my last two lifeboats..............superb finish. neil.
Roadrunner Forum Overlord
Posts : 1714 Join date : 2011-06-10
Subject: Re: Aero-Naut Classic Fri Mar 28, 2014 5:39 pm
That's just the rough applied coats Neil, after another 7 coats i have the opportunity to polish it with rubbing compound and polish, it will be as close as i can to a glass finish in the end.
With all things like paints and varnishes, it all to do with preparation and layers, all good polished finishes take time to pull out, the more time you spend the better the end result.
For those who are unsure how to achieve such a finish with paints and varnishes, the same methods apply's.
Start by LIGHTLY rubbing down with 1000 grit wet sanded, then work your way to 2000, ~( this will clean the burrs, over spray marks and smooth the paint layer), next in the case with varnishes & enamel paints use rubbing compound to get the end surface, in the case with cellulose and acrylic sprays paints use T cut (T cut is specific to car sprays) this will smooth the final surface ready, rub using a lint free cloth in circular motions, then wipe it dry with a soft cloth, then you can apply the polish, again with a soft cloth in circular motions, this is the stage where spending time will give the best results, you can never use to much polish, but remember this final polishing stage will only give you the best results if you have spent time working on the first 2 previous stages.
I'll demo with photos once I'm ready for that stage to show you all how its achieved as a photos says 1000 words!
_________________ I'm Not Anti-Social, I'm Anti-Stupid.
Roadrunner Forum Overlord
Posts : 1714 Join date : 2011-06-10
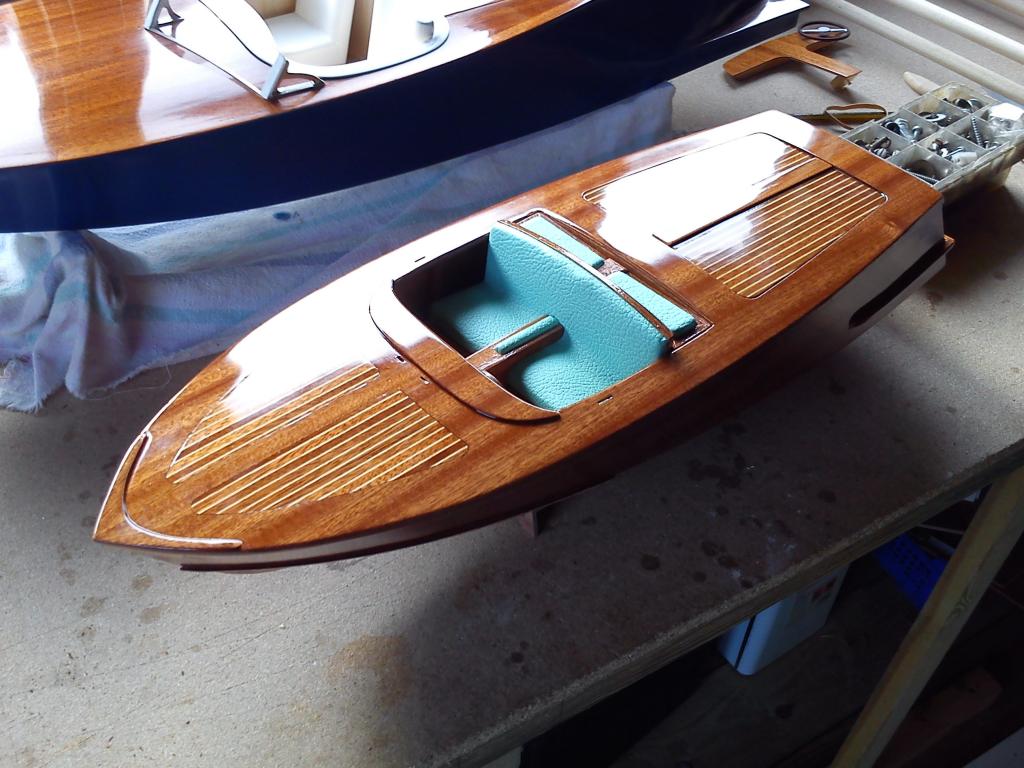
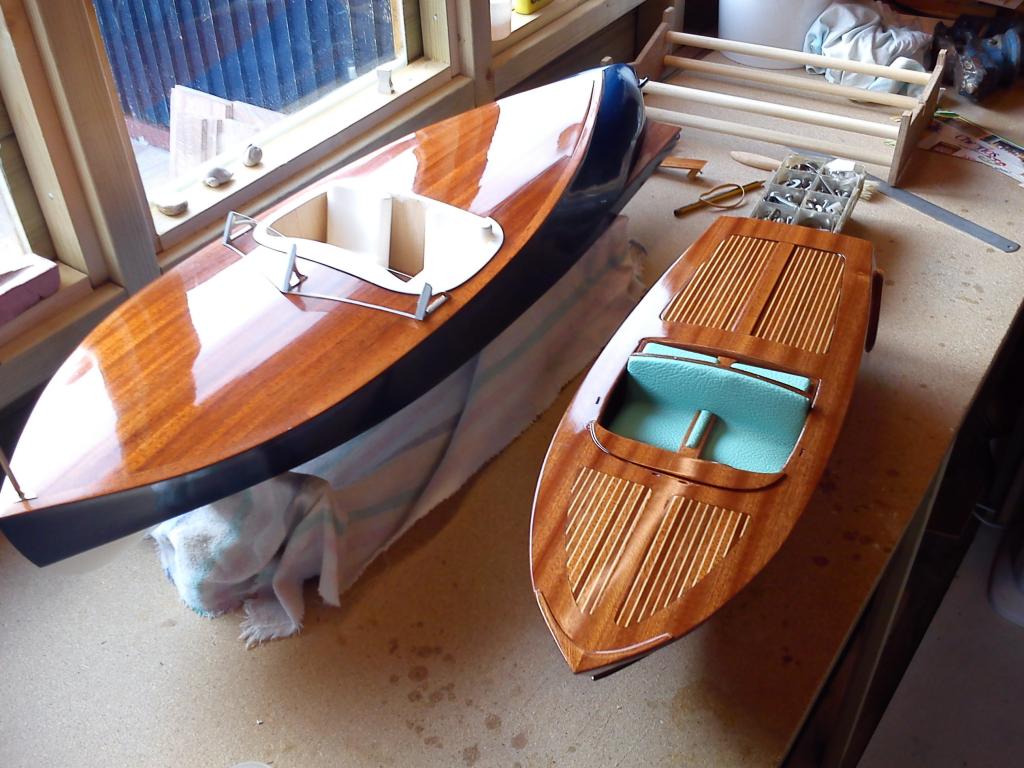
Subject: Re: Aero-Naut Classic Sun Mar 30, 2014 7:00 pm
Well guys varnishing is all done
11 Coats later and well the photos say it all, the last job before buffing it to its finish is the paint job, which i'm hoping the mrs will allow me to do tomorrow, if not well we'll see i guess.
Now i know what some of you guys are saying ''oh lookie at that boat behind yours!''
That is my Fathers gentleman runabout, its a scratch built model, plank on frame construction and full mahogany deck, its been some 2 years in the making for him and hes still not done, however his deck is polished ( sides hes yet to do ) this was the other boat being done at the same time however his finish had 22 coats rather them the 11 i had on mine.
Its powered by a 1550 Brush less Outrunner, 80 amp esc on 3's for around 14,000 rpm on a X40 prop water cooled whole 9 yards there, (my dads a speed freak)
_________________ I'm Not Anti-Social, I'm Anti-Stupid.
Guest Guest
Subject: Re: Aero-Naut Classic Sun Mar 30, 2014 9:44 pm
that's woodworking at it's finest and most beautiful RR.........superb.........
Tug--Kenny Lost But Never Forgotten R.I.P
Posts : 284 Join date : 2011-06-11 Age : 82 Location : Newport, South Wales,UK
Subject: Re: Aero-Naut Classic Tue Apr 01, 2014 11:56 am
Posts : 271 Join date : 2011-06-11 Age : 68 Location : Bristol, West country
Subject: Re: Aero-Naut Classic Sun Apr 06, 2014 8:50 pm
Havent been online for a week so not had the chance to see the last update. Not sure I can add any words over what has already been said about the quality of the build and the finish. Beautiful is the best I can come up with.