| | Metcalf Mouldings River Star |  |
|
|
|
| Author | Message |
|---|
intrepid75
Master


Posts : 271
Join date : 2011-06-11
Age : 68
Location : Bristol, West country
| | Subject: Metcalf Mouldings River Star Mon Nov 18, 2013 8:20 pm | |
| Haven't done a build blog for some time - not since I completed my Motor Minesweeper. Doesn't mean I haven't been busy of course, I have done a Metcalf Mouldings Lady Laura tug but didn't do a build blog but a pic is attached. 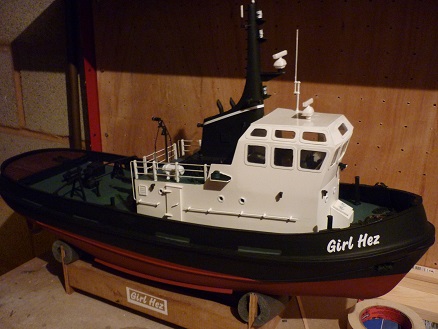 So thought I would do a short build blog of my latest build which is I am just starting. This is the Metcalfe Mouldings River Star Yacht Tug. Being perfectly honest I have to say although I have seen this advertised it had never really appealed to me. However at the International Boat Show in Warwick having bought a kit from Deans and on my way out of the show I noticed the heavy discount on Dave Metcalfs site. Having been impressed by the quality of the Lady Laura I decided to buy it sort of on a whim influenced by a hefty £50 off the price. Once home and looking over it I have warmed to it quite a lot now, particularly the quality of the kit. The kit contains a number of sheets of very accurately and cleanly cut CNC plastic sheets, some very good white metal fittings, GRP hull and ample rod, dowel, rubber fendering and plastic strips and printed wood for deck inserts.   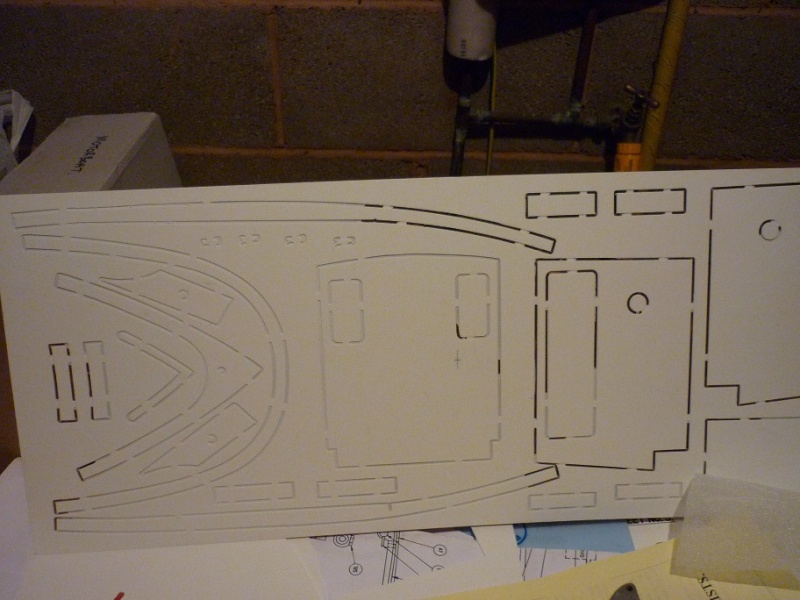  | |
|
| | |
intrepid75
Master
Posts : 271
Join date : 2011-06-11
Age : 68
Location : Bristol, West country
| | Subject: Re: Metcalf Mouldings River Star Mon Nov 18, 2013 8:30 pm | |
| First job was to make the stand with the template supplied and off cuts of some pine I had lying round. Then onto the kit. As I said the overall kit is very good quality. The hull is not as substantial as I expected. Being 1/12th scale I did expect it to be very thick and solid but its actually quite thin, a lot thinner than I expected - nothing wrong with it of course just as I say I was expecting it to be a couple of mm thicker but the quality is still good. A few blemishes that required making good and a couple of mould lines down the centre from the moulding process needed rubbing down. So far I have made the prop shaft and rudder shaft openings and used expoxy to secure both in place using a wooden block which is supplied for support around the rudder shaft tube. After setting some car body filler used for extra security.  The shaft lines up easily with the moulded in keel.  Next job was to cut out the four freeing ports. 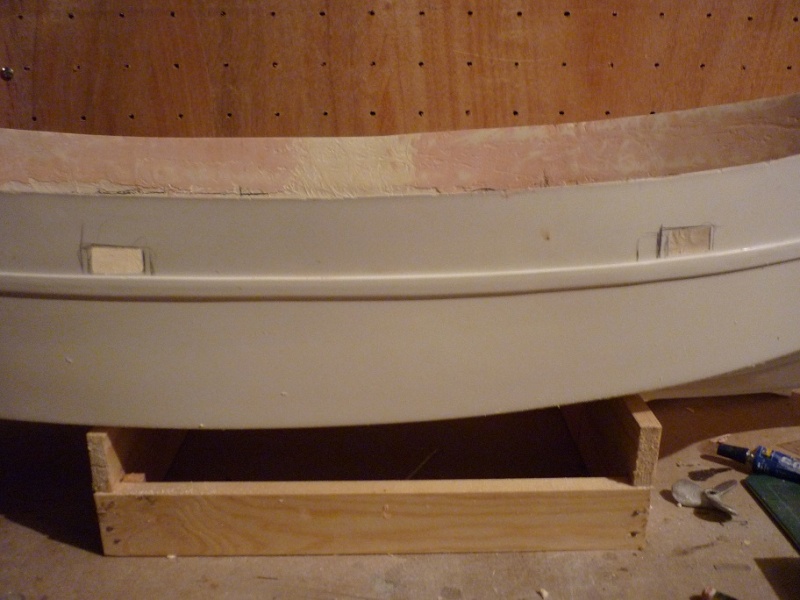 The motor is temporary lined up so the next couple of nights work will be making the servo box, making up the Action ESC and doing the motor mount. I am using a 'standard' 540 motor. The wood base for the motor lines up quite easily with shaft using the Huco coupling. Be a few nights before I can post the next stages due to work. | |
|
| | |
Guest
Guest
| | Subject: Re: Metcalf Mouldings River Star Tue Nov 19, 2013 7:56 am | |
| hi matey...........I find this a very quirky little boat that he produced, and it was a Marmite type of boat, but as I like marmite, I will look forward to this.
Carry on, and I'll watch with interest, as I have never seen one built before.
neil. |
|
| | |
intrepid75
Master
Posts : 271
Join date : 2011-06-11
Age : 68
Location : Bristol, West country
| | Subject: Re: Metcalf Mouldings River Star Sun Nov 24, 2013 7:39 pm | |
| Well bit of progress over the last 7 days. The rudder servo has been fitted. Used some off cuts of Ply lying around to construct a servo box and secured that in place with epoxy where it was indicated on the plan. The instructions recommended that the rudder servo box be made big enough to be secured against the side of the hull AND the propshaft. Personally I didn't think it needed to be secured in such a way and that it would be secure enough and well placed enough secured to the hull side which is what I opted for. It isn't the most aesthetically pleasing servo box but it holds it in nicely IMHO. Gave it a couple of licks of paint to make it look a little nicer though. Then made up the motor mounting, the instructions suggest that for the prototype to carve a semi circle in a block of wood and use the elastic band to hold it in place. I used the simple tried and tested wood platform with two triangular wood supports either side of the motor to hold it in with two hooks for an elastic band. Lined up by sight but it seems very straight and lined up. After this I then finished the internals. The RX battery is placed under the shaft with a retaining frame of 1/4" wood baton around it. The rx is placed at the side of the servo and the ESC held in place by Velcro just forward of that. The instructions suggest a 6v 4.5 SLA which is what I am going to use. Havent made a frame for that yet but will soon. Although its a roomy model the battery does have to go quite well forward which is indicated as such on the plan. Clearly the main extra ballasting will need to be placed well aft to counteract the forward battery weight. I didn't fancy the white metal prop and I didn't fancy paying about 12 quid for a brass one either. However I did have a 40mm Raboesch prop in the box of accumulated bits and bobs and although its four bladed it should be suitable so I have fitted that instead. All internals then tested and worked okay with appropriate rudder throw. 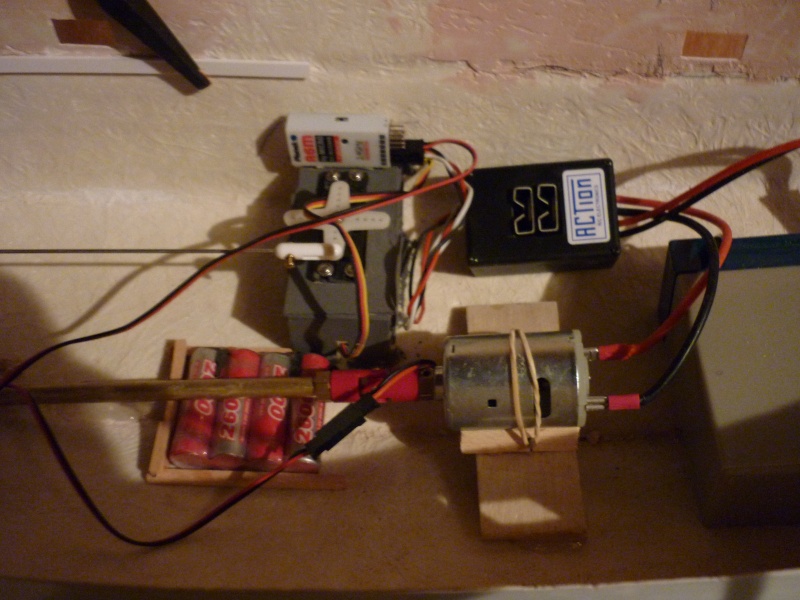  Ignore the rats nest wiring which will be tidied up when the decks and cabin are in place. Ignore the rats nest wiring which will be tidied up when the decks and cabin are in place. | |
|
| | |
intrepid75
Master
Posts : 271
Join date : 2011-06-11
Age : 68
Location : Bristol, West country
| | Subject: Re: Metcalf Mouldings River Star Sun Nov 24, 2013 7:47 pm | |
| I have started to fit the deck supports but while waiting for the epoxy to set on the first layer, I decided to make part of the cabin that doesn't need to be build over the deck openings. These are the rear locker and the front companionway. The fit of the parts is excellent. Probably some of the most accurate CNC parts I have put together. I can't see any gaps were filler will be needed. 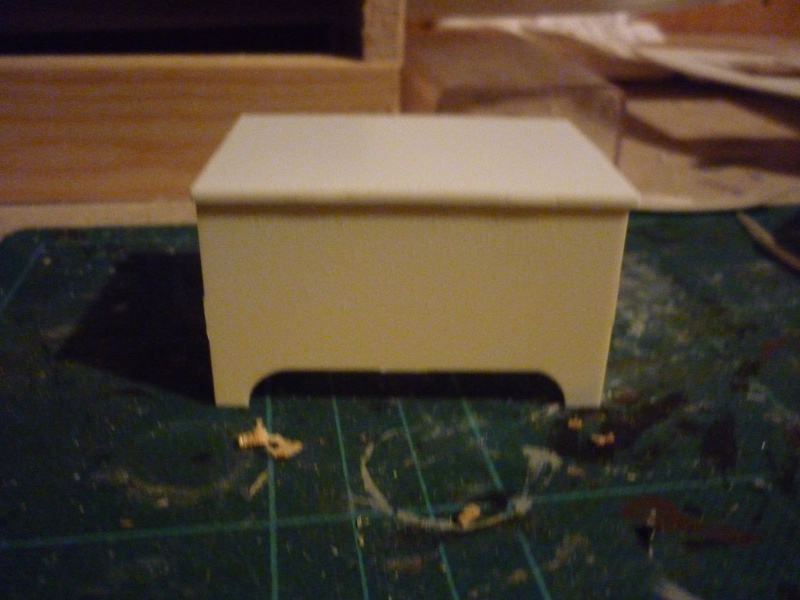 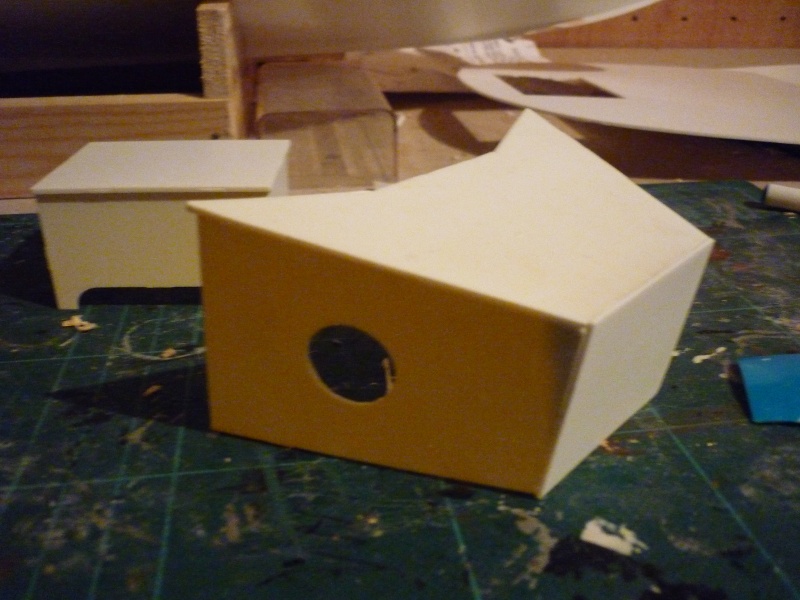 | |
|
| | |
Guest
Guest
| |
| | |
Guest
Guest
| | Subject: Re: Metcalf Mouldings River Star Mon Nov 25, 2013 9:19 am | |
| |
|
| | |
intrepid75
Master
Posts : 271
Join date : 2011-06-11
Age : 68
Location : Bristol, West country
| | Subject: Re: Metcalf Mouldings River Star Mon Nov 25, 2013 7:53 pm | |
| Thanks for the interest chaps. Apologies about the poor pics quality - even with the garage light on it was quite gloomy in there as the bulb went a week ago and only had a low wattage bulb lying around. Must get something brighter lol. Hope to get the deck supports completed this week and the fore and after decks fitted before Friday as no modelling over the weekend its Portsmouth Dockyard Christmas Fayre which I always take the missus away to for a weekend of her shopping - its my annual trade off to get stocked up with brownie points from her!! But I cant complain as I get to visit all the museums and exhibits in the Dockyard too and relive past glories of staggering to Middle Slip and South Railway with pie and pint of milk in hand at 3am lol. | |
|
| | |
intrepid75
Master
Posts : 271
Join date : 2011-06-11
Age : 68
Location : Bristol, West country
| | Subject: Re: Metcalf Mouldings River Star Sun Dec 01, 2013 7:59 pm | |
| Made some progress over the last few days despite being away for the weekend and it is starting to come together more now. I have to say that next time I'm at a show I will have to have words with Mr Metcalf. He seems intent in taking some of the fun that comes out of frustration from building kits. I have never built a kit yet where the deck is an exact fit to the hull and I usually have to shave equal bits of each side bit by bit gently until a reasonable fit is had, or in one case from a well known longstanding manufacturer having to cut a new deck completely as the die cut ply was about 10 mm short on each side. In this case the deck is an absolutely perfect fit with virtually no filler going to be required. Top marks for his CNC cutting. The coaming for the aft deck is quite clever in that the front part serves both as part of the aft deck support and also the coaming. One small measurement error in the cnc cutting was that the sides of the coamings were shot by 1mm. This was easily remedied by cutting a second piece the same size and shape of the rear coaming from scrap1mm and gluing to the original piece to thicken it by 1mm. This then gave it a perfect fit.   The rear deck is now fitted and the coaming and the tiller hatch. The supports for the front have been cut and attached to the hull sides with epoxy and waiting to set overnight. Trial fitting the deck to these showed that the forward deck is also a perfect fit. Once the supports are dried and well bonded I will attach the front deck. The coaming for this also follows the same principles as one piece being both a support and a coaming. Once this is done its onto the cabin and wheelhouse. | |
|
| | |
Guest
Guest
| | Subject: Re: Metcalf Mouldings River Star Tue Dec 03, 2013 9:04 pm | |
| you want to ring him up and tell him about his cnc cutting......he's been honing it for months, trying to get his cutter right, and feels that it still isn't perfected......it would give him an enormous ego boost if you were to tell him..........then may be he'd get on with the bloody Liverpool lifeboat I have been waiting for for years, lol. |
|
| | |
intrepid75
Master
Posts : 271
Join date : 2011-06-11
Age : 68
Location : Bristol, West country
| | Subject: Re: Metcalf Mouldings River Star Tue Dec 03, 2013 10:07 pm | |
| I did email him a few days ago Neil to pass on my views as to the accuracy of the CNC cuts (thus far) and I think he did appreciate the positive feedback. | |
|
| | |
Guest
Guest
| | Subject: Re: Metcalf Mouldings River Star Tue Dec 03, 2013 10:32 pm | |
| |
|
| | |
intrepid75
Master
Posts : 271
Join date : 2011-06-11
Age : 68
Location : Bristol, West country
| | Subject: Re: Metcalf Mouldings River Star Sun Dec 08, 2013 4:11 pm | |
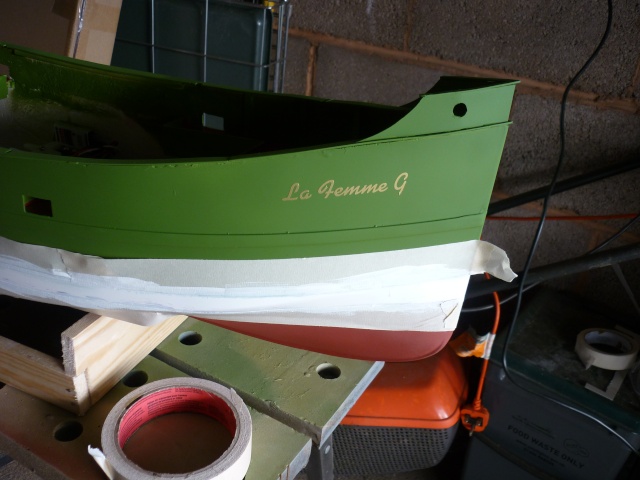
| Well have now completed (virtually) the hull and deck. I say virtually as I did encounter my first small size issue with the pre cut CNC parts. The fore deck on one side when fitted had a small triangular gap about 3 or so mm wide by about 5 mm in length. When I noticed this I did a test fit of the capping and when this was test fitted their was a small 3mm gap where the two lengths of capping rails met on the same side as the gap in the deck. I assume, possibly wrongly (but its my assumption so I stick with it!) that the parts are actually correct as cut but that the gap is caused by the variations in laying up each FG hull. I was wary of pulling the hull in to meet the gap as when viewed as it was the hull looked quite symetrical so I was happy to leave it like that and I have used a small fill of plastic card for the gap in the deck. For the capping rail I am leaving as is for the time being. It was quite awkward setting the capping rail to the hull as the hull is quite thin. The vertical bulwark supports of plastic strip help but where the gap is there is none just a 1mm thick hull to rest a small 3mm piece of plastic. However, where the join is supposed to be is where the fairleads sit so I figure it is easier to cut the piece of capping rail to bridge the gap but glue it to the white metal fairlead underside first and then glue the fairlead to the capping rail and thereby closing the gap and securing the fairlead at the same time. This piece that goes to close the gap wont be seen as it is shorter in length than the fairlead base and the same width as the fairlead base so I would only have to touch up the thickness of 1mm card with paint under the fairlead. I think that makes sense to read but if it doesn't I think I know what I intend to do!!!  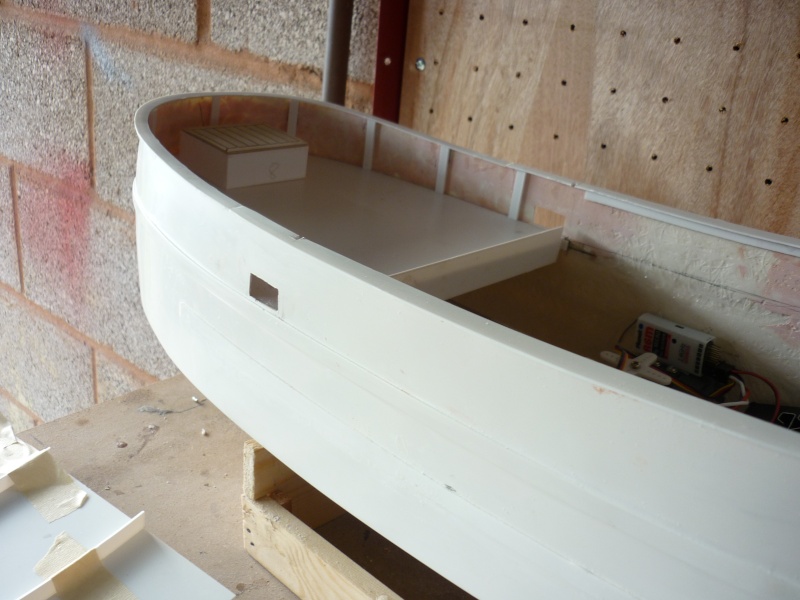 It is starting to look like something resembling the River Star. Not that she is being called the River Star, she is going to be 'La Femme G' . My wife and daughters each said they wanted a boat built with a name related to them which they picked so my Puffer was after the wife 'W'or Nettie', the Lady Laura Tug was Girl Hez and La Femme G is the last daughters choice. | |
|
| | |
intrepid75
Master
Posts : 271
Join date : 2011-06-11
Age : 68
Location : Bristol, West country
| | Subject: Re: Metcalf Mouldings River Star Sun Dec 08, 2013 4:29 pm | |
| The good thing for me after finishing the hull and internals is always the start of the superstructure build as it shows the model taking shape. Its also the point where I can safely bring it indoors on an evening to do the odd hour or so and not make a mess and get grief off her indoors. So now started on the main saloon. Now a small measurement issue here which isn't to do with the hull variances! A minor issue again though which doesn't detract from what is a lovely enjoyable model to build and probably nit picking on my part. The instructions and plan call for a tiny overhang of the roof over the saloon sides. It doesn't say how much just says to leave a small overhang and on the plan its about .5 of a mm each side. The rear Saloon bulkhead however is an EXACT fit to the width of the roof. If I build it as is everything would fit perfectly but I wouldnt have the overhang. To give it the overhang I would have to shave about 1.5 mm each side (losing .5 of a mm each side for the overhang and 1mm for the thickness of the sides) and probably wont get as perfect a straight line as it is now and have to use the filler in parts. As well as that I do have a view that the overhang being so small might just look like it wasn't built fully aligned. So going to think overnight do I lose a bit for the overhang or build without the overhang. This pic shows the roof underside with supports setting and shows the saloon sides one with windows removed one without and the saloon rear bulkhead and hopefully gives some idea of the quality of the CNC cut shapes (regardless of Mr Nit Picking's comments!!)  | |
|
| | |
intrepid75
Master
Posts : 271
Join date : 2011-06-11
Age : 68
Location : Bristol, West country
| | Subject: Re: Metcalf Mouldings River Star Sat Dec 14, 2013 7:08 pm | |
| | |
|
| | |
Guest
Guest
| | Subject: Re: Metcalf Mouldings River Star Sat Dec 14, 2013 11:28 pm | |
| |
|
| | |
intrepid75
Master
Posts : 271
Join date : 2011-06-11
Age : 68
Location : Bristol, West country
| | Subject: Re: Metcalf Mouldings River Star Sun Dec 15, 2013 11:01 am | |
| Thanks D. Just to be clear, there is little adversity in the kit. Just a few sizes a little out here and there. Nothing major and certainly less adjustment of parts needed than if I was cutting out printed parts. I always think that the larger the scale the build is the less tolerance of sizes in that gaps become more noticeable. Building in 1/96th for example any imperfections in size when parts are small aren't noticed as easily and are often hidden whereas at 1/12th a very big part that is not quite straight or the right length becomes very very obvious. I am very satisfied with this kit and would highly recommend it to anyone, accepting that as Neil says its not to everyone's taste. Wasn't my taste at the start - the discount ruled the heart but more building I do the more I am developing a liking for it's quirky looks. | |
|
| | |
Guest
Guest
| | Subject: Re: Metcalf Mouldings River Star Sun Dec 15, 2013 6:18 pm | |
| WOW!!!
That's coming on well.
neil |
|
| | |
intrepid75
Master
Posts : 271
Join date : 2011-06-11
Age : 68
Location : Bristol, West country
| | Subject: Re: Metcalf Mouldings River Star Thu Dec 26, 2013 3:39 pm | |
| Well thanks to the joys of Boxing Day being a non work and having the excuse of being unable to go out socialising or shopping as I am 'On Call' over xmas I managed to spend a whole morning and early afternoon undisturbed working on River Star and have made a fair bit of progress. I cut out the vac form funnel and cap and got them to be as good a straight fit as I could then used two off cut strips as a lip to join the two halves together. A little filler was needed but the halves have gone together well. When it is fitted it will need to be measured up against the wheelhouse and then cut again to size to be slotted over the top of the wheelhouse for half its width. 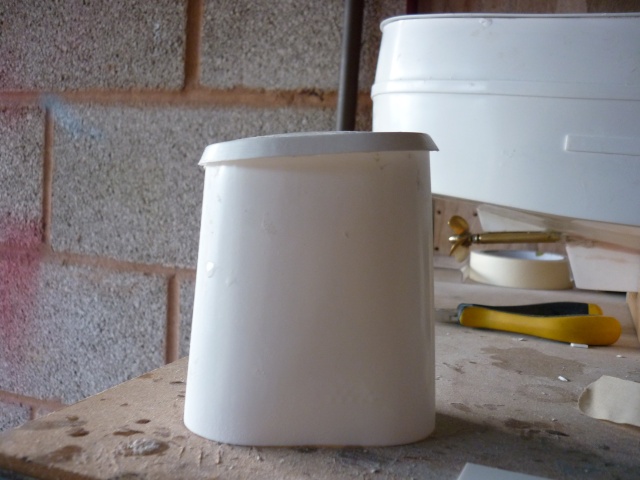 Then I decided to make the funnel base. Unfortunately when I cut out the listed parts the sides and ends of the base were clearly wrong. The sides were higher than the ends and both were too short. A few curses and I thought well a minor matter will just cut some more from off cuts to fit.  I then thought before I do that I would check all the remaining parts. When I checked the nav light boxes I realised the part listing numbers on the CNC guide sheet was wrong as the sides of the nav box had a curve bottom which made me realise the nav box part numbers were transposed with the funnel base so all well in the end. 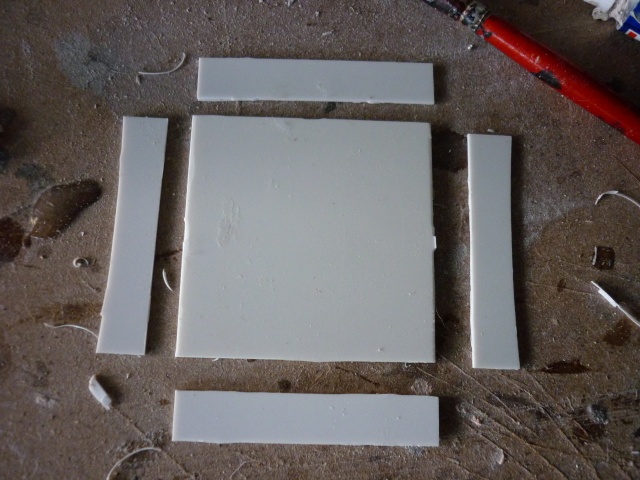 | |
|
| | |
intrepid75
Master
Posts : 271
Join date : 2011-06-11
Age : 68
Location : Bristol, West country
| | Subject: Re: Metcalf Mouldings River Star Thu Dec 26, 2013 3:58 pm | |
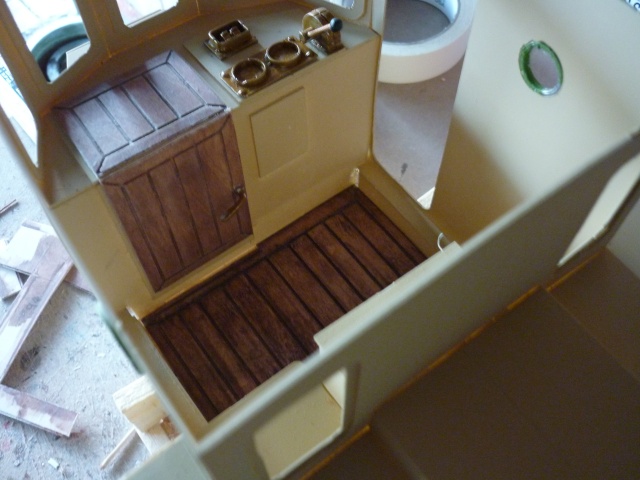
| I have also made up the Tow Winch which was a fairly simple job with a mix of white metal fittings and CNC parts. 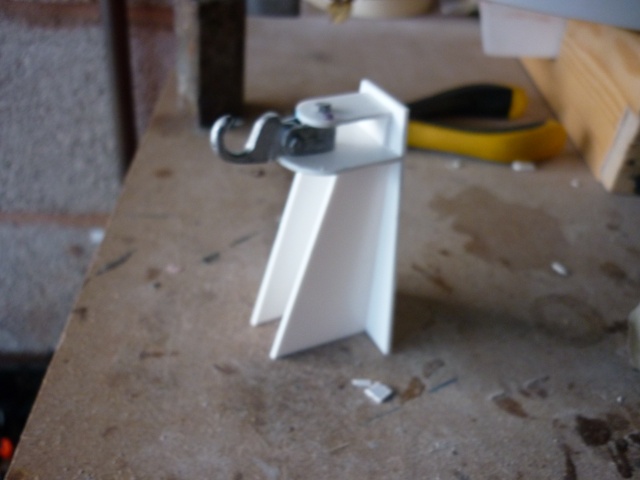 The onto the door frames. Again fairly simple just required using the doors as jig to make sure that the doors will fit inside and wont 'pop out' or force out of straight when sliding the doors open. At this stage although they are made up I wont be fitting them yet as it is now approaching the point where some painting needs doing - the wheelhouse will have to be painted inside and out before fitting the doors as otherwise the insides wont be fully accessible to paint. 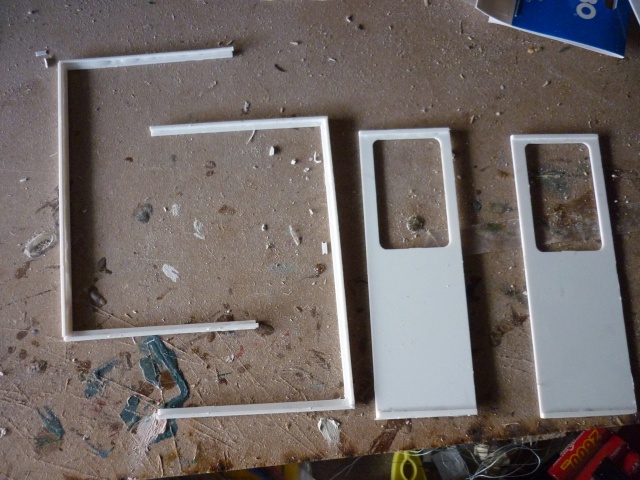 Final job for today was that I joined the wheelhouse to the saloon. This was actually more difficult than I thought. It needed some care to make sure as well as being a good fit it didn't force against one side more then the other so as not to buckle the saloon whilst fitting as close to the deck as possible. Once this was done the front saloon 'box' as fitted taking care not to glue anything to the deck. The floor then went in (my earlier misgivings about its shape were wrong!!!) and a test fit of the ply wood floor detail was made. There are a couple of tiny gaps at the side joins of the front angular sides but these aren't really noticeable as they are at the bottom and hidden easily by the bulwarks.  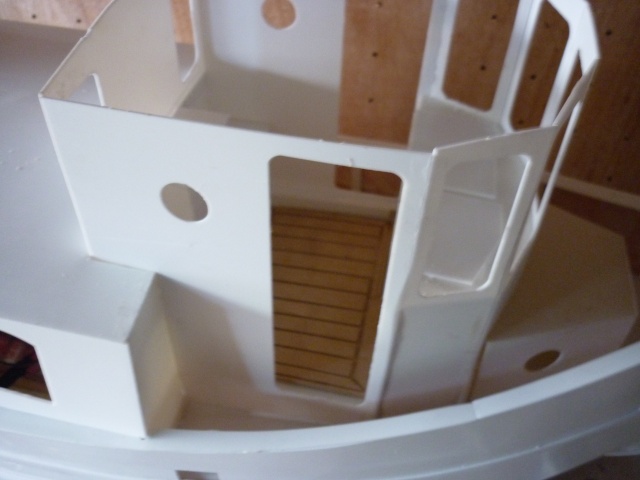 I will make up the funnel base next and then fit the funnel and then I think it will be time to paint the wheelhouse and saloon so I can fit the doors. | |
|
| | |
Guest
Guest
| | Subject: Re: Metcalf Mouldings River Star Thu Dec 26, 2013 10:44 pm | |
| |
|
| | |
intrepid75
Master
Posts : 271
Join date : 2011-06-11
Age : 68
Location : Bristol, West country
| | Subject: Re: Metcalf Mouldings River Star Sat Dec 28, 2013 5:58 pm | |
| Well thankfully nice weather today. First job was to get in her good books and replace the broken fence post and panel which was a ncie quick job and she was a happy bunny - so happy she went shopping with one of my daughters and gave me 3-4 clear horus in the garage working on River Star. Although it didn't look it at the end of todays session, I did get a fair bit done. Mostly fiddly bits like painting the funnel which I used Tamiya acrylics which have a quick dry time between coats. Essentially it was paint a coat, do something else, paint another coat, do something else etc. At the end of it I had a painted funnel with band at top, the aft companionway was fully assembled - there was quite a bit of a curve to put on the roof so I am leaving the masking tape on overnight to make sure it welds securely and wont spring off with the strain on the curve. Also made up the nav boxes for use later when the roof goes on - this is the last job on the model once painting is done on the saloon and wheelhouse. The funnel base was completed, measured up and glued into place. Hopefully tomorrow will be nice and sunny and maybe warm in the morning so I may get a chance to start painting the saloon and wheelhouse outside.  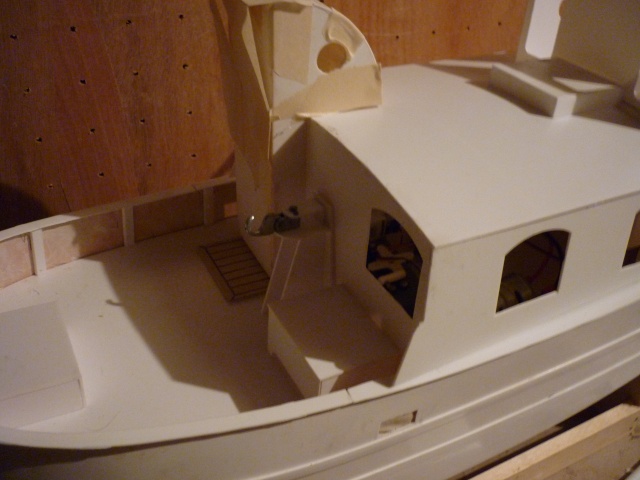 | |
|
| | |
intrepid75
Master
Posts : 271
Join date : 2011-06-11
Age : 68
Location : Bristol, West country
| | Subject: Re: Metcalf Mouldings River Star Sun Dec 29, 2013 4:41 pm | |
| Managed to have a little time working on her today but only managed a few small jobs. The plywood supplied for deck and door detail is a very very pale type of ply so it does need a touch of colour/varnish to make it stand out a little and look effective. I used a thin wash to acrylic earth brown paint lightly washed on in two coats and then applied a couple of coats of matt varnish and it does make a difference at least to my eyes. 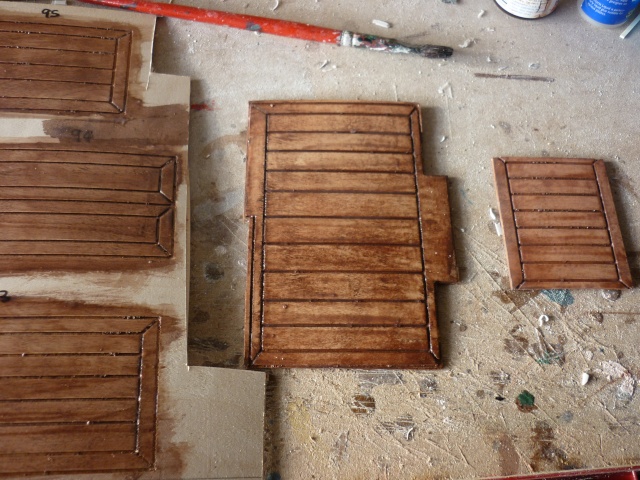 I also fitted the roof supports to the roof which took a little time holding in place the curve of the roof onto the beams but they are stuck solid now. A test fit showed it to be a good fit onto the wheelhouse ready for final fitting once the wheelhouse is painted. 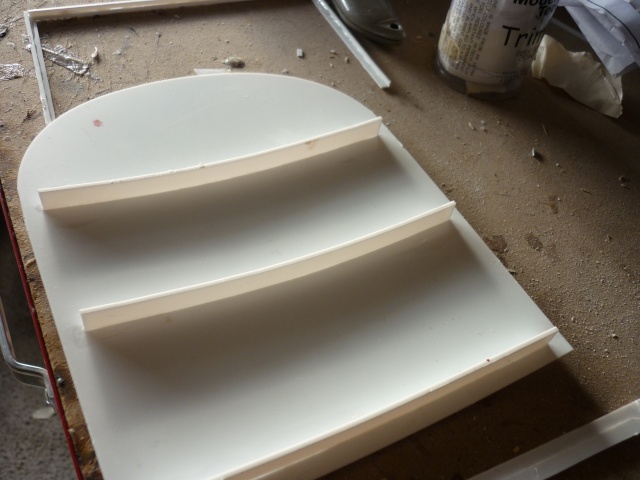 The bow bulwark was attached to the capping rail with its own capping glued in place. 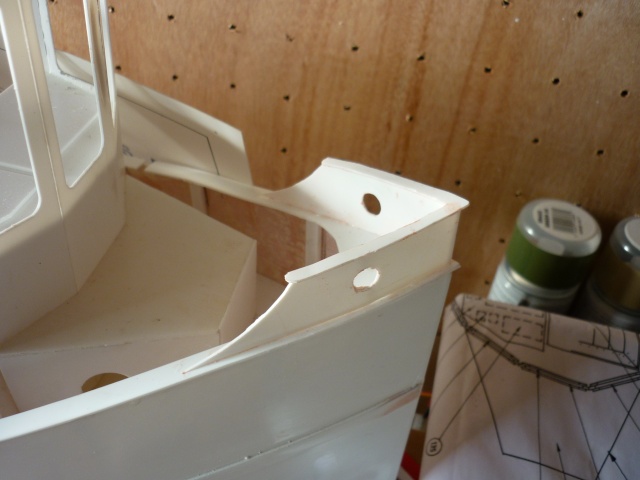 All that is needed now before painting the wheelhouse and saloon is to fit the interior window frames which I will try to do during the week a couple at a time - the two sliding door interior frames are fitted so only 7 interior frames to fit then its painting. Lets hope for some warm nice sunny weather at the end of next week. I am on a target time limit to finish her as a new puppy is joining our household the last week of January and her indoors has laid the law down that no modelling work until she's been settled in with our other dog. seems a reasonable request all things considered. | |
|
| | |
davidjt
Forum Sponsor

Posts : 534
Join date : 2013-01-08
Age : 72
Location : n wales coast
| | Subject: Re: Metcalf Mouldings River Star Sun Dec 29, 2013 8:10 pm | |
| hi. that is looking good. I have been watching in the back ground , thought I would let you no it really is going to be nice when complete, but don't start rushing now the end is in sight as mistakes can happen  just like puppys have mistakes  . keep plenty of old newspaper close by. david | |
|
| | |
intrepid75
Master
Posts : 271
Join date : 2011-06-11
Age : 68
Location : Bristol, West country
| | Subject: Re: Metcalf Mouldings River Star Sun Dec 29, 2013 9:03 pm | |
| Thanks David. No I certainly wont rush the last stages. It is virtually all at the painting stage and whilst I can paint the fittings indoors I will need nice sunny weather and a little warmth so I can do the spraying of the hull and saloon. But if the weather isn't kind enough it wont get done until it is kind enough. In any case I only have 130 days to my retirement - not that I am counting of course, and if I have to interrupt my progress for puppy watching and training well I will soon have plenty of time. | |
|
| | |
Guest
Guest
| | Subject: Re: Metcalf Mouldings River Star Sun Dec 29, 2013 10:26 pm | |
| |
|
| | |
Guest
Guest
| | Subject: Re: Metcalf Mouldings River Star Sun Dec 29, 2013 11:37 pm | |
| looking quite superb matey.
neil |
|
| | |
intrepid75
Master
Posts : 271
Join date : 2011-06-11
Age : 68
Location : Bristol, West country
| | Subject: Re: Metcalf Mouldings River Star Sun Dec 29, 2013 11:41 pm | |
| Well its a super offering by Mr Metcalf. A kit he should be well proud of that doesn't get the attention it merits compared with some more popular offerings. | |
|
| | |
intrepid75
Master
Posts : 271
Join date : 2011-06-11
Age : 68
Location : Bristol, West country
| | Subject: Re: Metcalf Mouldings River Star Tue Jan 07, 2014 8:56 pm | |
| Havent made much progress over the last 7 days due to a round trip to deliver my 95yo father in law back home a round trip of 620 miles, back to work and of course the weather in the South West isn't inviting enough to go into the garage. But a few bits here and there have been done. Most of the fittings have been painted - very very little work to be done on them prior to painting they are excellent first class white metal mouldings. The white vents have had two coats but will need a couple more. 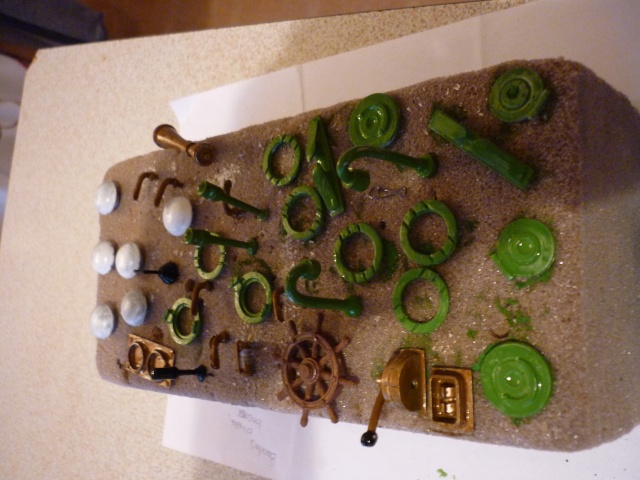 Also the window frames (well most still got 4 to go) have all been cut out. The pic doesn't show all the frames just some. There are a total of 26 frames and must admit of all the jobs in kit building I enjoy least its cutting out printed window frames. My M also includes quite a few spares but I wont bother butting these ty unless I muck up the last 4!! But they don't look too bad IMHO. The side frames ( the ones with the bars across) don't have an inner frame so I can paint these and the fit the glazing ready to fit into the saloon when its finally painted so at least its a job I can do regardless of weather being good or bad.  | |
|
| | |
Guest
Guest
| | Subject: Re: Metcalf Mouldings River Star Wed Jan 08, 2014 5:19 pm | |
| |
|
| | |
intrepid75
Master
Posts : 271
Join date : 2011-06-11
Age : 68
Location : Bristol, West country
| | Subject: Re: Metcalf Mouldings River Star Wed Jan 08, 2014 8:44 pm | |
| Thanks. Did the last few frames tonight and also painted a first green coat on the saloon window frames (ones with the bar across) and will paint another coat tomorrow. The instructions and the printed numbering shows each frame as being a different number and either outer or inner i.e. 85 Inner, 85 Outer, 86 Inner etc. However when they are matched against each other they are exactly the same (or seem to be to my eye). Regardless, I have numbered each one before cutting them out and will glue them as numbered. As I said in my previous post, I dont enjoy windows but I never know if my 'technique' for them is a good or bad way. A previous kit with window frames suggested drilling a small hole at each corner and then using a craft knife to join up the four corner drill holes. I have never done this. My preferred method is to cut the inside openings first around the lines with a steel rule then cut straight lines across from each corner to each corner at 45 degrees to make 4 segments and gently push out from the middle so that there are four quarter triangular segments. If they are curved in each corner then I end the cut lines before the curve and carefully and gently score around the curve. Once the centre is pushed out I then cut around the outside edges.  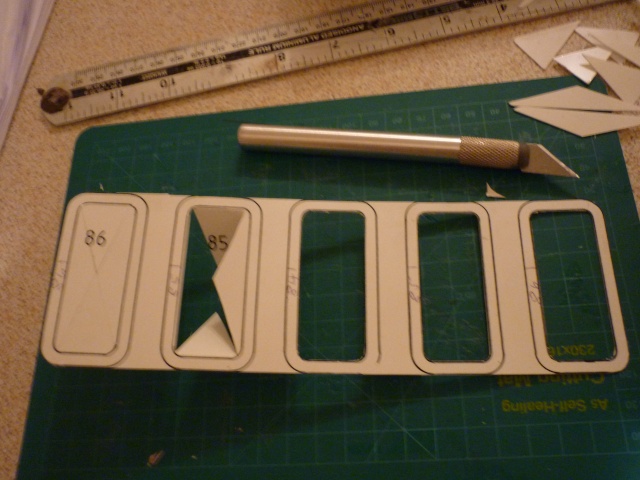 | |
|
| | |
intrepid75
Master
Posts : 271
Join date : 2011-06-11
Age : 68
Location : Bristol, West country
| | Subject: Re: Metcalf Mouldings River Star Sat Jan 11, 2014 5:09 pm | |
| | |
|
| | |
barriew
Captain (moderator)
Posts : 2631
Join date : 2011-11-26
Age : 83
Location : Thaxted, Essex
| | Subject: Re: Metcalf Mouldings River Star Sat Jan 11, 2014 6:10 pm | |
| Very smart  Barrie | |
|
| | |
Guest
Guest
| | Subject: Re: Metcalf Mouldings River Star Sat Jan 11, 2014 10:25 pm | |
| |
|
| | |
Capn Jim
Deck Hand


Posts : 2
Join date : 2014-01-14
Location : Surrey UK
| | Subject: River Star - is just that Wed Jan 15, 2014 5:17 pm | |
|  Hi, I've only just joined this forum - but I have a River Star- and it's one of my favourite models. Looks really good on the water, has presence and is big enough to be noticed - yet small enough for easy transportation - and handles like a dream, turning 'on a sixpence' when needed and is slightly over powered as specified - but this is good as I'm going to build a lighter to tow. Mine (acquired at a boat show bring and buy) is currently being refurbished as the original build quality was not the best - not kit related! As I said I'm new to this forum but I'll try and upload a couple of pics. now or separately. Even though mine is 'finished' I've enjoyed reading your building blog - thank you. I'm sure you'll get as much fun out of her as I do mine. Regards, Cap'n Jim. | |
|
| | |
Guest
Guest
| | Subject: Re: Metcalf Mouldings River Star Wed Jan 15, 2014 8:34 pm | |
| good to see you posting Jim. |
|
| | |
intrepid75
Master
Posts : 271
Join date : 2011-06-11
Age : 68
Location : Bristol, West country
| | Subject: Re: Metcalf Mouldings River Star Wed Jan 15, 2014 10:14 pm | |
| Thanks for the comments Jim. No progress since last update due to work commitments and the pretty naff weather - will the rain in the South West never stop? But hoping to get the hull painting finished this weekend. The Red Oxide is on - main hull green paint is just waiting on my getting into the garage on Saturday I hope. If I get that done then may get the deck painted and most of the fittings installed. Certainly on the home straight. Good to hear your views on how this model sails - I was expecting her to be a good steering boat so looking forward to getting her wet and then starting my next build. | |
|
| | |
intrepid75
Master
Posts : 271
Join date : 2011-06-11
Age : 68
Location : Bristol, West country
| | Subject: Re: Metcalf Mouldings River Star Sat Jan 18, 2014 1:30 pm | |
| | |
|
| | |
Guest
Guest
| | Subject: Re: Metcalf Mouldings River Star Sat Jan 18, 2014 6:34 pm | |
| that looks really nice and crisp. neil. |
|
| | |
barriew
Captain (moderator)
Posts : 2631
Join date : 2011-11-26
Age : 83
Location : Thaxted, Essex
| | Subject: Re: Metcalf Mouldings River Star Sat Jan 18, 2014 7:09 pm | |
| I really like that model but it falls outside my size limits   Barrie | |
|
| | |
Cody614
Deck Hand

Posts : 7
Join date : 2014-01-15
Age : 66
Location : Phoenix AZ.
| | Subject: Re: Metcalf Mouldings River Star Sat Jan 18, 2014 7:12 pm | |
| | |
|
| | |
intrepid75
Master
Posts : 271
Join date : 2011-06-11
Age : 68
Location : Bristol, West country
| | Subject: Re: Metcalf Mouldings River Star Sat Jan 18, 2014 9:46 pm | |
| Appreciate the positive comments. Any credit is due solely to Mr Metcalf for a really top class kit. In comparison to a lot of kit offerings across the spectrum of kit suppliers and makers he really has done an excellent job and this kit probably doesn't get the attention it deserves. | |
|
| | |
Guest
Guest
| | Subject: Re: Metcalf Mouldings River Star Sun Jan 19, 2014 4:33 am | |
| The best of builders give credit to others.
Just soak it up matey.
It really is a sweet build. |
|
| | |
intrepid75
Master
Posts : 271
Join date : 2011-06-11
Age : 68
Location : Bristol, West country
| |
| | |
intrepid75
Master
Posts : 271
Join date : 2011-06-11
Age : 68
Location : Bristol, West country
| |
| | |
AlanP
Master

Posts : 278
Join date : 2011-06-11
Age : 80
Location : South Cumbria
| | Subject: Re: Metcalf Mouldings River Star Sun Jan 19, 2014 10:49 pm | |
| Looks good intrepid and that green suits it well  Alan | |
|
| | |
intrepid75
Master
Posts : 271
Join date : 2011-06-11
Age : 68
Location : Bristol, West country
| | Subject: Re: Metcalf Mouldings River Star Wed Jan 22, 2014 9:10 pm | |
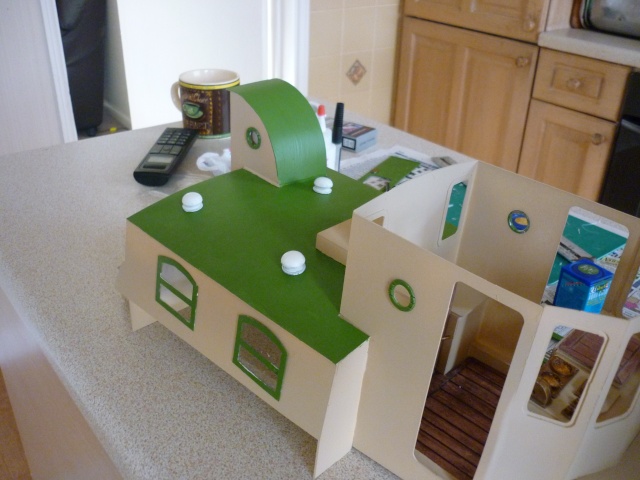
| A little more progress made over the last couple of evenings. I have finished the main painting of the hull and now the rubber fendering has been attached. Used contact adhesive as recommended in the instructions but first attempt was a bit of a *&*&*r!! The amount of fendering isn't generous and to get it all attached it does need to be stretched a little however after a little stretching, thinking it had stuck the ends contracted a little and took a bit of paint with it. Second time it seems to have held but I still have a couple of marks forward which I will need to touch up with grass green. Minor job only. The last of the window frames for the front 5 windows and the two rear wheelhouse windows are painted and the Perspex glued - so waiting for that to dry overnight. However I wont get any more work on it until Monday due to domestic duties!!! But, there is only the roof and funnel to attach (funnel needs cutting at front which might be a swearing process!!), the rail and stanchions and then half a dozen fittings. Will be all done next week fingers crossed. The onto the next build which awaits............. 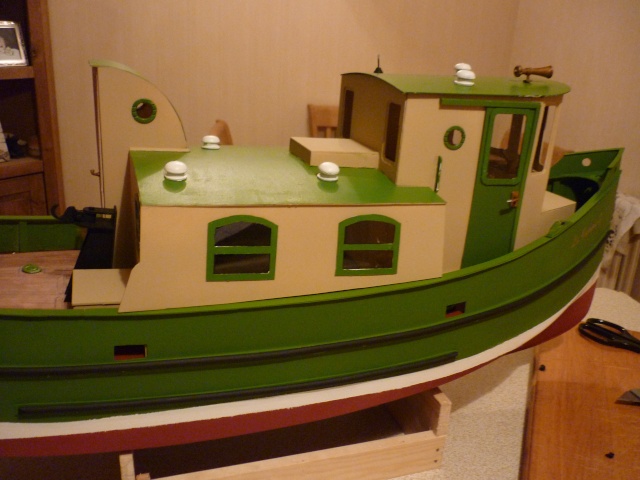 | |
|
| | |
Guest
Guest
| | Subject: Re: Metcalf Mouldings River Star Thu Jan 23, 2014 10:39 am | |
| |
|
| | |
intrepid75
Master
Posts : 271
Join date : 2011-06-11
Age : 68
Location : Bristol, West country
| | Subject: Re: Metcalf Mouldings River Star Sun Jan 26, 2014 7:42 pm | |
| Thanks to the rain my domestic plans to be away were cut a little short so I had the luxury of a few hours to work on my build this afternoon that I wasn't expecting. The remaining windows have been glazed and now are fitted which meant I could permanently secure the roof. Next came the funnel which has been as fiddly as I thought cutting it to the right size. My best efforts at getting an exact fit were clearly inadequate and there are some small gaps at the base and the roof in parts and I haven't trusted myself to keep cutting/sanding another mm off to get the perfect fit in case the mm's multiplied and I ended up with no funnel left. However I am fairly satisfied with the fit and I will glue a 1mm trim strip around the funnel join and the base join which will cover the gap and wont notice (much) when its painted in. The wheelhouse windbreak is now attached and I will trim the ends tomorrow when its fully set and of course paint it to match the roof. Next was to make a start on the stanchions and the roof rails. One side of the roof rails are done as are some of the stanchions and I hope to get those finished tomorrow (and remove the pencil lines on the roof to keep the rails aligned) and then she's all finished subject to a coat or two of acrylic satin varnish on the hull. After that there are 3 or 4 fittings to finish. One fitting I am undecided about is the searchlight on the roof. Its nicely moulded but somehow to me it just seems out of place on a tug like this. So will ponder............   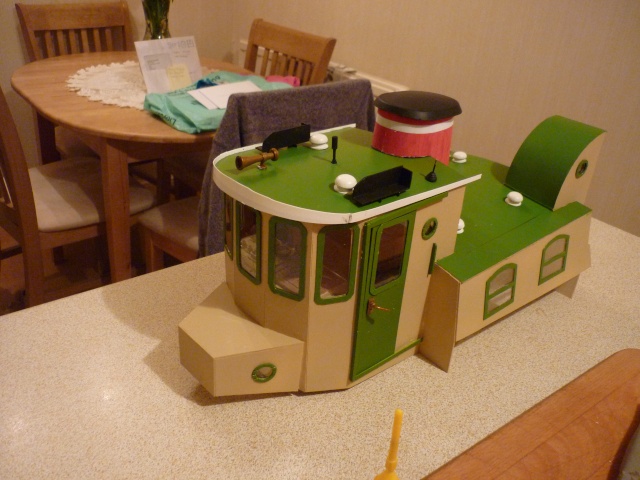 | |
|
| | |
Guest
Guest
| | Subject: Re: Metcalf Mouldings River Star Sun Jan 26, 2014 10:20 pm | |
| |
|
| | |
Sponsored content
| | Subject: Re: Metcalf Mouldings River Star | |
| |
|
| | |
| | Metcalf Mouldings River Star | |
|