| | MY NEW PROJECT...or two. |  |
|
+6davidjt barriew Tug--Kenny TonyW phil winks Footski 10 posters |
|
| Author | Message |
|---|
Guest
Guest
 |  Subject: Re: MY NEW PROJECT...or two. Subject: Re: MY NEW PROJECT...or two.  Thu Feb 07, 2013 7:04 pm Thu Feb 07, 2013 7:04 pm | |
| cheers guys, and thanks barrie.......I couldn't work out how to do that..........bit brain dead after all those rubber blocks in front of me, lol
off casting tomorrow, lol |
|
  | |
Guest
Guest
 |  Subject: Re: MY NEW PROJECT...or two. Subject: Re: MY NEW PROJECT...or two.  Fri Feb 08, 2013 9:27 pm Fri Feb 08, 2013 9:27 pm | |
| I have had a session moulding this afternoon, and am absolutely amazed as to how well the mouldings have popped out. there are only two that have given a slight problem and this is because of the way I oriented the figures into the mould which has left air traps leading to bubbles and air pockets in the mouldings.......not big ones but with a little bit of tweaking should overcome them. the pictures in order show the first two mouldings to come out. next was the first crew member to make surface, followed by the whole lot of moulds with mouldings curing inside, and the two box's full of arms. finally emerged and born into a brave new world are two full sets of both cork and Kapock wearing crew members. There is some slight flashing ( the creepage between the edges of the mould halves of the resin) but this is easily trimmed, but I'll try to eliminate that on the next lot of little fellows by tightening the elastic bands that hold the two mould halves and their ply wood backings together....... just really a little bit of trial and error in the early stages. 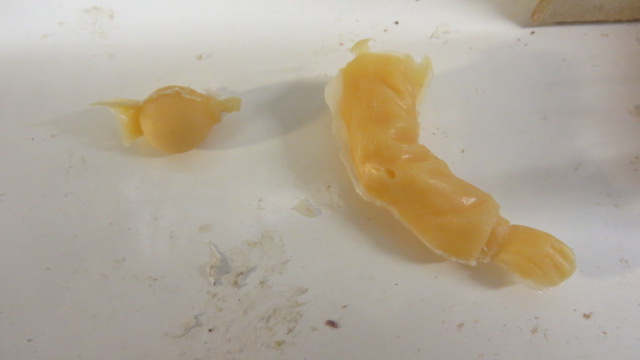  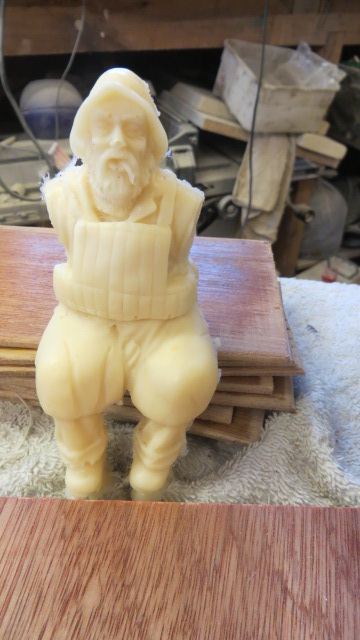 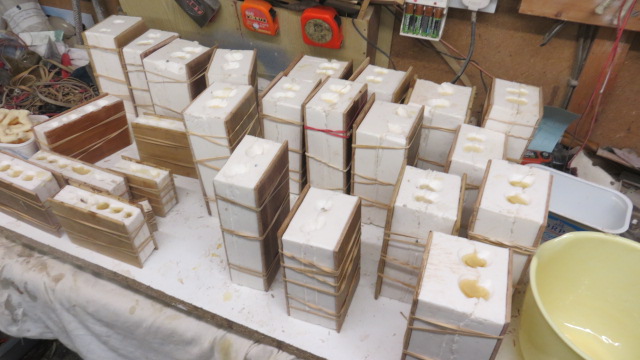 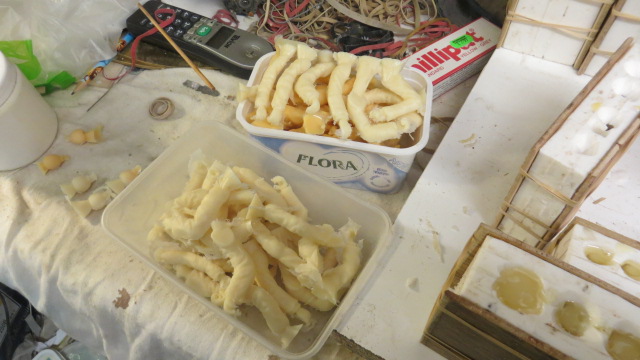 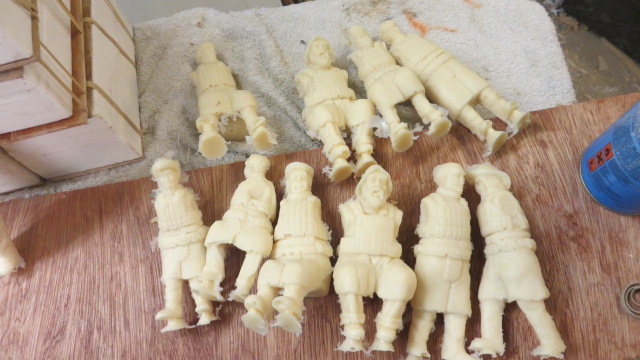 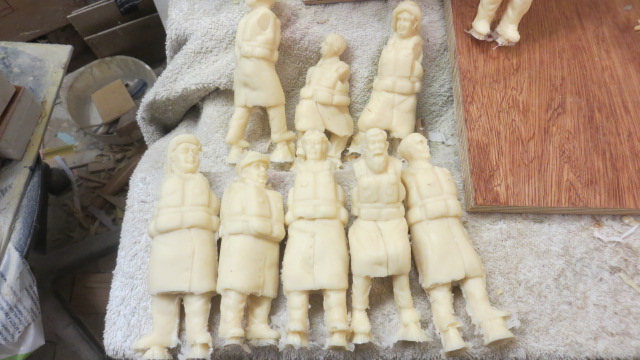 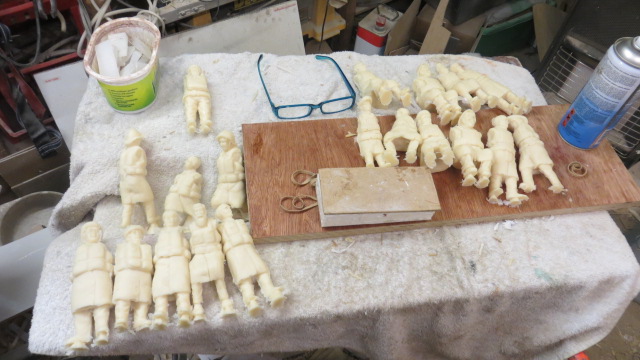 |
|
  | |
Guest
Guest
 |  Subject: Re: MY NEW PROJECT...or two. Subject: Re: MY NEW PROJECT...or two.  Fri Feb 08, 2013 10:10 pm Fri Feb 08, 2013 10:10 pm | |
| Great outcome Neil. umm we need a thumbs up emoticon m8 |
|
  | |
Guest
Guest
 |  Subject: Re: MY NEW PROJECT...or two. Subject: Re: MY NEW PROJECT...or two.  Fri Feb 08, 2013 10:57 pm Fri Feb 08, 2013 10:57 pm | |
| |
|
  | |
phil winks
Master


Posts : 583
Join date : 2011-06-12
Age : 68
Location : Taunton
 |  Subject: Re: MY NEW PROJECT...or two. Subject: Re: MY NEW PROJECT...or two.  Fri Feb 08, 2013 11:47 pm Fri Feb 08, 2013 11:47 pm | |
| Yes nice work and Damien's right about the thumbs up emoticon I'll see what can be done | |
|
  | |
phil winks
Master


Posts : 583
Join date : 2011-06-12
Age : 68
Location : Taunton
 |  Subject: Re: MY NEW PROJECT...or two. Subject: Re: MY NEW PROJECT...or two.  Fri Feb 08, 2013 11:53 pm Fri Feb 08, 2013 11:53 pm | |
|  try this I found it in my "!incredimail" emoticon library and cut and pasted it from there seems to work Damien | |
|
  | |
Footski
Master


Posts : 548
Join date : 2011-06-11
Age : 66
Location : Malaga, Spain
 | |
  | |
Guest
Guest
 |  Subject: Re: MY NEW PROJECT...or two. Subject: Re: MY NEW PROJECT...or two.  Sat Feb 09, 2013 8:56 am Sat Feb 09, 2013 8:56 am | |
| you are all flatterers, ........but I like you all.
neil. |
|
  | |
Guest
Guest
 |  Subject: Re: MY NEW PROJECT...or two. Subject: Re: MY NEW PROJECT...or two.  Sat Feb 09, 2013 8:59 am Sat Feb 09, 2013 8:59 am | |
| |
|
  | |
phil winks
Master


Posts : 583
Join date : 2011-06-12
Age : 68
Location : Taunton
 | |
  | |
Guest
Guest
 |  Subject: Re: MY NEW PROJECT...or two. Subject: Re: MY NEW PROJECT...or two.  Sat Feb 09, 2013 5:42 pm Sat Feb 09, 2013 5:42 pm | |
| WELL!!!!.........we're all ready...for a launch...what about our lifeboat??? Ain't it about time the builders got their fingers out and got it ready for us.  |
|
  | |
phil winks
Master


Posts : 583
Join date : 2011-06-12
Age : 68
Location : Taunton
 |  Subject: Re: MY NEW PROJECT...or two. Subject: Re: MY NEW PROJECT...or two.  Sat Feb 09, 2013 5:48 pm Sat Feb 09, 2013 5:48 pm | |
| I agree with them Neil  Ps does that emoticon display properly ? | |
|
  | |
tattooed
Able Seaman


Posts : 45
Join date : 2011-06-30
Age : 60
Location : Bristol
 |  Subject: Re: MY NEW PROJECT...or two. Subject: Re: MY NEW PROJECT...or two.  Sat Feb 09, 2013 6:09 pm Sat Feb 09, 2013 6:09 pm | |
| fantastic work your doing neil well done , lifeboat crews are pritty tough guys but these look pritty armless to me  | |
|
  | |
phil winks
Master


Posts : 583
Join date : 2011-06-12
Age : 68
Location : Taunton
 | |
  | |
tattooed
Able Seaman


Posts : 45
Join date : 2011-06-30
Age : 60
Location : Bristol
 |  Subject: Re: MY NEW PROJECT...or two. Subject: Re: MY NEW PROJECT...or two.  Sat Feb 09, 2013 6:46 pm Sat Feb 09, 2013 6:46 pm | |
| i'm fine thanks phil and i hope you and your family are all ok , been doing long hours at work ,been building alot model trucks for oversea customers , i do enjoy seeing what everyone is up to but i must say that when i see what neil does it just blows my mind this guy is in a league of his own | |
|
  | |
phil winks
Master


Posts : 583
Join date : 2011-06-12
Age : 68
Location : Taunton
 |  Subject: Re: MY NEW PROJECT...or two. Subject: Re: MY NEW PROJECT...or two.  Sat Feb 09, 2013 6:56 pm Sat Feb 09, 2013 6:56 pm | |
| Yep not to bad here in somerset mate though not so good for the family up in yorkshire. have a look in Here to bring you up to speed Your right about Neils skills but hey I remember someone turning a tremendous beam trawler out not to far from here eh mate  | |
|
  | |
barriew
Captain (moderator)

Posts : 2631
Join date : 2011-11-26
Age : 83
Location : Thaxted, Essex
 |  Subject: Re: MY NEW PROJECT...or two. Subject: Re: MY NEW PROJECT...or two.  Sat Feb 09, 2013 8:04 pm Sat Feb 09, 2013 8:04 pm | |
| Phil,
I suspect that only you can see the emoticon because it is stored locally on your PC, not in the Forum.
Barrie | |
|
  | |
phil winks
Master


Posts : 583
Join date : 2011-06-12
Age : 68
Location : Taunton
 |  Subject: Re: MY NEW PROJECT...or two. Subject: Re: MY NEW PROJECT...or two.  Sat Feb 09, 2013 8:36 pm Sat Feb 09, 2013 8:36 pm | |
| - barriew wrote:
- Phil,
I suspect that only you can see the emoticon because it is stored locally on your PC, not in the Forum.
Barrie After a little investigation it appears its a browser specific emoticon as I can see it fine using my incredimail browser but not using google chrome | |
|
  | |
Guest
Guest
 |  Subject: Re: MY NEW PROJECT...or two. Subject: Re: MY NEW PROJECT...or two.  Sat Feb 09, 2013 10:04 pm Sat Feb 09, 2013 10:04 pm | |
| hi Phill.....it just shows up as a little box on mine.............and thanks for the comments........I would get through the b****** door tonight, the heads swelled so much:lol!:  |
|
  | |
Guest
Guest
 |  Subject: Re: MY NEW PROJECT...or two. Subject: Re: MY NEW PROJECT...or two.  Sat Feb 09, 2013 11:33 pm Sat Feb 09, 2013 11:33 pm | |
| - phil winks wrote:
 try this I found it in my "!incredimail" emoticon library and cut and pasted it from there seems to work Damien try this I found it in my "!incredimail" emoticon library and cut and pasted it from there seems to work Damien I saw nowt. |
|
  | |
phil winks
Master


Posts : 583
Join date : 2011-06-12
Age : 68
Location : Taunton
 | |
  | |
Guest
Guest
 |  Subject: Re: MY NEW PROJECT...or two. Subject: Re: MY NEW PROJECT...or two.  Sat Feb 09, 2013 11:41 pm Sat Feb 09, 2013 11:41 pm | |
| Chrome m8 never heard of incredimail |
|
  | |
barriew
Captain (moderator)

Posts : 2631
Join date : 2011-11-26
Age : 83
Location : Thaxted, Essex
 |  Subject: Re: MY NEW PROJECT...or two. Subject: Re: MY NEW PROJECT...or two.  Sun Feb 10, 2013 6:47 am Sun Feb 10, 2013 6:47 am | |
| Phil - saw that one - but it doesn't appear on the panel to the left.
Barrie | |
|
  | |
phil winks
Master


Posts : 583
Join date : 2011-06-12
Age : 68
Location : Taunton
 |  Subject: Re: MY NEW PROJECT...or two. Subject: Re: MY NEW PROJECT...or two.  Sun Feb 10, 2013 10:19 am Sun Feb 10, 2013 10:19 am | |
| Its a slightly tedious process to post them Barrie but I will put a sticky up in the lakeside forum with instructions but basically I saved the emoticon to my photo host acc as a .GIF file and posted it as a photo
Now back to Neil as we're hogging his build blog lol | |
|
  | |
Guest
Guest
 |  Subject: Re: MY NEW PROJECT...or two. Subject: Re: MY NEW PROJECT...or two.  Sun Feb 10, 2013 6:33 pm Sun Feb 10, 2013 6:33 pm | |
| I had chance today, after running out of casting resin for my figures to do a bit on the boat, and decided to start off with the part that has been giving me some concerned thought.that of fitting a steering mechanism for the pulley and rope method used on these boats linked to the steering wheel. But first I had to build the bulkhead for the stern end box and this needed a top and bottom runner. then a template from card, which will be transfered to the timber later. My one concern is that once I have blocked off the servo it would need a massive rebuild of the rear end to retreive a broken servo unless I make a hatch in the top so this is of some concern....will have to have a think.......but I won't be swayed from the pulley system. So looking at the plan one can see what is needed, where the servo will be mounted, and the brass turned connecter to the servo that I will be making in the next few days on the laithe x 2 (one for each boat). the pulleys/rollers I am going to buy in.......seen some nice ones on the market. 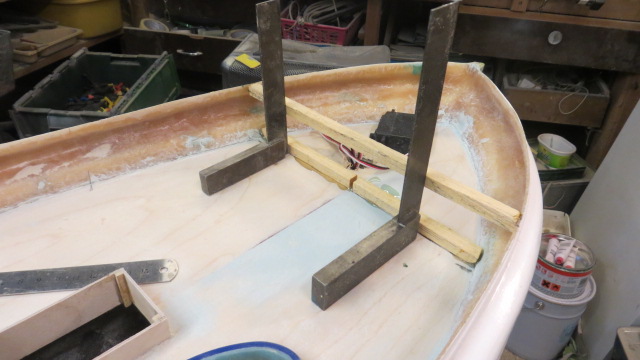 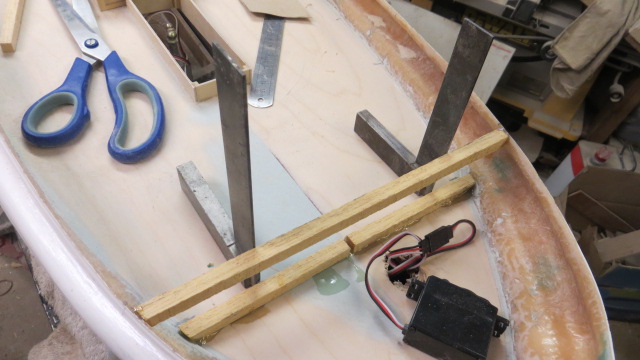 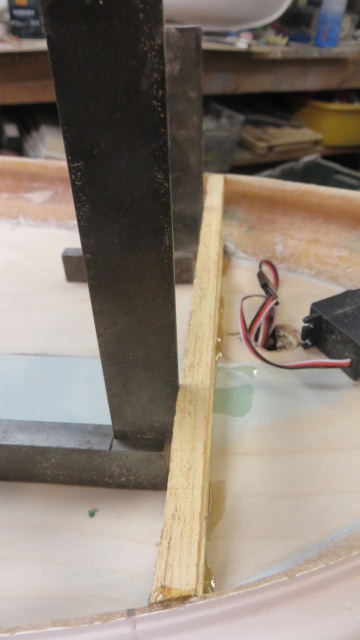 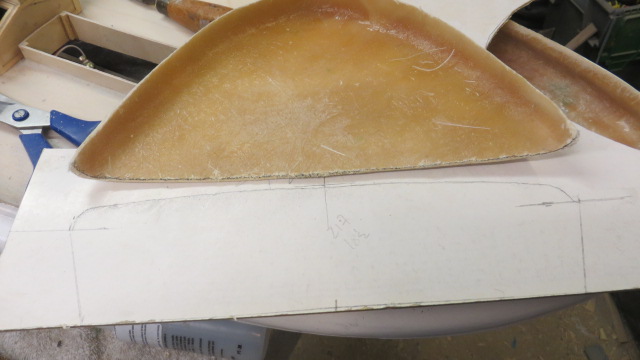 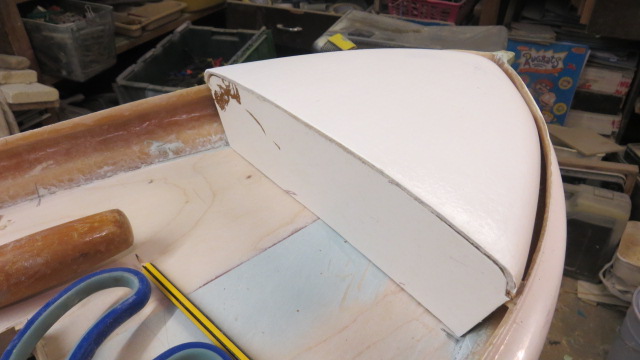 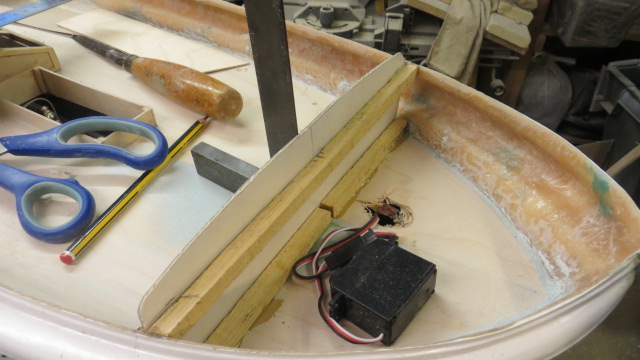  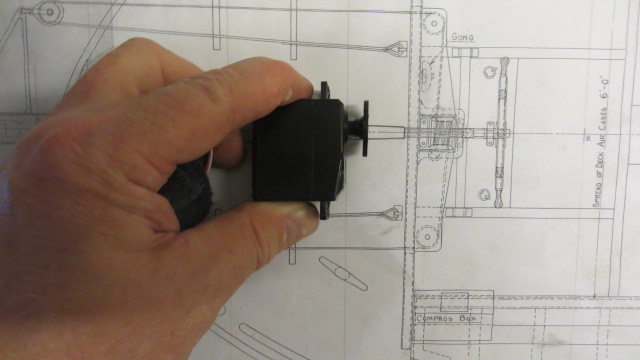 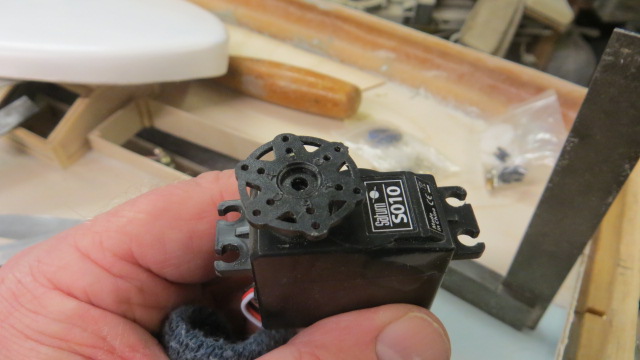 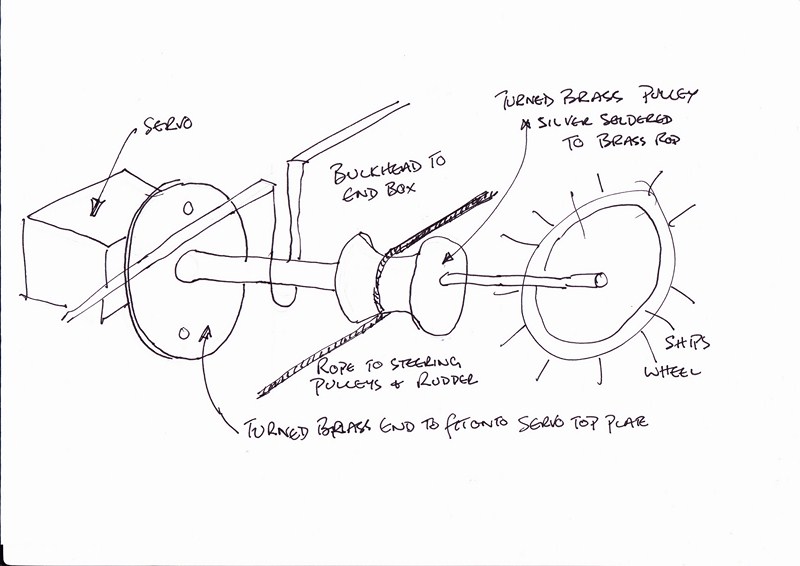 |
|
  | |
Guest
Guest
 |  Subject: Re: MY NEW PROJECT...or two. Subject: Re: MY NEW PROJECT...or two.  Mon Feb 11, 2013 9:55 am Mon Feb 11, 2013 9:55 am | |
| |
|
  | |
Guest
Guest
 |  Subject: Re: MY NEW PROJECT...or two. Subject: Re: MY NEW PROJECT...or two.  Mon Feb 11, 2013 8:43 pm Mon Feb 11, 2013 8:43 pm | |
| brass rod silver soldered onto a turned plate, and the plate drilled to screw onto a servo arm fitting. the pulley has been turned that the rope from the rudder coils around, and onto that a bush with grub screw silver soldered onto. then the assembly put together onto the servo. 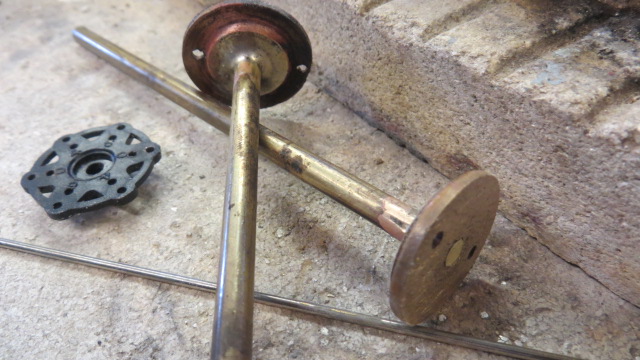 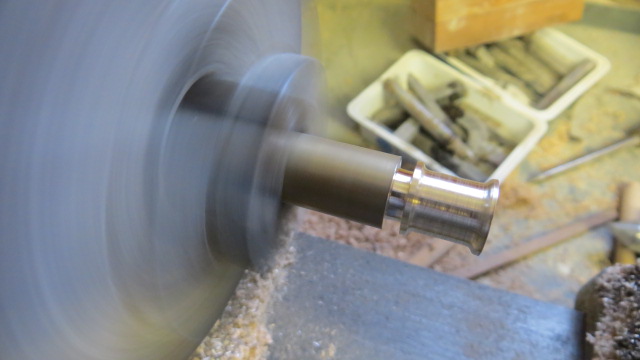 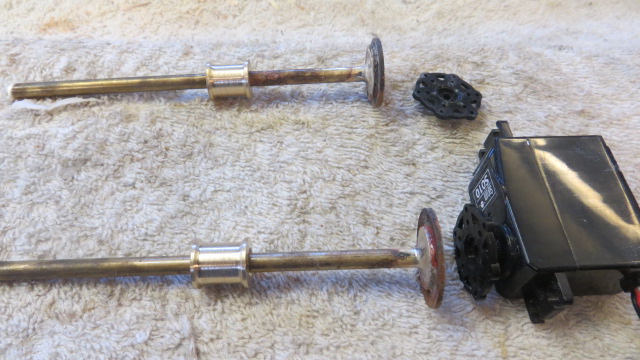 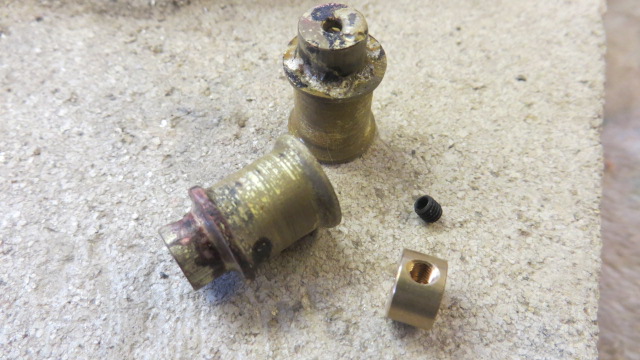 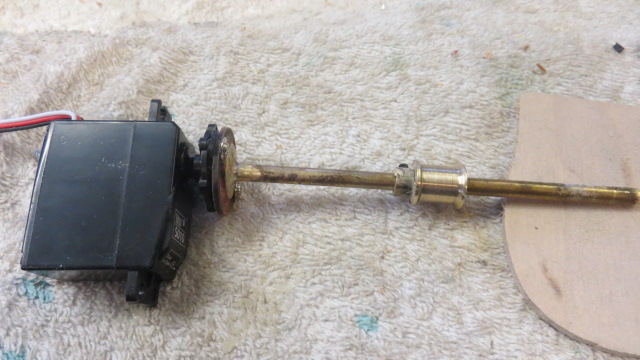 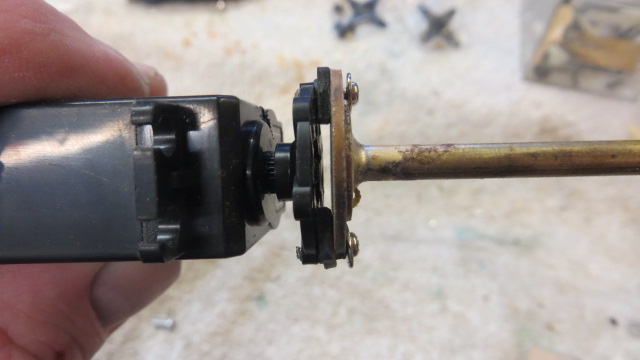 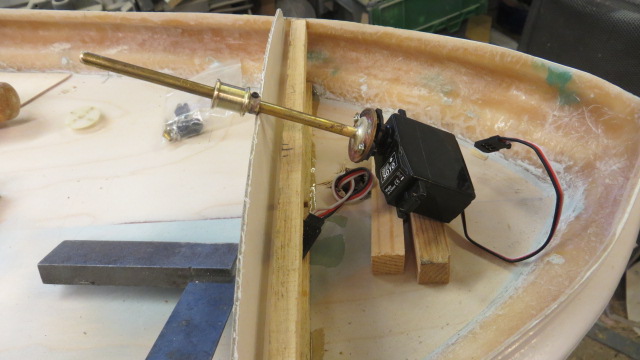 |
|
  | |
Guest
Guest
 |  Subject: Re: MY NEW PROJECT...or two. Subject: Re: MY NEW PROJECT...or two.  Tue Feb 12, 2013 7:07 pm Tue Feb 12, 2013 7:07 pm | |
| Sadly my second daughter came down with the flu today ( s'ppose it'll be my turn in the next few days) and so I had to don my nurses cap on again today as Swmbo was out working, and look after her. It's swmbo's birthday tomorrow so decided as I couldn't get into the workshop i'd turn my attention to other creative matters, and so decided to bake her a chocolate birthday cake. My other daughter who loves making things in the kitchen decorated it for us, and here's the results of our joint efforts. nom nom.............look forward to tomorrow. neil. 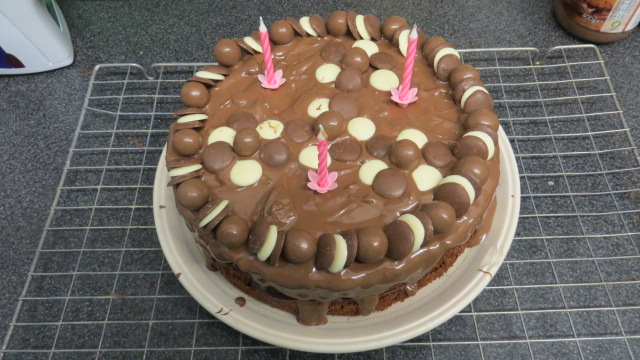 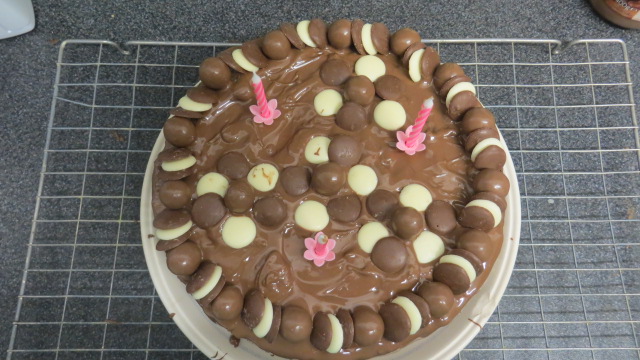 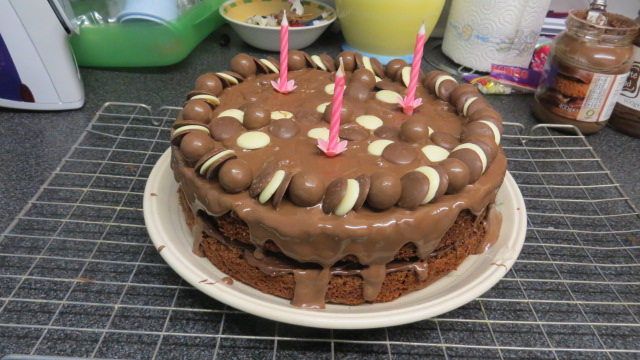 |
|
  | |
Footski
Master


Posts : 548
Join date : 2011-06-11
Age : 66
Location : Malaga, Spain
 |  Subject: Re: MY NEW PROJECT...or two. Subject: Re: MY NEW PROJECT...or two.  Tue Feb 12, 2013 9:31 pm Tue Feb 12, 2013 9:31 pm | |
| | |
|
  | |
Guest
Guest
 |  Subject: Re: MY NEW PROJECT...or two. Subject: Re: MY NEW PROJECT...or two.  Tue Feb 12, 2013 10:28 pm Tue Feb 12, 2013 10:28 pm | |
| |
|
  | |
Guest
Guest
 |  Subject: Re: MY NEW PROJECT...or two. Subject: Re: MY NEW PROJECT...or two.  Thu Feb 14, 2013 7:21 pm Thu Feb 14, 2013 7:21 pm | |
| |
|
  | |
Guest
Guest
 |  Subject: Re: MY NEW PROJECT...or two. Subject: Re: MY NEW PROJECT...or two.  Fri Feb 15, 2013 8:00 pm Fri Feb 15, 2013 8:00 pm | |
| I finally decided today that on the sailing lifeboat there were too many holes in the deck doing nothing. It's taken me a few weeks to decide that, but I have decided to fill the two in abreast of the rear drop keel box.........and so today placed supports around, and topped off with a piece of 1.8mm ply before filling in ready for sanding down to a smooth finish. 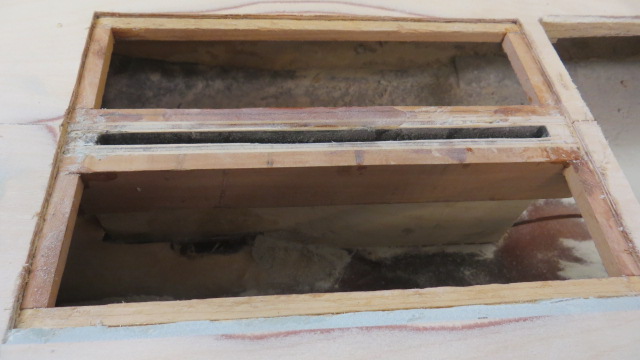 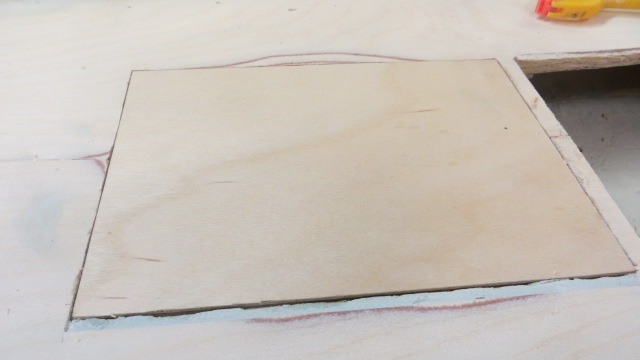 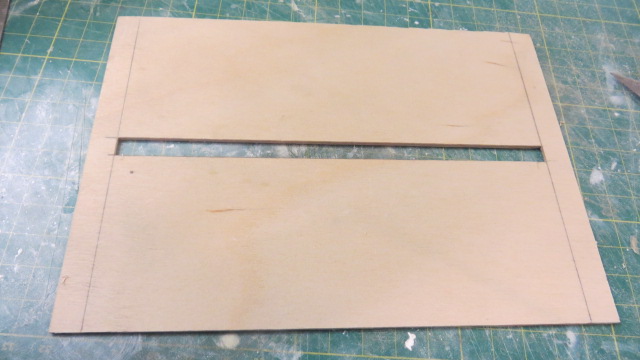 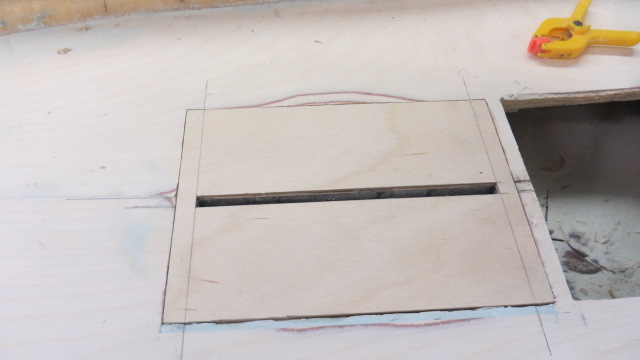 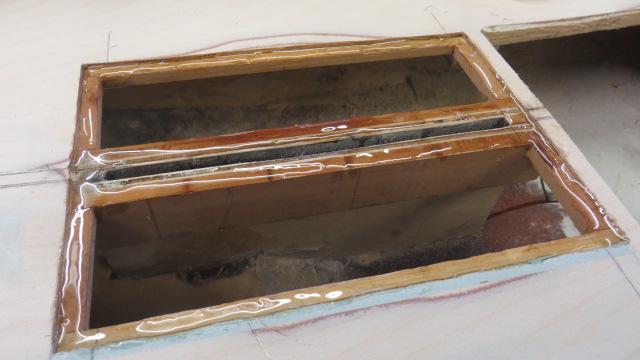 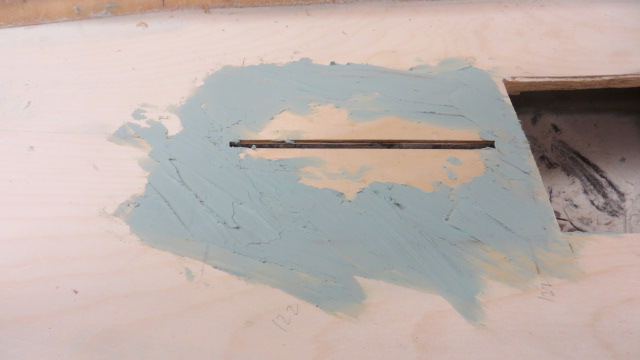 |
|
  | |
Footski
Master


Posts : 548
Join date : 2011-06-11
Age : 66
Location : Malaga, Spain
 |  Subject: Re: MY NEW PROJECT...or two. Subject: Re: MY NEW PROJECT...or two.  Fri Feb 15, 2013 8:13 pm Fri Feb 15, 2013 8:13 pm | |
| I just love your work Neil... | |
|
  | |
Guest
Guest
 |  Subject: Re: MY NEW PROJECT...or two. Subject: Re: MY NEW PROJECT...or two.  Fri Feb 15, 2013 9:01 pm Fri Feb 15, 2013 9:01 pm | |
| thanks barrie.....I've made more bad design mistakes on these two than the whole fleet that I built last year, lol..........but they are taking shape now, lol |
|
  | |
Guest
Guest
 |  Subject: Re: MY NEW PROJECT...or two. Subject: Re: MY NEW PROJECT...or two.  Sat Feb 16, 2013 4:11 pm Sat Feb 16, 2013 4:11 pm | |
| |
|
  | |
Guest
Guest
 |  Subject: Re: MY NEW PROJECT...or two. Subject: Re: MY NEW PROJECT...or two.  Sat Feb 16, 2013 4:17 pm Sat Feb 16, 2013 4:17 pm | |
| |
|
  | |
Guest
Guest
 |  Subject: Re: MY NEW PROJECT...or two. Subject: Re: MY NEW PROJECT...or two.  Sun Feb 17, 2013 10:02 pm Sun Feb 17, 2013 10:02 pm | |
| |
|
  | |
Guest
Guest
 |  Subject: Re: MY NEW PROJECT...or two. Subject: Re: MY NEW PROJECT...or two.  Sun Feb 17, 2013 10:10 pm Sun Feb 17, 2013 10:10 pm | |
| |
|
  | |
Guest
Guest
 |  Subject: Re: MY NEW PROJECT...or two. Subject: Re: MY NEW PROJECT...or two.  Sun Feb 17, 2013 10:27 pm Sun Feb 17, 2013 10:27 pm | |
| cheers mate........now that I have got the figures out the way it's been a relief to be able to get down to some model making again, and it's catch up time now..................I'd hopefully like to have these two ready for sailing in June at one of the first lifeboat rallies of the season.
neil |
|
  | |
Guest
Guest
 |  Subject: Re: MY NEW PROJECT...or two. Subject: Re: MY NEW PROJECT...or two.  Tue Feb 19, 2013 8:55 pm Tue Feb 19, 2013 8:55 pm | |
| Today was a good day, unlike yesterday when I spent a whole day looking for the chuck key on my dremel drill to do a job, didn't find it and then badly cut my soriosis covered knee catching it on a sharp wooden box cover.......got sodall done and an injured knee into the bargain. Today I found my chuck key ( well one of them) and then took a drive to the model shop at Lancaster...they had my epoxy glue in and some very nice 3/32" veneered ply so that I could start panelling my bulwarks and covering the hollow made by the protective belting......great day. so when I got home I started cutting the panels...each one separately to fit to the correct deck sheer. As the planking on these lifeboats (and all british wooden lifeboats for that matter) was diagonally planked, I needed the grain on my panels to run the same direction at approximately 45degrees, sloping backwards towards the stern from the top edge, and so I had to cut each panel from my sheet at 45degrees. To get it to fit nicely to the sheer of the deck I used my trusty pencil stub to run along the deck at right angles to the panel ( which had been clamped to the side of the boat) which gave a parallel line on the panel to the deck........it was then sanded to that line on my belt linisher. the ends joining together along the bulwarks were left as a 45* scarf joint, and all lengths cut to fit. Next step will be to draw the diagonal plank lines onto the timber with dark pencil line and then glue the panels to the boat using two part epoxy. the tops will be trimmed level along with the correct height to the bulwarks once it has all been glued and set.       |
|
  | |
Guest
Guest
 |  Subject: Re: MY NEW PROJECT...or two. Subject: Re: MY NEW PROJECT...or two.  Fri Feb 22, 2013 5:25 pm Fri Feb 22, 2013 5:25 pm | |
| |
|
  | |
Guest
Guest
 | |
  | |
Guest
Guest
 |  Subject: Re: MY NEW PROJECT...or two. Subject: Re: MY NEW PROJECT...or two.  Mon Feb 25, 2013 8:29 pm Mon Feb 25, 2013 8:29 pm | |
| |
|
  | |
Footski
Master


Posts : 548
Join date : 2011-06-11
Age : 66
Location : Malaga, Spain
 |  Subject: Re: MY NEW PROJECT...or two. Subject: Re: MY NEW PROJECT...or two.  Tue Feb 26, 2013 7:49 am Tue Feb 26, 2013 7:49 am | |
| Neil, let me have your address and I will send you a new pencil!  | |
|
  | |
Guest
Guest
 |  Subject: Re: MY NEW PROJECT...or two. Subject: Re: MY NEW PROJECT...or two.  Tue Feb 26, 2013 8:04 am Tue Feb 26, 2013 8:04 am | |
| |
|
  | |
Guest
Guest
 | |
  | |
Guest
Guest
 |  Subject: Re: MY NEW PROJECT...or two. Subject: Re: MY NEW PROJECT...or two.  Thu Feb 28, 2013 3:39 pm Thu Feb 28, 2013 3:39 pm | |
| |
|
  | |
Guest
Guest
 |  Subject: Re: MY NEW PROJECT...or two. Subject: Re: MY NEW PROJECT...or two.  Tue Mar 05, 2013 12:11 pm Tue Mar 05, 2013 12:11 pm | |
| |
|
  | |
Guest
Guest
 |  Subject: Re: MY NEW PROJECT...or two. Subject: Re: MY NEW PROJECT...or two.  Tue Mar 05, 2013 7:36 pm Tue Mar 05, 2013 7:36 pm | |
| a little less obeche planking left....have just completed the edging on the motor sailor........ had to make card templates for the curved edging around the bulwarks, and scarfed the joints in to finish them off. 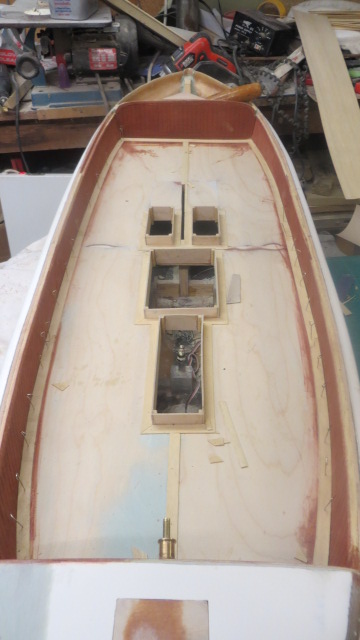  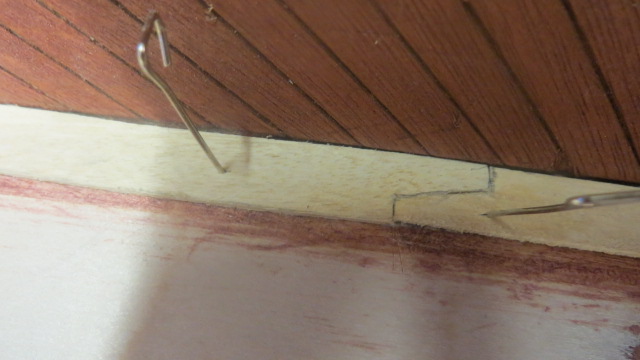 |
|
  | |
Guest
Guest
 |  Subject: Re: MY NEW PROJECT...or two. Subject: Re: MY NEW PROJECT...or two.  Wed Mar 06, 2013 7:53 pm Wed Mar 06, 2013 7:53 pm | |
| Today I spent most of the afternoon planking the deck of the sailing boat. I have precut the planks, marked and set the centre king plank into place and worked each side in pairs to make sure the lay was even. To simulate the black tar caulking in between planks I coloured the aliphatic resin with a black aclylic based paint.........which actually works well and makes the adhesive even stickier. It might look a mess when laid out like in the shots, but the planks are 0.8mm thick giving a decent sanding thickness and when sanded and coloured and then varnished, gives a decent slightly weathered look.  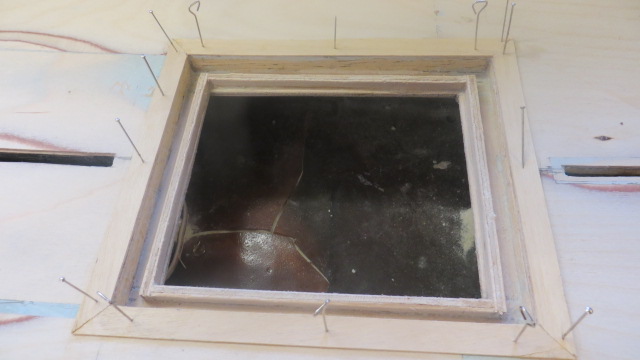 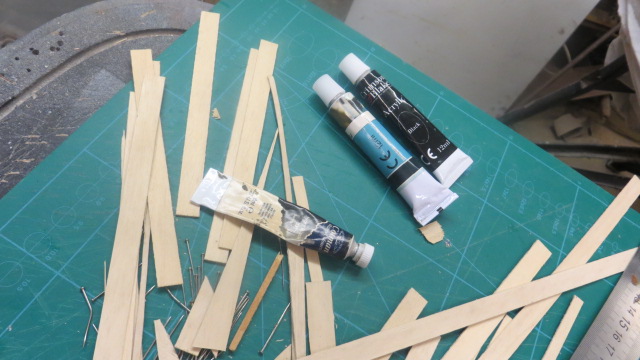 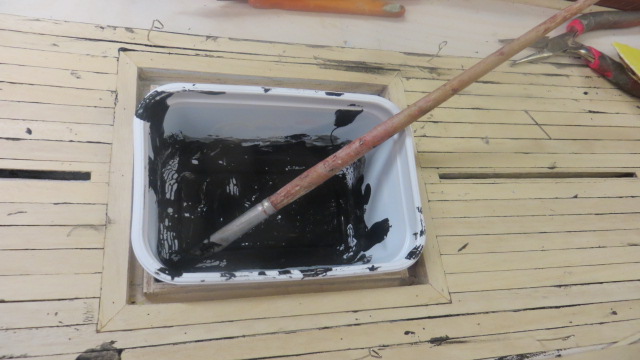 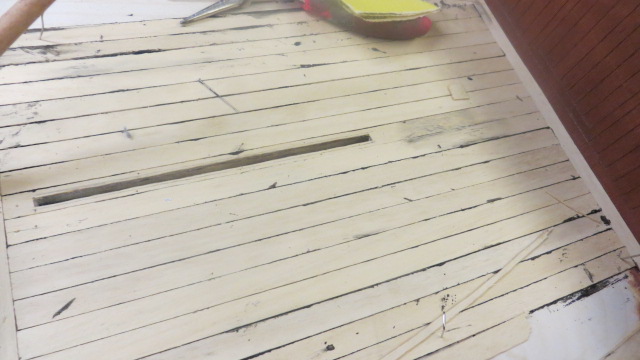  |
|
  | |
Sponsored content
 |  Subject: Re: MY NEW PROJECT...or two. Subject: Re: MY NEW PROJECT...or two.  | |
| |
|
  | |
| | MY NEW PROJECT...or two. |  |
|
