| | Sea Road Lady |  |
|
|
|
| Author | Message |
|---|
Guest
Guest
 |  Subject: Re: Sea Road Lady Subject: Re: Sea Road Lady  Wed Sep 25, 2013 11:41 am Wed Sep 25, 2013 11:41 am | |
| Certainly worth a thought Barrie, I have to trim the bottom of the rudder as sits about 3mm below the keel rail & I dont want anything that can snag weeds.
I can extend the rudder about an inch and have it still under the stern. |
|
  | |
Guest
Guest
 |  Subject: Re: Sea Road Lady Subject: Re: Sea Road Lady  Wed Sep 25, 2013 12:33 pm Wed Sep 25, 2013 12:33 pm | |
| Carved away the insides needed to move the drive pulley as far over as I could to not foul the car access to the deck as best I can and cut a notch in the deck to clear the pulley that a pulley cover that will attach to the removeable deck section will cover.  The pulley cover.  I ground 3mm from the bottom of the rudder and epoxied .8mm ply each side 20mm longer than the aluminium a little sanding and filler and it's a much better size for this model. 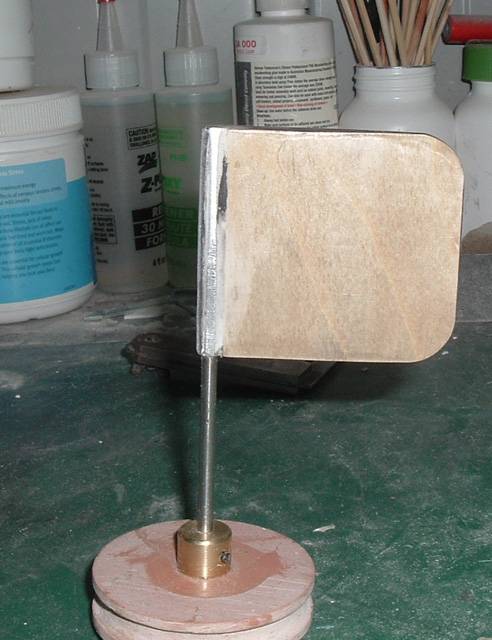 |
|
  | |
Guest
Guest
 |  Subject: Re: Sea Road Lady Subject: Re: Sea Road Lady  Mon Sep 30, 2013 1:40 pm Mon Sep 30, 2013 1:40 pm | |
| A coat of dope to the outside of the hull.  Polyester resin to the inside.  The keel and stem piece were cut from a laminate of of 3 2mm blind slats cut 7mm wide. 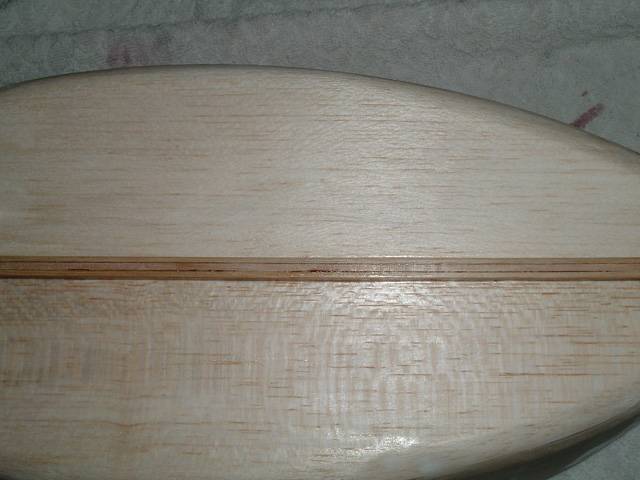  Some stock 2mm card was used for the upper deck the hull was put upside down on it and drawn around it and cut with my bandsaw after trimming, it was marked with the locations of the supports and clamped to the hull and pilot holes were drilled. 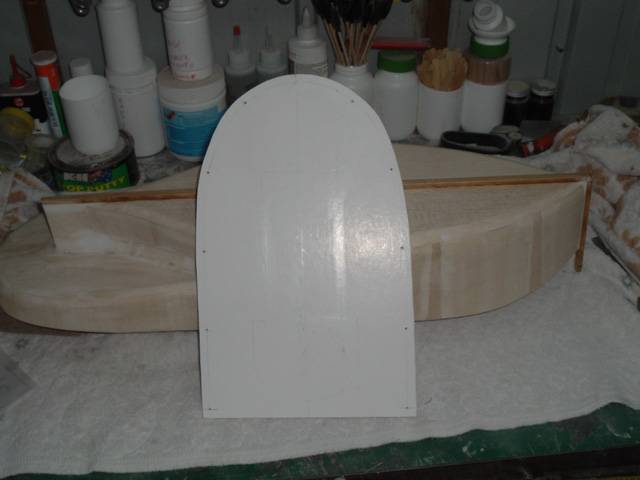 A sliding motor tray similar to the one I used in the stern wheel Wrigley 121 was made on a 3mm mdf base. 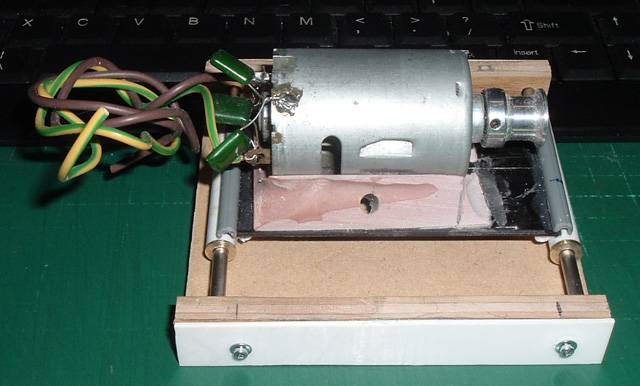 I started on the steps to the upper deck cutting 1mm styrene treads fitting them to1/35th scale ladders set a the required angle gave correct tread hight for 1/43rd stairs. 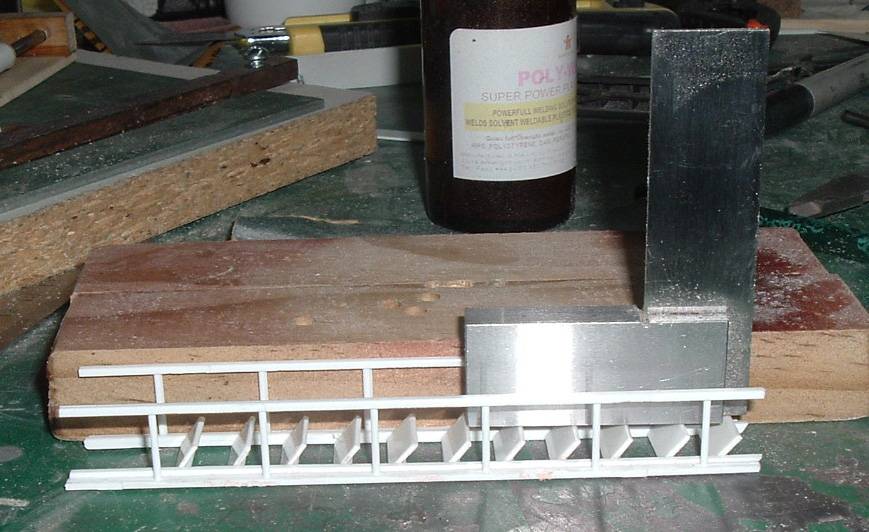 Some more ladders were used as hand rails with every second rung removed. A bit of a climb but looks good just need brackets to attack to the upper deck so it lifts off with it.  |
|
  | |
barriew
Captain (moderator)

Posts : 2631
Join date : 2011-11-26
Age : 83
Location : Thaxted, Essex
 |  Subject: Re: Sea Road Lady Subject: Re: Sea Road Lady  Mon Sep 30, 2013 5:08 pm Mon Sep 30, 2013 5:08 pm | |
| Looking good Damien.
Barrie | |
|
  | |
Guest
Guest
 |  Subject: Re: Sea Road Lady Subject: Re: Sea Road Lady  Tue Oct 01, 2013 2:12 am Tue Oct 01, 2013 2:12 am | |
| |
|
  | |
davidjt
Forum Sponsor


Posts : 534
Join date : 2013-01-08
Age : 72
Location : n wales coast
 |  Subject: Re: Sea Road Lady Subject: Re: Sea Road Lady  Tue Oct 01, 2013 5:15 pm Tue Oct 01, 2013 5:15 pm | |
| hi Damien,
those ladders are brilliant, its all comeing together now.
david | |
|
  | |
Guest
Guest
 |  Subject: Re: Sea Road Lady Subject: Re: Sea Road Lady  Tue Oct 01, 2013 9:41 pm Tue Oct 01, 2013 9:41 pm | |
| |
|
  | |
Guest
Guest
 |  Subject: Re: Sea Road Lady Subject: Re: Sea Road Lady  Wed Oct 02, 2013 3:09 am Wed Oct 02, 2013 3:09 am | |
| Thanks but due to a senior moment forgetting I'd put them in a pocket while going to shed and started drilling my chair base for new wheels I found three pieces in pocket some hours later the rungs broke off the rails bin time for this one. Next will be grey & white I think I'll have enough. |
|
  | |
Guest
Guest
 |  Subject: Re: Sea Road Lady Subject: Re: Sea Road Lady  Wed Oct 02, 2013 8:16 am Wed Oct 02, 2013 8:16 am | |
| You know the days when after all the care measuring 4 times before you glue and you discover you messed up? Well the stem piece turned out was not at 90 deg to the hull . I took to it with a 20mm dia saw blade in the dremel. 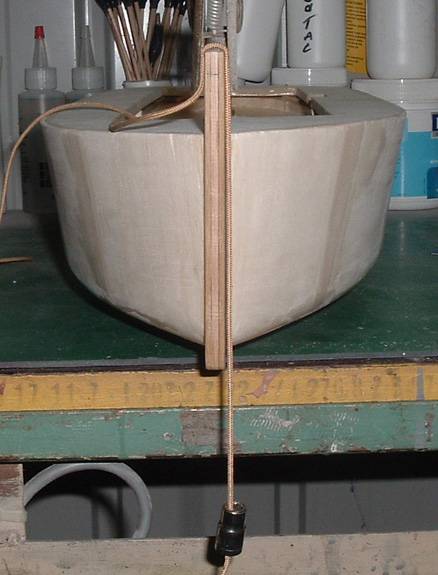 Next I discovered I must have missed a whoops with the bandsaw as I discovered a hollow amidship that requires substancial filling and as it's already doped I'm having trouble getting plaster type filler to adhere I'll raid the missus's talc and mix with dope tonight. 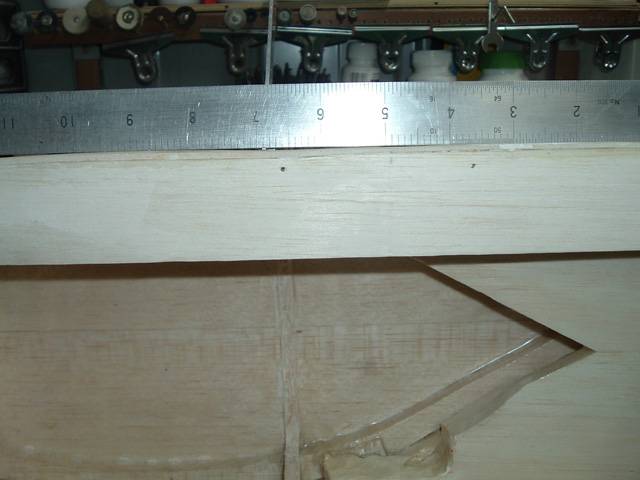 First attempt at filler I used Selleys spakfilla and most of it peeled off. 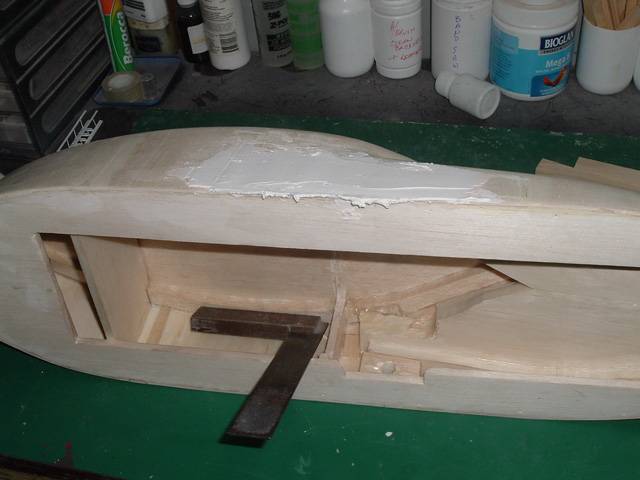 |
|
  | |
Guest
Guest
 |  Subject: Re: Sea Road Lady Subject: Re: Sea Road Lady  Wed Oct 02, 2013 11:06 am Wed Oct 02, 2013 11:06 am | |
| The reconstructed Stairs. and the 3rd lot of filler, the first obviously was't dry after overnight in the shed so it spent most of the day in our heated lounge and sanded well after dinner I didn't stay long as it's blowing a gale and only 4c heading for 2c tonight brrrrrrrrr.  |
|
  | |
davidjt
Forum Sponsor


Posts : 534
Join date : 2013-01-08
Age : 72
Location : n wales coast
 |  Subject: Re: Sea Road Lady Subject: Re: Sea Road Lady  Wed Oct 02, 2013 11:29 am Wed Oct 02, 2013 11:29 am | |
| hi Damien,
when ever I find hollows like yours using balsa, I just cut some balsa to what ever the gap is plus a bit more and fix with cayno, then when dry it rubs down easier than filler and blends better, much better than filler I think and you have a better finish, that's my opinion:lol!: .
david | |
|
  | |
Guest
Guest
 |  Subject: Re: Sea Road Lady Subject: Re: Sea Road Lady  Wed Oct 02, 2013 11:35 am Wed Oct 02, 2013 11:35 am | |
| I may end up doing that yet David I remember now i thought I' do tha to the 6mm deck prior to putting the 3mm skin on then promptly forgot lol senior moment.
Last edited by Damien on Mon Feb 02, 2015 7:21 am; edited 1 time in total |
|
  | |
barriew
Captain (moderator)

Posts : 2631
Join date : 2011-11-26
Age : 83
Location : Thaxted, Essex
 |  Subject: Re: Sea Road Lady Subject: Re: Sea Road Lady  Wed Oct 02, 2013 5:15 pm Wed Oct 02, 2013 5:15 pm | |
| OK Damien, I expect to see it almost complete when I come out of hospital  I'll leave you to keep this forum going as everyone else seems to have given up modelling.    I hope to be back working on my fireboat in a week or so - new knee willing  Barrie | |
|
  | |
Guest
Guest
 |  Subject: Re: Sea Road Lady Subject: Re: Sea Road Lady  Thu Oct 03, 2013 1:01 am Thu Oct 03, 2013 1:01 am | |
| That's a big ask Barrie  I to have noticed the the big slow down of participation not just here though Paddleducks seems to be suffering the same fate. Hope the Op goes well mate. |
|
  | |
davidjt
Forum Sponsor


Posts : 534
Join date : 2013-01-08
Age : 72
Location : n wales coast
 |  Subject: Re: Sea Road Lady Subject: Re: Sea Road Lady  Thu Oct 03, 2013 2:13 pm Thu Oct 03, 2013 2:13 pm | |
| hi,
I to have noticed the lack of posts to, nobody seems to be interested all they do is read the old posts, other sites have been quiet for the past month or so.
david | |
|
  | |
Guest
Guest
 |  Subject: Re: Sea Road Lady Subject: Re: Sea Road Lady  Thu Oct 03, 2013 5:49 pm Thu Oct 03, 2013 5:49 pm | |
| I think there are lulls in posting on forums, at certain times of the years, not only on here but on all all kinds of forums.
Lifeboats24-7 suffers greatly.............and Model Boats is ruled by an iron rod from the editor........I don't stand a chance of putting anything on there, in any way controvertial......it gets wiped immediately, lol.........so haven't been on that site in months.
we need a ruck to take place on Mayhem, lol...........and then a few members come over from the dark side for a bit of peace and quiet, lol |
|
  | |
Guest
Guest
 |  Subject: Re: Sea Road Lady Subject: Re: Sea Road Lady  Fri Oct 04, 2013 1:18 pm Fri Oct 04, 2013 1:18 pm | |
| I mixed plaster powder with dope and this filler adhered to the already doped hull really well. Tiller arm turned and silver soldered.  |
|
  | |
Guest
Guest
 |  Subject: Re: Sea Road Lady Subject: Re: Sea Road Lady  Fri Oct 04, 2013 5:21 pm Fri Oct 04, 2013 5:21 pm | |
| I like the silver soldering, Damien......
over the years I have turned more to silver soldering than soft soldering and have lost the art of soft soldering.
neil |
|
  | |
Guest
Guest
 |  Subject: Re: Sea Road Lady Subject: Re: Sea Road Lady  Sun Oct 06, 2013 1:27 am Sun Oct 06, 2013 1:27 am | |
| With a flat screw driver I was able to break up the borax that had set like concrete and add a little water to make a paste and of course the brass has to be bright shiny clean. I haven't done this type of work since using an arc torch to braze 3mm steel weld rod to the flared lip on my race car in my avatar pic in 2001 Tiller arm insitu it's a rather tight fit.  Rudder in place.  I marked out planking on the balsa deck hatch. 
Last edited by Damien on Tue Oct 22, 2013 6:26 am; edited 1 time in total |
|
  | |
Guest
Guest
 |  Subject: Re: Sea Road Lady Subject: Re: Sea Road Lady  Sun Oct 06, 2013 3:04 am Sun Oct 06, 2013 3:04 am | |
| The rest of the deck planking drawn pencilled in.  |
|
  | |
Guest
Guest
 |  Subject: Re: Sea Road Lady Subject: Re: Sea Road Lady  Sun Oct 06, 2013 9:58 am Sun Oct 06, 2013 9:58 am | |
| Upper deck support pillars fitted to top deck and location ferrules fitted to hull. 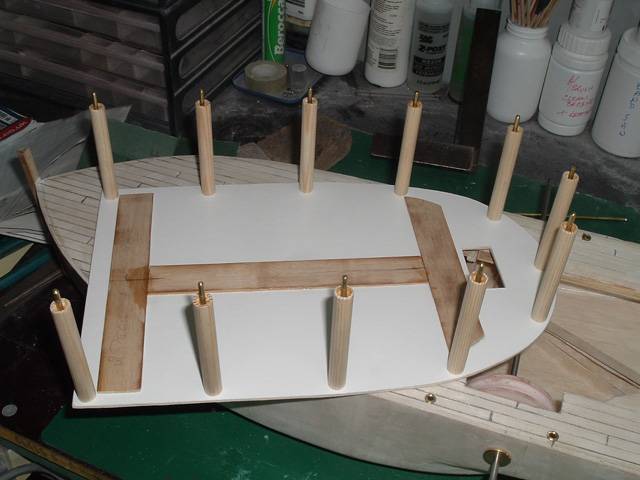  Already made upper deck parts in place temp. 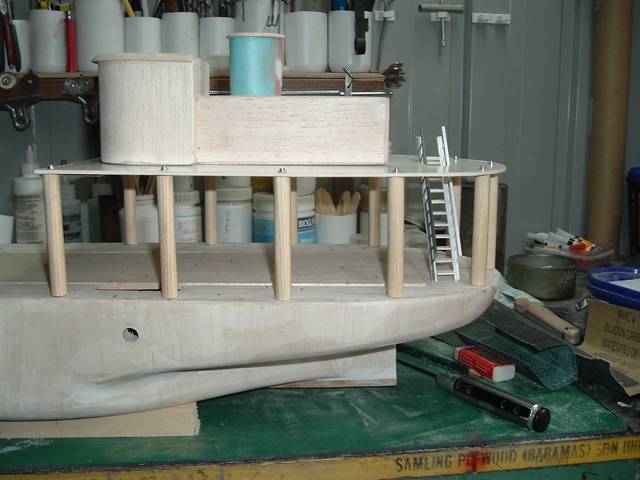 Stairway in place mounts still to be made. 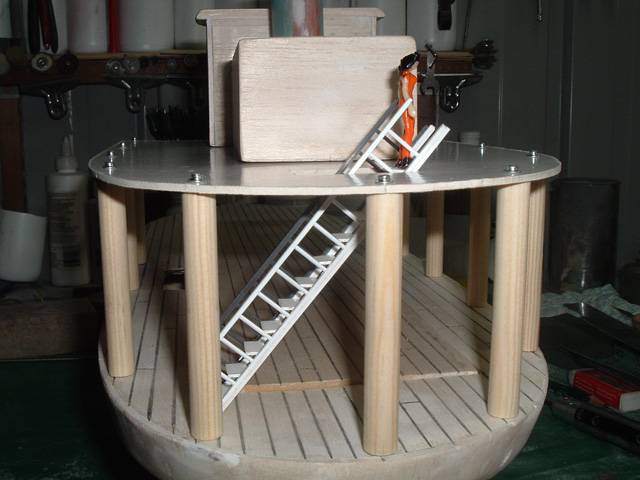 Cars temporarily on deck. 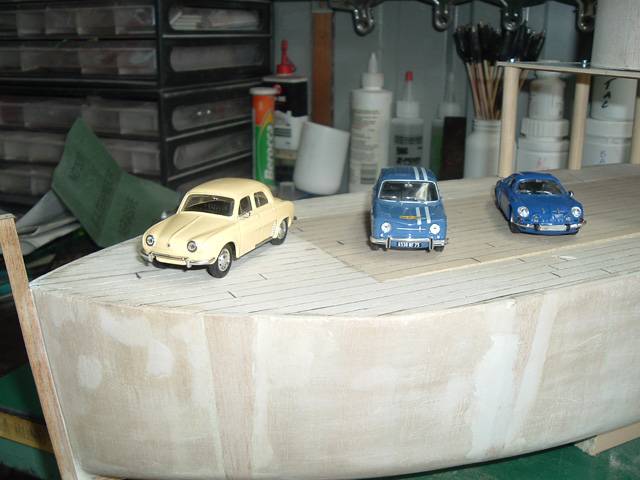 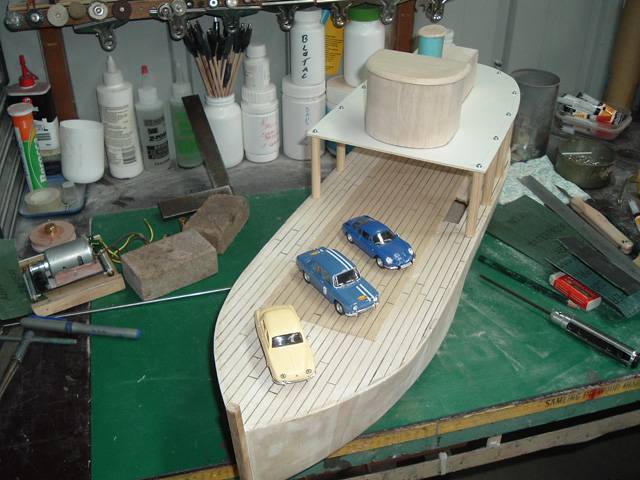 Motor tray in place showing line of drive belt. 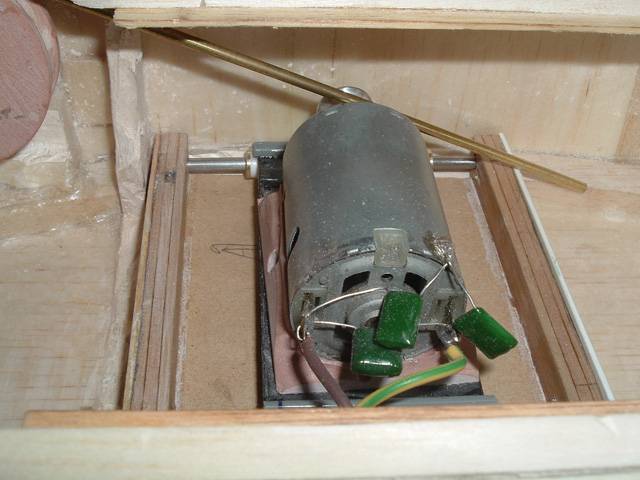 Paddle shaft bearings glued into hull with paddles on the shaft to keep the bearings aligned whilst the epoxy dries. 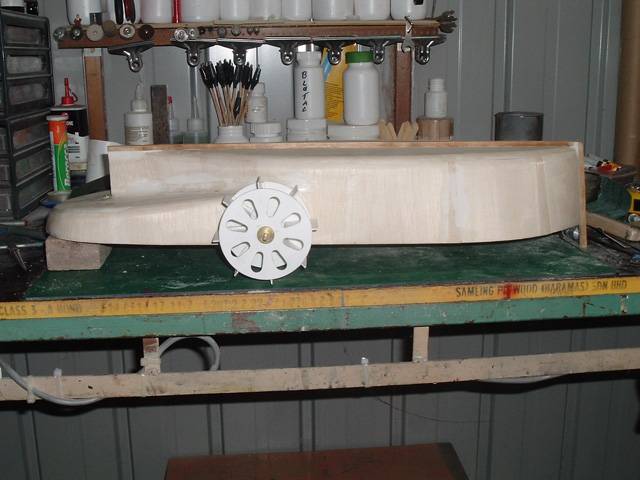 A productive weekend without mishaps. |
|
  | |
Guest
Guest
 |  Subject: Re: Sea Road Lady Subject: Re: Sea Road Lady  Sun Oct 06, 2013 8:43 pm Sun Oct 06, 2013 8:43 pm | |
| I always liked the old Renault Dophine...was a nice shapely car. |
|
  | |
Guest
Guest
 |  Subject: Re: Sea Road Lady Subject: Re: Sea Road Lady  Mon Oct 07, 2013 7:01 am Mon Oct 07, 2013 7:01 am | |
| Started the paint work with dark walnut to the deck pillars.   Then onto the deck hatch cover.  And last for the day the deck.  |
|
  | |
Guest
Guest
 |  Subject: Re: Sea Road Lady Subject: Re: Sea Road Lady  Mon Oct 07, 2013 11:21 am Mon Oct 07, 2013 11:21 am | |
| Another 2 cars arrived today, a 1910 Renault AG Beer Truck and a RX4. 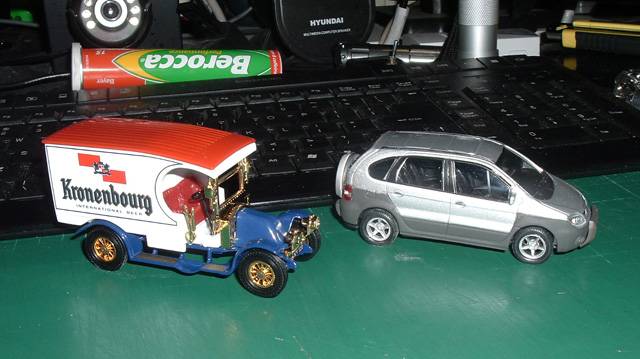 |
|
  | |
Guest
Guest
 |  Subject: Re: Sea Road Lady Subject: Re: Sea Road Lady  Thu Oct 10, 2013 4:20 am Thu Oct 10, 2013 4:20 am | |
| Final car arrived an R5 Maxi Turbo rally car. 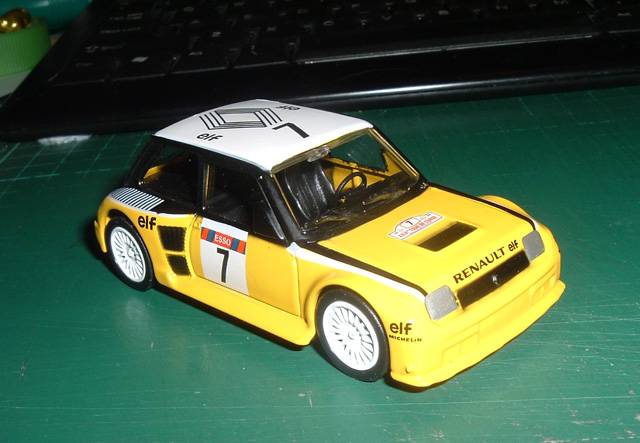 Not thrilled with the deck paint lighter spots show any where super glue was used. 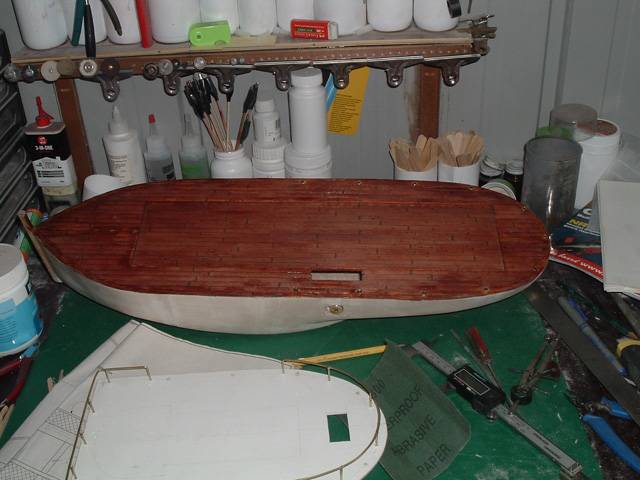 Rails done on upper deck. 
Last edited by Damien on Wed Jan 01, 2014 5:07 am; edited 1 time in total |
|
  | |
davidjt
Forum Sponsor


Posts : 534
Join date : 2013-01-08
Age : 72
Location : n wales coast
 |  Subject: Re: Sea Road Lady Subject: Re: Sea Road Lady  Thu Oct 10, 2013 7:20 am Thu Oct 10, 2013 7:20 am | |
| hi Damien, I wouldn't worry to much about the stain, by the time you have placed your fleet of cars on board you wont see much what with shadows etc of the cars, plus they will look like oil drips from cars  you cant keep working boats pristine on deck there is allways misshaps. david | |
|
  | |
Guest
Guest
 |  Subject: Re: Sea Road Lady Subject: Re: Sea Road Lady  Thu Oct 10, 2013 7:32 am Thu Oct 10, 2013 7:32 am | |
| |
|
  | |
Tug--Kenny
Lost But Never Forgotten R.I.P

Posts : 284
Join date : 2011-06-11
Age : 82
Location : Newport, South Wales,UK
 |  Subject: Re: Sea Road Lady Subject: Re: Sea Road Lady  Thu Oct 10, 2013 10:57 am Thu Oct 10, 2013 10:57 am | |
| That superglue gets everywhere.  The best thing is to stain all the wood before assembly as I've found out to my cost. Cheers ken | |
|
  | |
Guest
Guest
 |  Subject: Re: Sea Road Lady Subject: Re: Sea Road Lady  Thu Oct 10, 2013 11:00 am Thu Oct 10, 2013 11:00 am | |
| Lesson learned here too Ken  |
|
  | |
Tug--Kenny
Lost But Never Forgotten R.I.P

Posts : 284
Join date : 2011-06-11
Age : 82
Location : Newport, South Wales,UK
 |  Subject: Re: Sea Road Lady Subject: Re: Sea Road Lady  Thu Oct 10, 2013 11:07 am Thu Oct 10, 2013 11:07 am | |
| Would it be too much trouble to replace the deck ?
ken | |
|
  | |
Guest
Guest
 |  Subject: Re: Sea Road Lady Subject: Re: Sea Road Lady  Thu Oct 10, 2013 11:22 am Thu Oct 10, 2013 11:22 am | |
| It would destroy the hull unfortunately Ken as I coated the inside with polyester resin. I'll try darkening the dots with a cotton bud dabbing more paint on just the light bits. Soldering on the rails tidied with a carbide bit in my dremel. 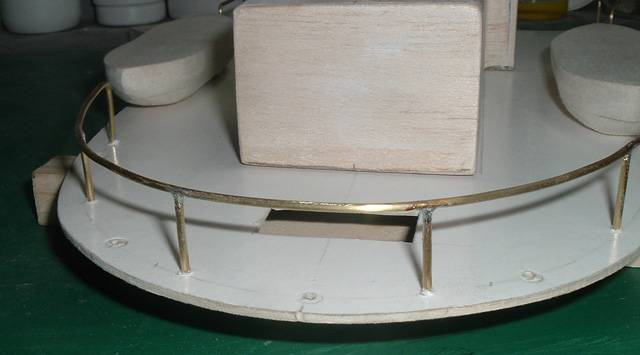 Life boats in place temporarily in place. 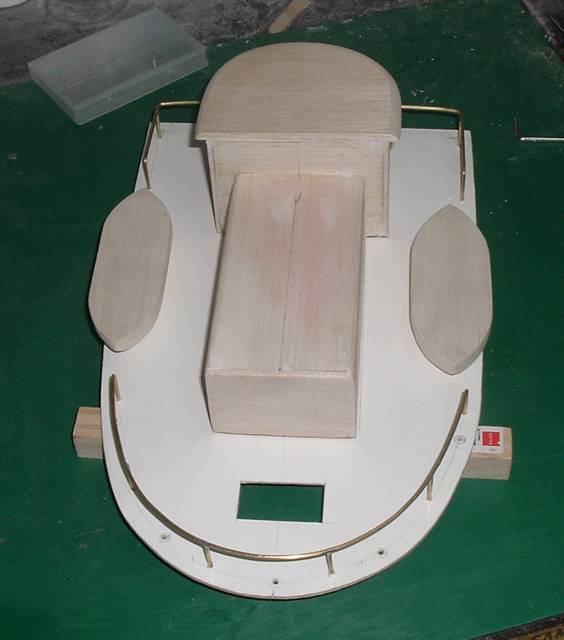 Bridge assembly glued un place. 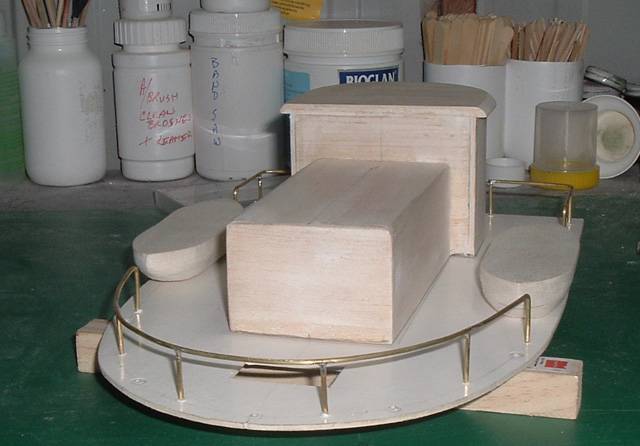 |
|
  | |
barriew
Captain (moderator)

Posts : 2631
Join date : 2011-11-26
Age : 83
Location : Thaxted, Essex
 |  Subject: Re: Sea Road Lady Subject: Re: Sea Road Lady  Thu Oct 10, 2013 2:59 pm Thu Oct 10, 2013 2:59 pm | |
| Hi Damien, Very good progress whilst I was away  Its looking good now. I think it will be a week or two before I'm able to restart modelling so we need David to start posting so I have something to look at. Barrie | |
|
  | |
Guest
Guest
 |  Subject: Re: Sea Road Lady Subject: Re: Sea Road Lady  Thu Oct 10, 2013 11:00 pm Thu Oct 10, 2013 11:00 pm | |
| |
|
  | |
Guest
Guest
 |  Subject: Re: Sea Road Lady Subject: Re: Sea Road Lady  Fri Oct 11, 2013 12:34 pm Fri Oct 11, 2013 12:34 pm | |
| Started on the car and passenger ramps today spent around 2 hours cutting coffee stirrers to 5mm strips and cutting to length, then after 20mins of fighting to get them straight whilst gluing without success I made this jig. 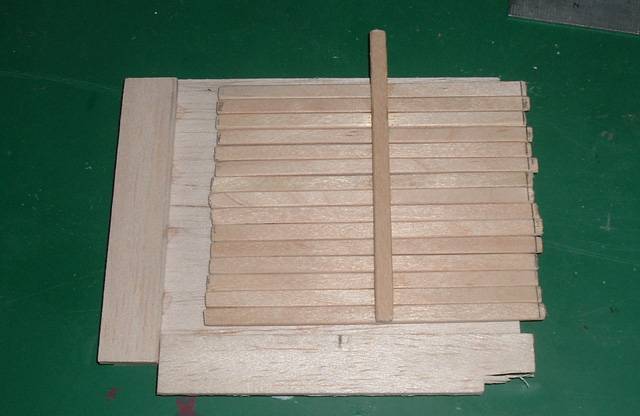 The 4 complete bar some trimming.  From card I cut 20mm strips for the gunwales and 6mm strips for lower and 5mm for the upper edge of them. 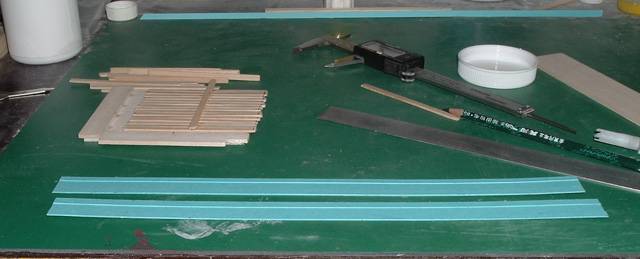
Last edited by Damien on Wed Jan 01, 2014 5:11 am; edited 1 time in total |
|
  | |
Guest
Guest
 |  Subject: Re: Sea Road Lady Subject: Re: Sea Road Lady  Sun Oct 13, 2013 11:22 am Sun Oct 13, 2013 11:22 am | |
| The plan showed posts with the ramps against them with no means of lifting or securing them and the ramp needed to be longer to clear the 65mm width of the paddle boxes, so I got on the lathe and made some 6.5mm pulleys with 2mm holes as I had 2mm x 25mm stainless steel nuts & bolts on hand. 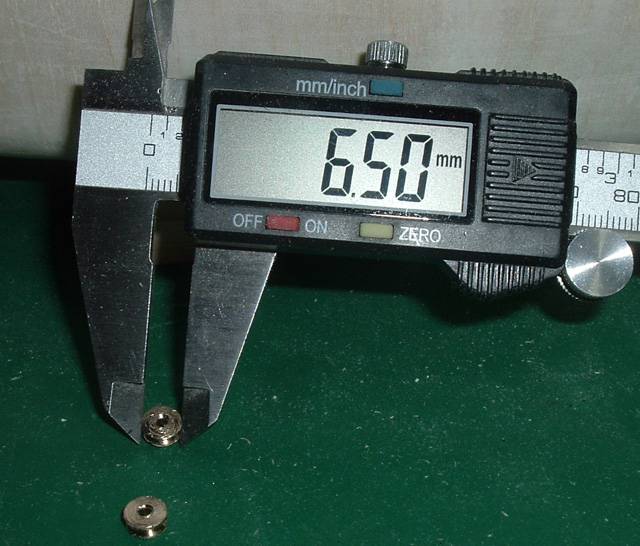 Also prepared 6mm sq posts for the pulleys and 3mm brass spikes to go through the hull for support.  Temp fitting. 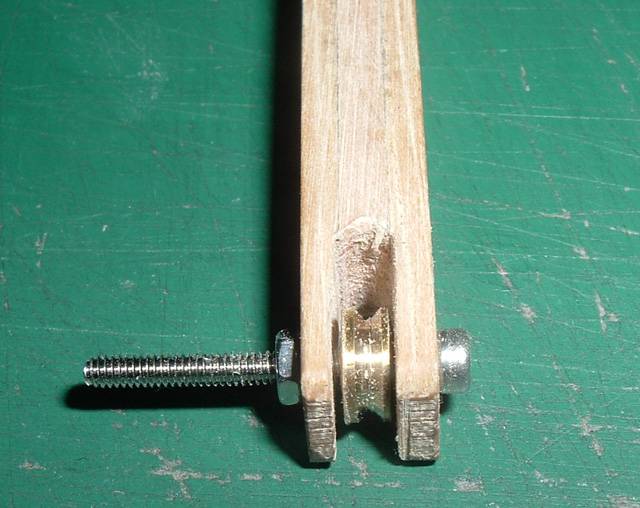 The upper deck in place with strips to mount the passenger gangway too, the upper edge will attach to the upper deck with some overhang. 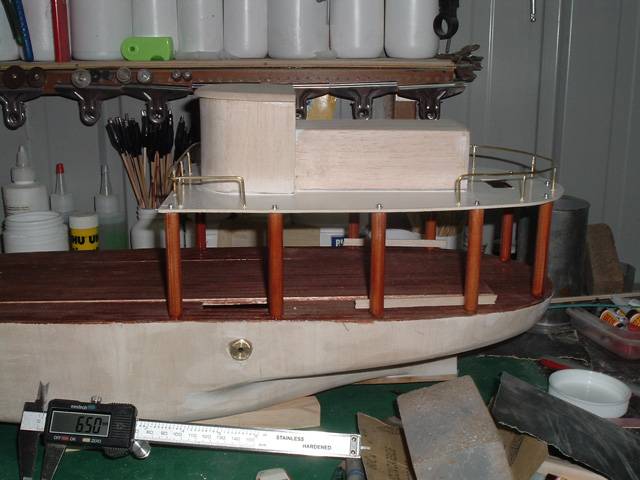
Last edited by Damien on Wed Jan 01, 2014 5:13 am; edited 3 times in total |
|
  | |
Guest
Guest
 |  Subject: Re: Sea Road Lady Subject: Re: Sea Road Lady  Sun Oct 13, 2013 7:53 pm Sun Oct 13, 2013 7:53 pm | |
| - Damien wrote:
- Started on the car and passenger ramps today spent around 2hours cutting coffee stirrers to 5mm stripsand cutting to length, then after 20mins of fighting to get them straight whilst gluing without success I made this jig.

The 4 complete bar some trimming.

From card I cut 20mm strips for the gunwales and 6mm strips for lower and 5mm for the upper edge of them.
 ahh, the ubiquitous McDonalds coffee stirrers..................wonder how many modellers just have a mac's so they can nick a handfullof them..........I have a jar full at home. looking great Damien. I haven't done a jot to my build in ages............must put more effort in, lol |
|
  | |
Guest
Guest
 |  Subject: Re: Sea Road Lady Subject: Re: Sea Road Lady  Mon Oct 14, 2013 12:29 am Mon Oct 14, 2013 12:29 am | |
| Hmmmmmm hadn't considered theft I get packs of 500 on ebay for mixing paints and epoxy. I must be gooder than my wife thinks lol She continually say's i'm bad  |
|
  | |
Guest
Guest
 |  Subject: Re: Sea Road Lady Subject: Re: Sea Road Lady  Mon Oct 14, 2013 11:06 am Mon Oct 14, 2013 11:06 am | |
|
Last edited by Damien on Wed Jan 01, 2014 5:15 am; edited 1 time in total |
|
  | |
Guest
Guest
 |  Subject: Re: Sea Road Lady Subject: Re: Sea Road Lady  Tue Oct 15, 2013 1:14 pm Tue Oct 15, 2013 1:14 pm | |
| |
|
  | |
Guest
Guest
 |  Subject: Re: Sea Road Lady Subject: Re: Sea Road Lady  Tue Oct 15, 2013 1:48 pm Tue Oct 15, 2013 1:48 pm | |
| The model shown in Model Boats has black below the water line and dark green above the upper deck is tan.
Can anyone suggest colours for the paddles and paddle boxes, I'm thinking a dark red for the paddles at a loss for the boxes though. |
|
  | |
davidjt
Forum Sponsor


Posts : 534
Join date : 2013-01-08
Age : 72
Location : n wales coast
 |  Subject: Re: Sea Road Lady Subject: Re: Sea Road Lady  Tue Oct 15, 2013 7:15 pm Tue Oct 15, 2013 7:15 pm | |
| hi damien, i would go with red oxide paddle wheels, then on top of paddle box's keep green, then on the face i would paint white or cream and pick out the cut outs with green on the thin edge, if you have a steady hand, then the name accross following the curve. hope you follow me  david | |
|
  | |
Guest
Guest
 |  Subject: Re: Sea Road Lady Subject: Re: Sea Road Lady  Tue Oct 15, 2013 9:21 pm Tue Oct 15, 2013 9:21 pm | |
| I agree with david.....would look nice in that scheme |
|
  | |
Guest
Guest
 |  Subject: Re: Sea Road Lady Subject: Re: Sea Road Lady  Wed Oct 16, 2013 7:45 am Wed Oct 16, 2013 7:45 am | |
| I still have some of this from the Wrigley build.  |
|
  | |
davidjt
Forum Sponsor


Posts : 534
Join date : 2013-01-08
Age : 72
Location : n wales coast
 | |
  | |
Guest
Guest
 |  Subject: Re: Sea Road Lady Subject: Re: Sea Road Lady  Wed Oct 16, 2013 8:04 am Wed Oct 16, 2013 8:04 am | |
| |
|
  | |
Guest
Guest
 |  Subject: Re: Sea Road Lady Subject: Re: Sea Road Lady  Fri Oct 18, 2013 12:40 pm Fri Oct 18, 2013 12:40 pm | |
| Upon checking the red paint it had turned to jelly I'll have to mix some more it was red with a bit of black. Mean while I put the card bulwarks on today.  and put some modified model aircraft hindges on the car ramps and cut slots with a 20mm circ saw blade in the dremel. The ramps will be fixed partly down, I also raided my wifes neckless chains and found 2 that will provide the 8 lengths needed. 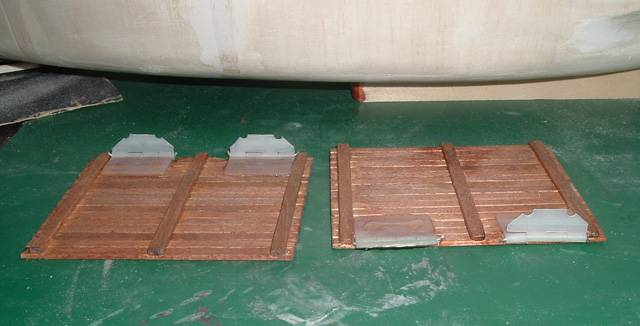
Last edited by Damien on Sat Oct 19, 2013 11:56 pm; edited 1 time in total |
|
  | |
Guest
Guest
 |  Subject: Re: Sea Road Lady Subject: Re: Sea Road Lady  Fri Oct 18, 2013 5:37 pm Fri Oct 18, 2013 5:37 pm | |
| |
|
  | |
Guest
Guest
 |  Subject: Re: Sea Road Lady Subject: Re: Sea Road Lady  Sat Oct 19, 2013 10:44 am Sat Oct 19, 2013 10:44 am | |
| Stern railings in progress 2 laminations of 1.5mm x 4mm balsa soaked in water for a few minutes. 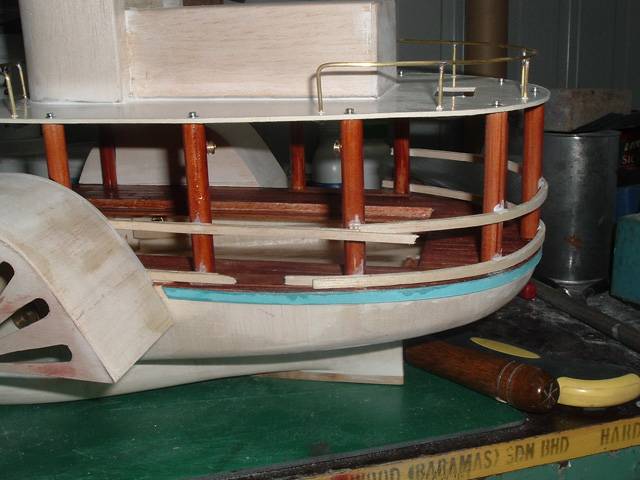 The white on the posts was caused by my home made water/bicarb kicker it was cured with a cotton bud dipped in acetone. Note the spacer blocks to ensure correctly spaced rails.  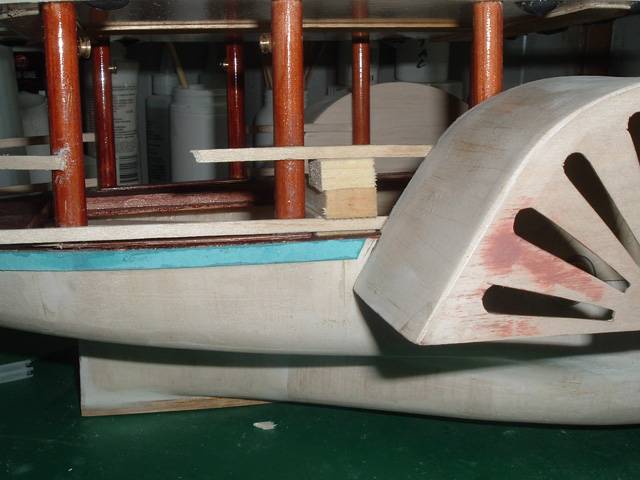 I was wrong earlier in the post saying it was dark walnut stain on the deck it is infact dark mahogany I got the railings finished and varnished/stained. 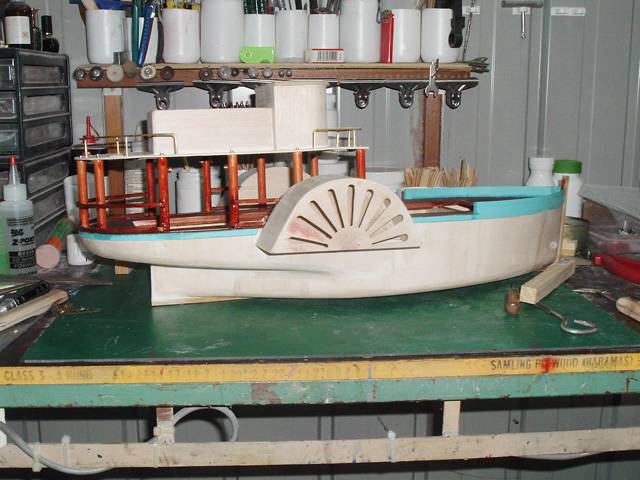 In decicing to put chains on the ramps I then needed hawse pipes for through deck access for the imaginary winches back on the lathe I went these are 5mm flange 4mm shaft with a 2.5mm hole the chain is epoxied in from the bottom to stop any water ingress to the hull. 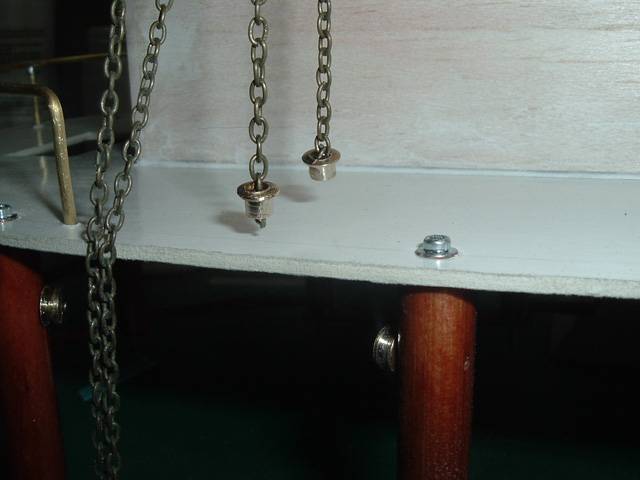 |
|
  | |
Guest
Guest
 |  Subject: Re: Sea Road Lady Subject: Re: Sea Road Lady  Sat Oct 19, 2013 4:55 pm Sat Oct 19, 2013 4:55 pm | |
| can't wait to see this one on the water. neil |
|
  | |
Guest
Guest
 |  Subject: Re: Sea Road Lady Subject: Re: Sea Road Lady  Sun Oct 20, 2013 10:04 am Sun Oct 20, 2013 10:04 am | |
| Be patient Neil it'll be a while yet. Today was a day of revelation I hung old drapes on the back fence so I didn't upset the land lord with overspray, a warm 27c day no wind set up my old metal ironing board spray bench mixed and thinned the primer, set up the power and air hose for my compressor set up the hull and upper deck ready to paint. "note" I masked off the deck last night. loaded the touch up gun face mask on. One side of the hull done & up comes a 30kph wind the drapes threaten to nock the model to the ground I shift the table mid way through the mask on the hull decides it dosen't like the air pressure and lifts press it down and hope so i persevere to the finish, after cleaning the spray equipment I discover my hull wasn't as perfect as I thought bubbles over the second half day a bit humid so after an hour to harden I went for wet sanding with 400 grid put it in the sun to dry. The pic's show the filling needed. 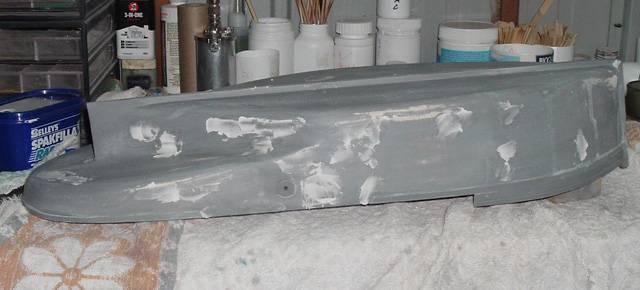 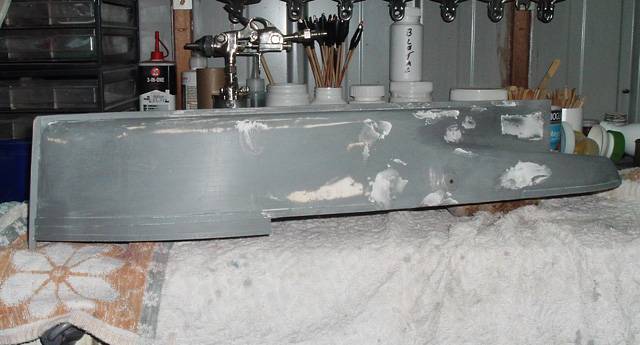 Next time I'll shift the scooters into the back yard and spray under cover.
Last edited by Damien on Sun Oct 20, 2013 12:06 pm; edited 1 time in total |
|
  | |
Sponsored content
 |  Subject: Re: Sea Road Lady Subject: Re: Sea Road Lady  | |
| |
|
  | |
| | Sea Road Lady |  |
|
