TheRcModelBoatForum.com
Please login using your username and password to use the forum.

If you do not have an account please register to participate, it’s free!
TheRcModelBoatForum.com
Would you like to react to this message? Create an account in a few clicks or log in to continue.


https://www.thercmodelboatforum.com/
 
HomeHome  PortalPortal  Latest imagesLatest images  RegisterRegister  Log inLog in  


 STEAM HYDRAULIC LIFEBOAT

Go down 
5 posters
Go to page : Previous  1, 2, 3  Next
AuthorMessage
Guest
Guest


STEAM HYDRAULIC LIFEBOAT - Page 2 Empty
PostSubject: Re: STEAM HYDRAULIC LIFEBOAT   STEAM HYDRAULIC LIFEBOAT - Page 2 EmptyTue Sep 19, 2017 7:43 pm

all I can say matey is I hope you have more sun than I got on my holiday in Scotland...............it rained EVERY single day............never done that in 18 years..........and I came away thinking what a waste of money..........may as well have stayed at home...

hope you not flying Ryan Airways, lol.
Back to top Go down
barriew
Captain (moderator)
Captain (moderator)


Posts : 2631
Join date : 2011-11-26
Age : 83
Location : Thaxted, Essex

STEAM HYDRAULIC LIFEBOAT - Page 2 Empty
PostSubject: Re: STEAM HYDRAULIC LIFEBOAT   STEAM HYDRAULIC LIFEBOAT - Page 2 EmptyTue Sep 19, 2017 7:47 pm

Off to Germany Neil with Air Berlin who are bankrupt Shocked Should be about as warm there as here, but the wine is better lol! lol!

Barrie
Back to top Go down
Guest
Guest


STEAM HYDRAULIC LIFEBOAT - Page 2 Empty
PostSubject: Re: STEAM HYDRAULIC LIFEBOAT   STEAM HYDRAULIC LIFEBOAT - Page 2 EmptyTue Sep 19, 2017 11:02 pm

is it hot air balloon then seeing as they are banko, lol...enjoy yourself mate.
Back to top Go down
Guest
Guest


STEAM HYDRAULIC LIFEBOAT - Page 2 Empty
PostSubject: Re: STEAM HYDRAULIC LIFEBOAT   STEAM HYDRAULIC LIFEBOAT - Page 2 EmptyWed Sep 20, 2017 12:31 pm

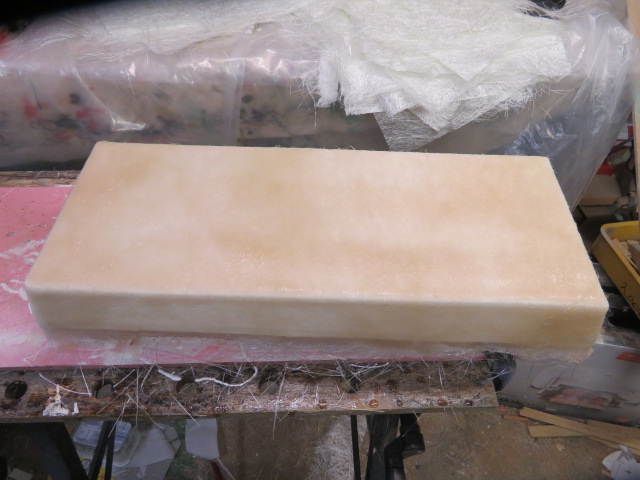
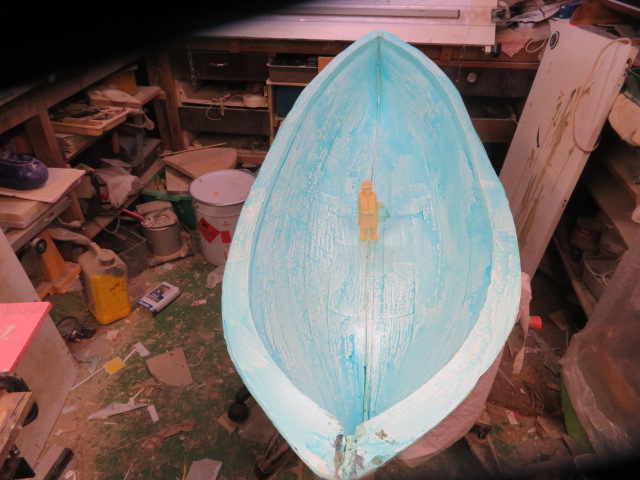
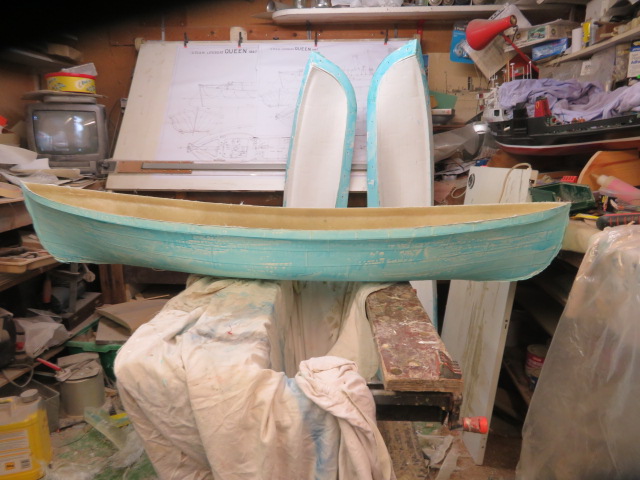
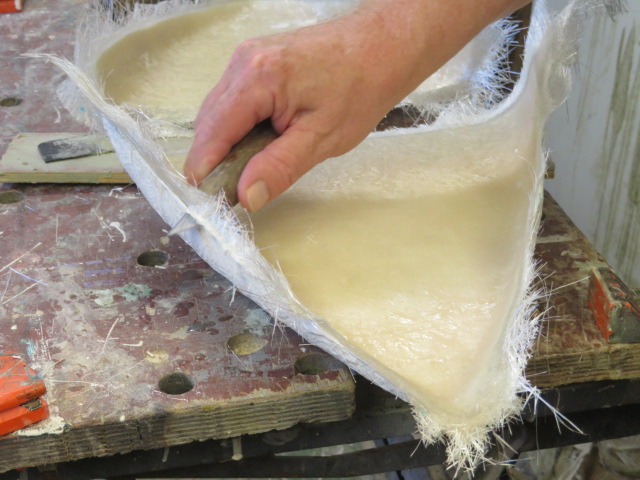
After preparing and cutting all the chopped strand matting into squares, rectangles and 4" strips last night, I had a marathon none stop 2 hour session this morning laying up the first side of the hull mould.

I am going to leave the cabin and end boxes until the hull mould is complete and trimmed up before I lay them up or I'm not going to have enough room in my workshop.


STEAM HYDRAULIC LIFEBOAT - Page 2 Img_6413


STEAM HYDRAULIC LIFEBOAT - Page 2 Img_6415
Back to top Go down
Guest
Guest


STEAM HYDRAULIC LIFEBOAT - Page 2 Empty
PostSubject: Re: STEAM HYDRAULIC LIFEBOAT   STEAM HYDRAULIC LIFEBOAT - Page 2 EmptyWed Sep 20, 2017 2:54 pm

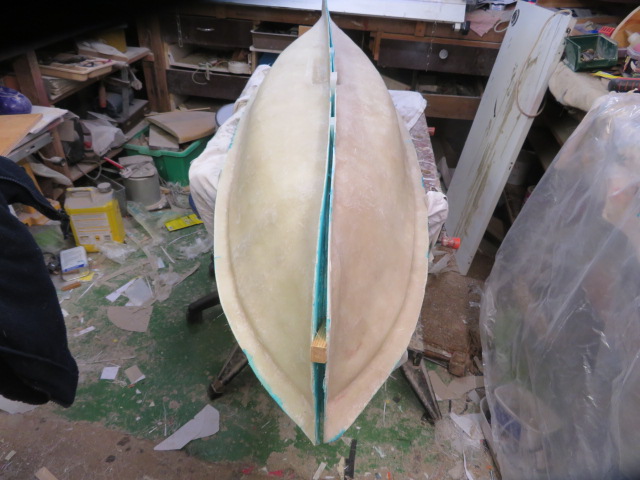
I have cleaned up the overlay from the flanges and also taken the plastecine and white sticky mastic from the main flange, ready for taking it off later this evening. the garage heaters are working overtime to help hasten the curing of the first half mould, as I really want to get the gelcoat onto the second half this evening.

I have also cut and split the matting ready for laying up tomorrow.

I buy 450 gram chopped strand matting, as it is a little thick and unpliable when moulding a model hull.......but it is the same price as 300 gram matting. however, if you split the layers, it then becomes more pliable and you get half as much coverage again for the same price.
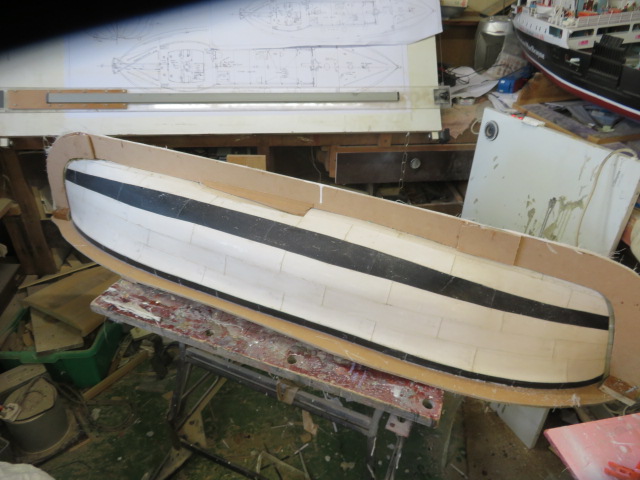
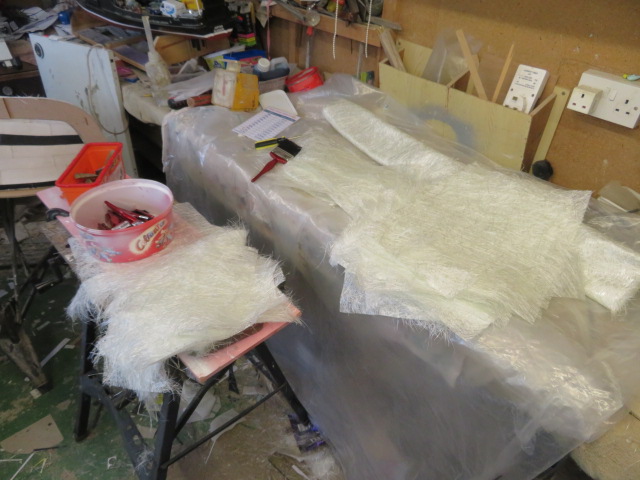

STEAM HYDRAULIC LIFEBOAT - Page 2 Img_6416


STEAM HYDRAULIC LIFEBOAT - Page 2 Img_6417


STEAM HYDRAULIC LIFEBOAT - Page 2 Img_6419
Back to top Go down
Guest
Guest


STEAM HYDRAULIC LIFEBOAT - Page 2 Empty
PostSubject: Re: STEAM HYDRAULIC LIFEBOAT   STEAM HYDRAULIC LIFEBOAT - Page 2 EmptyWed Sep 20, 2017 9:16 pm

I realised tonight that I really had only 24 hours from putting the gelcoat on to laying up the chop strand mat before the possibility of delamination between the two could in remote circumstances take place, and so I laid up a couple of layers on both the end boxes and the cabin.......I can put another couple of layers on each after I have done the second half of the hull mould.

I cleaned up the joint between the hull and the now fabricated grp flange after splitting the mdf flange from the moulded flange, and then waxed the whole "B" side up, including the flange. once dry I polished it and then added the blue release agent, before my last job this evening and that was to put the second side gelcoat layer on, ready for moulding up with matting tomorrow.


STEAM HYDRAULIC LIFEBOAT - Page 2 Img_6420


STEAM HYDRAULIC LIFEBOAT - Page 2 Img_6421


STEAM HYDRAULIC LIFEBOAT - Page 2 Img_6422


STEAM HYDRAULIC LIFEBOAT - Page 2 Img_6423


STEAM HYDRAULIC LIFEBOAT - Page 2 Img_6424


STEAM HYDRAULIC LIFEBOAT - Page 2 Img_6425


STEAM HYDRAULIC LIFEBOAT - Page 2 Img_6426


STEAM HYDRAULIC LIFEBOAT - Page 2 Img_6427


STEAM HYDRAULIC LIFEBOAT - Page 2 Img_6429
Back to top Go down
Guest
Guest


STEAM HYDRAULIC LIFEBOAT - Page 2 Empty
PostSubject: Re: STEAM HYDRAULIC LIFEBOAT   STEAM HYDRAULIC LIFEBOAT - Page 2 EmptyThu Sep 21, 2017 10:17 am

2thumbsup 2thumbsup 2thumbsup 2thumbsup 2thumbsup 2thumbsup 2thumbsup 2thumbsup 2thumbsup 2thumbsup
Back to top Go down
Guest
Guest


STEAM HYDRAULIC LIFEBOAT - Page 2 Empty
PostSubject: Re: STEAM HYDRAULIC LIFEBOAT   STEAM HYDRAULIC LIFEBOAT - Page 2 EmptyThu Sep 21, 2017 1:52 pm

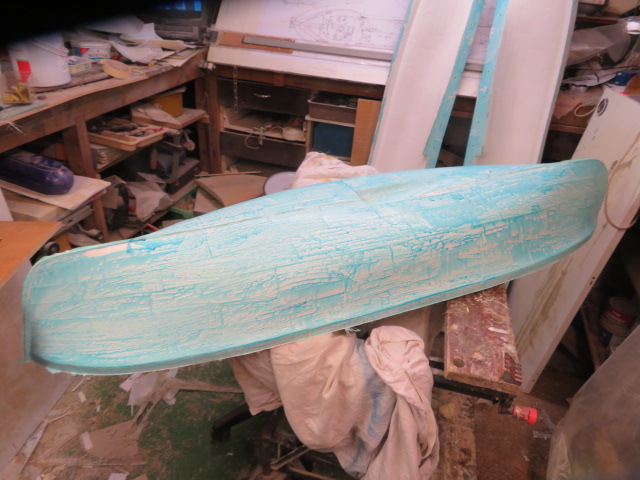
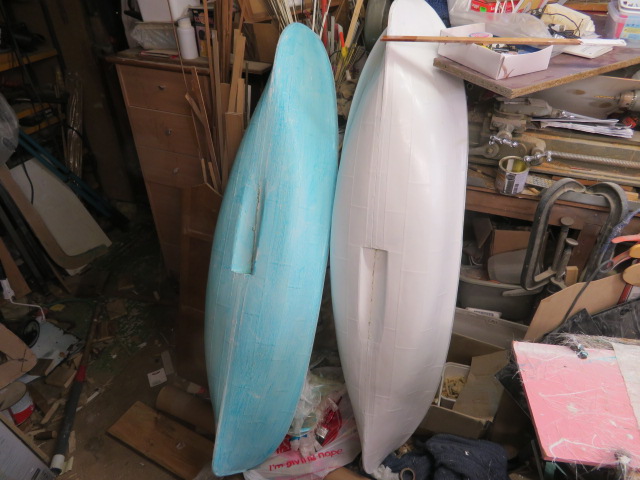
I said at the start that this as with my other builds would be a "warts and all" build and if I make a mistake I would own up to it in order to help others not to make the same one.

Well I made one big style.

When I laid up the first half of the hull I cheapened myself by using some gelcoat that had been in a sealed tin for some time......in fact probably since I moulded the hull of the ferry nearly 4 years ago, on reflection......shelf life of such stuff once opened is a maximum 6 months under controlled conditions, and no way are the temperatures in my workshop controlled........but I hoped and prayed that there wouldn't be a reaction to using this on the first half.........

Sadly my prayers weren't answered, and when I finally finished the mould this morning and then trimmed it up, I split it and removed it from the plug to find that the old gel coat had crinkled and left an uneven surface.

there was a choice, leave it and when waxing up to put extra wax into the crinkles so that when the moulding is taken off it the raised particles can be sanded off or leave the second half attached to the plug and lay up a ew half to that.

However the plug was now in a state and would need cleaning and probably wet and drying again before waxing again, and so I decided that as only a few sets of mouldings are going to be taken off by myself for friends, then they can sand down their own hulls to the perfection they want.

But the moral is.........DON'T CHEAPEN YOURSELF AND USE OLD AND SHODDY MATERIALS...........it causes more work and expense in the end.
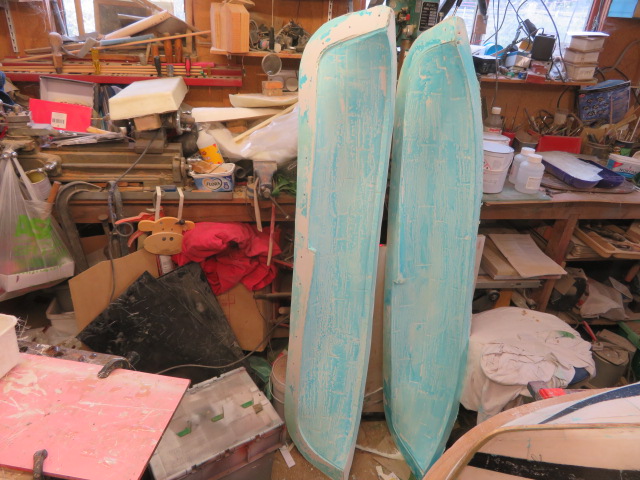
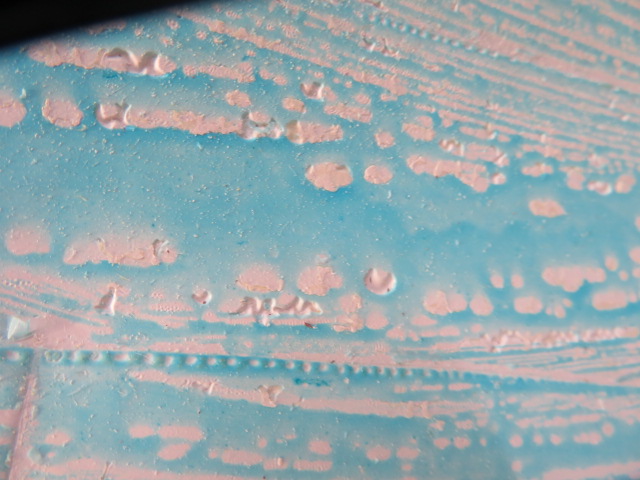

STEAM HYDRAULIC LIFEBOAT - Page 2 Img_6430


STEAM HYDRAULIC LIFEBOAT - Page 2 Img_6431


STEAM HYDRAULIC LIFEBOAT - Page 2 Img_6433
Back to top Go down
Guest
Guest


STEAM HYDRAULIC LIFEBOAT - Page 2 Empty
PostSubject: Re: STEAM HYDRAULIC LIFEBOAT   STEAM HYDRAULIC LIFEBOAT - Page 2 EmptyThu Sep 21, 2017 2:04 pm

2thumbsup Thumbup 2thumbsup Thumbup 2thumbsup Thumbup 2thumbsup Thumbup 2thumbsup Thumbup 2thumbsup Thumbup
Back to top Go down
Guest
Guest


STEAM HYDRAULIC LIFEBOAT - Page 2 Empty
PostSubject: Re: STEAM HYDRAULIC LIFEBOAT   STEAM HYDRAULIC LIFEBOAT - Page 2 EmptyThu Sep 21, 2017 9:08 pm

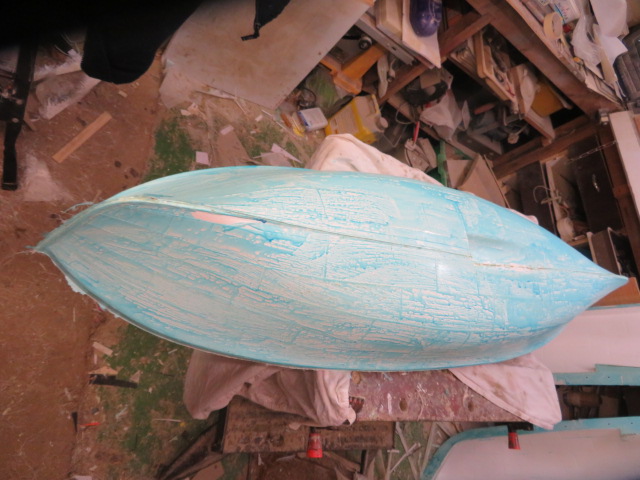
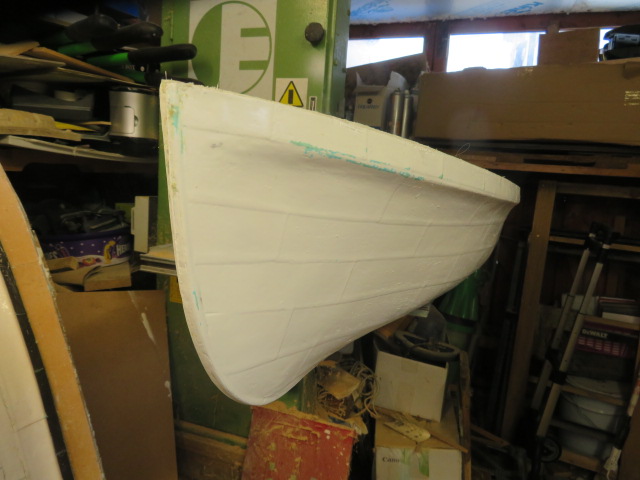
have now cleaned off the blue release agent and found that the pitting in the gelcoat isn't as bad as I thought............t's mostly under the waterline................only joking, it's not as deep as I thought and mainly restricted to the bow area...........

with liberal coatings of wax on the mould, the raised bits on the moulding, although numerous, won't need as much sanding off as first thought, so spirits are lifted a little..........may be a beer can be lifted as well as the spirits.
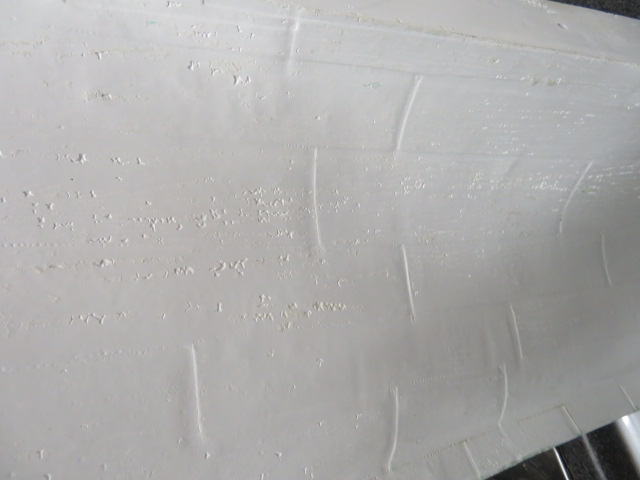

STEAM HYDRAULIC LIFEBOAT - Page 2 Img_6434
Back to top Go down
Guest
Guest


STEAM HYDRAULIC LIFEBOAT - Page 2 Empty
PostSubject: Re: STEAM HYDRAULIC LIFEBOAT   STEAM HYDRAULIC LIFEBOAT - Page 2 EmptyMon Sep 25, 2017 8:25 pm

the two halves of the hull mould have been waxed copiously and hopefully much of the rippling "craters" have been filled to a good extent with the wax. the halves were then painted with the blue PVA release agent before bolting together.

there will be no trouble finding space in the hull for controls, pump, batteries etc as it is cavernous, as you can see from the lifeboat crew man placed into the hull......at the same scale 1;12.

once the hull was bolted together a biggish gap could be seen between the two halves on the top of the induction scoop. and so this was filled with plastecine.

once this was done the white gelcoat was applied inside the mould.

laying up will be done tomorrow morning.


STEAM HYDRAULIC LIFEBOAT - Page 2 Img_6435


STEAM HYDRAULIC LIFEBOAT - Page 2 Img_6436


STEAM HYDRAULIC LIFEBOAT - Page 2 Img_6437


STEAM HYDRAULIC LIFEBOAT - Page 2 Img_6438


STEAM HYDRAULIC LIFEBOAT - Page 2 Img_6439


STEAM HYDRAULIC LIFEBOAT - Page 2 Img_6440


STEAM HYDRAULIC LIFEBOAT - Page 2 Img_6441
Back to top Go down
Guest
Guest


STEAM HYDRAULIC LIFEBOAT - Page 2 Empty
PostSubject: Re: STEAM HYDRAULIC LIFEBOAT   STEAM HYDRAULIC LIFEBOAT - Page 2 EmptyTue Sep 26, 2017 11:43 am

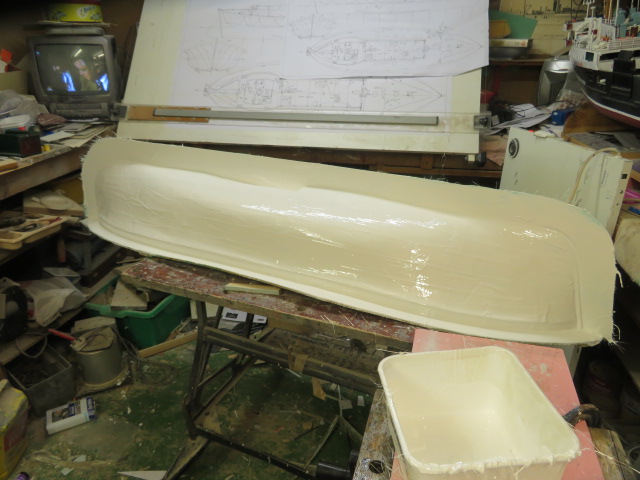
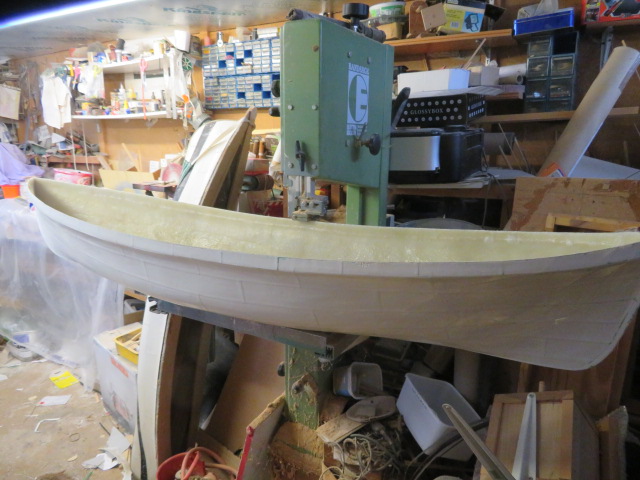
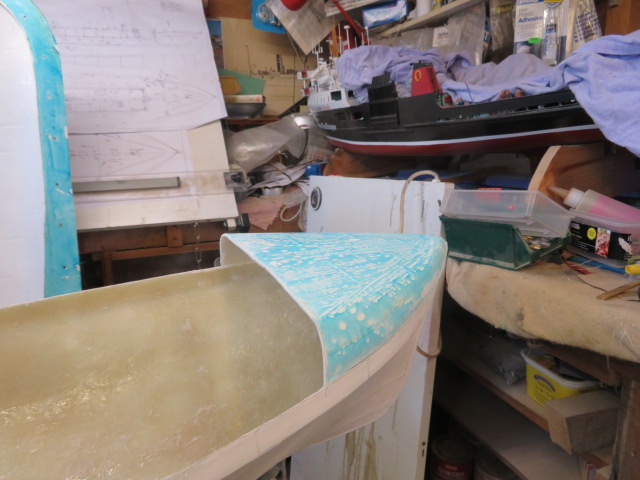
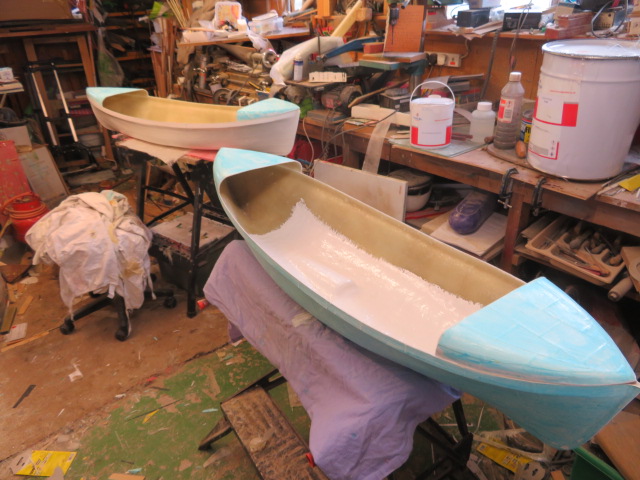
and the first hull moulding has been laid up this morning, 3 layers o 300gram chopped strand matting, and then the bulwark level trimmed off to the top of the flange.

the moment to worry about is when I split the mould tonight after it has hardened and started to cure......see whether the mistakes of the gash gelcoat on the first half comes back to haunt me and rips the mould apart........  
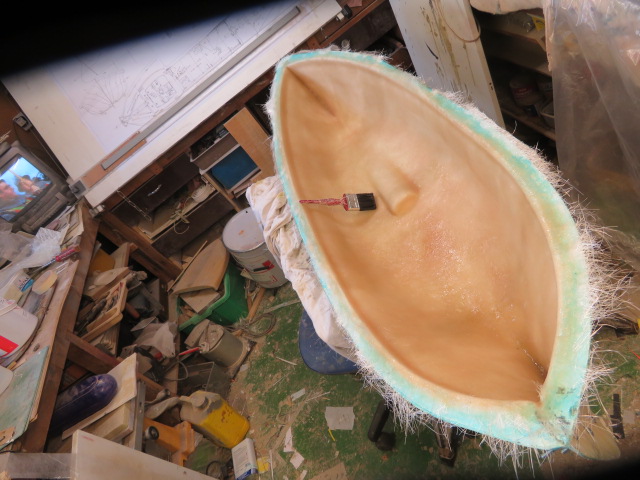
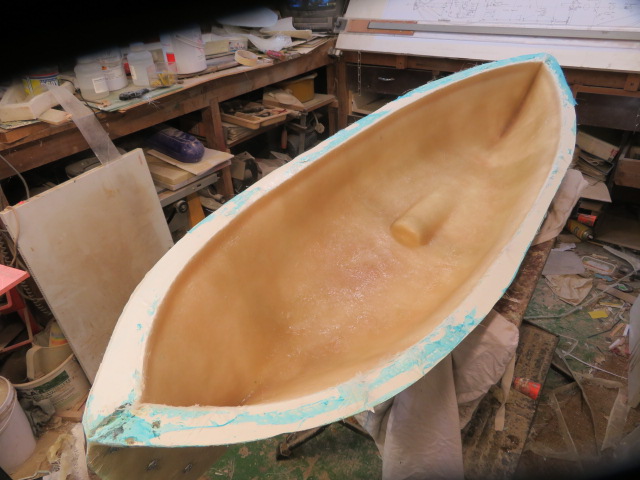
STEAM HYDRAULIC LIFEBOAT - Page 2 Img_6442


STEAM HYDRAULIC LIFEBOAT - Page 2 Img_6443
Back to top Go down
Guest
Guest


STEAM HYDRAULIC LIFEBOAT - Page 2 Empty
PostSubject: Re: STEAM HYDRAULIC LIFEBOAT   STEAM HYDRAULIC LIFEBOAT - Page 2 EmptyTue Sep 26, 2017 9:53 pm

yippppeeeeee........the copious amounts of wax pushed into the crinkles on the mould have worked as the new moulding today popped out like a baby's dummy with just wax residue left on the moulding, and no damage what so ever, which I feared most, to the mould.it will just need cleaning up and then more waxing and a release agent and off again........might get another hull out by Thursday with any luck.


STEAM HYDRAULIC LIFEBOAT - Page 2 Img_6444

STEAM HYDRAULIC LIFEBOAT - Page 2 Img_6447


STEAM HYDRAULIC LIFEBOAT - Page 2 Img_6445


STEAM HYDRAULIC LIFEBOAT - Page 2 Img_6446
Back to top Go down
Guest
Guest


STEAM HYDRAULIC LIFEBOAT - Page 2 Empty
PostSubject: Re: STEAM HYDRAULIC LIFEBOAT   STEAM HYDRAULIC LIFEBOAT - Page 2 EmptyWed Sep 27, 2017 3:44 pm

washed clean and cleaned up.......on to the next hull. she has got lovely classic lines.


STEAM HYDRAULIC LIFEBOAT - Page 2 Img_6448


STEAM HYDRAULIC LIFEBOAT - Page 2 Img_6449
Back to top Go down
Guest
Guest


STEAM HYDRAULIC LIFEBOAT - Page 2 Empty
PostSubject: Re: STEAM HYDRAULIC LIFEBOAT   STEAM HYDRAULIC LIFEBOAT - Page 2 EmptyThu Sep 28, 2017 3:35 pm

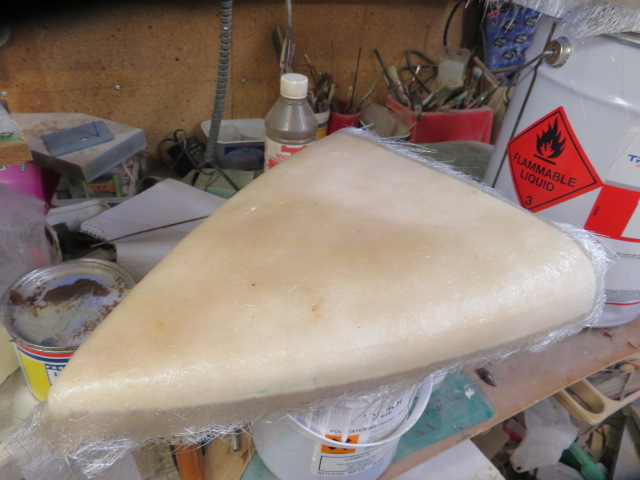
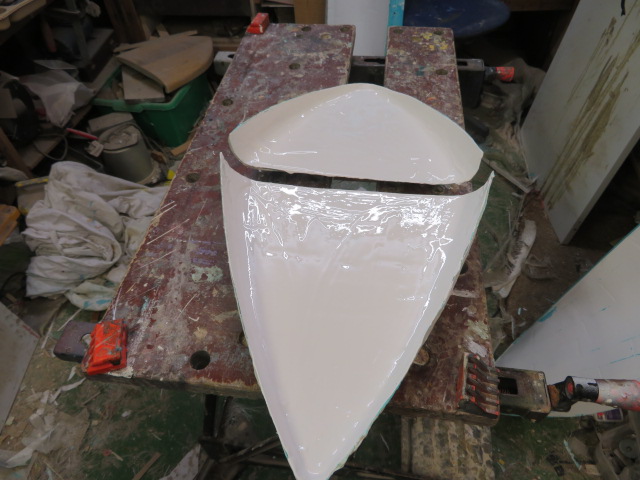
I have now readied the two end boxes for moulding, but waxing up, painting with PVA and glueing two blocks of wood onto the underside of each mould.

These blocks are to clamp into the Black and Dekker workmate to  hold them still whilst moulding.

Will knock a couple out tonight.

However, the cabin mould came out c r a p when I finally got to look at it......too many air bubbles in the gelcoat, which collapsed when waxing up, and so I have decided to make my cabin from 3mm ply, and offer templates to anyone wanting a set of mouldings..........it will be sturdier and easy to construct.
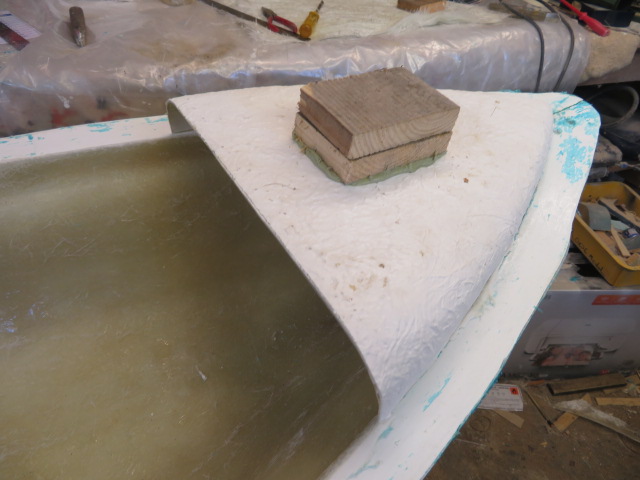
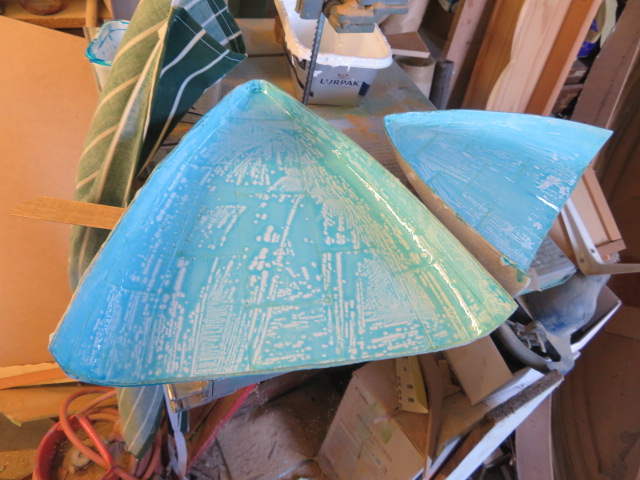
STEAM HYDRAULIC LIFEBOAT - Page 2 Img_6450


STEAM HYDRAULIC LIFEBOAT - Page 2 Img_6451


STEAM HYDRAULIC LIFEBOAT - Page 2 Img_6452


STEAM HYDRAULIC LIFEBOAT - Page 2 Img_6453
Back to top Go down
Guest
Guest


STEAM HYDRAULIC LIFEBOAT - Page 2 Empty
PostSubject: Re: STEAM HYDRAULIC LIFEBOAT   STEAM HYDRAULIC LIFEBOAT - Page 2 EmptyThu Sep 28, 2017 7:19 pm

set the end boxes into the grip of the workmate and gelcoated up...........mixed a bit too much, so waste not want not, I painted the inside of the new hull with the remainder.

think the hulls are breeding.


STEAM HYDRAULIC LIFEBOAT - Page 2 Img_6454


STEAM HYDRAULIC LIFEBOAT - Page 2 Img_6455


STEAM HYDRAULIC LIFEBOAT - Page 2 Img_6456


STEAM HYDRAULIC LIFEBOAT - Page 2 Img_6457
Back to top Go down
Guest
Guest


STEAM HYDRAULIC LIFEBOAT - Page 2 Empty
PostSubject: Re: STEAM HYDRAULIC LIFEBOAT   STEAM HYDRAULIC LIFEBOAT - Page 2 EmptyFri Sep 29, 2017 2:09 am

2thumbsup 2thumbsup Thumbup Thumbup 2thumbsup 2thumbsup Thumbup Thumbup 2thumbsup 2thumbsup Thumbup Thumbup 2thumbsup 2thumbsup Thumbup Thumbup
Back to top Go down
Guest
Guest


STEAM HYDRAULIC LIFEBOAT - Page 2 Empty
PostSubject: Re: STEAM HYDRAULIC LIFEBOAT   STEAM HYDRAULIC LIFEBOAT - Page 2 EmptyFri Sep 29, 2017 6:00 pm

the end boxes have now been moulded and placed onto the hull as a dry fit to see how they lie on the boat.......pretty good, and who ever made the plugs, did a superb ob.........with I had known who made them...........shake his hand.


STEAM HYDRAULIC LIFEBOAT - Page 2 Img_6458


STEAM HYDRAULIC LIFEBOAT - Page 2 Img_6459


STEAM HYDRAULIC LIFEBOAT - Page 2 Img_6460


STEAM HYDRAULIC LIFEBOAT - Page 2 Img_6461


STEAM HYDRAULIC LIFEBOAT - Page 2 Img_6462


STEAM HYDRAULIC LIFEBOAT - Page 2 Img_6464


STEAM HYDRAULIC LIFEBOAT - Page 2 Img_6466
Back to top Go down
Guest
Guest


STEAM HYDRAULIC LIFEBOAT - Page 2 Empty
PostSubject: Re: STEAM HYDRAULIC LIFEBOAT   STEAM HYDRAULIC LIFEBOAT - Page 2 EmptySat Sep 30, 2017 11:16 am

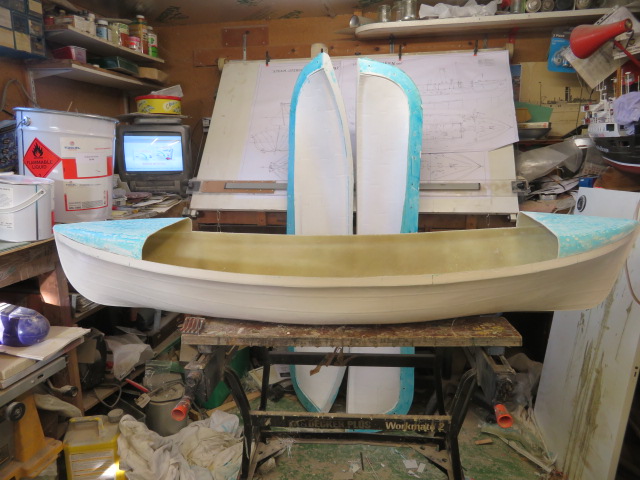
Just finished the second set of end boxes for the second hull.......had a bit of a dilemma as my daughter rung me just before I was due to start laying up and asked if I could pick her up from a friends house where she stayed last night after a night on the razz........so left me little time.....

so I added another 2 mills of catalyst to the mix to send it off a little quicker........once laid up  I then added a little accelerant.....a trick that my GRP tutor taught me when I was on a course building my 1st 16' Canadian style canoe in Canberra, Australia in 1976.......use a hot air gun once the mix has started to gell on the brush....used lightly, the extra heat won't damage the layup.

So that is it..........two sets of mouldings predicted, two sets made, and now I can bolt up the mould to stop it from being damaged or deformed and then I can put the moulds and plugs away and get on with the building of the lifeboat with a little space to spare in the workshop.
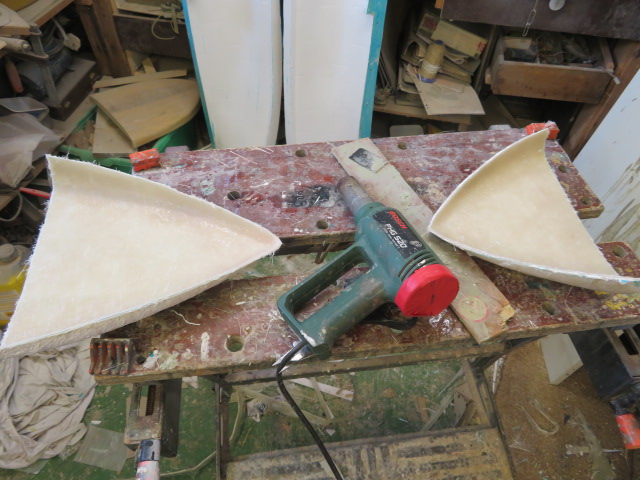
STEAM HYDRAULIC LIFEBOAT - Page 2 Img_6467
Back to top Go down
Guest
Guest


STEAM HYDRAULIC LIFEBOAT - Page 2 Empty
PostSubject: Re: STEAM HYDRAULIC LIFEBOAT   STEAM HYDRAULIC LIFEBOAT - Page 2 EmptySat Sep 30, 2017 6:00 pm

the two steam boats QUEEN and CITY OF GLASGOW look well together with their crews ready to take command lol.


STEAM HYDRAULIC LIFEBOAT - Page 2 Img_6468


STEAM HYDRAULIC LIFEBOAT - Page 2 Img_6469


STEAM HYDRAULIC LIFEBOAT - Page 2 Img_6470


STEAM HYDRAULIC LIFEBOAT - Page 2 Img_6471
Back to top Go down
Guest
Guest


STEAM HYDRAULIC LIFEBOAT - Page 2 Empty
PostSubject: Re: STEAM HYDRAULIC LIFEBOAT   STEAM HYDRAULIC LIFEBOAT - Page 2 EmptySun Oct 01, 2017 11:36 am

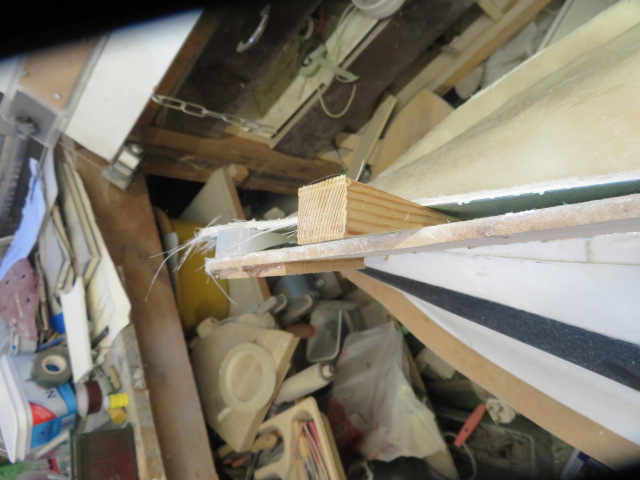
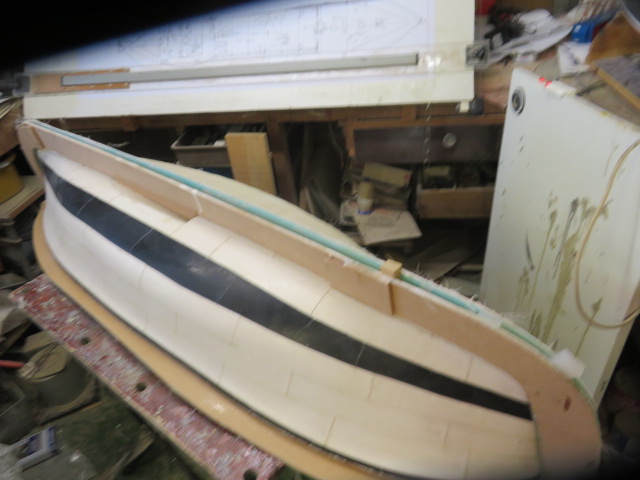
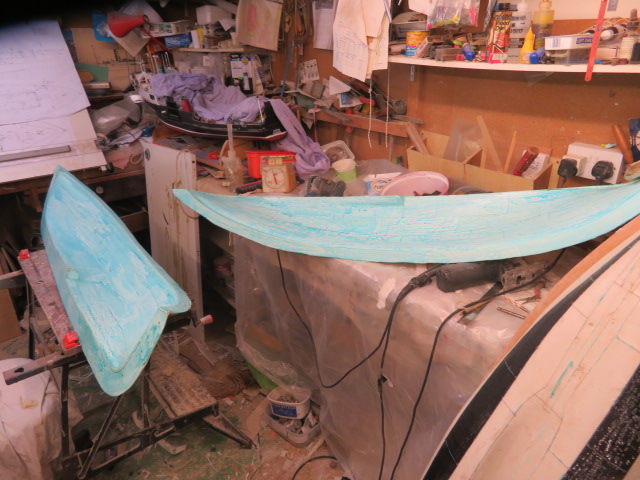
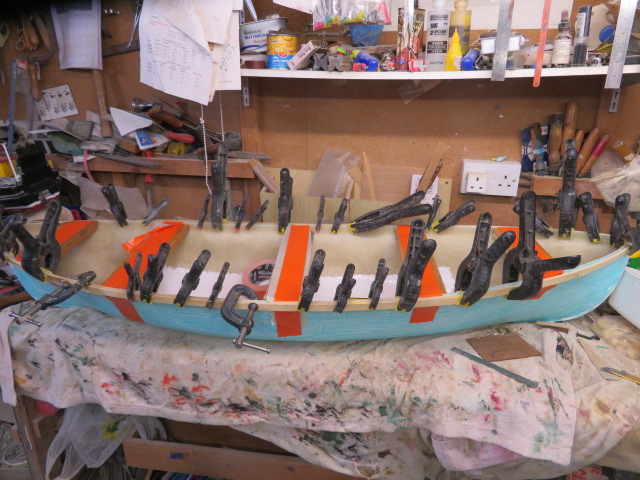
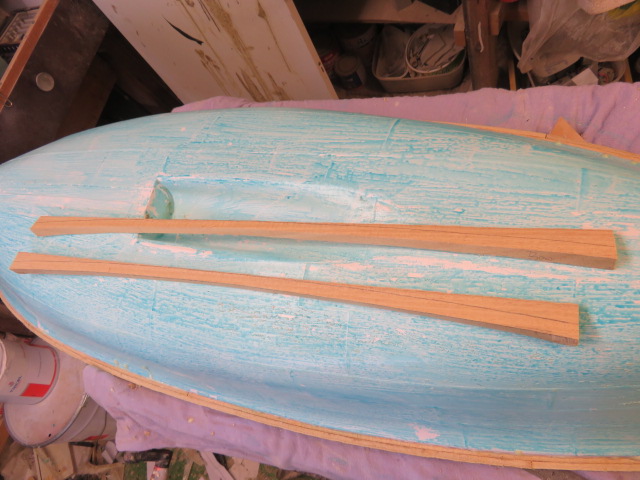
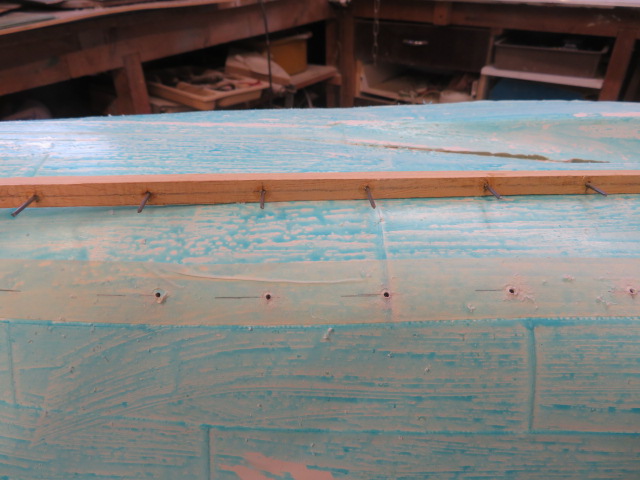
now that the hull has cured into it's permanent state for modelling I need to put on the belting..made from timber before I do anything else, for reasons later. I am going to try making them form 2 pieces of but jointed obeche 15mm square in section.

because it is quite a lump of timber that has to bend I have first fixed the hull shape temporarily with pieces of timber, duct taped in place, and placed the obeche in a bath of hot water for a couple of hours to wet and make pliable.. then I shall take a piece at a time and offer it up to the hull an clamp in place. should it not bend to the bulwark shape, then I shall cut it again into 19 X 7mm strips and try laminating the belting in two parts.

what I don't want to do is cut the timber cross wise to aid bending.
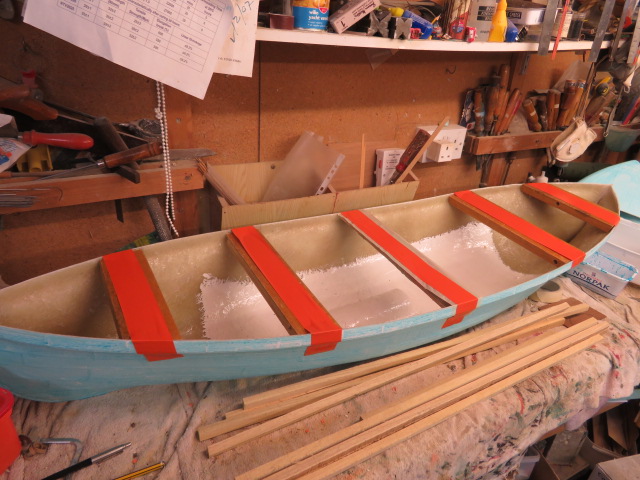
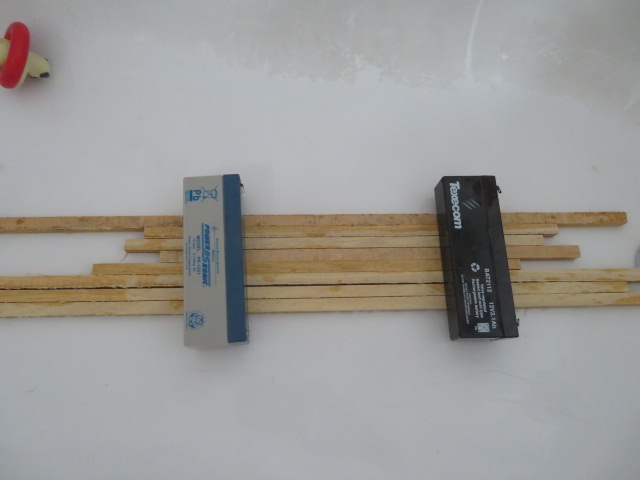

STEAM HYDRAULIC LIFEBOAT - Page 2 Img_6472


STEAM HYDRAULIC LIFEBOAT - Page 2 Img_6473

STEAM HYDRAULIC LIFEBOAT - Page 2 Img_6477
Back to top Go down
Guest
Guest


STEAM HYDRAULIC LIFEBOAT - Page 2 Empty
PostSubject: Re: STEAM HYDRAULIC LIFEBOAT   STEAM HYDRAULIC LIFEBOAT - Page 2 EmptySun Oct 01, 2017 12:16 pm

Just tried bending the 15 x 15mm obeche dry..........and not a hope in hell, so those timbers can be used for the deck framing, and I have cut some 15 x 7mm obeche, and even dry fit, this works well so that is now in soak in the bath.


STEAM HYDRAULIC LIFEBOAT - Page 2 Img_6478


STEAM HYDRAULIC LIFEBOAT - Page 2 Img_6480
Back to top Go down
Guest
Guest


STEAM HYDRAULIC LIFEBOAT - Page 2 Empty
PostSubject: Re: STEAM HYDRAULIC LIFEBOAT   STEAM HYDRAULIC LIFEBOAT - Page 2 EmptyMon Oct 02, 2017 9:03 pm

the stern quarter pieces have been placed onto the hull, and then overlapping this and the bow section I have also lad a centre piece overlapping both fore and aft sections, to give the sectional thickness of the belting, and clamped them all down. I'll add the bow and stern second layer later, if I have enough clamps left.


STEAM HYDRAULIC LIFEBOAT - Page 2 Img_6510


STEAM HYDRAULIC LIFEBOAT - Page 2 Img_6513


STEAM HYDRAULIC LIFEBOAT - Page 2 Img_6515
Back to top Go down
Guest
Guest


STEAM HYDRAULIC LIFEBOAT - Page 2 Empty
PostSubject: Re: STEAM HYDRAULIC LIFEBOAT   STEAM HYDRAULIC LIFEBOAT - Page 2 EmptyMon Oct 02, 2017 10:30 pm

both layers of the belting are now clamped up and drying out, to take a reasonable shape.


once dry, the outer layer will be glued to the inner layer first to keep it stable and to the position akin to what it is now.


oh it feels good to have a few clamps.
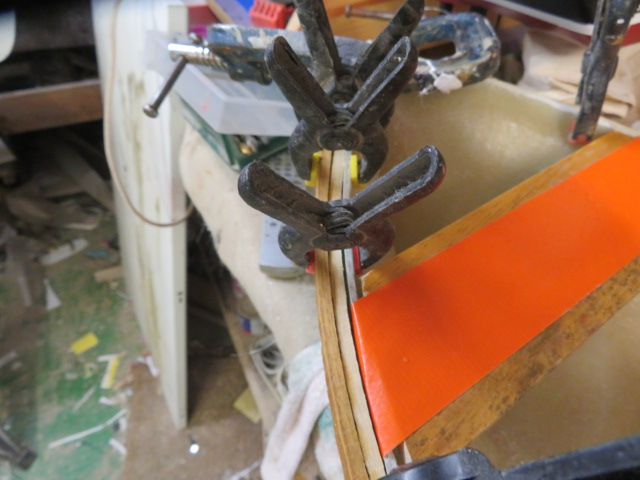
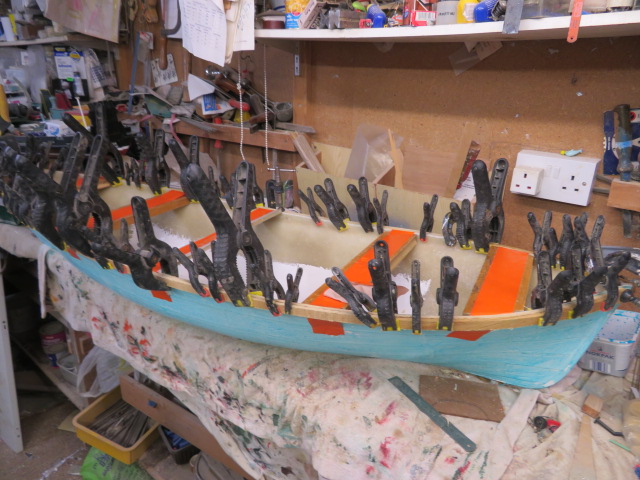

STEAM HYDRAULIC LIFEBOAT - Page 2 Img_6517


STEAM HYDRAULIC LIFEBOAT - Page 2 Img_6520


STEAM HYDRAULIC LIFEBOAT - Page 2 Img_6522
Back to top Go down
Guest
Guest


STEAM HYDRAULIC LIFEBOAT - Page 2 Empty
PostSubject: Re: STEAM HYDRAULIC LIFEBOAT   STEAM HYDRAULIC LIFEBOAT - Page 2 EmptyWed Oct 04, 2017 7:21 pm

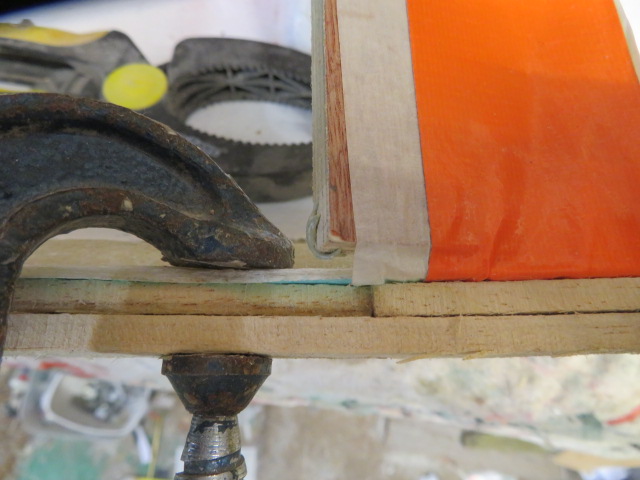
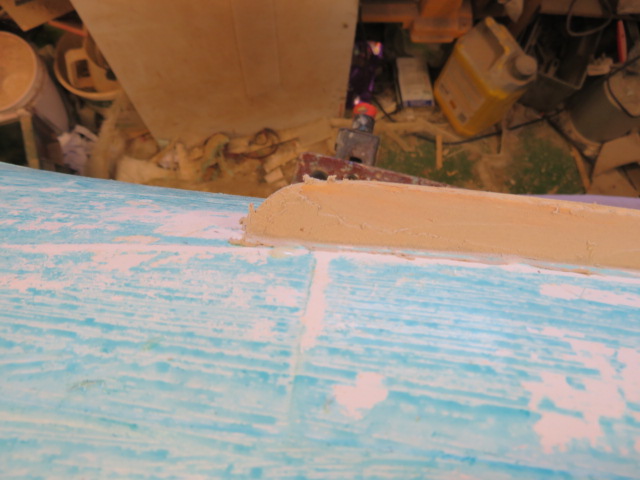
The starboard sde belting has been removed now the glue adhering the two strips together has set. the belting has kept much of it's form and curve.

the hull has been sanded smooth and 2.5 mm holes drilled into the hull centrally along the flat face of the upper bulwarks to take the 1/2" x6 screws.

the hull was wiped with a damp cloth and the glue, called Gater Glue and totally waterproof, so it says lol [similar to gorilla glue] was applied to the timber. it was reclamped up to the hull and screwed up tight to the grp moulding using the screws from the inside.

hopefully I'll get the other side on to the hull tomorrow.........going to give it a good enough of time to set solidly.
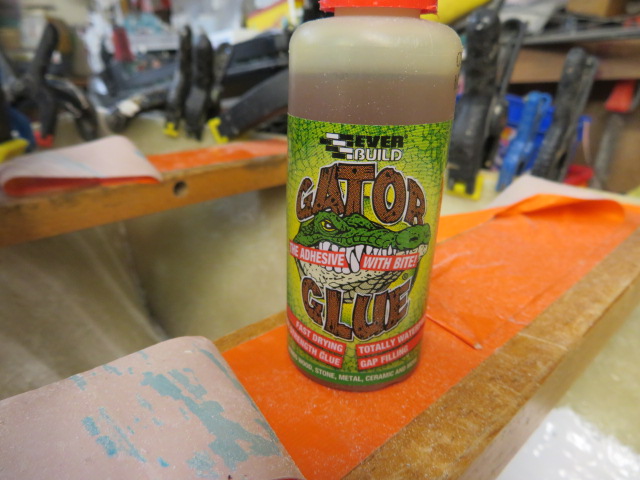
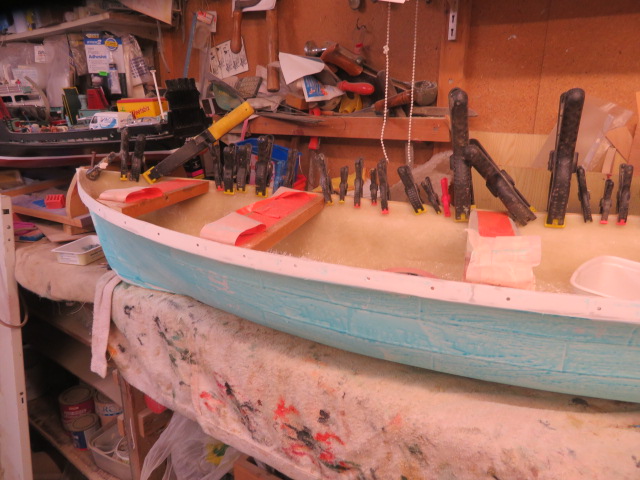
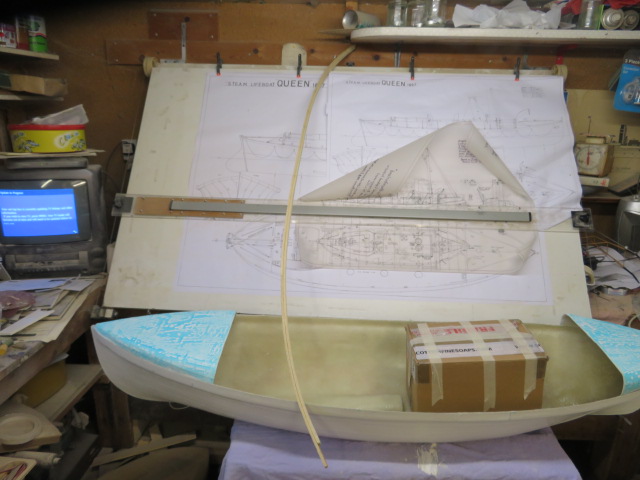
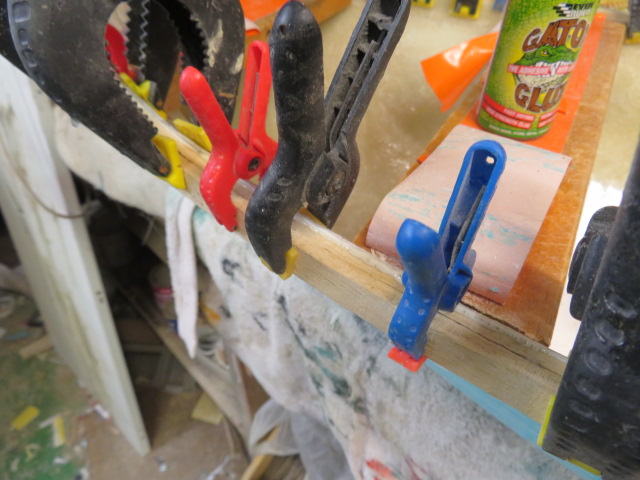

STEAM HYDRAULIC LIFEBOAT - Page 2 Img_6523


STEAM HYDRAULIC LIFEBOAT - Page 2 Img_6524


STEAM HYDRAULIC LIFEBOAT - Page 2 Img_6525


STEAM HYDRAULIC LIFEBOAT - Page 2 Img_6526
Back to top Go down
Guest
Guest


STEAM HYDRAULIC LIFEBOAT - Page 2 Empty
PostSubject: Re: STEAM HYDRAULIC LIFEBOAT   STEAM HYDRAULIC LIFEBOAT - Page 2 EmptyThu Oct 05, 2017 9:34 am

i'm cracking on with this at the moment as I just want to get a few basics done for a forthcoming show in Blackpool near home in 2 weeks time........just need to get the belting on, and the deck beams in plus the end boxes on.........

the first side has now been glued on and set. it has also been screwed in place from the inside of the hull.

on to the second side now, but before I do.......off down to the tool shop to get a decent cross head screw driver, as the one I have is knackered and keeps slipping out of the screw.
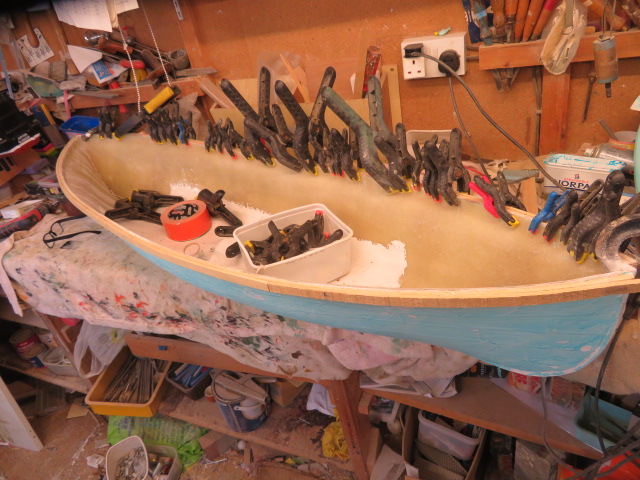
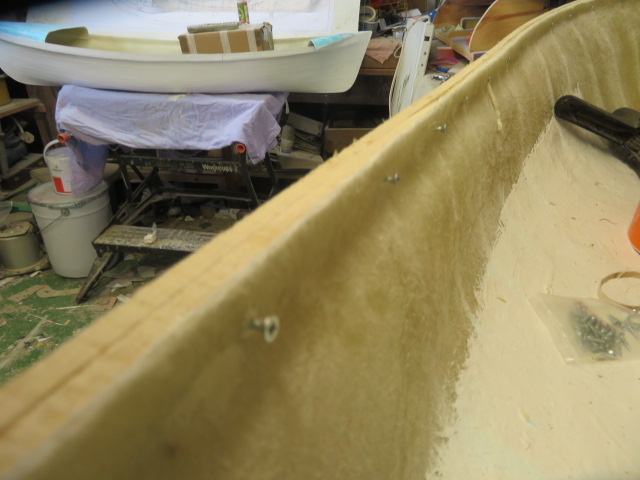
STEAM HYDRAULIC LIFEBOAT - Page 2 Img_6527


STEAM HYDRAULIC LIFEBOAT - Page 2 Img_6528


STEAM HYDRAULIC LIFEBOAT - Page 2 Img_6529
Back to top Go down
Guest
Guest


STEAM HYDRAULIC LIFEBOAT - Page 2 Empty
PostSubject: Re: STEAM HYDRAULIC LIFEBOAT   STEAM HYDRAULIC LIFEBOAT - Page 2 EmptyThu Oct 05, 2017 11:41 am

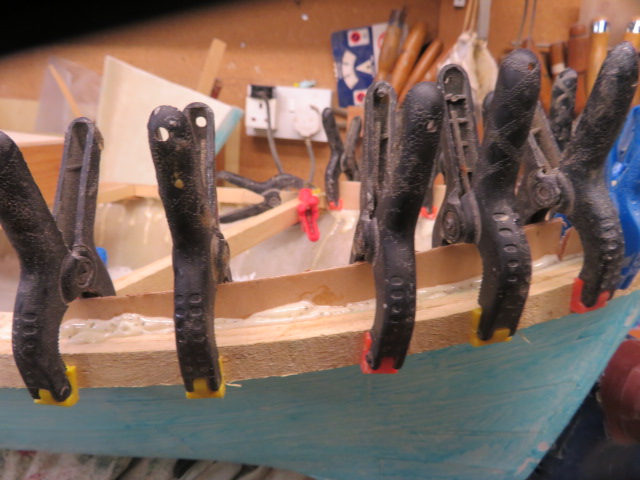
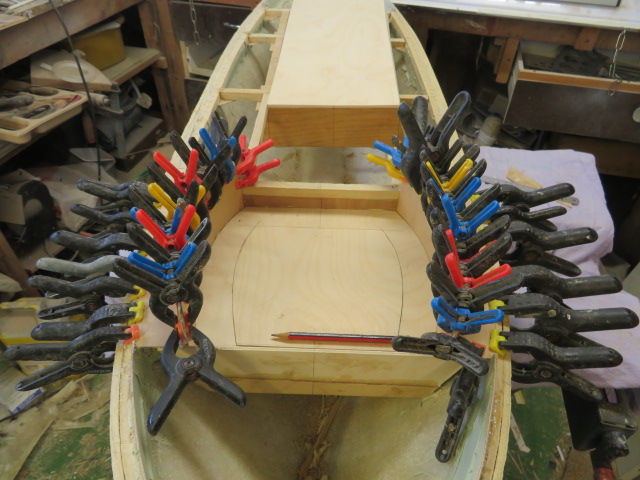
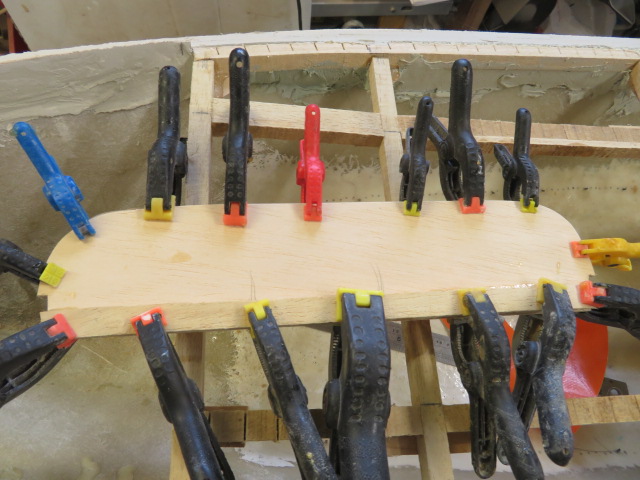
second side on, the glue is foaming, so at least working. I have 4 G cramps and as many spring clamps on the belting as will fit.......no space for any more so a good universal grip right the way along.........if you have them, use them...............

no good leaving gaps of lesser pressure at places where the grip will be less...........

and in the heated workshop hopefully I'll be able to start screwing it on for total bonding later tonight, and as each clamp taken off I'll put a screw in to hold the area tight.
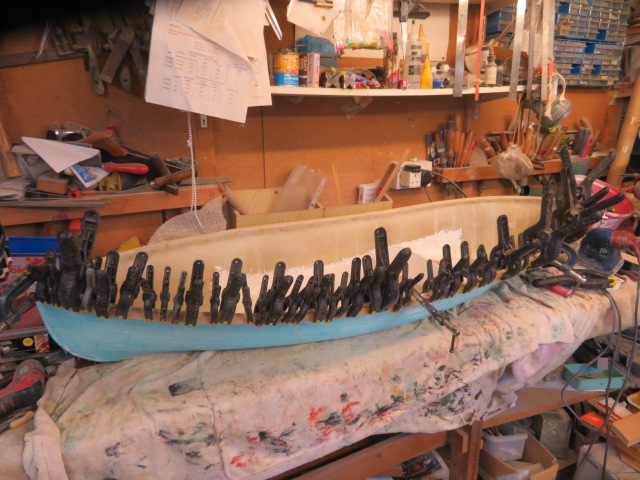
STEAM HYDRAULIC LIFEBOAT - Page 2 Img_6530
Back to top Go down
Guest
Guest


STEAM HYDRAULIC LIFEBOAT - Page 2 Empty
PostSubject: Re: STEAM HYDRAULIC LIFEBOAT   STEAM HYDRAULIC LIFEBOAT - Page 2 EmptyThu Oct 05, 2017 1:59 pm

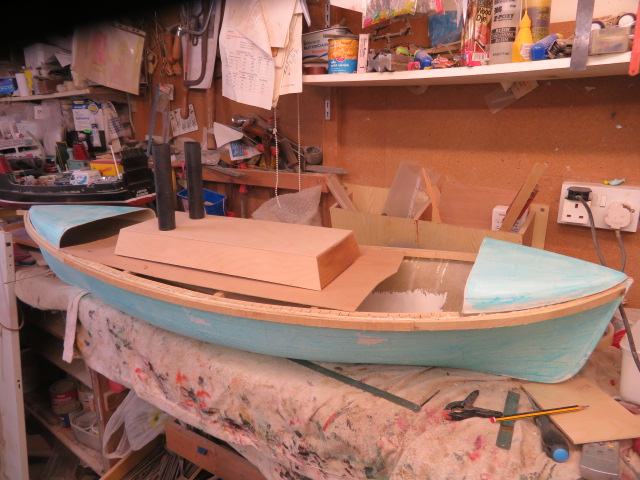
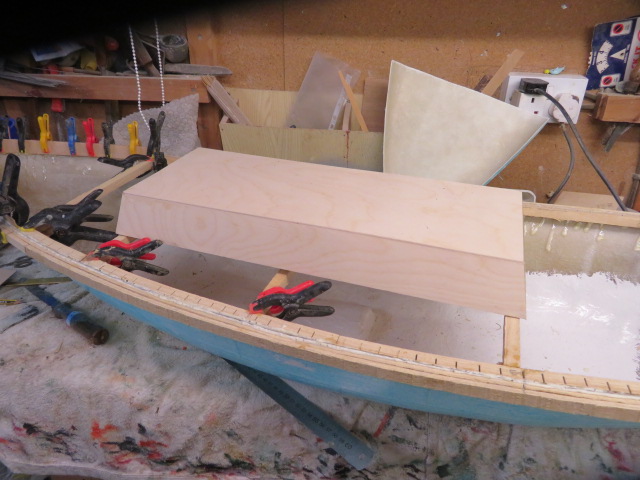
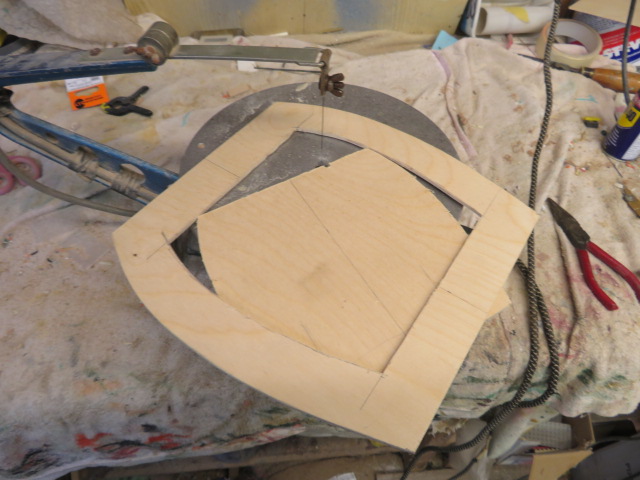
Sadly the mould I made for the main cabin was a flop.......more gaps between gelcoat and matting than a Swiss gruyere cheese and so it went in the bin, and so I decided to make the cabin from 3.5mm ply, and here is the first part of the construction.....main uprights made first using my sliding bevel to get the angles of the ends correct, cutting on a band saw and then using epoxy to glue the 4 walls and then the Gator glue to fix the top down.

Weighted down with old batteries it has been left to set till later.

didn't realise just how much ply it would take...........used a whole 2' sheet of 3.5 ply that arrived this morning........none left now to make the deck surrounds..........7 quid for a cabin............must be getting old moaning about that xpense, lol.
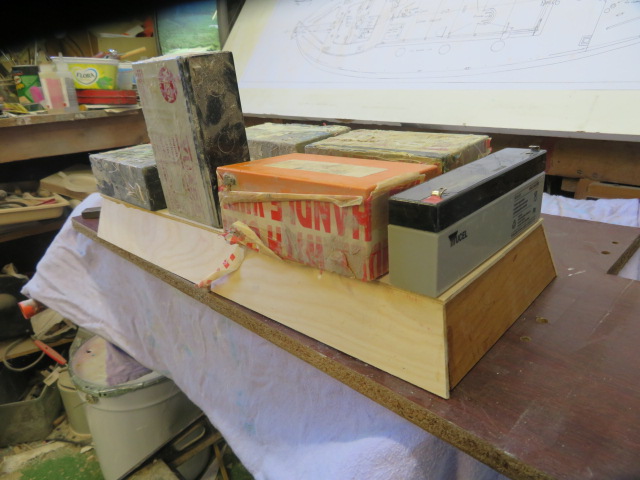
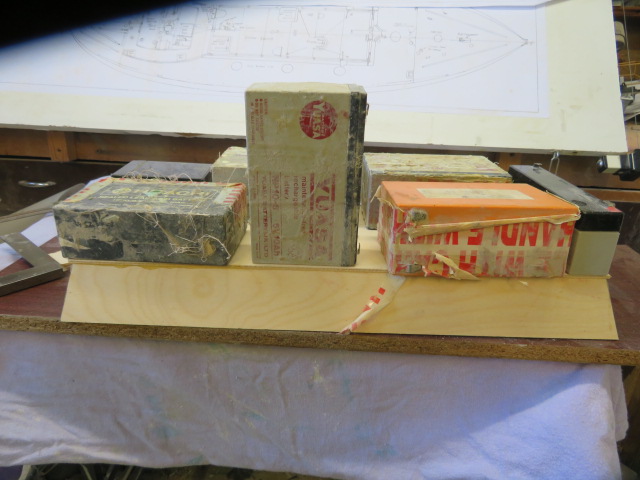

STEAM HYDRAULIC LIFEBOAT - Page 2 Img_6533


STEAM HYDRAULIC LIFEBOAT - Page 2 Img_6534


STEAM HYDRAULIC LIFEBOAT - Page 2 Img_6536
Back to top Go down
Guest
Guest


STEAM HYDRAULIC LIFEBOAT - Page 2 Empty
PostSubject: Re: STEAM HYDRAULIC LIFEBOAT   STEAM HYDRAULIC LIFEBOAT - Page 2 EmptyThu Oct 05, 2017 7:13 pm

unfortunately one of the corners of the fabrication sprung out when the top was weighted down and so I decided to put in corner buttresses to strengthen the corners.


it was, after the glue had set was sanded down on the belt linisher, to  take off the excess timber. I also made a central gusset as a support to stop the long side walls from turning inwards with timber warping. this was glued in using 2 part epoxy.


STEAM HYDRAULIC LIFEBOAT - Page 2 Img_6537


STEAM HYDRAULIC LIFEBOAT - Page 2 Img_6538


STEAM HYDRAULIC LIFEBOAT - Page 2 Img_6543


STEAM HYDRAULIC LIFEBOAT - Page 2 Img_6544


Attention was then turned to the deck supports.


in my usual way, I used some decent sized side supports.........the left over 15 x 15 mm square obeche that I didn't use for the belting. this was cut on the band saw to aid bending around the hull. this was glued in with the Gator glue and clamped in place..


tomorrow i'll set to putting in the cross members to take the hull to the correct beam............not forgetting that I have to make patterns for the pump, so need some space between the beams to play around with chunks of wood.

STEAM HYDRAULIC LIFEBOAT - Page 2 Img_6545


STEAM HYDRAULIC LIFEBOAT - Page 2 Img_6546


STEAM HYDRAULIC LIFEBOAT - Page 2 Img_6547
Back to top Go down
Guest
Guest


STEAM HYDRAULIC LIFEBOAT - Page 2 Empty
PostSubject: Re: STEAM HYDRAULIC LIFEBOAT   STEAM HYDRAULIC LIFEBOAT - Page 2 EmptyFri Oct 06, 2017 4:36 pm

The deck cross beams randomly placed and a plank of plywood placed on top, with the new cabin and "funnels" placed roughly where they should be to give an idea of where the actual deck cross members need to go.


STEAM HYDRAULIC LIFEBOAT - Page 2 Img_6548


STEAM HYDRAULIC LIFEBOAT - Page 2 Img_6549
Back to top Go down
Guest
Guest


STEAM HYDRAULIC LIFEBOAT - Page 2 Empty
PostSubject: Re: STEAM HYDRAULIC LIFEBOAT   STEAM HYDRAULIC LIFEBOAT - Page 2 EmptyFri Oct 06, 2017 8:48 pm

I have now fixed the main cross beams to bear the deck and cabin, and supported them with 1.8mm ply, all fixed with two part epoxy.


next job, was to glue in guides for the two end boxes. I used this method some years ago when fixing the end boxes on both the pulling and sailing lifeboats seen in the masterclass section and also the Liverpool class lifeboat that went to Metcalf mouldings.


it is an easy way of locating the two boxes and fixed in place with goodly amounts of filler both interior and exterior to the moulding and then sanded down to a smooth even relief.


STEAM HYDRAULIC LIFEBOAT - Page 2 Img_6550


STEAM HYDRAULIC LIFEBOAT - Page 2 Img_6551


STEAM HYDRAULIC LIFEBOAT - Page 2 Img_6552


STEAM HYDRAULIC LIFEBOAT - Page 2 Img_6553


STEAM HYDRAULIC LIFEBOAT - Page 2 Img_6554
Back to top Go down
Guest
Guest


STEAM HYDRAULIC LIFEBOAT - Page 2 Empty
PostSubject: Re: STEAM HYDRAULIC LIFEBOAT   STEAM HYDRAULIC LIFEBOAT - Page 2 EmptySun Oct 08, 2017 2:30 pm

saw this amazing little bit of kit on mayhem, and I have just spoken to the guy via phone, and am taking the boat over to him week after next to discuss using two pumps running off brushless motors [ one for forward propulsion and one for reverse, or one single pump with a manifold. the guy is an engineer and 3d prints the details and then casts them in his own foundry........so I'm hoping that he can come up with a specifically designed unit for the boat.

STEAM HYDRAULIC LIFEBOAT - Page 2 Pump10
Back to top Go down
Guest
Guest


STEAM HYDRAULIC LIFEBOAT - Page 2 Empty
PostSubject: Re: STEAM HYDRAULIC LIFEBOAT   STEAM HYDRAULIC LIFEBOAT - Page 2 EmptySun Oct 08, 2017 2:32 pm

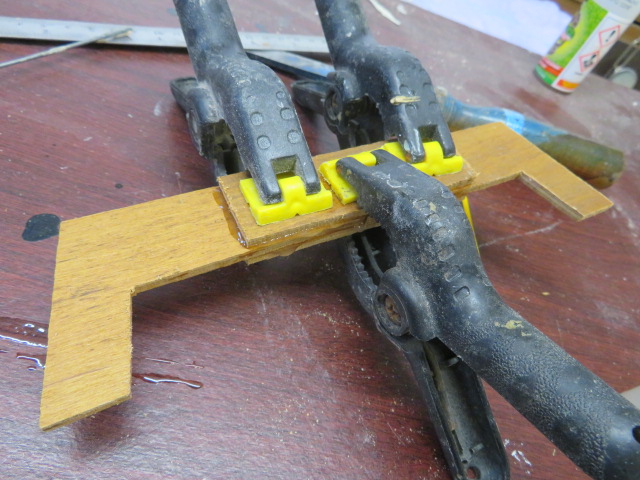
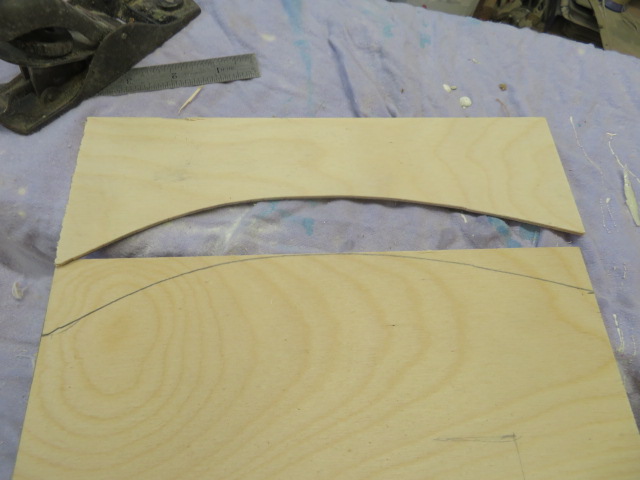
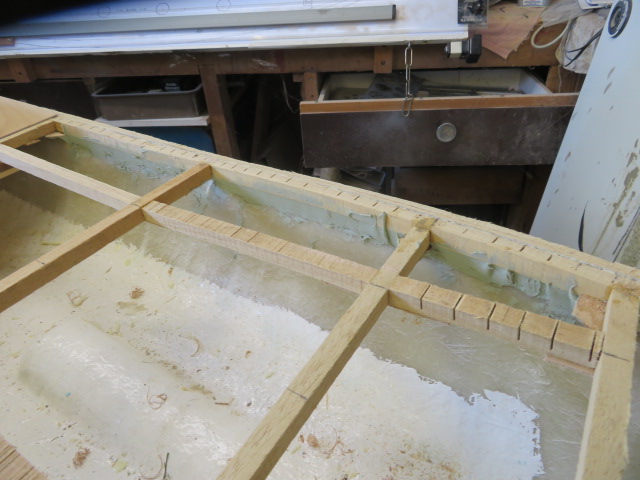
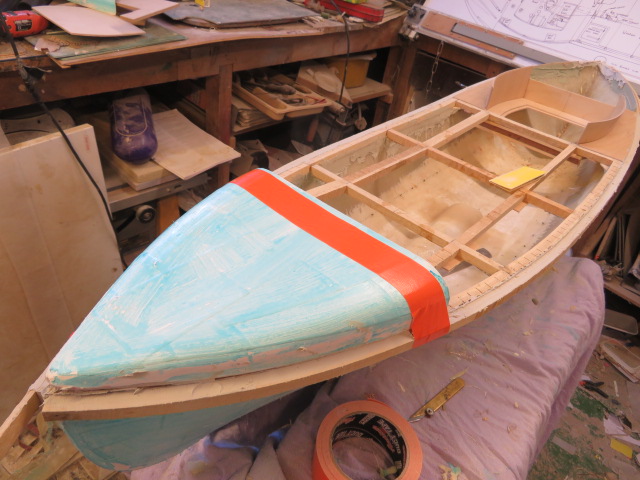
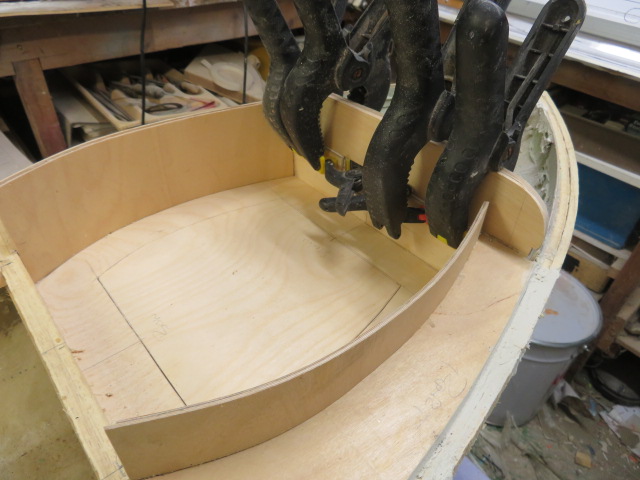
back to the actual building.......I have cut the guides down for the end boxes to glue on to, and cut the deck support beams running fore/aft, but haven't glued those in just yet.
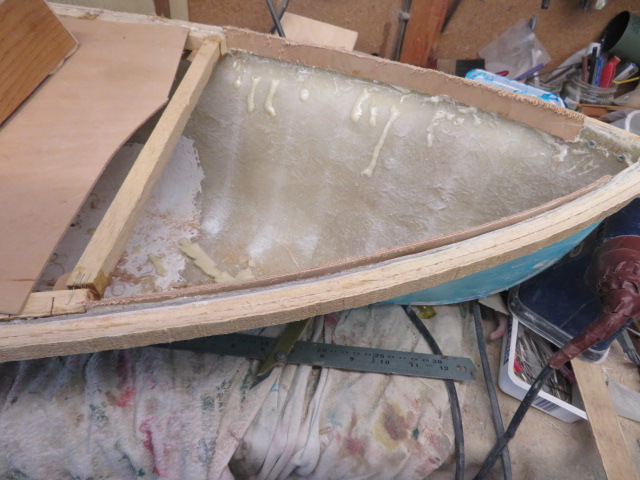

STEAM HYDRAULIC LIFEBOAT - Page 2 Img_6556
Back to top Go down
Guest
Guest


STEAM HYDRAULIC LIFEBOAT - Page 2 Empty
PostSubject: Re: STEAM HYDRAULIC LIFEBOAT   STEAM HYDRAULIC LIFEBOAT - Page 2 EmptySun Oct 08, 2017 2:43 pm

next was to fabricate the end walls and the main deck for the aft well deck...........this hurt my brain as I had to actually think about it, and contemplate how I was going to do it whilst retaining access to the aft end box and the hull below the well deck, whilst fixing the walls to the deck beams.
in the end I made some wooden brackets to fix to the deck beams.
the hole in the floor of the well deck was cut with the first power tool I ever bought for my hobby, back in 1979 from a school I used to teach at.


it has had good use over the years and "touch wood" will continue to do so all but on a very rare occasion these days...........but the best 15 quid I ever spent.


STEAM HYDRAULIC LIFEBOAT - Page 2 Img_6557


STEAM HYDRAULIC LIFEBOAT - Page 2 Img_6558


STEAM HYDRAULIC LIFEBOAT - Page 2 Img_6559

STEAM HYDRAULIC LIFEBOAT - Page 2 Img_6560


STEAM HYDRAULIC LIFEBOAT - Page 2 Img_6561


STEAM HYDRAULIC LIFEBOAT - Page 2 Img_6562


STEAM HYDRAULIC LIFEBOAT - Page 2 Img_6563
Back to top Go down
Guest
Guest


STEAM HYDRAULIC LIFEBOAT - Page 2 Empty
PostSubject: Re: STEAM HYDRAULIC LIFEBOAT   STEAM HYDRAULIC LIFEBOAT - Page 2 EmptySun Oct 08, 2017 2:48 pm

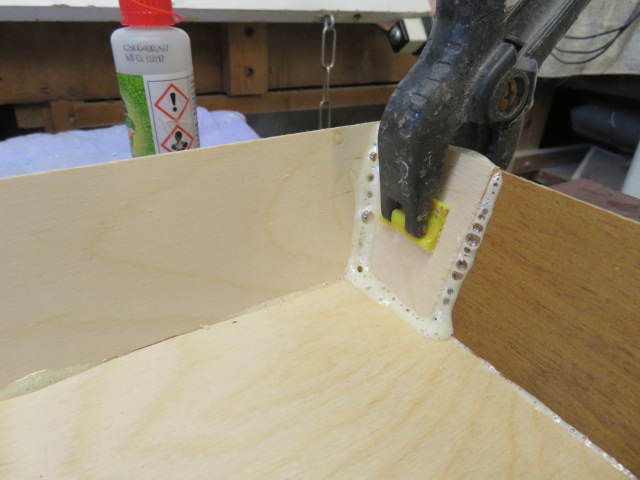
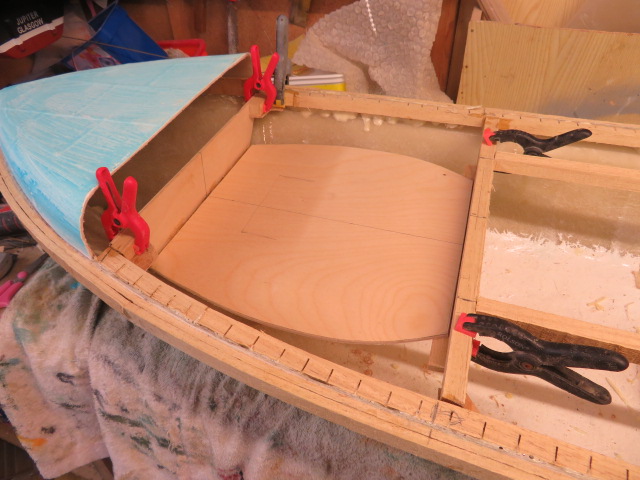
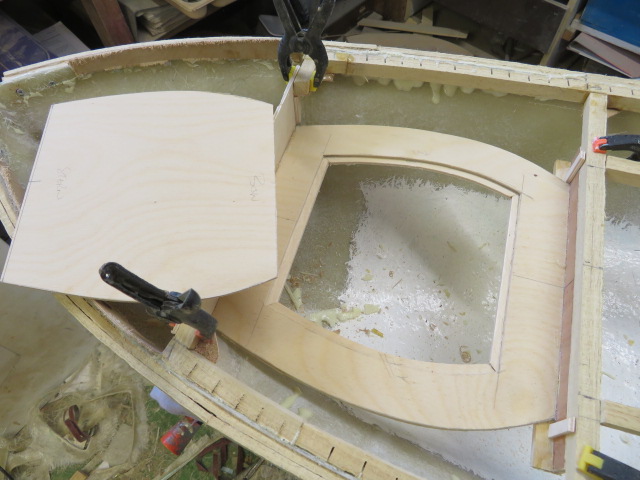
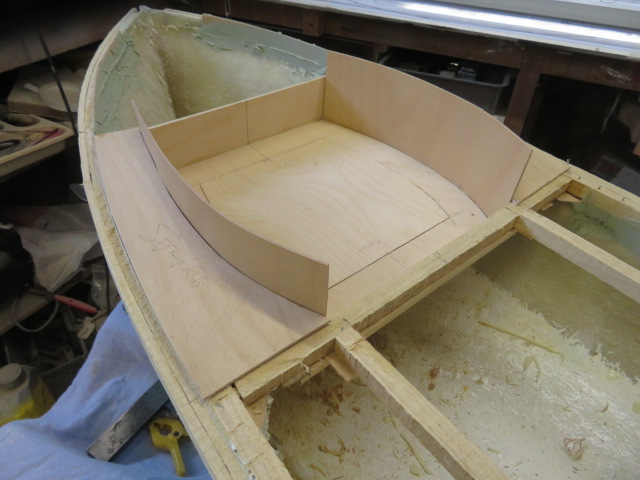
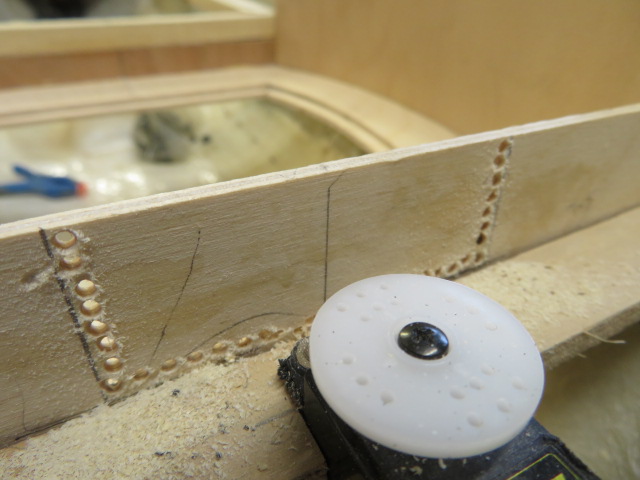
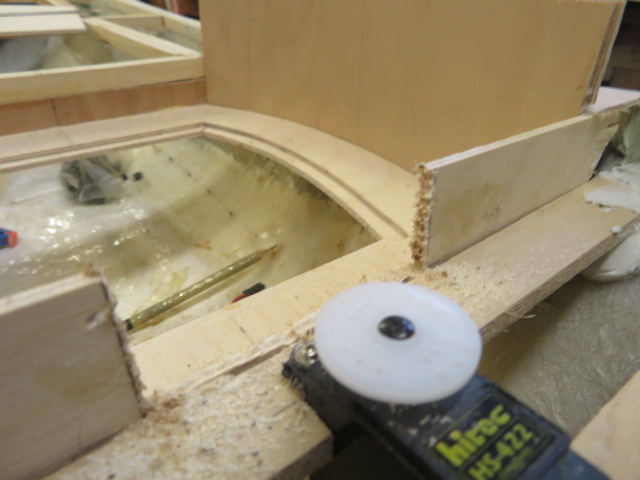
I then put onto the two end walls, the guides for the side walls to fit into, which will be seen to work later. they were made from 5mm ply, bevelled one edge to take the wall.

then support lip for the removable floor was glued in to the underside of the structures access hole.

finally the side floors were thickened by a second layer of 3,5mm ply, which is what the main floor is made from, so that the side walls have ample gluing surface to attach to..............all using waterproof aliphatic resin quick grab glue and plenty of clamps.
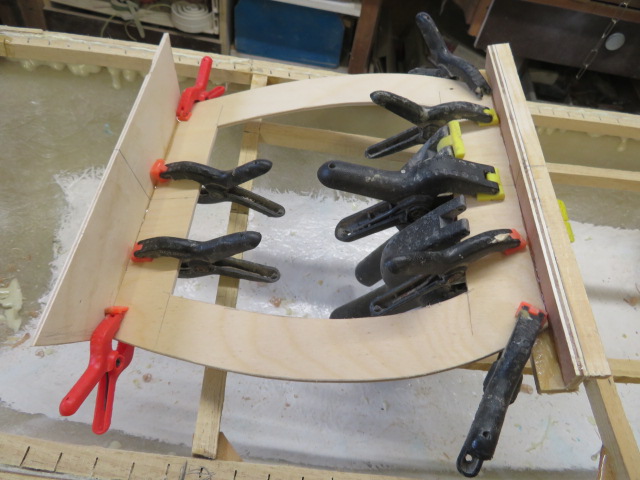
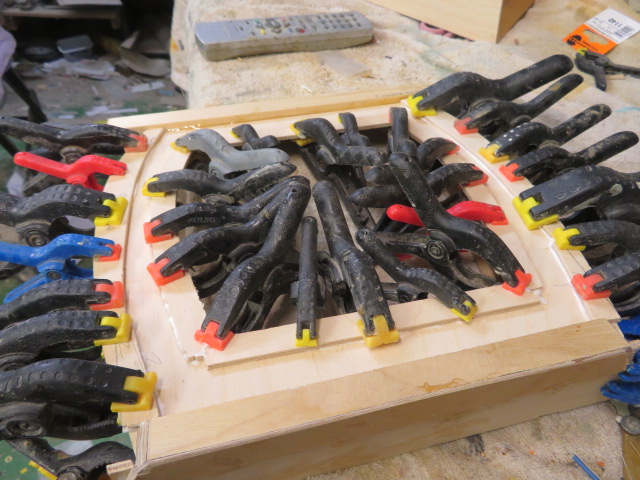
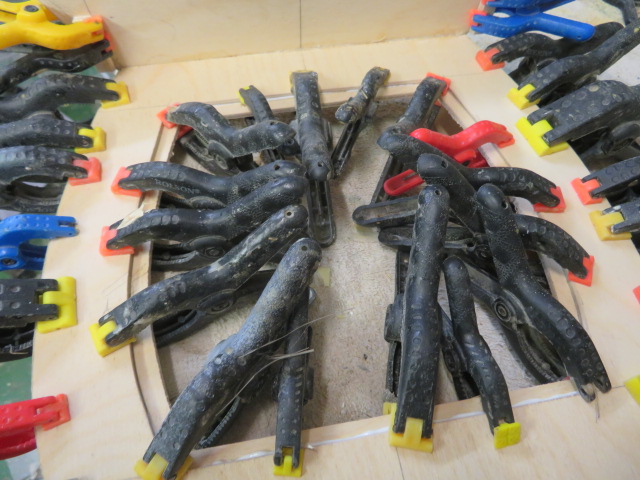
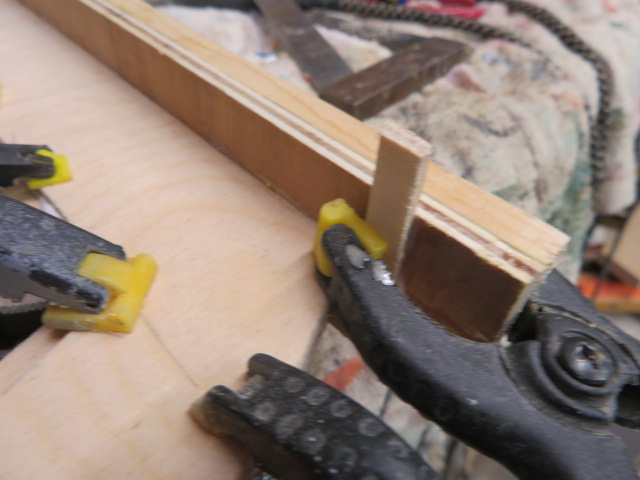

STEAM HYDRAULIC LIFEBOAT - Page 2 Img_6564


STEAM HYDRAULIC LIFEBOAT - Page 2 Img_6565


STEAM HYDRAULIC LIFEBOAT - Page 2 Img_6566


STEAM HYDRAULIC LIFEBOAT - Page 2 Img_6567
Back to top Go down
Guest
Guest


STEAM HYDRAULIC LIFEBOAT - Page 2 Empty
PostSubject: Re: STEAM HYDRAULIC LIFEBOAT   STEAM HYDRAULIC LIFEBOAT - Page 2 EmptySun Oct 08, 2017 2:59 pm

the floor has been completed with the cut out access to the hull now done.


next thing was to make the side walls and fit them. In order to facilitate the bend in them I made this easier by cutting the 1.6mm ply across the grain instead of lengthways, making bending no problem at all. these were glued with aliphatic quick grip resin and slipped into the upright guides fitted earlier........... and then nailed with small pins to the thickened base for extra grip.


only then did I glue in all of the  fore /aft deck beams in place, adding two extra ones in the aft section where the well deck will go. the reason for this is to eventually offer up the base of the well deck to the top of the aft beams, and then cut the beams to the round shape of the well deck sides so that the sides can be glued to the beams to make  a permanent fixture.


STEAM HYDRAULIC LIFEBOAT - Page 2 Img_6568


STEAM HYDRAULIC LIFEBOAT - Page 2 Img_6570


STEAM HYDRAULIC LIFEBOAT - Page 2 Img_6572


STEAM HYDRAULIC LIFEBOAT - Page 2 Img_6573


STEAM HYDRAULIC LIFEBOAT - Page 2 Img_6574


STEAM HYDRAULIC LIFEBOAT - Page 2 Img_6576


STEAM HYDRAULIC LIFEBOAT - Page 2 Img_6577


STEAM HYDRAULIC LIFEBOAT - Page 2 Img_6578
Back to top Go down
Guest
Guest


STEAM HYDRAULIC LIFEBOAT - Page 2 Empty
PostSubject: Re: STEAM HYDRAULIC LIFEBOAT   STEAM HYDRAULIC LIFEBOAT - Page 2 EmptyTue Oct 10, 2017 1:25 pm

the joint between the side deck support beams has now been strengthened and waterproofed by a fillet of polyester filler, right around the inner bulwarks......i'm happy now that I can start putting the deck on in sections,
and after gluing in place the well deck I have cut to shape and added the side decks to the well deck.as no access is needed under this little bit.


STEAM HYDRAULIC LIFEBOAT - Page 2 Img_6510


STEAM HYDRAULIC LIFEBOAT - Page 2 Img_6511


STEAM HYDRAULIC LIFEBOAT - Page 2 Img_6512
Back to top Go down
Guest
Guest


STEAM HYDRAULIC LIFEBOAT - Page 2 Empty
PostSubject: Re: STEAM HYDRAULIC LIFEBOAT   STEAM HYDRAULIC LIFEBOAT - Page 2 EmptyTue Oct 10, 2017 5:58 pm

A second skin has been glued to the outside side walls of the well deck, above deck level. this will both strengthen the structure and also keep the first layer from twisting.


STEAM HYDRAULIC LIFEBOAT - Page 2 Img_6610


STEAM HYDRAULIC LIFEBOAT - Page 2 Img_6513
Back to top Go down
barriew
Captain (moderator)
Captain (moderator)


Posts : 2631
Join date : 2011-11-26
Age : 83
Location : Thaxted, Essex

STEAM HYDRAULIC LIFEBOAT - Page 2 Empty
PostSubject: Re: STEAM HYDRAULIC LIFEBOAT   STEAM HYDRAULIC LIFEBOAT - Page 2 EmptyTue Oct 10, 2017 6:29 pm

You're racing along with this one Neil 2thumbsup 2thumbsup

Barrie
Back to top Go down
Guest
Guest


STEAM HYDRAULIC LIFEBOAT - Page 2 Empty
PostSubject: Re: STEAM HYDRAULIC LIFEBOAT   STEAM HYDRAULIC LIFEBOAT - Page 2 EmptyTue Oct 10, 2017 8:53 pm

I am absolutely amazed just how easily it is going together Barrie........no fiddly bits to fabricate like wooden effect cockpits, small amount of fittings to make and everything big and chunky...........I am also enjoying building something that I have wanted to buil for many years. Thumbup
Back to top Go down
barriew
Captain (moderator)
Captain (moderator)


Posts : 2631
Join date : 2011-11-26
Age : 83
Location : Thaxted, Essex

STEAM HYDRAULIC LIFEBOAT - Page 2 Empty
PostSubject: Re: STEAM HYDRAULIC LIFEBOAT   STEAM HYDRAULIC LIFEBOAT - Page 2 EmptyWed Oct 11, 2017 8:49 am

Its obvious that you should stick to building lifeboats. 2thumbsup 2thumbsup 2thumbsup

Barrie
Back to top Go down
Guest
Guest


STEAM HYDRAULIC LIFEBOAT - Page 2 Empty
PostSubject: Re: STEAM HYDRAULIC LIFEBOAT   STEAM HYDRAULIC LIFEBOAT - Page 2 EmptyWed Oct 11, 2017 12:34 pm

I must admit I am happiest when building a lifeboat, matey......feel in my own world and element, and can't wait to get back into the build each day.

having said that have been running my daughter around this morning so won't be back on it till this afternoon/evening at the earliest.
Back to top Go down
Guest
Guest


STEAM HYDRAULIC LIFEBOAT - Page 2 Empty
PostSubject: Re: STEAM HYDRAULIC LIFEBOAT   STEAM HYDRAULIC LIFEBOAT - Page 2 EmptyWed Oct 11, 2017 4:11 pm

There I was, charging ahead, when a sudden thought came to my head............bilge keels   errrm.........had forgotten all about them and was just about to start putting the decks on.........


so I cut two chunks of obeche from my stock, and then used the tilt table of the band saw and cut the side angles.


once cut, I used my eye, to cut the lengthways curve of each keel. I could have made a jig from a French curve I have, but it would probably have taken longer than to take the plunge and do it by guesswork...........and luckily I hit it bang on first cut......so transferred the shape to the second keel and cut that one too.


next was to drill the jointing face every 60mm or so to take a 1.8mm rod of stainless steel......which would be used to locate and hold the keel in place. I marked the position  on a piece of masking tape run along the crease of a section of plating, and as such both placed in the exact position.

STEAM HYDRAULIC LIFEBOAT - Page 2 Img_6612
the hull was then drilled to take the steel rods and the keels dry fitted.........so far so good.


STEAM HYDRAULIC LIFEBOAT - Page 2 Img_6611


STEAM HYDRAULIC LIFEBOAT - Page 2 Img_6613


STEAM HYDRAULIC LIFEBOAT - Page 2 Img_6616

STEAM HYDRAULIC LIFEBOAT - Page 2 Img_6619


STEAM HYDRAULIC LIFEBOAT - Page 2 Img_6620


STEAM HYDRAULIC LIFEBOAT - Page 2 Img_6621


STEAM HYDRAULIC LIFEBOAT - Page 2 Img_6622


STEAM HYDRAULIC LIFEBOAT - Page 2 Img_6624
Back to top Go down
Guest
Guest


STEAM HYDRAULIC LIFEBOAT - Page 2 Empty
PostSubject: Re: STEAM HYDRAULIC LIFEBOAT   STEAM HYDRAULIC LIFEBOAT - Page 2 EmptyWed Oct 11, 2017 8:00 pm

and now been glued up using very strong gaffa tape and 15 minute 2 part epoxy.......shall leave that overnight to set, and then filled on the outside, but with some grp matting and resin on the inside..
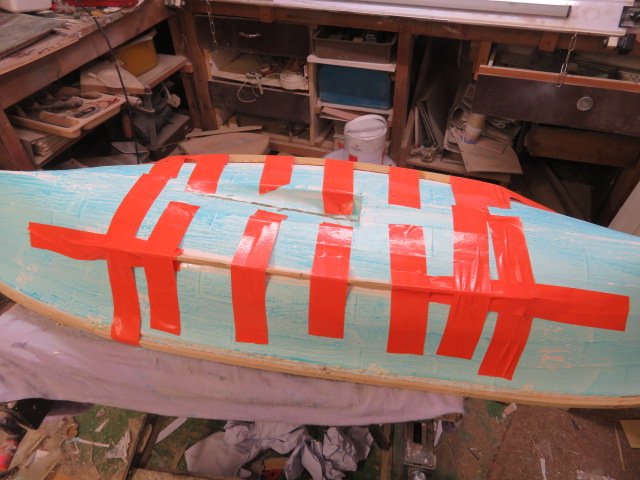

  STEAM HYDRAULIC LIFEBOAT - Page 2 Img_6625
Back to top Go down
Guest
Guest


STEAM HYDRAULIC LIFEBOAT - Page 2 Empty
PostSubject: Re: STEAM HYDRAULIC LIFEBOAT   STEAM HYDRAULIC LIFEBOAT - Page 2 EmptyThu Oct 12, 2017 6:54 am

Looking good Neil.  2thumbsup 2thumbsup 2thumbsup 2thumbsup 2thumbsup 2thumbsup 2thumbsup 2thumbsup 2thumbsup
Back to top Go down
Guest
Guest


STEAM HYDRAULIC LIFEBOAT - Page 2 Empty
PostSubject: Re: STEAM HYDRAULIC LIFEBOAT   STEAM HYDRAULIC LIFEBOAT - Page 2 EmptyThu Oct 12, 2017 10:19 am

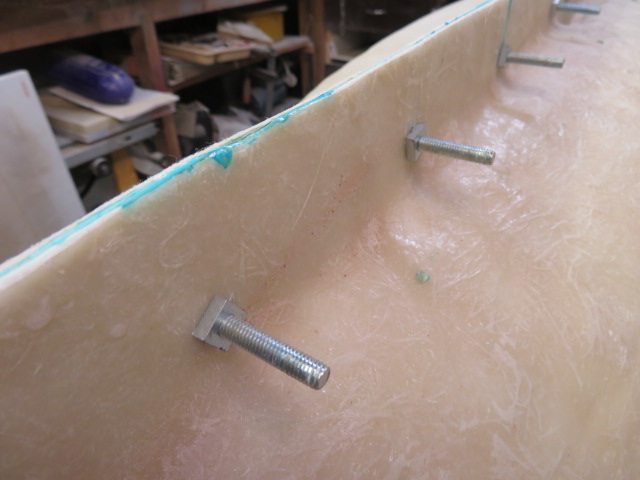
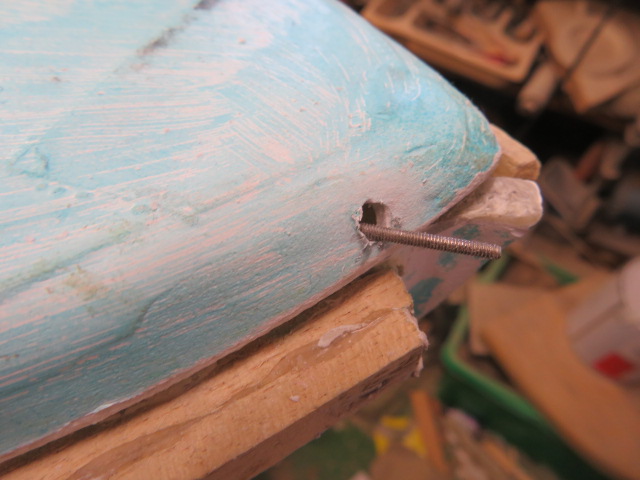
thanks guys......appreciate the comments.

I have been at it again.........before taking off the tape and pressure from the bilge keels, this morning I cut some strips of fine surface tissue and laid them over the steel pegs and holes on the inside of the hull, and sealed in with some polyester resin. I put 4 layers of tissue over the steel pegs/holes to give good purchase and holding power. hopefully the bile keels will now be rock solid and secure.


I also, whilst I had some resin mixed, put multiple strips of surface tissue over the top end of the water scoop tunnel on the inside to build up a little thickness to eventually take the inlet tubes for the pumps, because as yet the diameter of these hasn't been chosen.
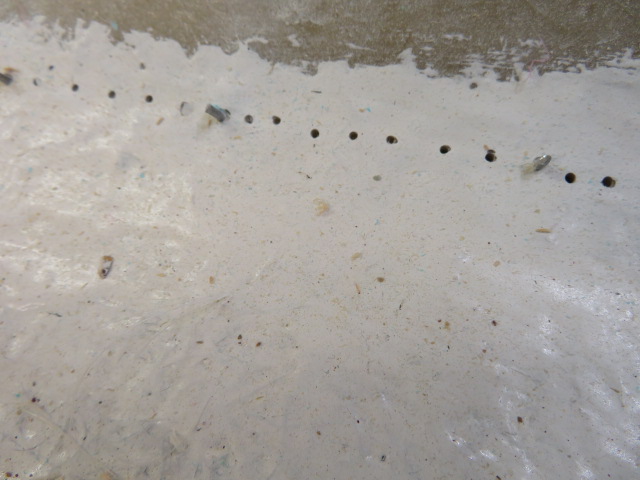
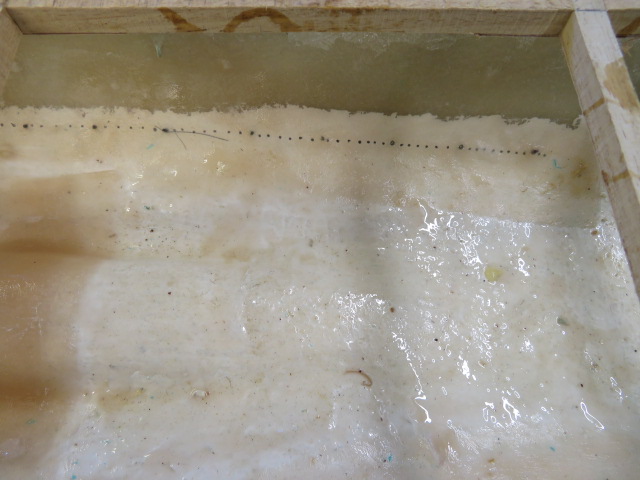
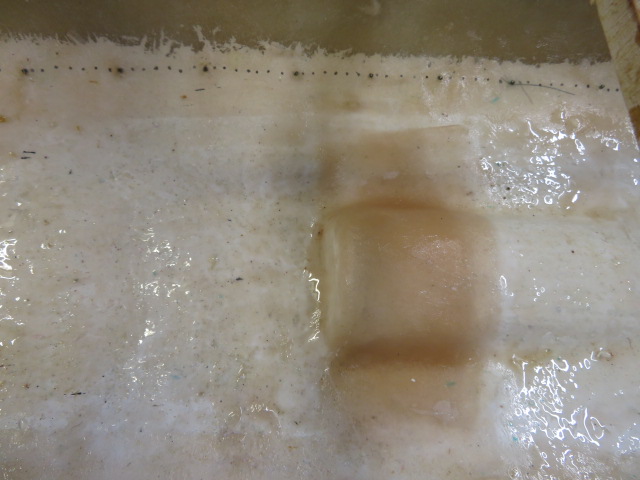

STEAM HYDRAULIC LIFEBOAT - Page 2 Img_6626


STEAM HYDRAULIC LIFEBOAT - Page 2 Img_6627


STEAM HYDRAULIC LIFEBOAT - Page 2 Img_6628


STEAM HYDRAULIC LIFEBOAT - Page 2 Img_6629
Back to top Go down
Guest
Guest


STEAM HYDRAULIC LIFEBOAT - Page 2 Empty
PostSubject: Re: STEAM HYDRAULIC LIFEBOAT   STEAM HYDRAULIC LIFEBOAT - Page 2 EmptyThu Oct 12, 2017 12:46 pm

and for the rest of the morning I have filled in the gaps left between hull and bilge keels plus the top/bottom edges of the belting, and readied the fore end box for gluing on this afternoon using  something or other.....not decided yet........making it up as I go along........"he who dares" as Del boy would say.


STEAM HYDRAULIC LIFEBOAT - Page 2 Img_6630


STEAM HYDRAULIC LIFEBOAT - Page 2 Img_6631
Back to top Go down
Guest
Guest


STEAM HYDRAULIC LIFEBOAT - Page 2 Empty
PostSubject: Re: STEAM HYDRAULIC LIFEBOAT   STEAM HYDRAULIC LIFEBOAT - Page 2 EmptyThu Oct 12, 2017 7:40 pm

my next job is to make the bulkheads for the two end boxes...made from 3.5mm ply a thickener around the top and sides on the inside of the bulkhead to give better adherence to the top.


they have either been added with a spacer to fit to the line of the deck or aft.


then a support for the rear rudder servo was constructed, servo added ready for when the top end box goes on permanently, and front access hatch cut out using drills first and then my Worx sonic sander to trim up.


STEAM HYDRAULIC LIFEBOAT - Page 2 Img_6632


STEAM HYDRAULIC LIFEBOAT - Page 2 Img_6633


STEAM HYDRAULIC LIFEBOAT - Page 2 Img_6634


STEAM HYDRAULIC LIFEBOAT - Page 2 Img_6635


STEAM HYDRAULIC LIFEBOAT - Page 2 Img_6636


STEAM HYDRAULIC LIFEBOAT - Page 2 Img_6637


STEAM HYDRAULIC LIFEBOAT - Page 2 Img_6638


STEAM HYDRAULIC LIFEBOAT - Page 2 Img_6639


STEAM HYDRAULIC LIFEBOAT - Page 2 Img_6640


STEAM HYDRAULIC LIFEBOAT - Page 2 Img_6641


STEAM HYDRAULIC LIFEBOAT - Page 2 Img_6642


STEAM HYDRAULIC LIFEBOAT - Page 2 Img_6643
Back to top Go down
Guest
Guest


STEAM HYDRAULIC LIFEBOAT - Page 2 Empty
PostSubject: Re: STEAM HYDRAULIC LIFEBOAT   STEAM HYDRAULIC LIFEBOAT - Page 2 EmptyFri Oct 13, 2017 4:08 pm

all steaming along happily in order to get the end boxes on I had to fit the second half of the rear bulkhead, cutting the upper part of the servo access  port, and then gluing the bulkhead in place using epoxy.


next was to fabricate the linkage from the servo to the rudder. I was dreading this as I thought I'd have to go through the rigmarole of doing what I did with the pulling sailing boats and use cord for linkage.........but no......the main steering rod on the real ship was an external rod to the tiller bar on the rudder.........so the actual steering rod will fit under the end box and just protrude through the box immediately under the dummy steering rod. the rod was extended using two servo linkage rods and a length of brass tubing, and all silver soldered together.


STEAM HYDRAULIC LIFEBOAT - Page 2 Img_6644


STEAM HYDRAULIC LIFEBOAT - Page 2 Img_6645


STEAM HYDRAULIC LIFEBOAT - Page 2 Img_6646


STEAM HYDRAULIC LIFEBOAT - Page 2 Img_6647


STEAM HYDRAULIC LIFEBOAT - Page 2 Img_6648
Back to top Go down
Guest
Guest


STEAM HYDRAULIC LIFEBOAT - Page 2 Empty
PostSubject: Re: STEAM HYDRAULIC LIFEBOAT   STEAM HYDRAULIC LIFEBOAT - Page 2 EmptyFri Oct 13, 2017 6:29 pm

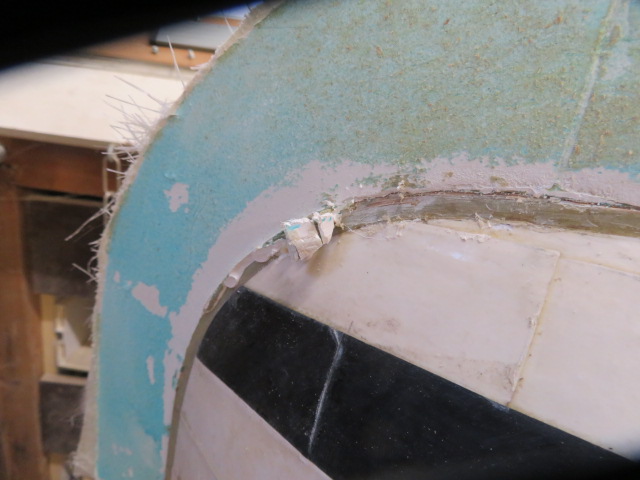
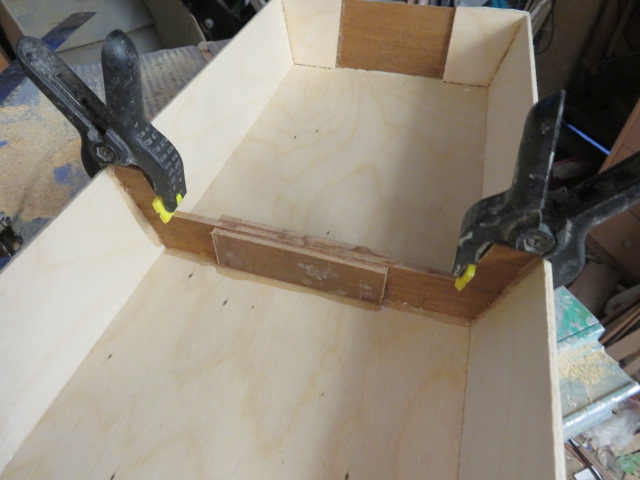
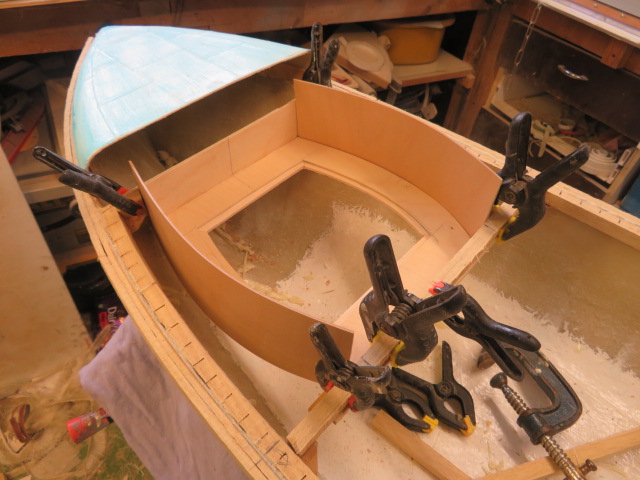
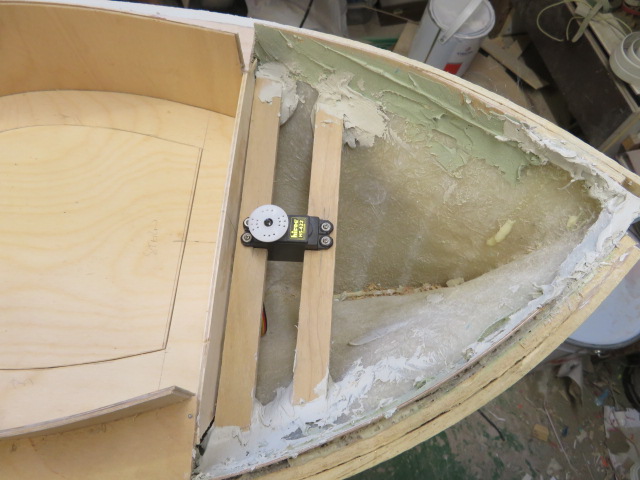
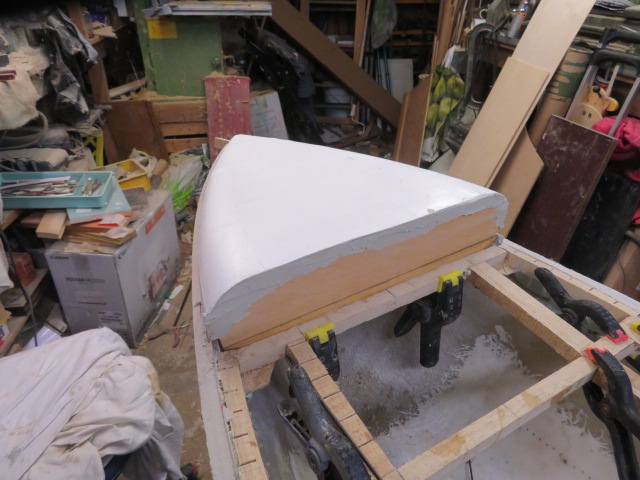
I cannot believe that it has only been two weeks since I took the mouldings I am working on out of the moulds. it has been a quicker build so far than any kit I have ever built.


today, and probably the last bit of work on it tonight I fitted the front end box.........using polyester car body filler, smearing it on the inside leading edges of the box and placing it onto the flanges running around the inside of the hull to locate it. I glued the lower wooden part of the bulkhead to the deck cross beam using waterproof glue. this I'll leave to set until tomorrow and under weight from batteries. then I'll fill the gaps between the top and deck.


whilst this was setting I inserted a plastic guide into the aft end box for the servo arm linkage, and set with cyano to begin with.
that's it for today.......going to have tea and a beer.
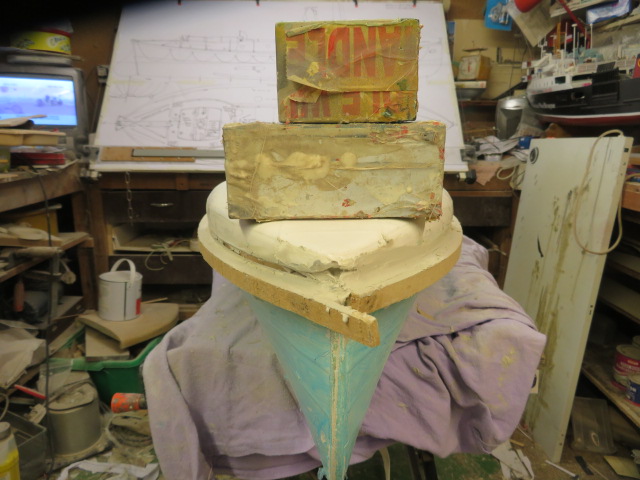
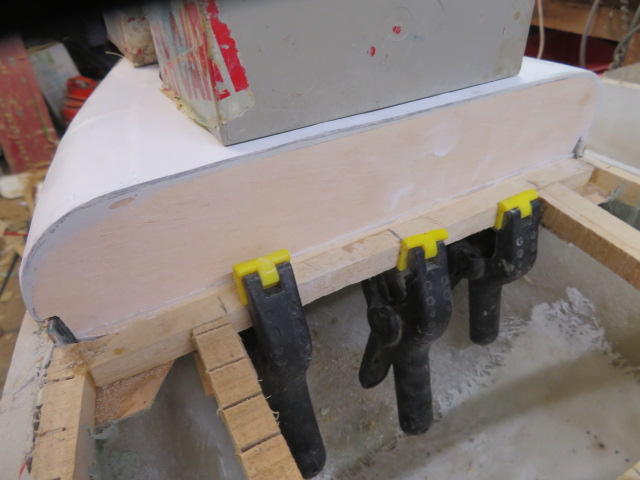
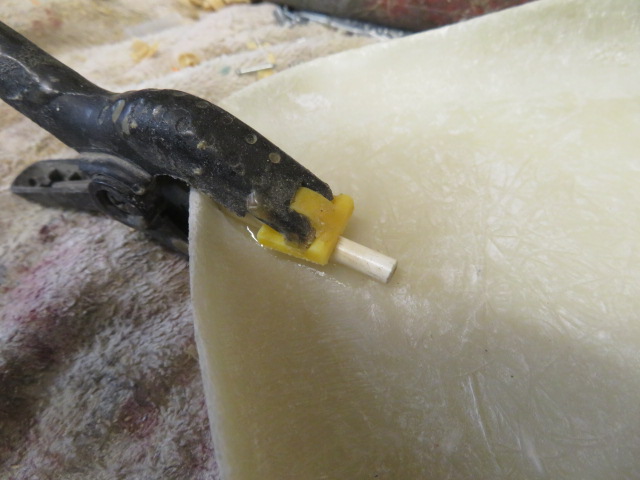
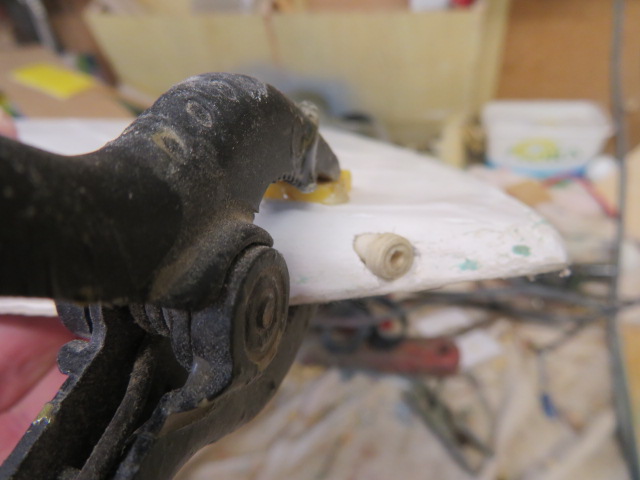

STEAM HYDRAULIC LIFEBOAT - Page 2 Img_6649


STEAM HYDRAULIC LIFEBOAT - Page 2 Img_6650


STEAM HYDRAULIC LIFEBOAT - Page 2 Img_6652


STEAM HYDRAULIC LIFEBOAT - Page 2 Img_6653
Back to top Go down
Sponsored content


STEAM HYDRAULIC LIFEBOAT - Page 2 Empty
PostSubject: Re: STEAM HYDRAULIC LIFEBOAT   STEAM HYDRAULIC LIFEBOAT - Page 2 Empty

Back to top Go down
 
STEAM HYDRAULIC LIFEBOAT
Back to top 
Page 2 of 3Go to page : Previous  1, 2, 3  Next
 Similar topics
-
» Rowing Lifeboat and Surf class Lifeboat
»  OAKLEY LIFEBOAT HAR - LIL Rhyl lifeboat
» Tyne Class 1/20 + slideway and boathouse
» Welcome Steam oil
» Steam Tug Furie

Permissions in this forum:You cannot reply to topics in this forum
TheRcModelBoatForum.com :: Modelling Categories & Archived Build Logs :: Lifeboats-
Jump to: