Subject: AeroKits Sea Urchin Wed Jun 15, 2016 4:31 pm
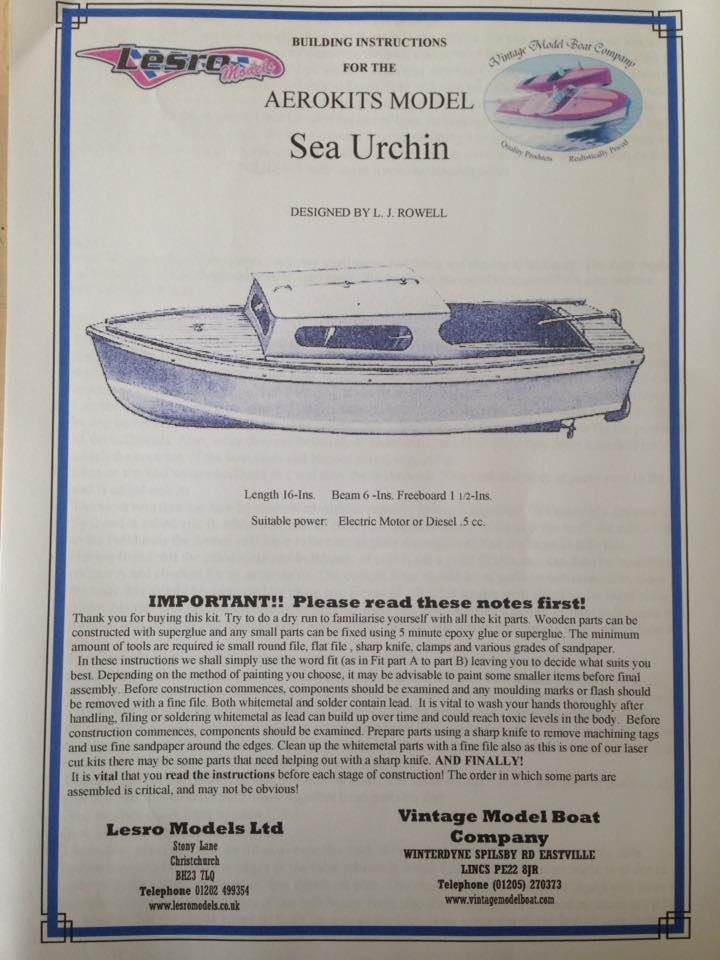
This time around i'm building the Aerokits Sea Urchin, which is now produced by the vintage model boat company.
At a quite reasonable £60 with shipping.
// link updated 2018 //
http://www.slecuk.com/balsa-wood/Boat-Kits.html
To finish the model will require the purchase of all the running gear so i will make effort to source what i need as and when.
This model will run a Brushed electrical system this time around as its not huge and is not a speed boat, but i'll leave options for upgrades later if required. There will be Minimal modifications to this project to keep it as authentic to the kit as possible, although some customization will be added to keep it unique, such as working tiller/rudder linkages and a few other details.
I'll do an honest review of the kit so you can see what sort of quality and issues you face should you decide to do one of these newly refurbed kits.
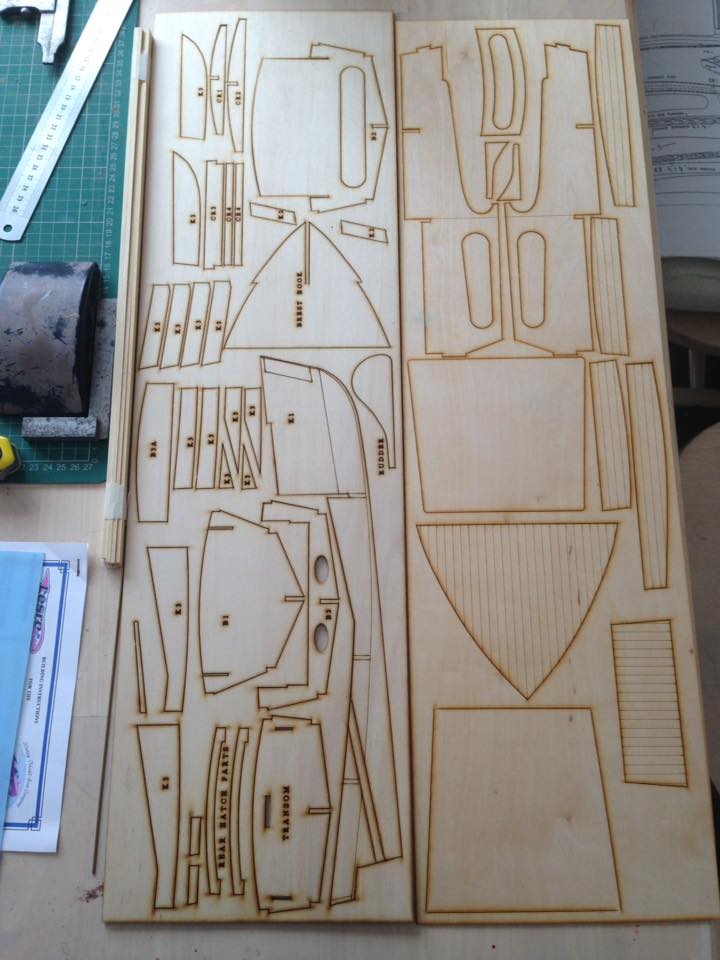
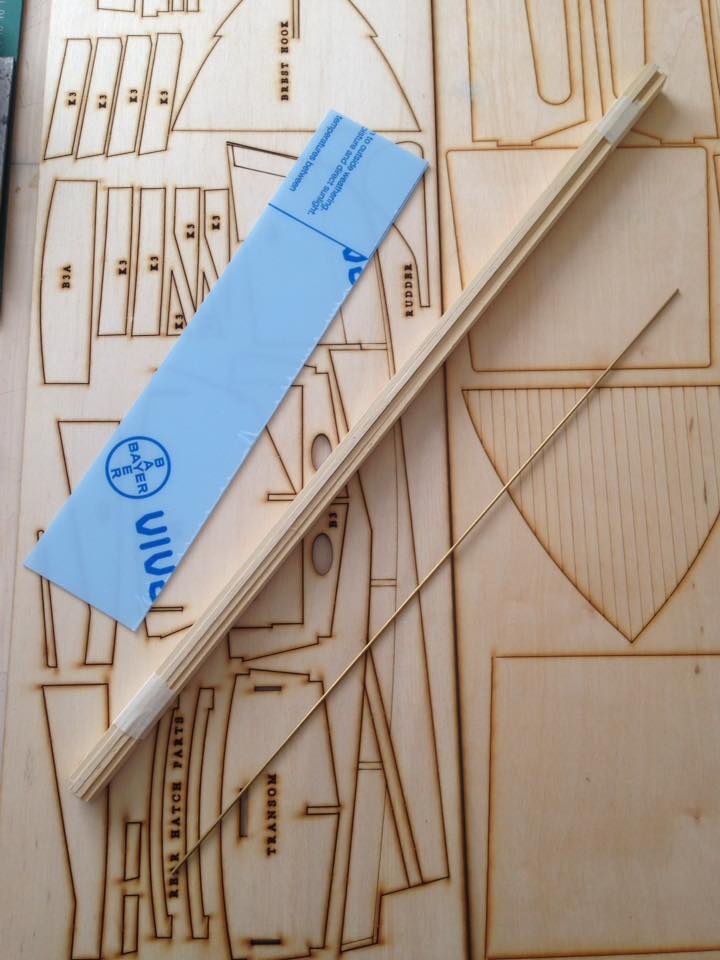
Opening the pack all seams fine and all parts are lazer cut in birch ply and some uncut sheet materials for the side and lower hull panels, a few lengths of strip for chines, and a length of brass rod for the finishing touches, a instruction booklet and i think its a full size plan, although not that it would matter the plan is detailed enough for you to work out what goes where.
_________________ I'm Not Anti-Social, I'm Anti-Stupid.
Last edited by Roadrunner on Sun May 06, 2018 11:42 am; edited 3 times in total
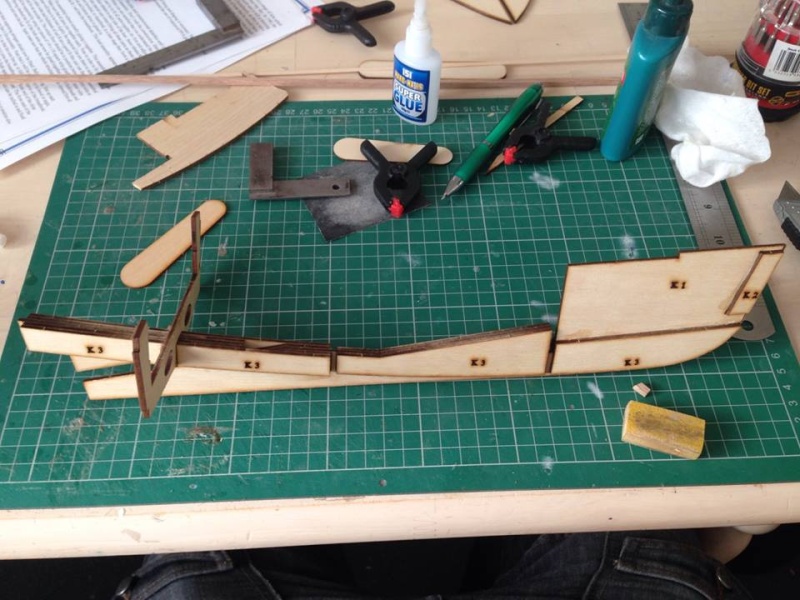
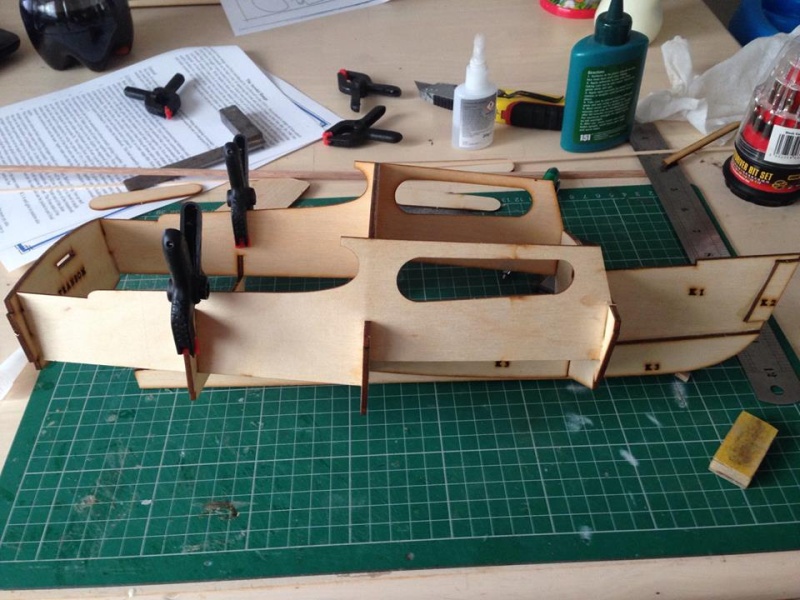
Today i've built up the keel with its rebates as per the plan, and broken out the prop shaft slot.
Now i must point out that the break point for the shaft makes the entire back end very flimsy once removed until the bulkhead is fixed in place, this is due to the lazer guide lines cut in at this section, ( the instructions say to remove this much later in the build but the tags holding it in place are very thick, snapping it out is near impossible once the skin in on!) I have found a few of the lazer cuts very deep in places, such as the transom, (the markings on each part in places are all the way through sections, so filler will be needed to seal the gaps). I've had to improvise to not snap the keel in several places between bulkheads with reinforcement 5x5 sections, which has also aided in me keeping the bulkheads square.
This isn't a huge deal once the bulkheads and chines are installed and skinned the whole thing will become rock solid, but a warning to those at this early point that the keel is very fragile until progress is made!
i should point out that the ply is a little wavy on the keel after all the pieces are joined. there isnt much you can do about that for now, i am hoping that it will straighten out as i get the lower skin on. if not sanding and filler will be needed to correct this.
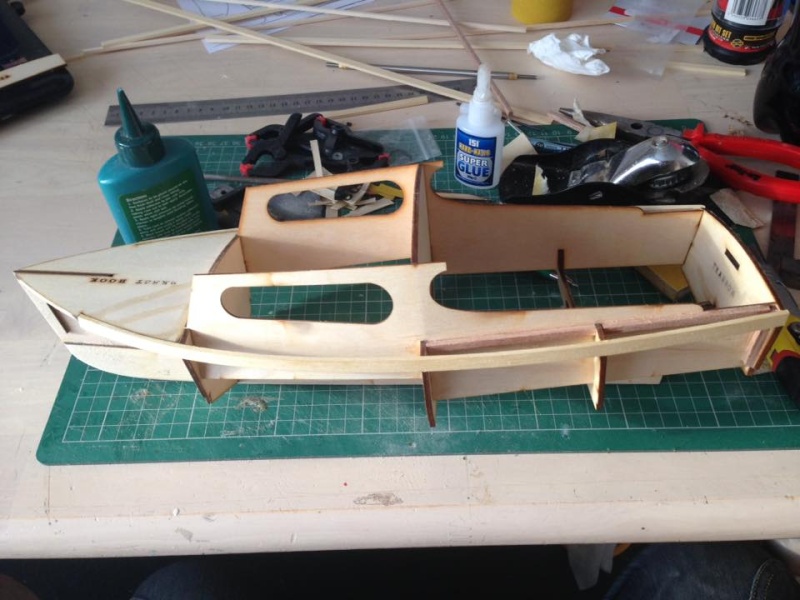
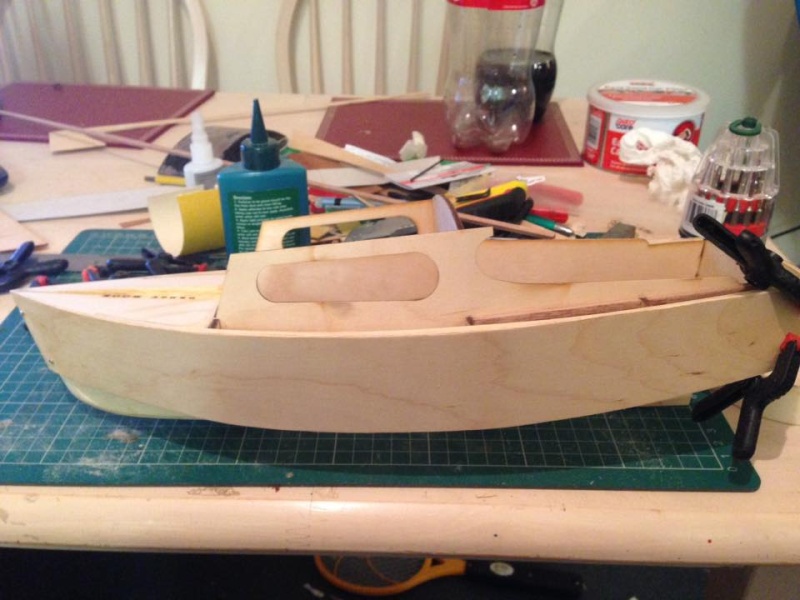
the superstructure makes up a lot of the form of the boat so dry fitting in place then adjusting for square is needed then i've just run glue down the seams to make each joint permanent.
i will also make a slight modification at this early point by adding a 5mm strip between bulkheads for the deck level to fix more securely then butting up against the cabin sections, this ensures not only strength but water tightness.. butt joints are 'ok' providing you get a good glue joint but adding extra support would not go amiss here.
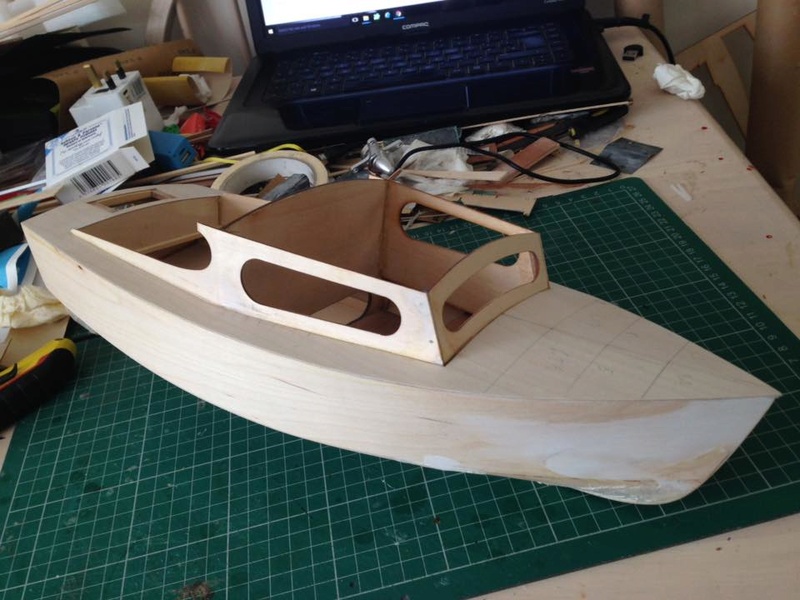
as you can see from the photos is a very fast amount of progress that is simply due to a lot of the superstructure being part of the frame and support work.
_________________ I'm Not Anti-Social, I'm Anti-Stupid.
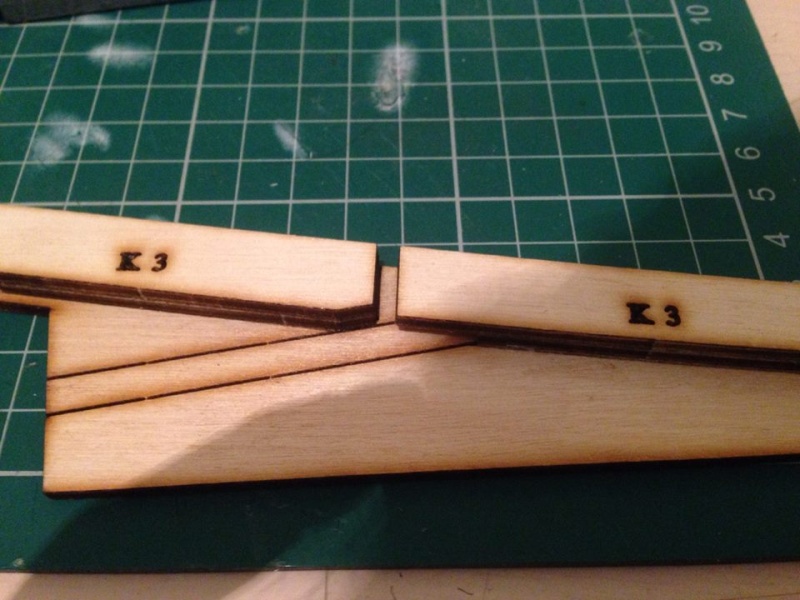
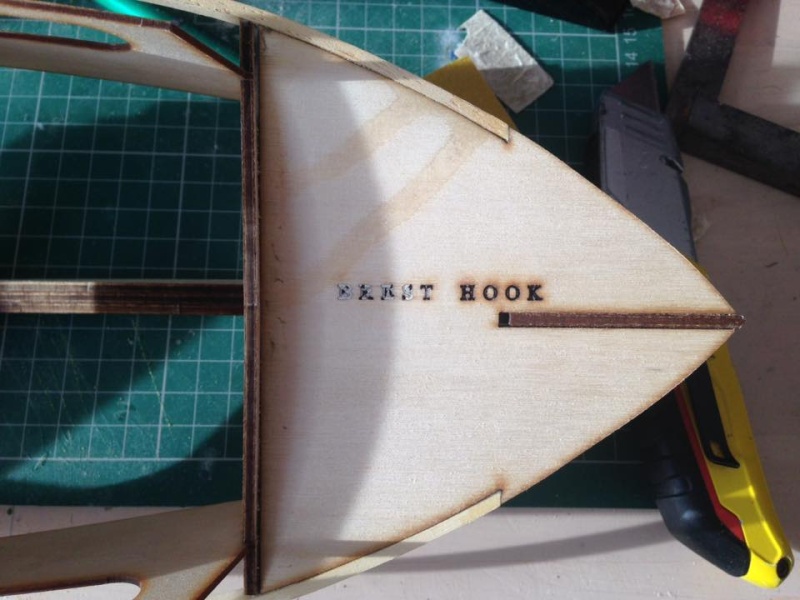
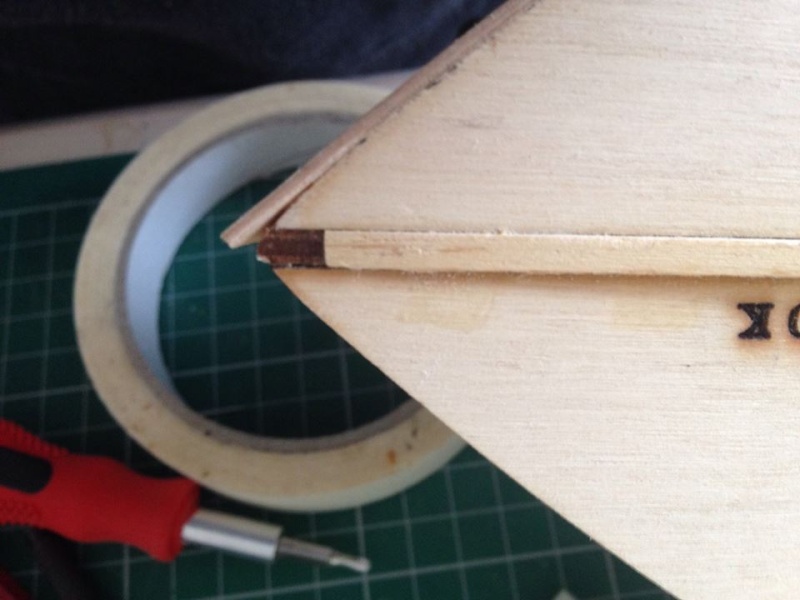
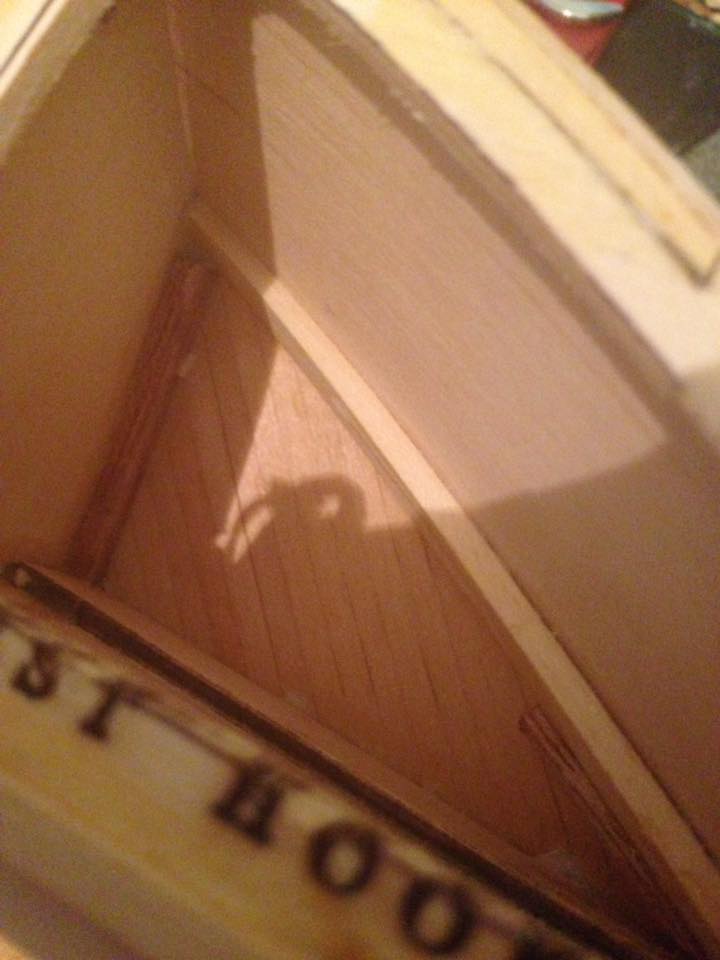
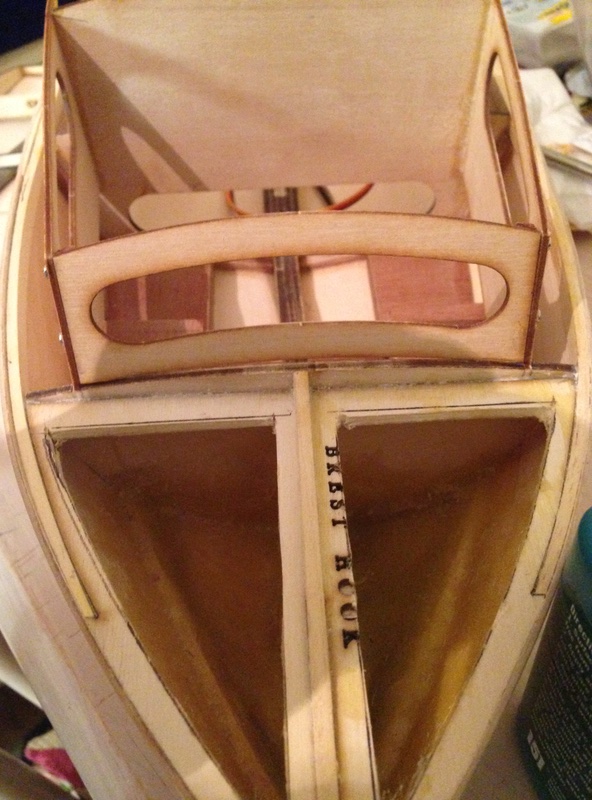
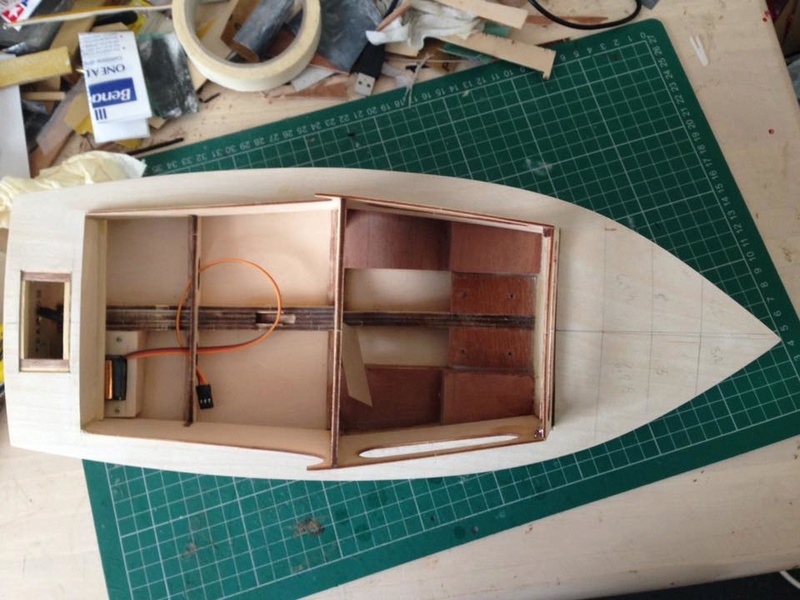
More progress today, i've added the brest hook which is the under plate of the deck fitting, which is part of the gunwhale stringer. I've yet to fit the bottom chine stringer..
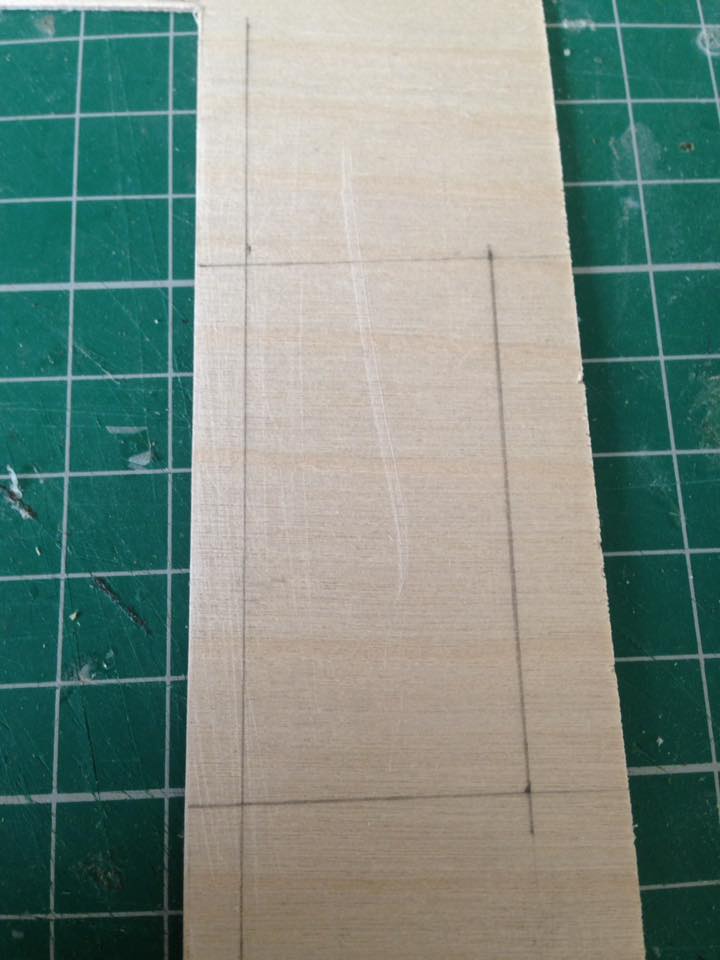
This should have been done by now, but there is some discrepancy to the plan and the way the parts fit in regards to the brest hook...
The hook according to the visual plan shows the hook butting up flush to the first bulkhead, however the parts cut slot wants to fit cleanly further forward to the bow, the 1st photo below shows the distance in the discrepancy, should i have fitted the hook tight to the bow it wouldn't have any support even with the gunwhale chine fitted now would it meet with the bulkhead as indicated, in fact i do recon that if i had fitted it this way when it comes to tapering the stringers it would have snapped clean off messing up the top completely forcing an ugly repair.
So I've followed the drawings forcing the brest hook to meet with the first bulkhead which leaves me to chamfer the over handing 5mm to allow for the skins ( which would have needed doing anyway, but i've had to remove more material then you world normally) and also to now fit the bottom stringers correctly.
This will only decrees the boats length by around 2mm if the plan is correct over the lazer cut part. however it is a lot of work to pull the ply back with 80 grit. but the end result will be much better to keep the contours correct for the skin, this also gives me a better scope to inset the chine stringers in the correct place, if i had put them on earlier before sanding the joints holding the bow in place would have become very weak with the removal of so much material.
its hard to say if this is correct or not, but i've used best judgment to to fit the parts to make what is now a solid section rather then something floating about, this may leave me an issue later when fitting the deck with material removal but its better to remove then to add if the lazer cut was incorrect!
_________________ I'm Not Anti-Social, I'm Anti-Stupid.
Roadrunner Forum Overlord
Posts : 1714 Join date : 2011-06-10
Subject: Re: AeroKits Sea Urchin Sun Jun 19, 2016 5:01 pm
At this point I've abandoned following the written instructions and only following the visual diagrams for a guide.
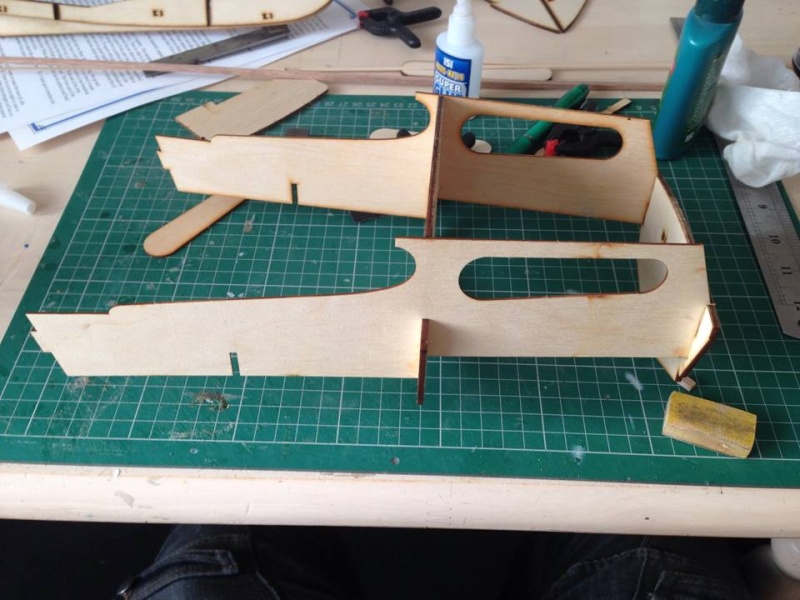
Simple reason is it suggests fitting the hull panels after all the electrical installation is done, this sadly isnt the right way to go about building this boat and leaving the frames and chines exposed to damage at this point of which will reverentially ruin what could be a nice model.
its not really the correct way to true up the bottom chines until you know where the side panel is to be fitted, as this also needs sanded to clean up after fitting, its far easier to do both the bottom chines and the side panel together, this way you get a perfect fit of the bottom panels, as well as not wasting your time doing it twice or sanding back more material then you should!
I have trued up the chine rails to now take the side skins only at this point using a large sanding block and 120 grit.
There is also a small issue with on the central bulkhead, that is actually to narrow either side by 2mm!
If you set the side panel to flow naturally against the hull (as you should) you find a gap opening top dead center, this will need to be addressed with some reinforcement later. Now i did check both sides ( just in case i had messed up somewhere in sanding) its Exactly the same either side, so be aware that if you do fit tight to this bulkhead the side panels will take a bow inwards, which you wont notice until you sand back the deck layer much later! giving you wavy sides ~~~
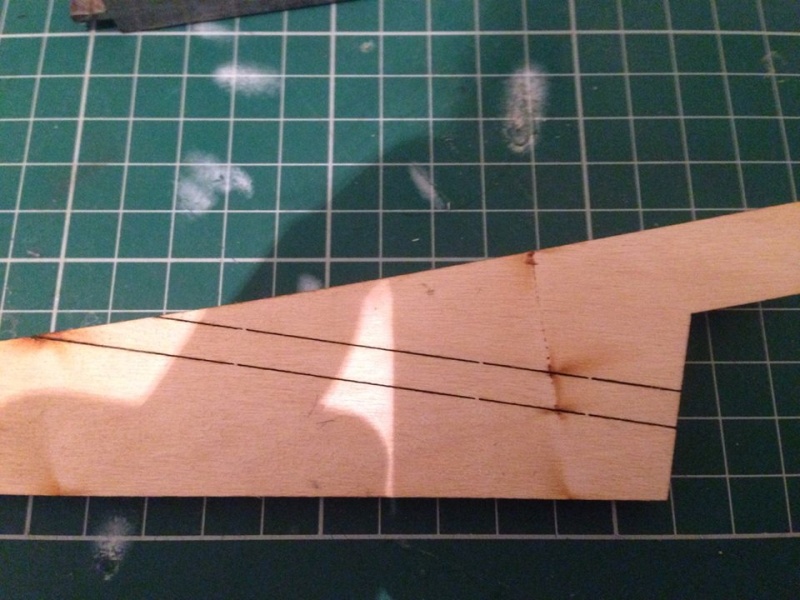
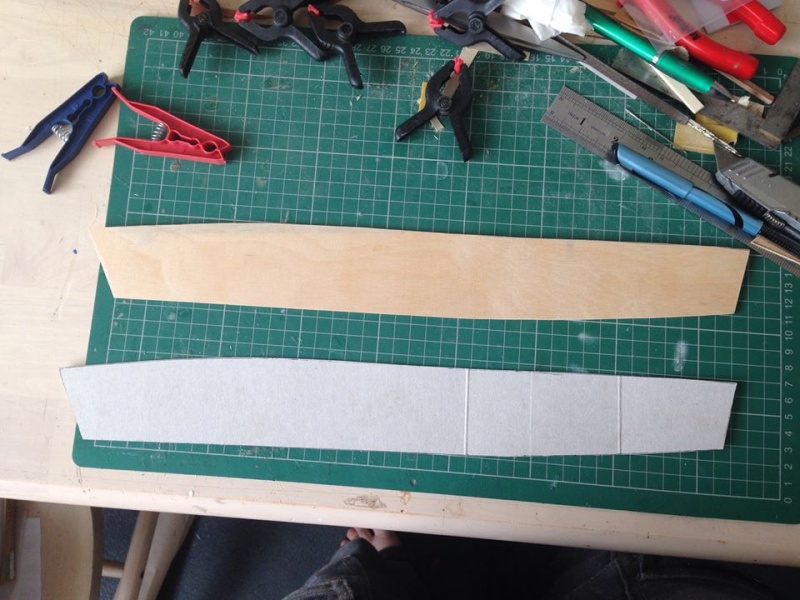
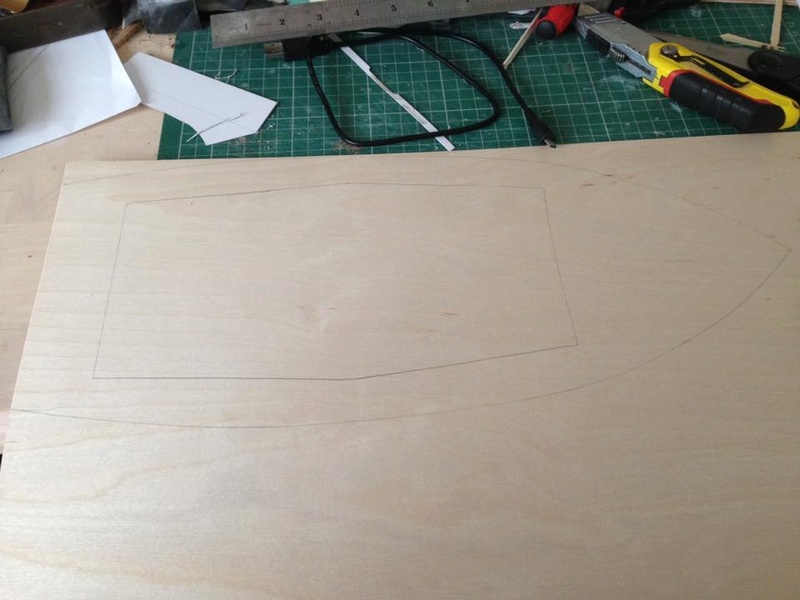
I've had to make up a template to cut the side panels out of the ply, i do suggest to make up templates rather then attempt to fit with the sheet, this will remove upcoming mistakes!
its some credit to the design and its construction that the side template fits perfectly both left and right side as well as the rear deck slots in perfectly with out the need to adjust the boat. this also means its dead square and there is no slant in the boat, a common issues when building off a base board!
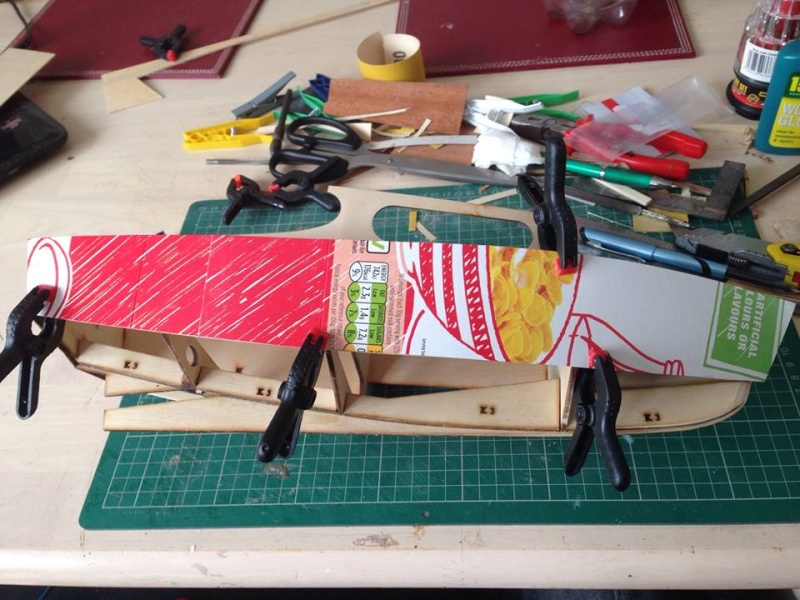
I've fitted the first side panel, so it fits flush to the bow stem, leaving the 2nd panel to overlap, i do this apposed to making each panel meet dead center as you end up with a better glue surface for them as well as ensuing no gaps and a straight bow. This is also a bit of a lazy cheat but its one that aids in stopping panel;s popping off much later.
The other panel will be fitted later and may require a couple of pins to keep it pulled in place ( this is common practice )
I've also used another cheat and what i call ''3rd set of hands'', which is to actually drill a couple of small holes and screw the bow section into place ( with the aid of glue) then glue and clamp the remaining panel into place. this ensures that the panel dose not slip during gluing, aids keeping the bow square and not bowed ( by adjusting the screw tightness) they can be removed once the glues set and filled later, giving you a perfect bow and not worrying its going to pop out at any moment while the glue drys ( a really bad common occurrence!)
Not all those methods are the 'correct' way to go so i might get a few frowns. but with out the aid of my old man's hands at these stages being 300 miles away, my lack of dedicated workshop, and the fact that making a jig for the purpose is just un-necessary waste of time for this single job, these cheats work just fine and won't effect the final outcome.
_________________ I'm Not Anti-Social, I'm Anti-Stupid.
Roadrunner Forum Overlord
Posts : 1714 Join date : 2011-06-10
Subject: Re: AeroKits Sea Urchin Sun Jun 19, 2016 10:40 pm
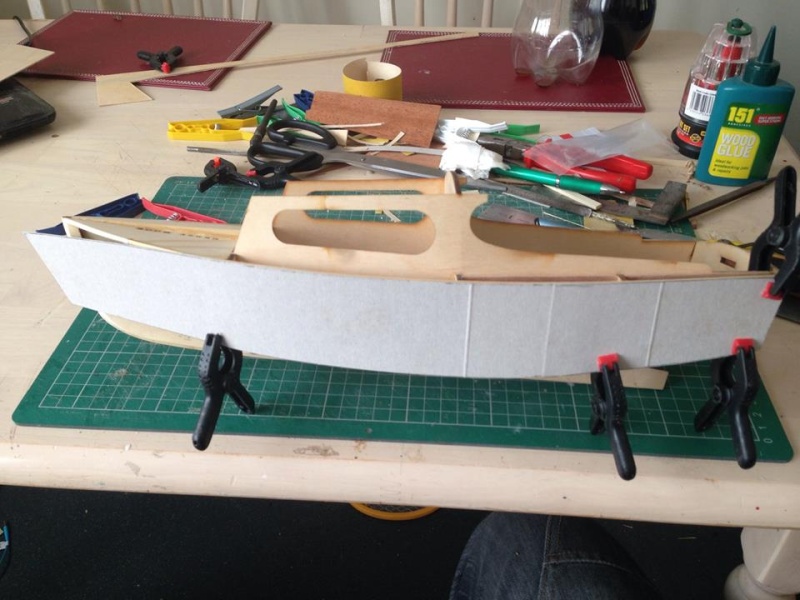
Now both skin sides are glued on, and the bow section overlap is straight, there is a minor gap in the center, I think this is from the sanded edge, but nothing to worry about that a bit of filler can't fix but on the whole a solid joint.
I'll leave all this to cure for a full day allowing the wood to settle then i'll crack on with the bottom skin.
_________________ I'm Not Anti-Social, I'm Anti-Stupid.
Guest Guest
Subject: Re: AeroKits Sea Urchin Mon Jun 20, 2016 12:55 am
Looking good so far.
troutrunner Master
Posts : 573 Join date : 2014-01-23 Location : Lincolnshire UK
Subject: Re: AeroKits Sea Urchin Mon Jun 20, 2016 8:31 am
Hi RR, I must say that when building the "Fast Patrol Launch" , a boat from the same stable as this one, I did as per instruction and fitted the electrics before the sides but the bottom panels were fitted, it did make it quite easy with my fat fingers to do. I made sure all could be removed with a few screws from where the access points will be and I did remove all electrics before fitting the sides.
I guess there are many ways of skinning a cat as they say, I made sure all was square when fitting the sides and bottom panels and it all turned out fine.
Roadrunner Forum Overlord
Posts : 1714 Join date : 2011-06-10
Subject: Re: AeroKits Sea Urchin Mon Jun 20, 2016 9:28 am
You're right here, there is no set way to do this part, the written instructions say to start at this point, where as my experience tells me to do things after the hull is stable and a stand can be made for it.
Honestly if I looked at a newbies point of view when building this, leaving the sides off is a big help ( although won't help in maint or repairs) and that gives a great scense of encouragement.
This boats cabin roof hatch is a measly 12x10cm to access I know some ppl would struggle to work in that space, and this boats floating rear deck is very low and drastically reduces what you can fit there.
Odds of fitting a stick pack are very much none existent given the height of the floor, although there is nothing to say you can't raise it higher, this leaves very little room to fit the electronics.
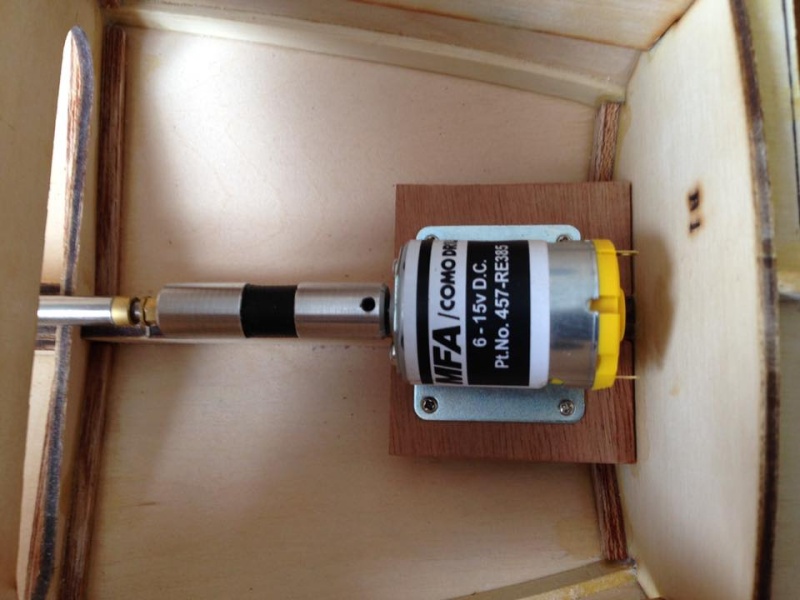
My plan is to fix the motor, esc and battery into the cabin. I'm using a D type 3 blade brass prop with a 385 15v motor which in turn will run off a 12v minature lead acid battery which I'll mount to one side of the cabin( again need the floor skin on to make the mount for extra support) thus leaving just the servo to mount at the back, this also leaves me the opportunity to glue down the floating rear deck as it will no longer be needed as an access point for anything, practically stopping water getting into the hull completely.
I could have opted for a lipo at this point, but I will leave the Battey space open enough to be changed later if a brushless setup is needed.
_________________ I'm Not Anti-Social, I'm Anti-Stupid.
troutrunner Master
Posts : 573 Join date : 2014-01-23 Location : Lincolnshire UK
Subject: Re: AeroKits Sea Urchin Mon Jun 20, 2016 11:16 am
Roadrunner wrote:
Honestly if I looked at a newbies point of view when building this, leaving the sides off is a big help ( although won't help in maint or repairs) and that gives a great scense of encouragement.
After fitting it out I did take all parts out through the hatch spaces and refitted it all again just to make sure it was easy to maintain then took it all out before fitting the sides. I know it was long winded but it has given me more confidence on the other two builds, which I do plan to continue soon.
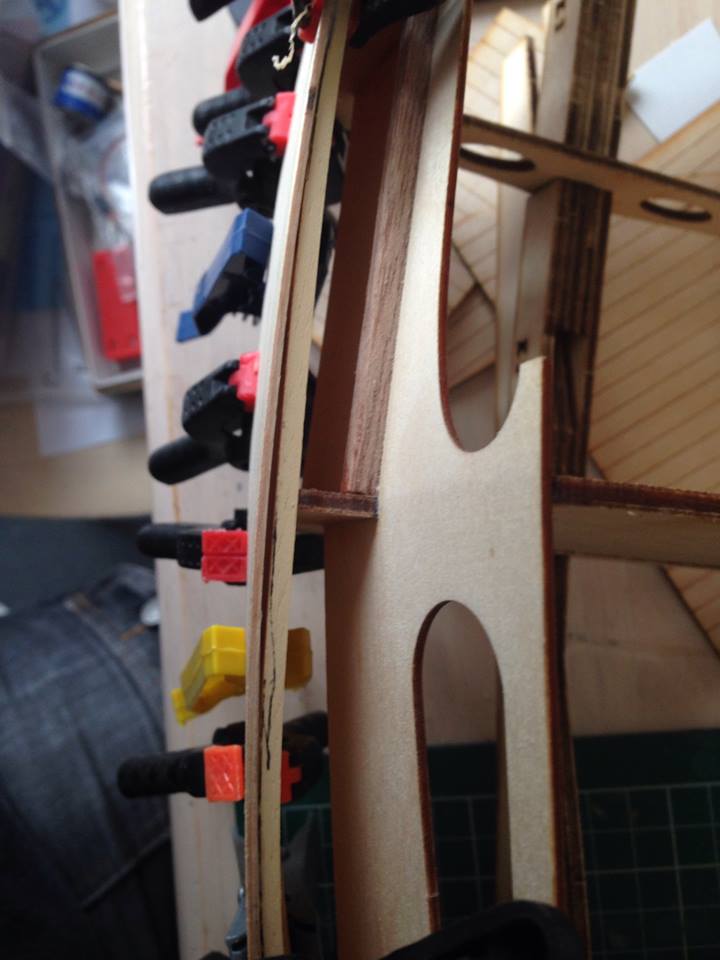
after fitting the side panels the keel line was still very wavy... i've no idea why this is, everything in the boat is square and there are no twists in the hull, i can only assume its the ply....
now this caused me one major headache fitting the hulls bottom panels, in all honesty i wish i had fitted those first and slipped the sides on last... but that still wouldnt have fixed the issue i was faced with, after making up a template of one of the base panels sides, i could not get it to sit correctly into the hull ( thats the wavy keel pushing sections out as i tried bending the front in) then once i finally got clamped into place, i couldn't for the life of me get the tip of the bow to glue to the sanded chine rail, even after steaming the panel for a couple of hours setting it in place, letting it dry several times,....
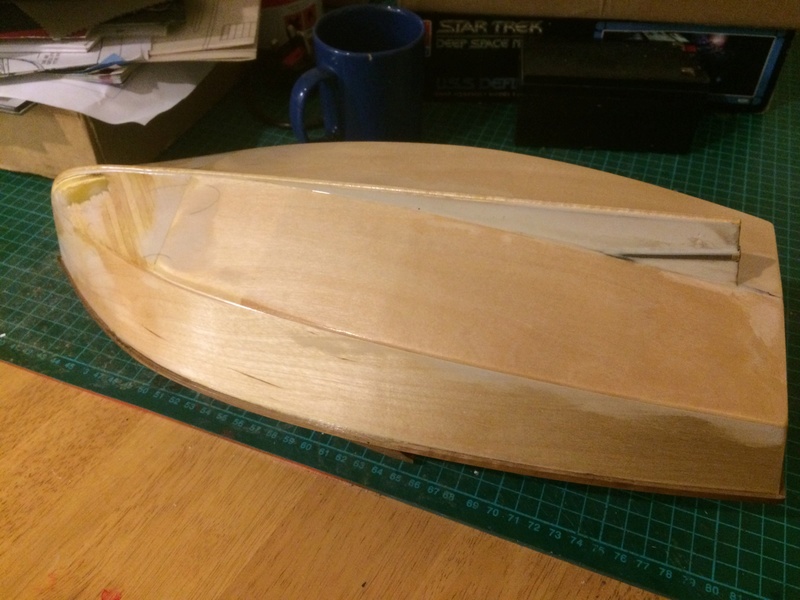
by Wednesday i had had enough of literally messing around with it so i straightened out the keel with 10mm ply and a lot of clamps, then gluing a hardwood strip down down the entire length of the keel from bow to stern, then cutting the base panel out to meet the all the bulkheads accept the curve leaving me basically a full flat section to glue up which was easy....
The bow section i did try to use the off cut of the bow sheet and see if i could again get it into place this was a fruitless effort as it wasnt going to conform to the hull shape given most of the panel is needed to keep its form, so have opted to plank the front of the bow with 2 layers 4x1mm lime strip (diagonally planked, which actually makes this the strongest part of the boat right now!!!) , and then using some decent filler leveled off the bow in shape giving the correct profile and then sanding the nose of the boat to give a decent round profile ( as it should be via the drawings this is not a hard angled stem)
I have also cut open the brest hook to allow access to inside the bow so i can reinforce the inside with some GRP filler just to be on the safe side, this will also allow me to fill the section with foam to stop the boat sinking should the worst occur. the brest hook will then get the deck cover on later which will hide all the unsightliness of this.
fortunately this fix to get the boat right hasn't cost anything in looks or security to the boat, its just annoying me that i couldn't do something as simple with a single sheet this time.
Not a pretty fix until the paints down but its soild enough to take years of pounding and with the added hardwood stem it defiantly will be able to take a few knocks!
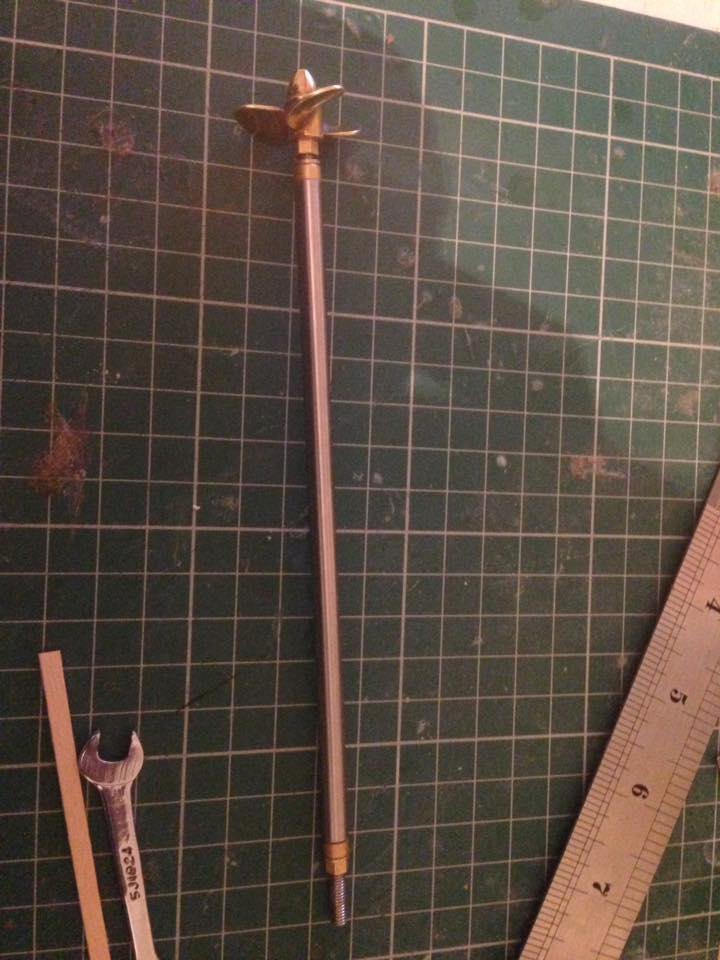
oh and good news got the nice shiny prop for it today in the post along with the stainless 6" prop shaft.
on another note this boat may yet leave my dining room table with a brushless setup rather then a brushed now.. possibly running a smaller 900kv 12amp esc on 2s.
_________________ I'm Not Anti-Social, I'm Anti-Stupid.
Roadrunner Forum Overlord
Posts : 1714 Join date : 2011-06-10
Subject: Re: AeroKits Sea Urchin Sat Jun 25, 2016 1:25 am
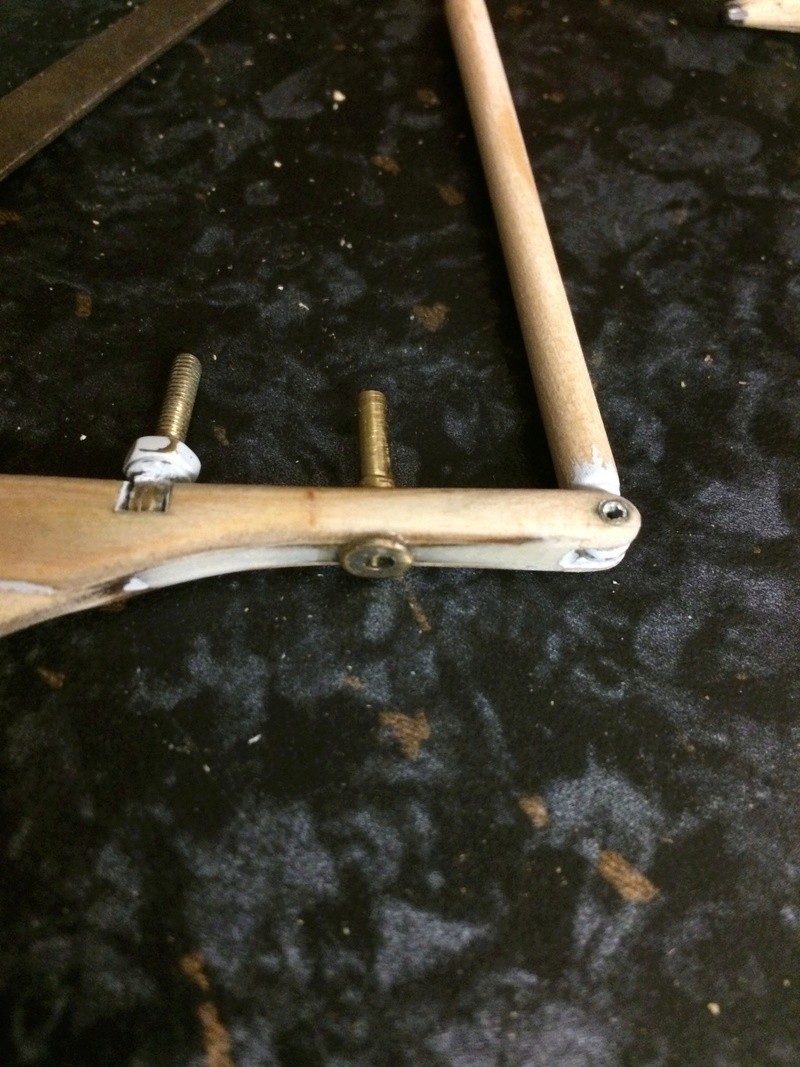
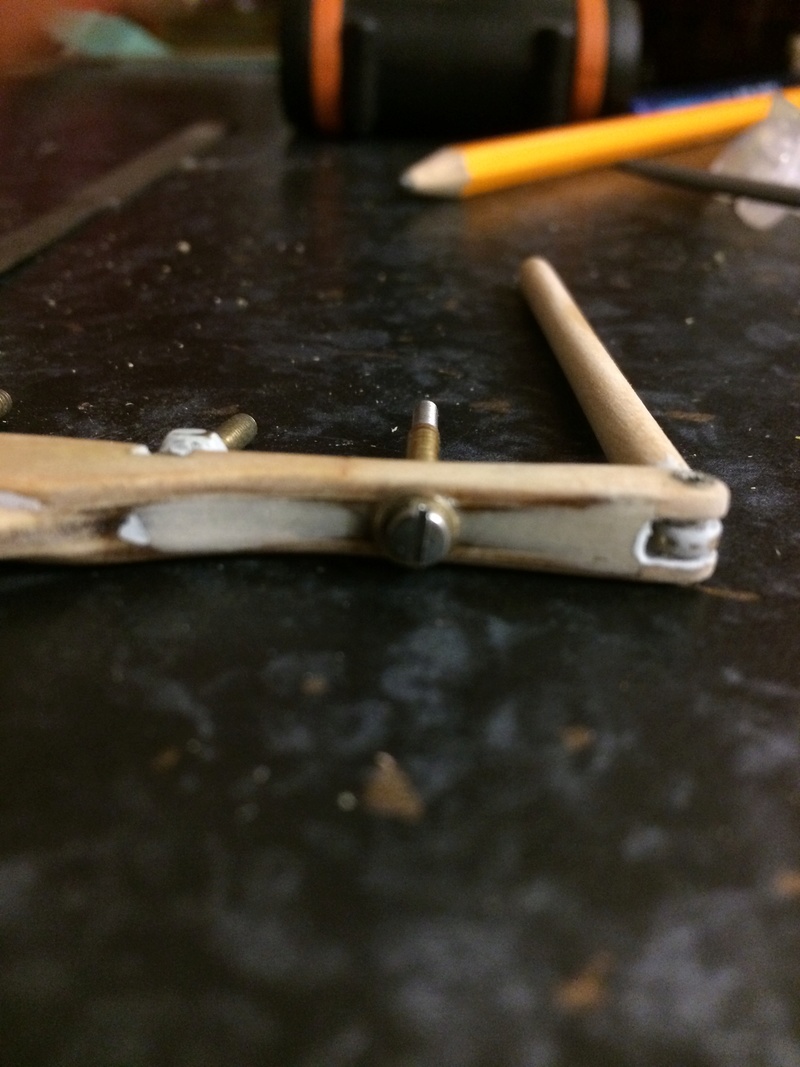
after my endured battle with the bow, i've now started on the stern more specifically the rudder.
There is no mountings for this part with the kit, the plan states to use brass eyes and L shaped brass to hook the rudder into place.
Honestly thats umm yeh....... first knock and thats rudders screwed,
MY plan......
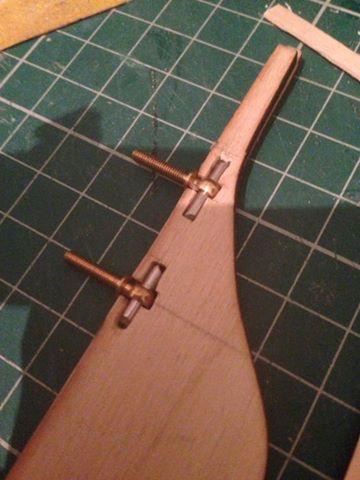
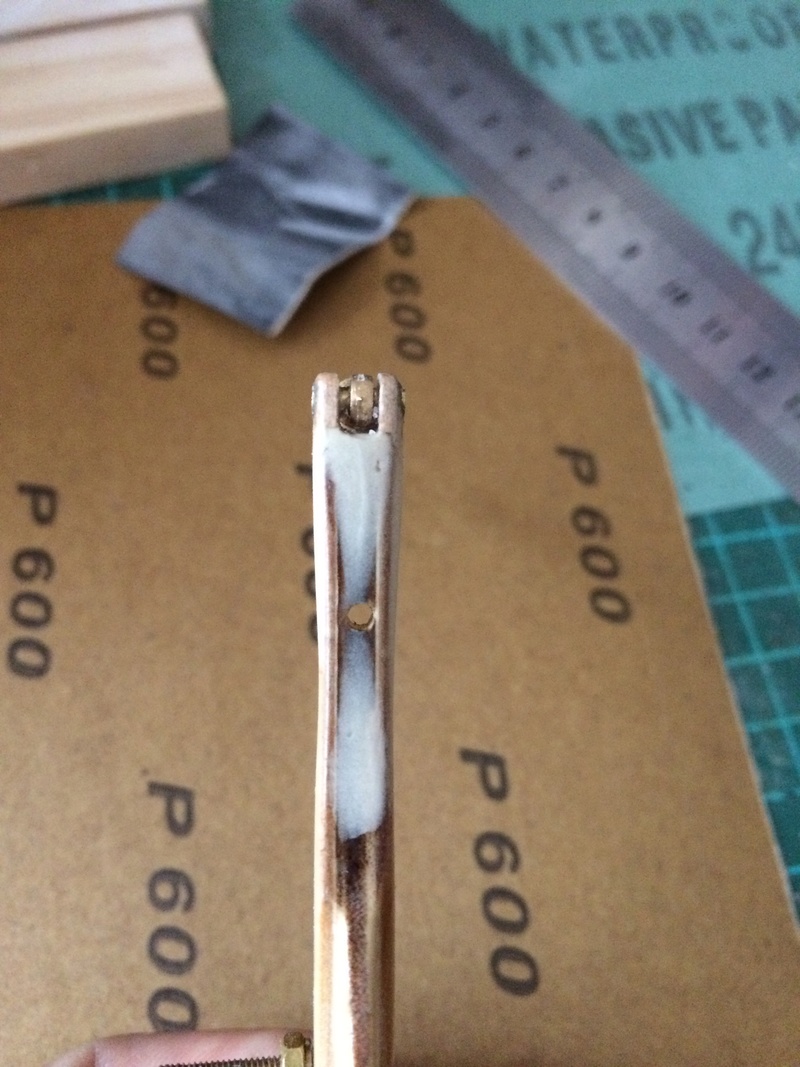
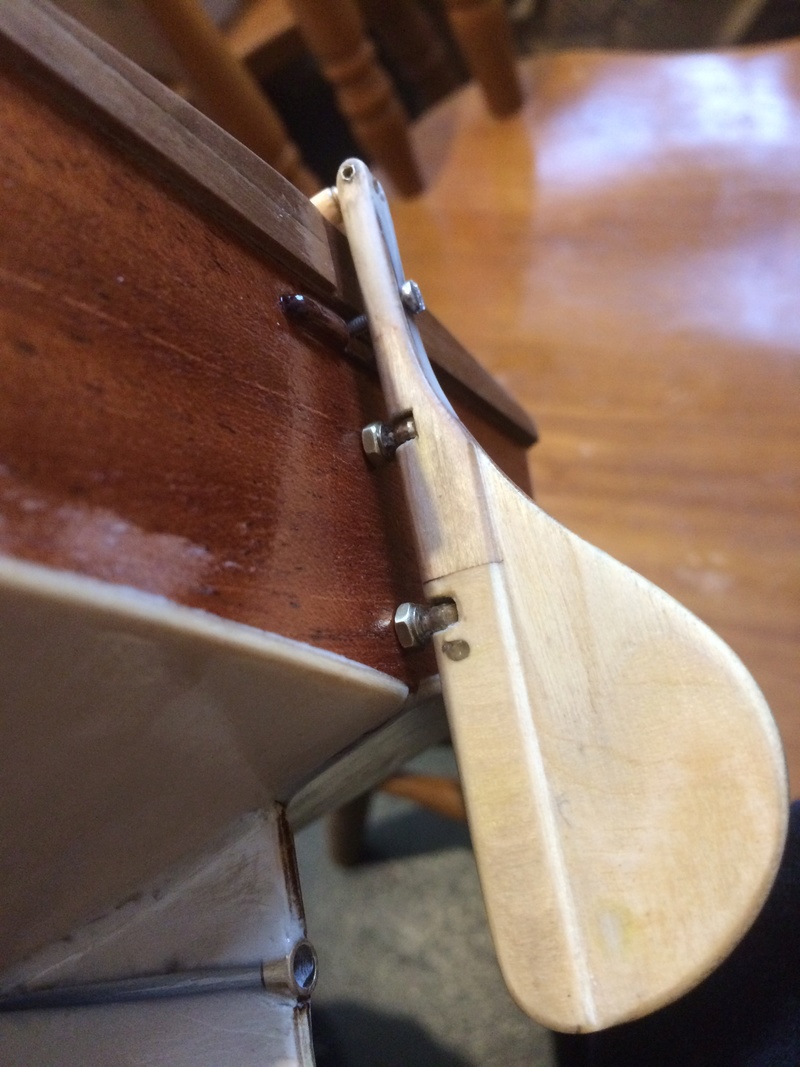
slice out + section and insert 2.5mm stainless rod sections which hang of some spare brass grab rail (normally used for handrail)
i'll have to do a little bit of reinforcement on the weaker top section with a little bit of GRP and cloth but other then that the rudder will be a nice solid fixture which simply unbolts through the hull for maintenance.
The rudder still needs its overlapping lamination fitted to clean it up for final sanding but you get the idea of how this linkage was created to be a strong working part of the boat.
_________________ I'm Not Anti-Social, I'm Anti-Stupid.
Guest Guest
Subject: Re: AeroKits Sea Urchin Sun Jun 26, 2016 2:32 am
Roadrunner Forum Overlord
Posts : 1714 Join date : 2011-06-10
Subject: Re: AeroKits Sea Urchin Sun Jun 26, 2016 4:11 pm
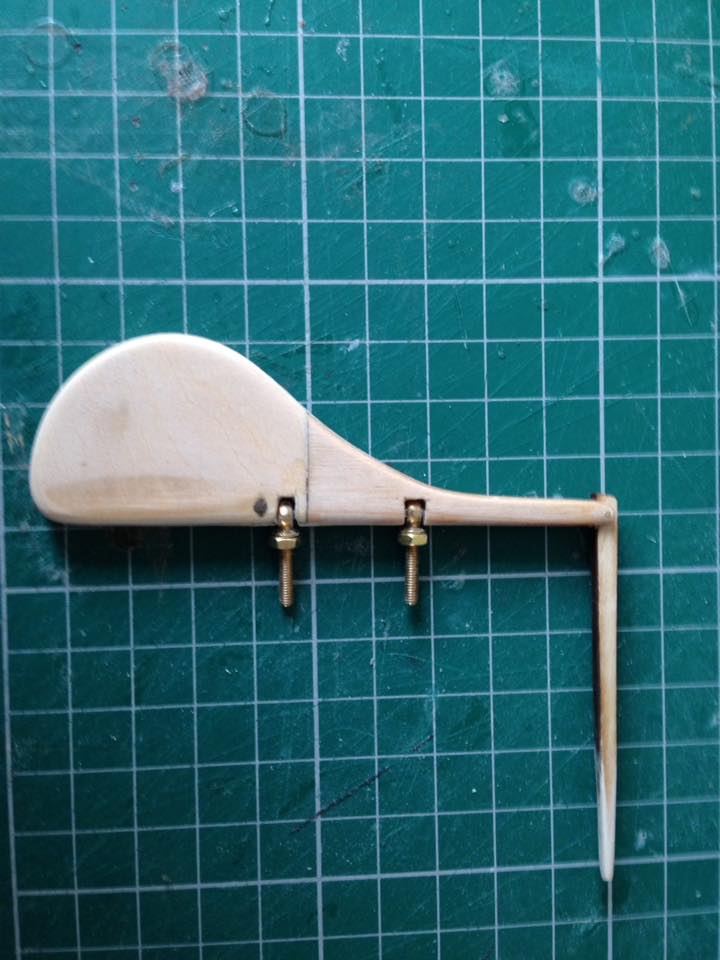
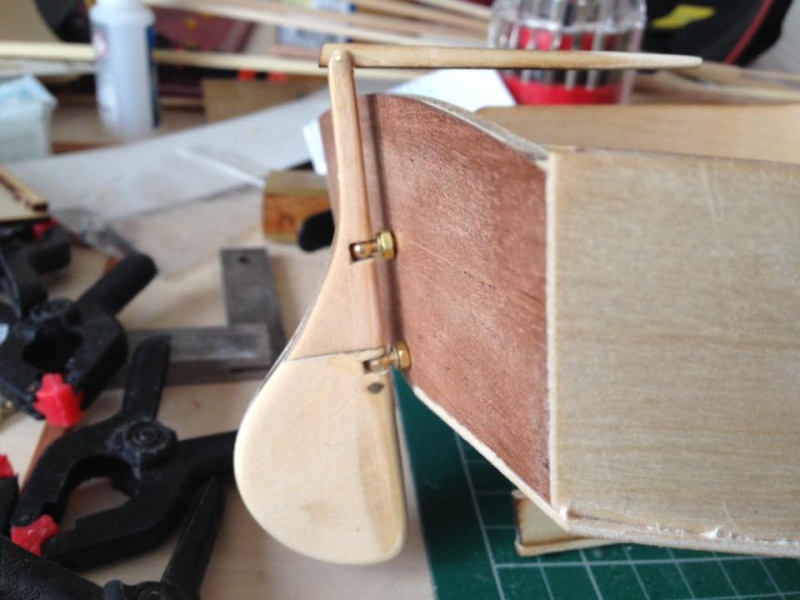
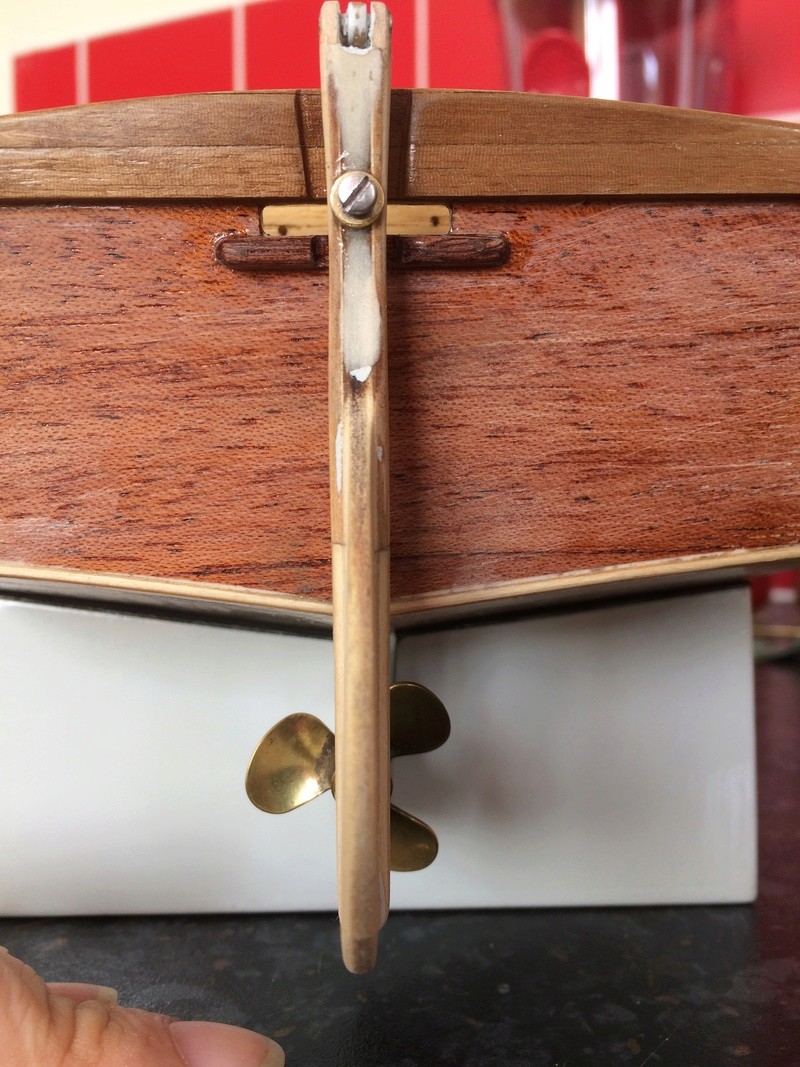
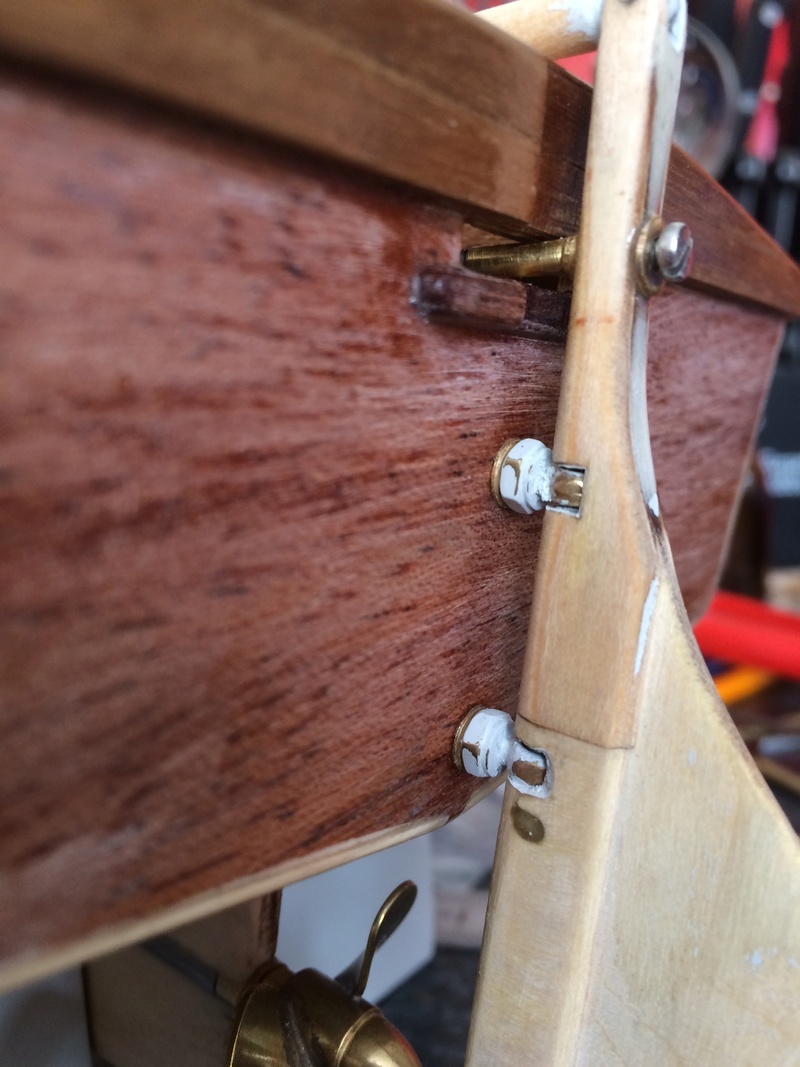
yesterday i finished up the rudder it will still need some GRP tape over the pin joint edges and some filler to tidy it all up to reinforce them but they are pretty solid held in with body filler as it is, better safe then sorry..
then mounting holes drilled for the hinges to sit in.
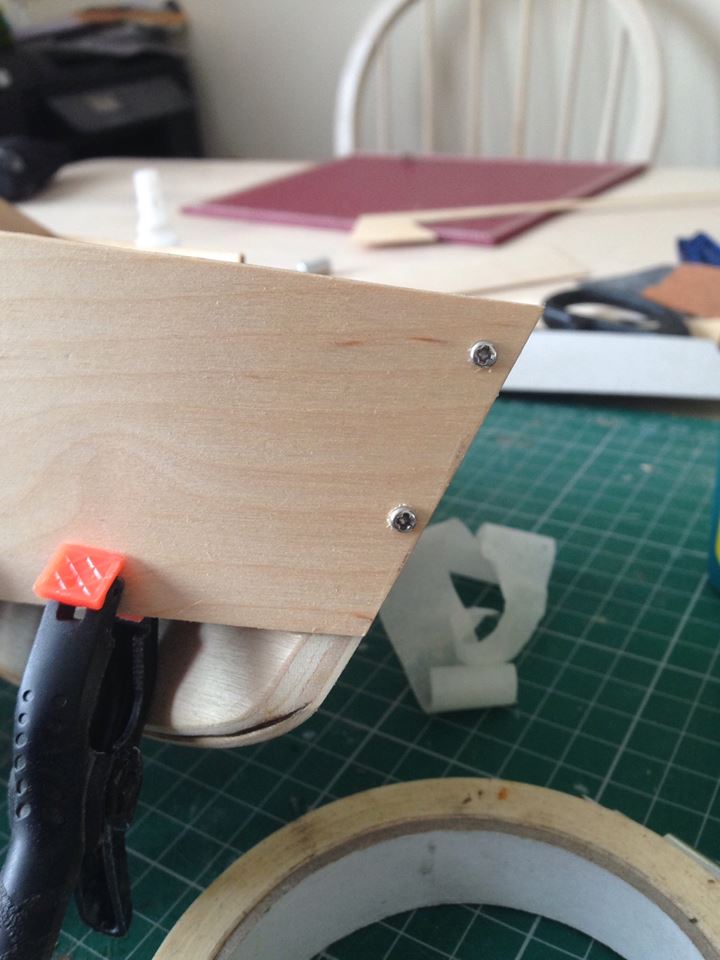
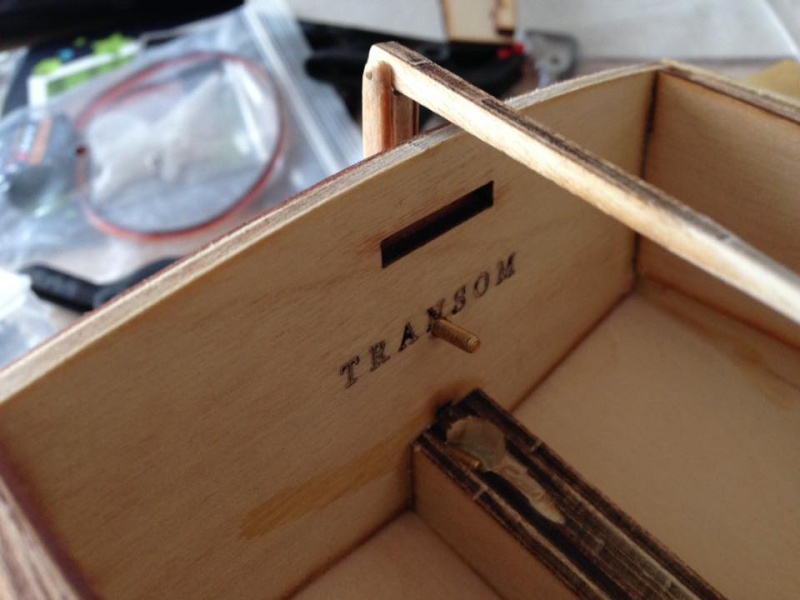
Note here the transom has a mahogany panel fitted over the original, this was for only a single reason. the lazer etched transom wording on the inside in many spots had cut all the way through, so i oped to seal the entire back end rather then use a ton of filler to repair, this will be painted over in the end, it was in fact the only material thin enough i had scurrying around to repair this way, i would have used ply if i had a cut off in 1mm.
i can now go back and cut out the transom slot for the rudder linkage ( but will have a serious think first before committing to gaping a hole in the rear like that as well as seeing if there are better methods, the linkage for the rudder needs to be affixed to the weakest point of the rudder at the top thinned stem, this may be avoided with GRP on the rudder. a couple of hours to think before committing.
I was hoping to use the rudder tiller arm but its again to flimsy to hold up for any length of time, but will work find if mounting a mans arm to it should that be your choice in decoration.
_________________ I'm Not Anti-Social, I'm Anti-Stupid.
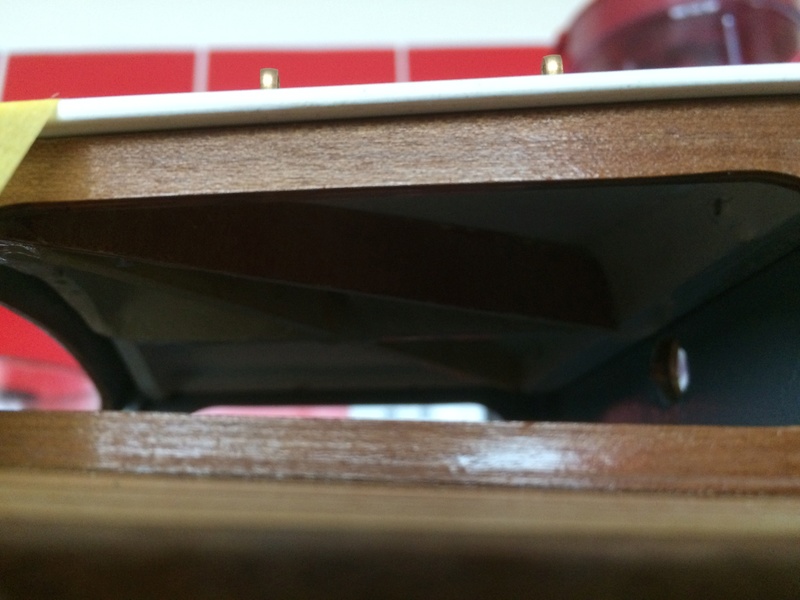
Today I've added the false transom to the boat alon with some reinforcements, these should have been used as part of the transom hatch, however I don't like how much of the opening the hatch gives being so close to the edges of the boat, it's simply asking for water intake so I will look to alter how the hatch works to gain access to the servo.
I've looked into the workings of the rudder and have decided to remain faithful to the plan by opening up the slot and allowin a length of carbon fiber rod to me made up as the linkage, I may swap this to a stainless screw, but I'll have to wait for some parts to arrive as again using roller linkages will give me the correct motion with the servos position.
I've also fitted on the false transom the edge for the fore deck to be mounted to, I still have to added the remains around the boat to finish this job as I am still feeling as to have this deck as a fixed peice rather then removable as with the electrical setup a small 2s lipo can fit securely into the cabin thus allowing as much water proofing of the boat as possible.
That said I will have to take a look to the rudder linkage slot to reduce water intake through this section which maybe a simple job of a peice of leather with a slot in which will act like a seal.
_________________ I'm Not Anti-Social, I'm Anti-Stupid.
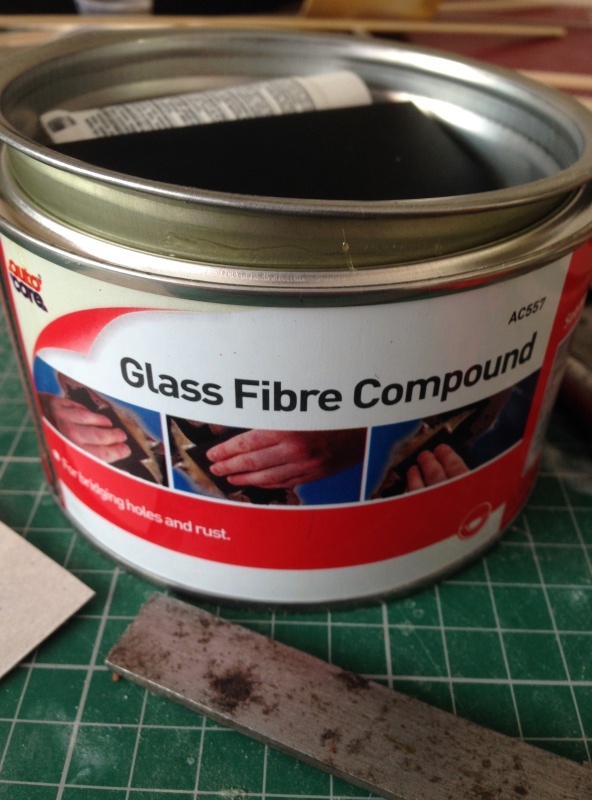
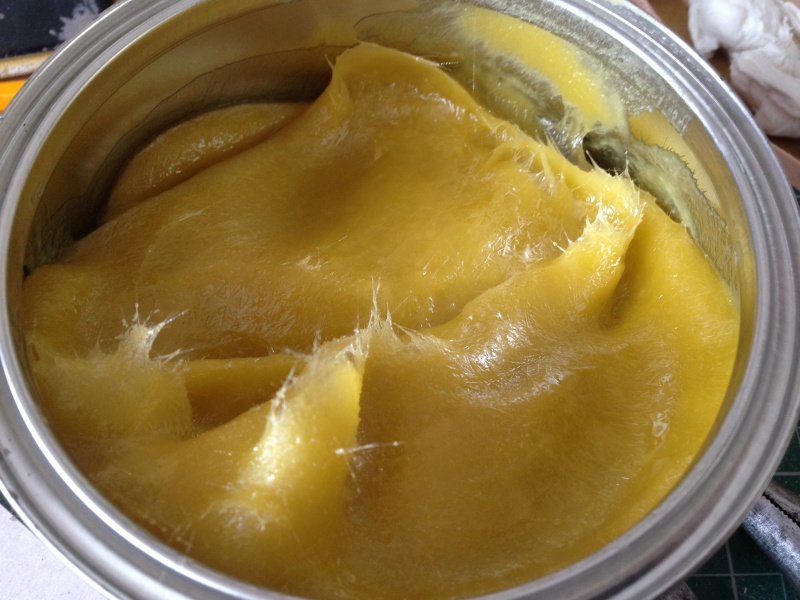
Slow progress at present as I'm waiting for additional parts to arrive, but my new tin of bridging compound arrived today so was able to start the bow reinforcement, if you haven't used this before it's very similar to using p38 just in a polyester glass fiber mix.
Working time is about 15mins and it goes rock hard in 30, this is an alternative method to glassing the inside of a boat, I would suggest using the normal glassing process rather then this for reinforcing your boat as the penetration to the wood and cloth is more extensive then this paste. In this case this happens to be the easiest, less messy and less expensive option. Cost of the can is about £5 and will support the small section totaly waterproofing and adding strength, it's also a good joint filler.
Right tool for the right job, this can also be used for moulding, my dad has used it for moulding detachable skegs, 'p' frames, 'a' frames and other high maintenence areas on boats subject to salt water conditions.
_________________ I'm Not Anti-Social, I'm Anti-Stupid.
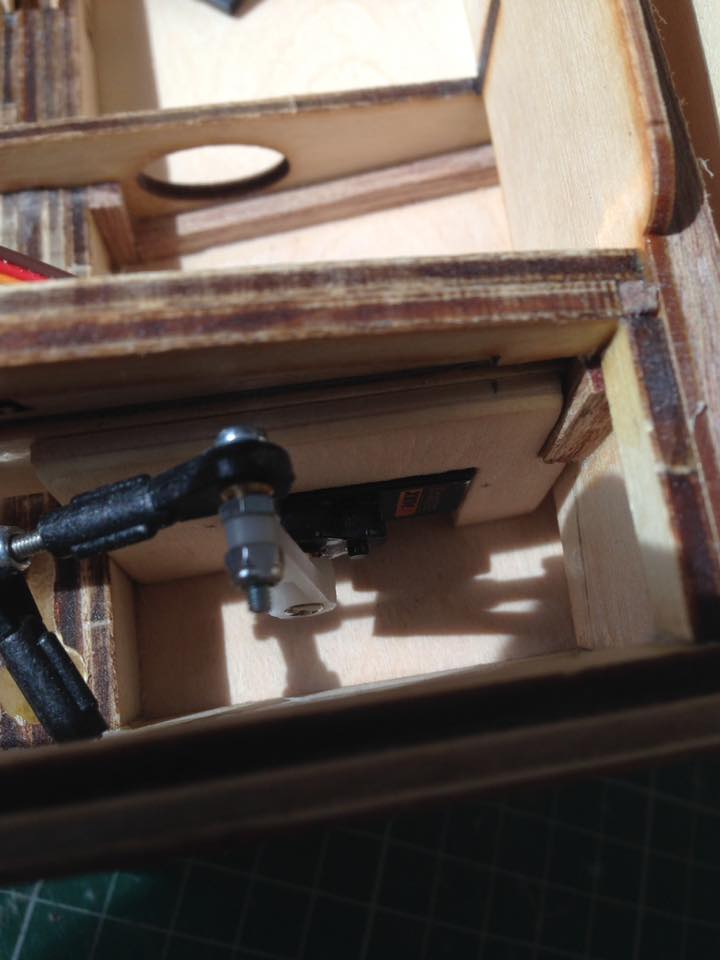
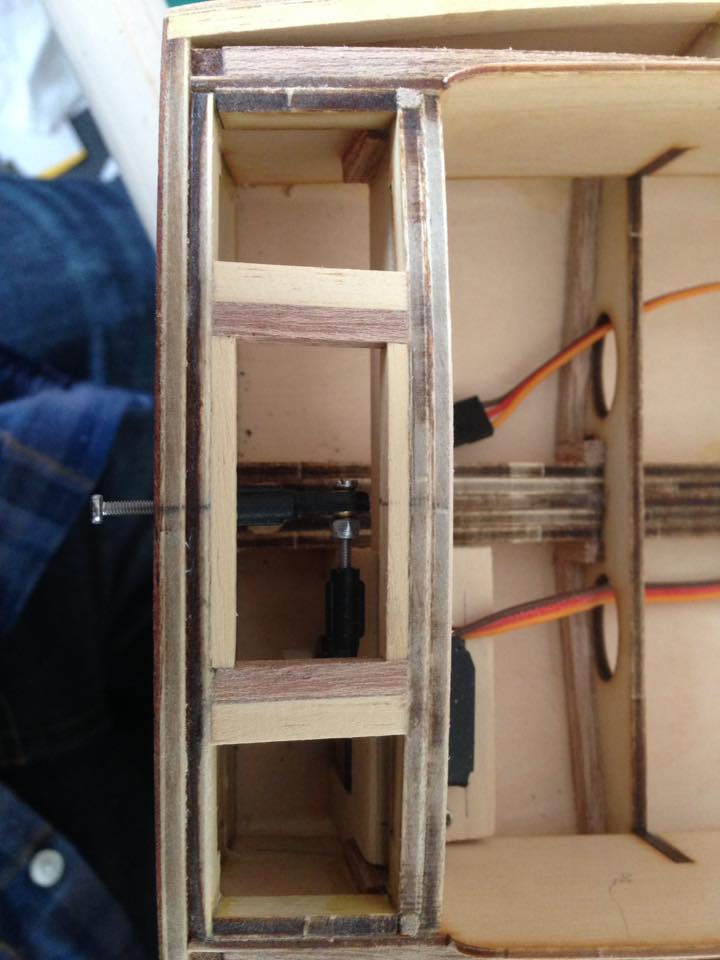
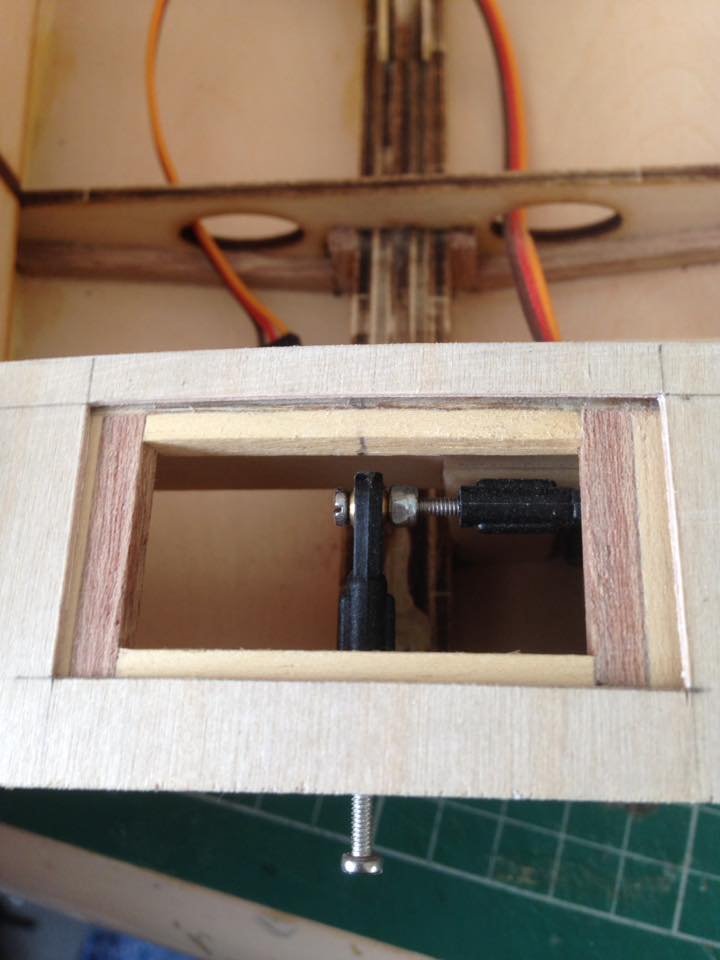
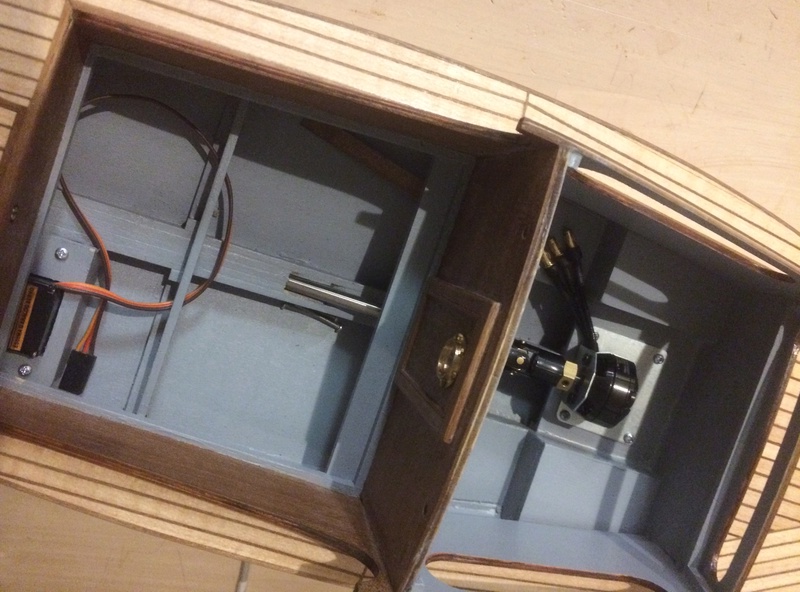
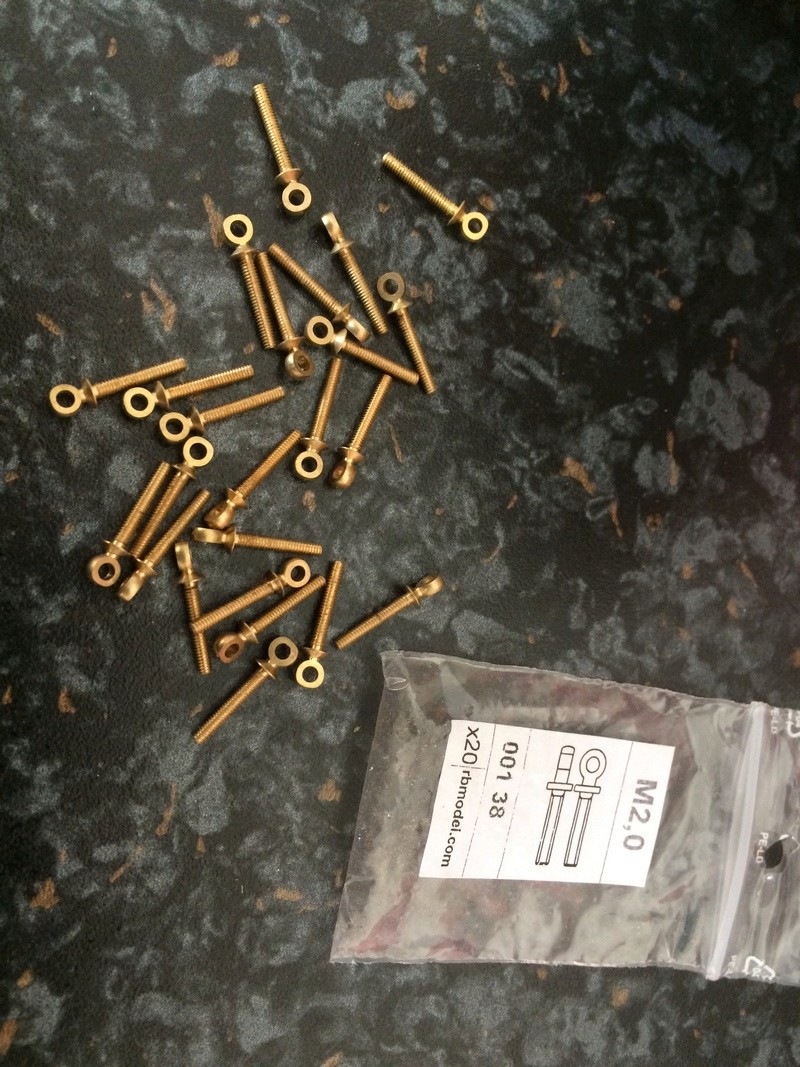
My linkages have arrived today so I've made a start on getting the servo into place which requires a mock up of the linkages, this space as you can see from the photos is very small to work in so some real thought went into planning how to get the rudder working correctly, the linkage is made up of 2x m2 20mm stainless screws, the first screw runs through the rudder and onto a ball linkage, the servo arm has been drilled to accept a bronze swivel type linkage which has been re drilled to accept the other 20mm screw, it's locked off with m2 stainless lock nut then the other ball linkage screwed on the end, both balls then have been bolted together.
As you can see even after using he smallest parts available the linkage is still a tight fit but does give me a couple of mm in clearance, all I have to do is make up a servo tray/support and screw it down, then I can test the throw and make adjustments if needed.
_________________ I'm Not Anti-Social, I'm Anti-Stupid.
Plan A failed.... After making up the first linkage and then a servo tray. I found the servo arm was barly giving me any throw, this turns out to be the limited space when mounting the servo upright with the longest arm I could fit.
After a bit of thought about how to extend the servos throw I opted to use the largest arm provided which mounted flush with the underside of the false transom and he linkages swapped around this gives me a more then decent throw. Now however I can no longer fix the rear deck down permantly as the servo will now have to sit under the deck this also means I need to make up the transom hatch almost to the orginal size ( something I drastically wanted to avoid doing.
Oh we'll never mind I'm sure I can come up with something.
_________________ I'm Not Anti-Social, I'm Anti-Stupid.
Its been a couple of days since my last post, truth be told last 48 hours I've not been feeling to great so progress has been very slow.
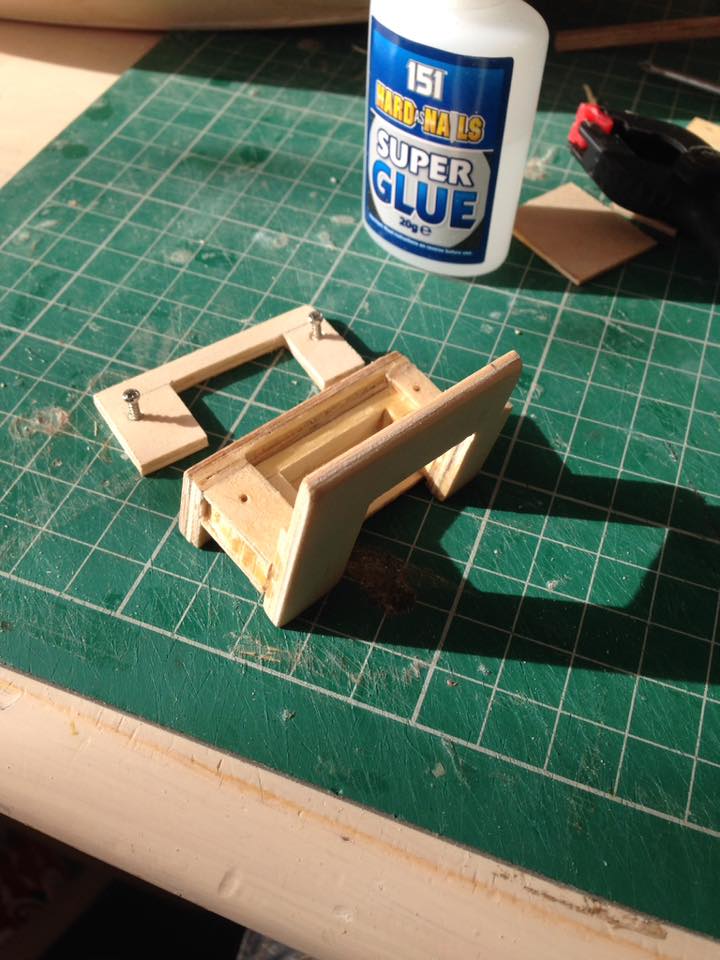
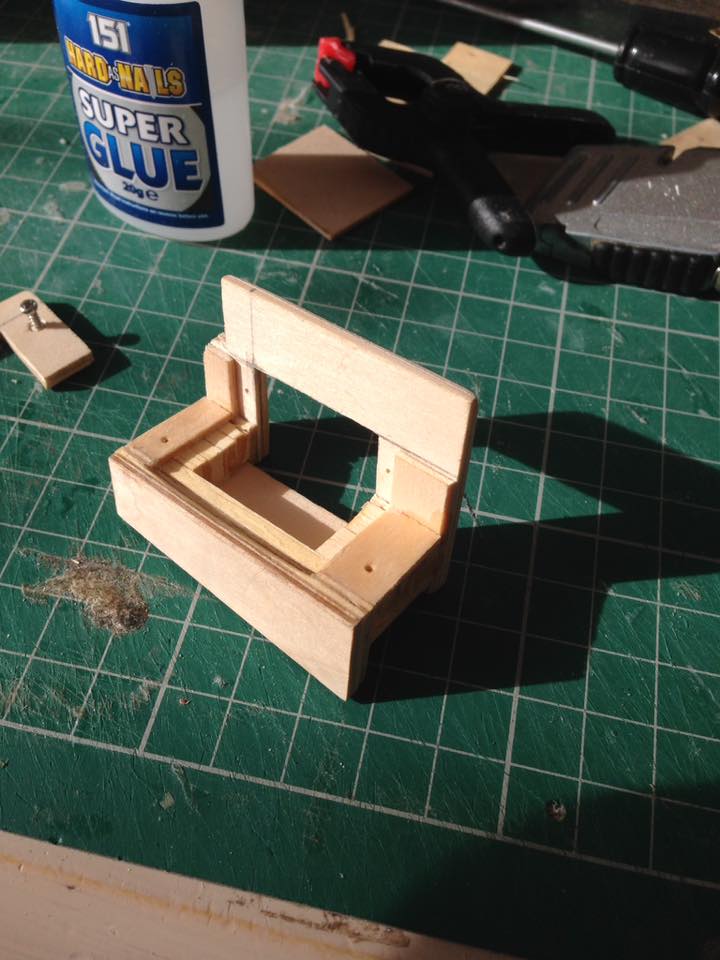
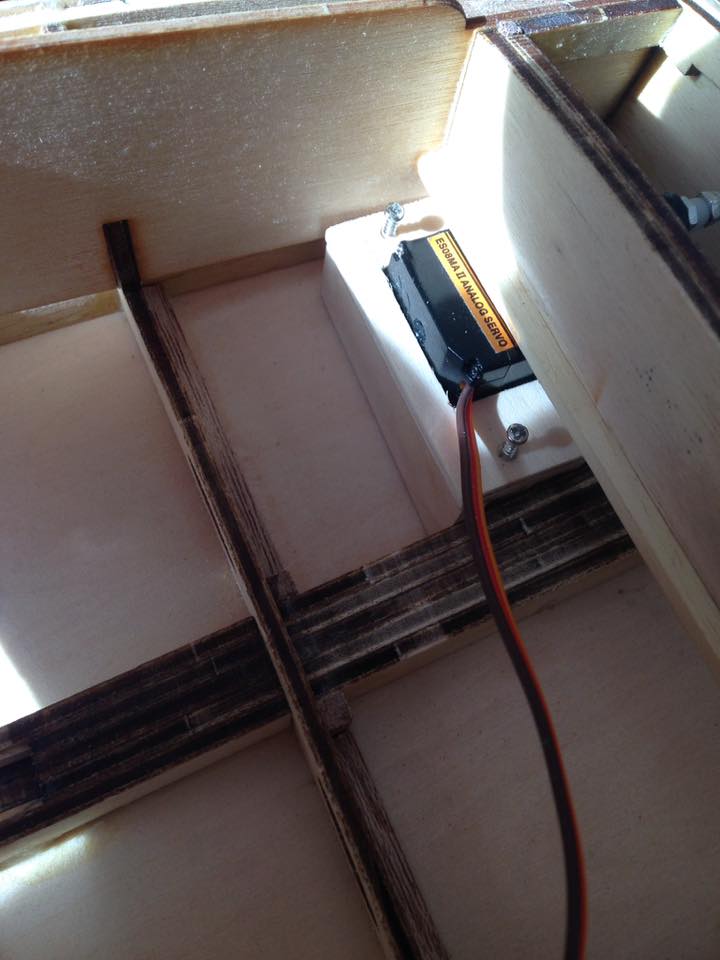
I have however fixed the servo tray issue with a new mount, which allows the servo to hook in and out easy enough with the entire linkage attached, which means for simple maintenance of the rudder i simply have to undo the linkage screw and the two brass nuts to detach the rudder completely from the linkage and the hull.
The servo is then in turn held in place by a plate to keep the servo from pushing back which is held down by two servo screws.
As you can see from the video it works fine, but dose need a bit of tweaking in the linkage lengths to get it to move equally port and starboard but overall i'm happy with the outcome and should prove simple and effective. ( you can also see in the video my simple method for reducing water from jumping in through the slot which is a simple piece of 2x3mm mahogany trim shaped and glued below the linkage slot)
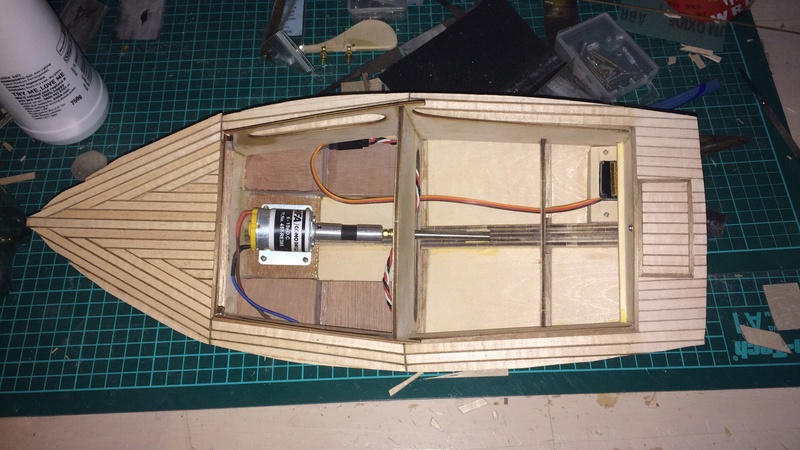
Sadly my option to permanently mount the rear deck has had to be scrapped which although sucks in terms totally water tightening that section forcing some extra work to make up a new seal for it dose allow me to swap the electrics around a tad by giving extra space for some slim line 3s lipos rather then a tiny but heavy LA battery which was originally planned, the boat itself will remain a brushed setup for now as all the original planned parts were purchased, but besides the battery which was the change to the plan ( costing only £6 to which i can use for other projects so no real loss) I've made adjustments for the boat to be able to take a 28mm brushless outrunner at a later date should the current motor not be up to scratch ( i fail to see that will be the case as the motor is rated for 14,000 RPM @ 15v and a 3s lipo should give approx 10,545 on a D type 3 blade prop Providing the motors specs are correct)
I've also started to make up the motor mount and trays to hold the esc and receiver as well as making allowances for a brushless setup should it be changed later.
I'll finish the equipment trays over the next week and i should be in a position to add the front window section and start final sanding ready for deck laying.
//There will be a slight break in between now and then as on the next good day i'm going to finish up the row boat with Paint as i'm tired of it sitting on the shelf looking untidy when that's all that pretty much remains to be done to it.//
photos so far
The linkage if anyone's unsure what it is, its a micro flex linkage 2.3mm to M4 thread ( 44mm long) available from ModelboatBits, which is where the adjustment can be made for fitting a brushless motor depending on the size (length) as this coupling can be swapped out to a shorter solid coupling or if its a similar short motor then the linkage can be re drilled to fit the new motor spindle.
_________________ I'm Not Anti-Social, I'm Anti-Stupid.
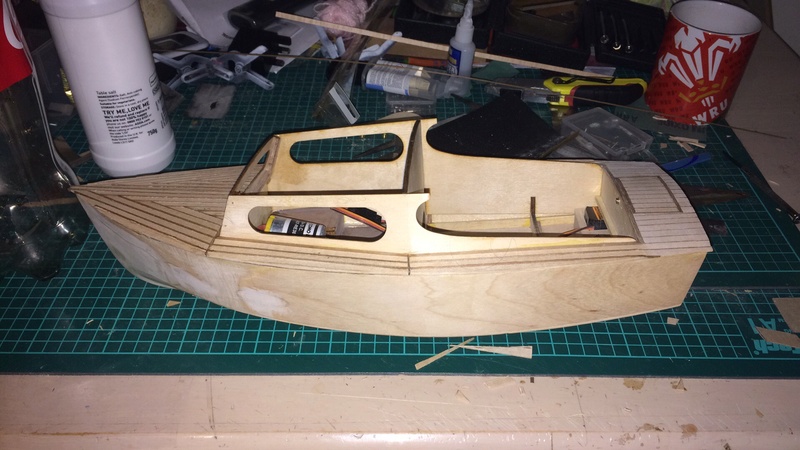
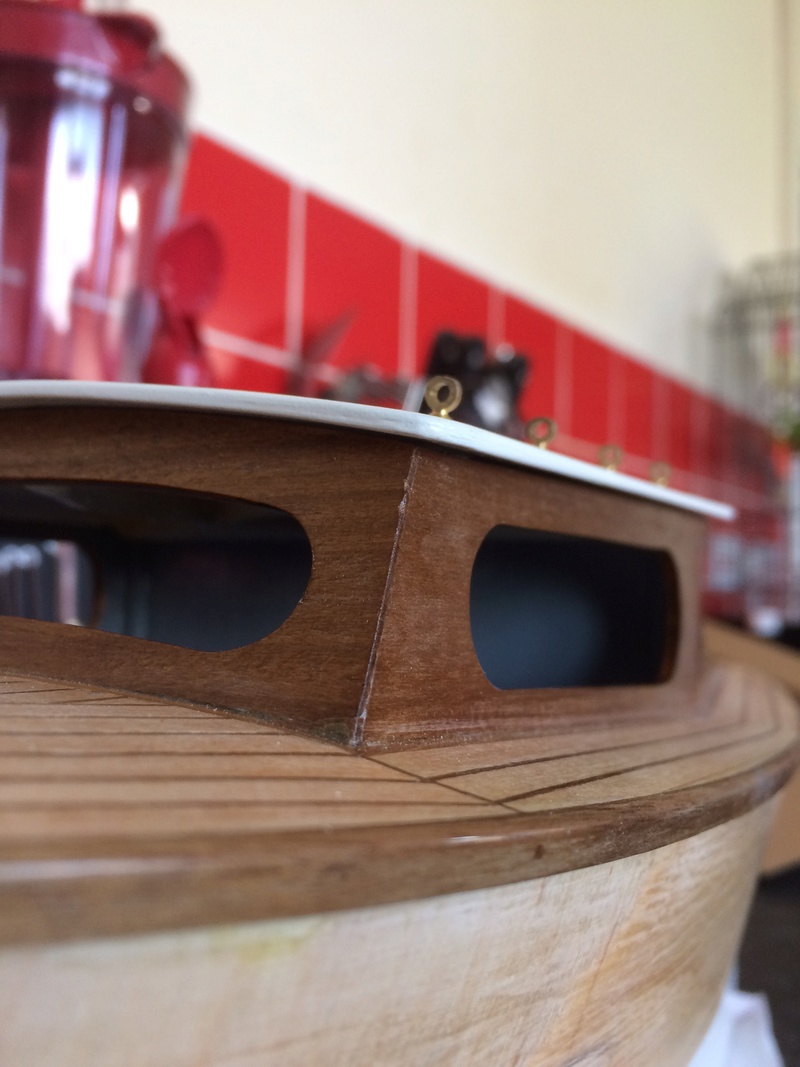
But of an update, I've finished the internal electrical placement supports and fitted the windscreen, it's been reinforced by some small lengths of 5x5mm and then screwed through, I don't think the sides can be held in by glue alone as the ply is not very flexible on two axis. I will remove the temporary screws holding the window in place and find a method of adding some extra strength down this joint, reason for this concern is the roof doubles up as a hatch so over time is can be subject to damage and a pulled joint.
Photos for now.
_________________ I'm Not Anti-Social, I'm Anti-Stupid.
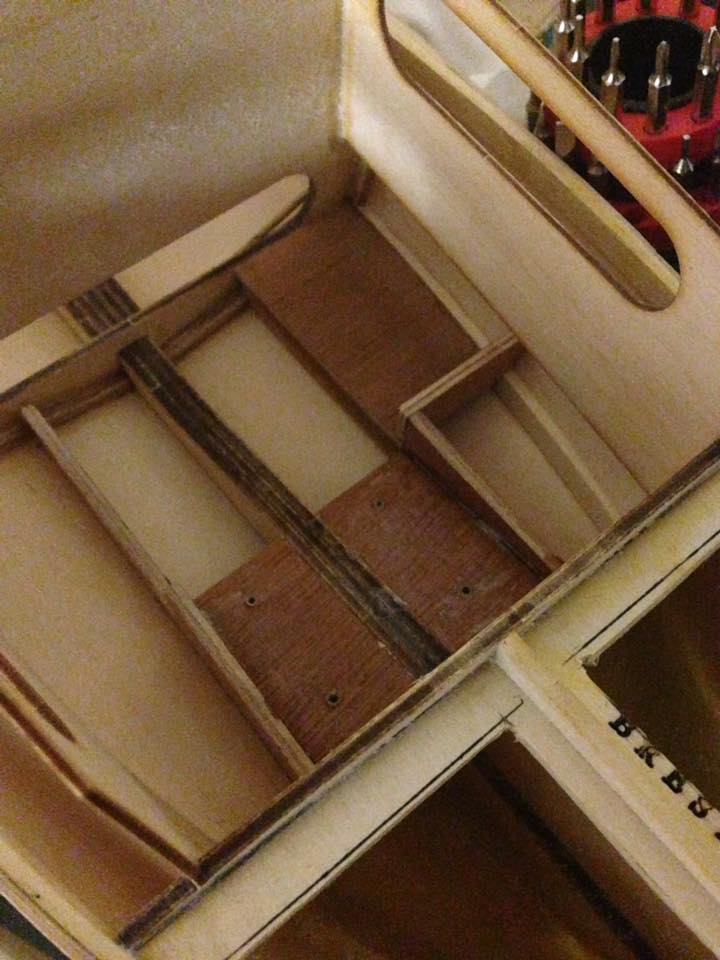
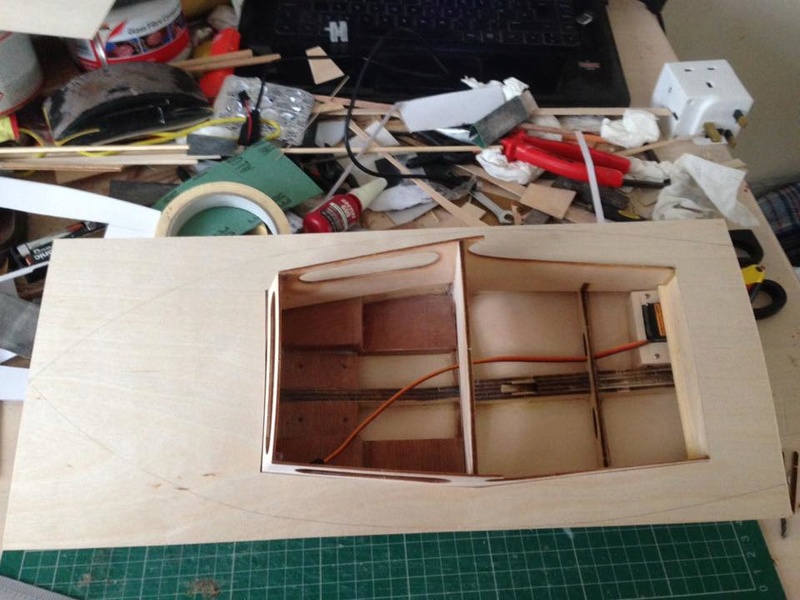
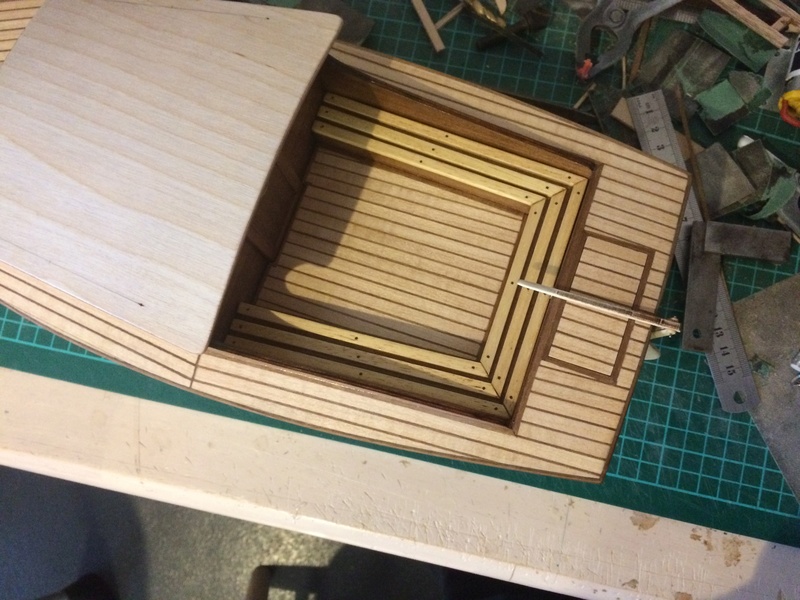
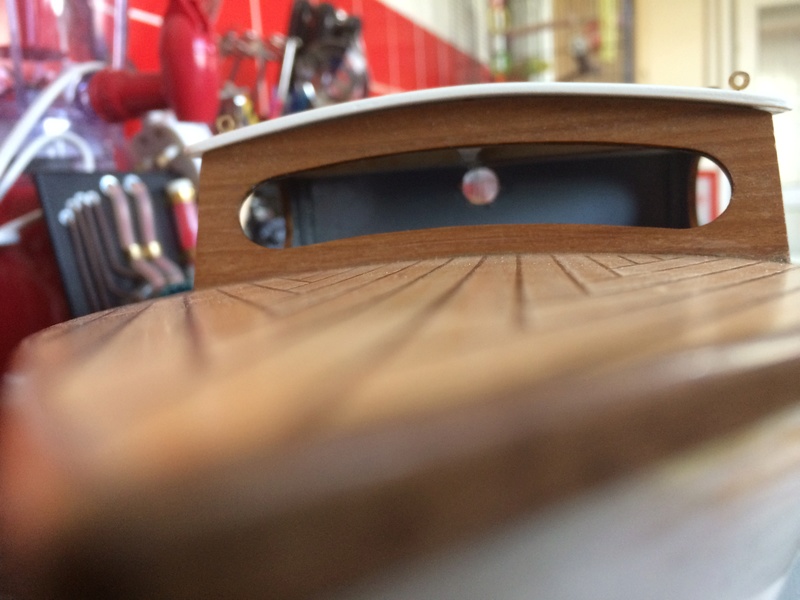
Quick update to where i am now, i've sanded the boats top to allow the creation of a subdeck to which the planks will glue too, and also come up with a new hatch to access the rudder screws and the linkage.
The sub deck is from a 0.5mm sheet of ply and the rear hatch support is just a bulk of scrap material, the hatch cutout is dead central, however the support structure is a little off as i had to allow clearance for the vertical linkage its only going to be noticeable when the hatch lid is off but other then that the hatch is perfectly central. The deck has been glued down and requires sanding to shape before i can commence with planking.
Planking this time will not be my normal mahogany style, this time i'm doing something a little different so i hope you guys will enjoy some variety.
have taken a short break for a day to paint the row boat.... work will resume asap.
_________________ I'm Not Anti-Social, I'm Anti-Stupid.
Since my varnishing has been put on hold to finish two other models due to the pisspoor British weather, I've resumed construction of the urchin.
So yesterday i trimmed up the subdeck edges, and put a big of filler on the bow area to fix some of the marks, dimples etc, I've found with a bit of research some of these kits do require a fair bit of filler so it makes me feel less worried that it's just me!
I've also started to mark up the center line and spacing's for the deck planking, to ensure that planks will be even each side, i'm pleased to say that the deck is perfectly symmetrical to the center line so i should have little issue when it comes to planking.
now i'll spend the day marking up a rough design of the planks onto the subdeck to give me an idea of what i'm aiming to achieve as the finished article, this time round i will be using lime and walnut, keeping the boat appearance very light rather then my usual style of mahogany, this should add a more antique look to the boat, as well as making it look more authentic for a boat of this style. given that when varnished the lime will take on a dull tanned appearance, and the walnut will simulate an oak effect.
as you all know planking is my favorite part of a boat build and really sets of the boat, so i hope you guys will enjoy this coming event as much as i will doing it!
_________________ I'm Not Anti-Social, I'm Anti-Stupid.
Last edited by Roadrunner on Fri May 12, 2017 11:22 am; edited 1 time in total
Roadrunner Forum Overlord
Posts : 1714 Join date : 2011-06-10
Subject: Re: AeroKits Sea Urchin Fri May 12, 2017 12:22 am
I should have updated this a while ago but I got to the planking stage and got a bit glue happy!
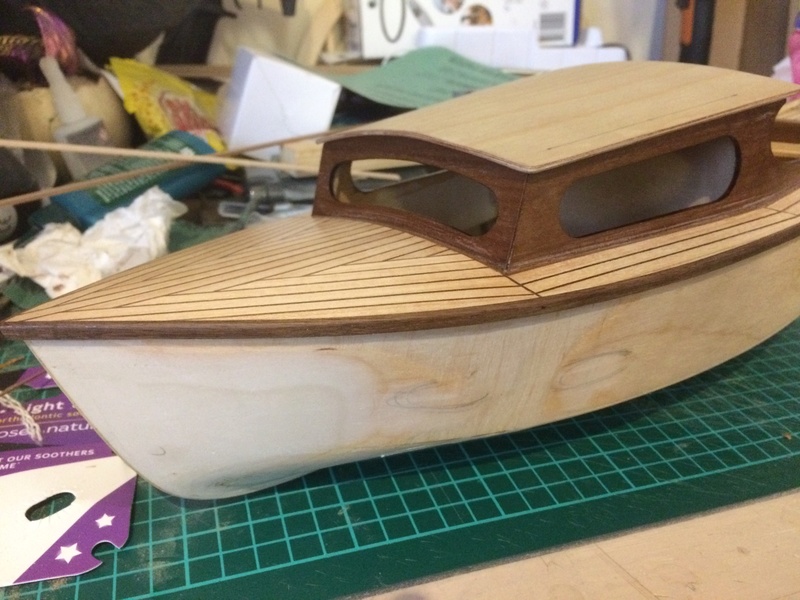
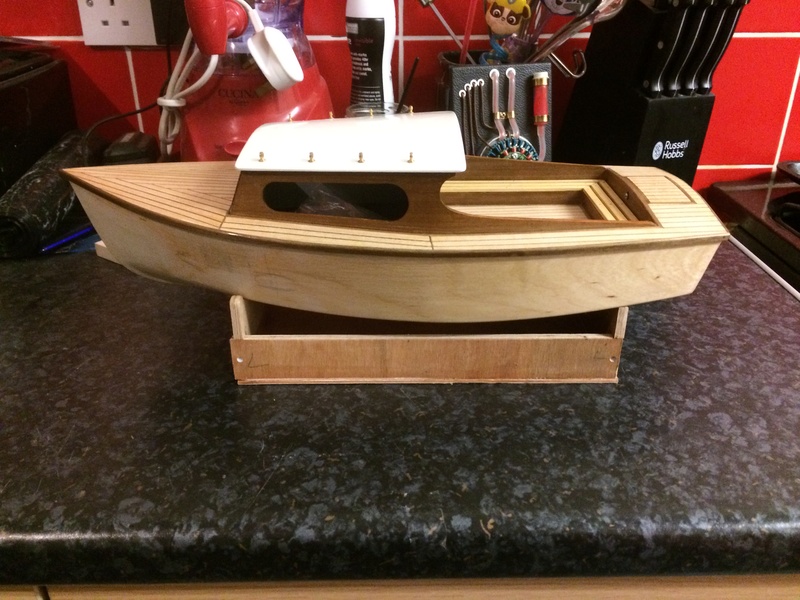
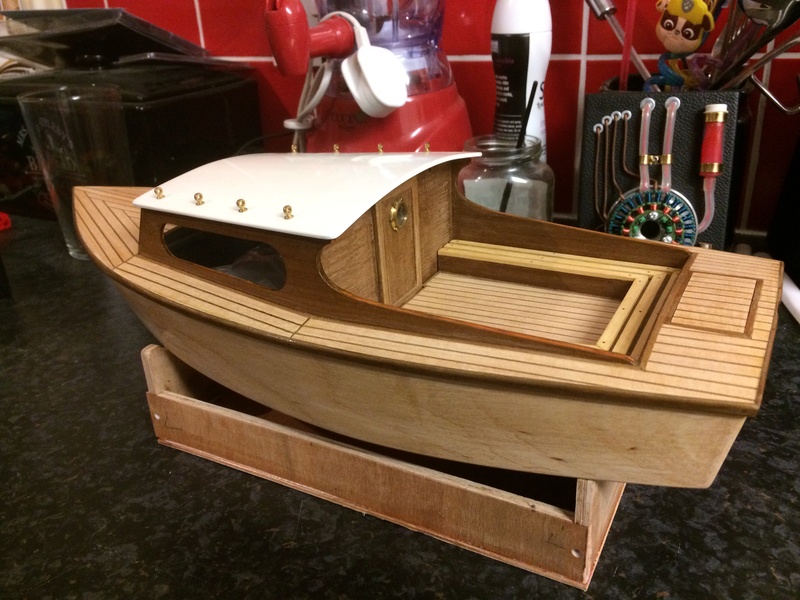
So sadly you guys have missed a fair bit, which includes the planking of the deck, my decision to not paint the cabin instead I've veneered the whole thing with walnut including the working deck...
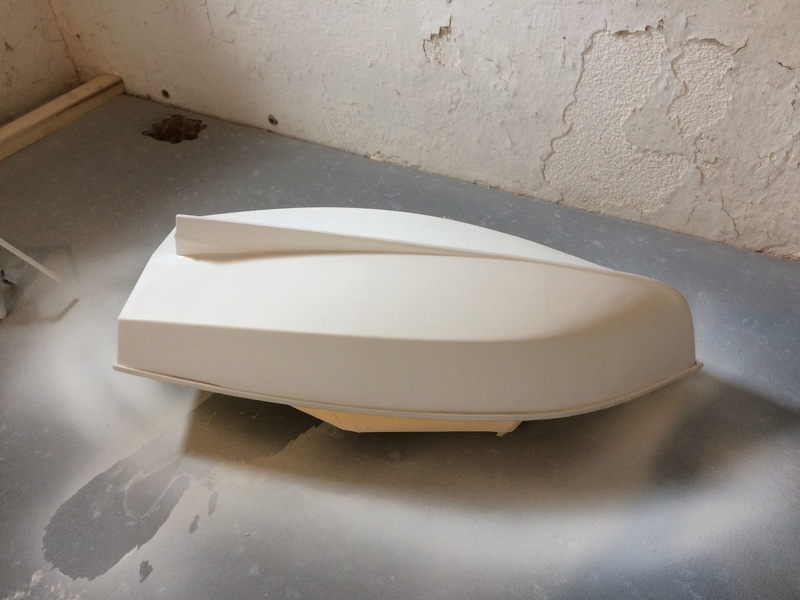
Made up a brand new roof ( since the old one really was junk IMO) and build up the rear deck with a sail boat seating style along with a door .
The whole things been given a couple of coats of epoxy to seal while I go back and work on the final hull sanding....
Get ready for the photos....
_________________ I'm Not Anti-Social, I'm Anti-Stupid.
Guest Guest
Subject: Re: AeroKits Sea Urchin Fri May 12, 2017 2:28 am
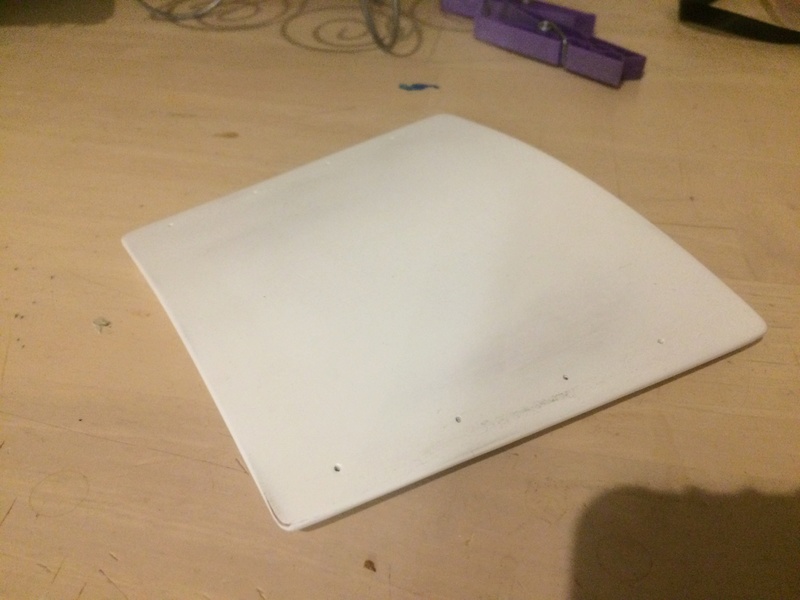
I've given the roof a couple of coats clear coat, topped with some primer, then given a sand to ensure no imperfections. Painting will commence once I can get to town to pick up some paints.
The hulls had its final shaping done, only a few spots to fill and fair up along the keel.
I've also had to recess the rear servo hatch screw flush to the side to allow the fore deck to be removed without fouling, which has lead me to making a modification to the rudders tiller arm as this has some free movement vertically but not enough to allow me to get the deck hatch out, so I'm in progress with making the tiller arm removable so it sits in a block ( similar to old style rudders) allowing me to remove the tiller at will.
And finally I've swapped out the mfa 385 motor for something better. 1200kv brushless, another overlander ( my only trusted brand). I've also swapped out the flexi coupling as the rubber insert is just to misaligned for smooth running at the rpm the brushless can put out for a standard UJ. £30 spent here but well worth it.
In comparison to the brushless the MFA motor requires 15v to give you a max 8000 rpm, considering I can only get a 2 or 3s Flight pack Lipo in the boat I was never going to get 8000rpm, and experience from when I built the classic using the same motor and voltages gave me Whoopsie Daisies poor performance.
Fortunately I was able to utilise the motors mount and have a spare flexi coupling for another project down the line.
_________________ I'm Not Anti-Social, I'm Anti-Stupid.
Roadrunner Forum Overlord
Posts : 1714 Join date : 2011-06-10
Subject: Re: AeroKits Sea Urchin Sun Dec 10, 2017 12:10 am
Progress has finally started in this model, a clear finish line in site.
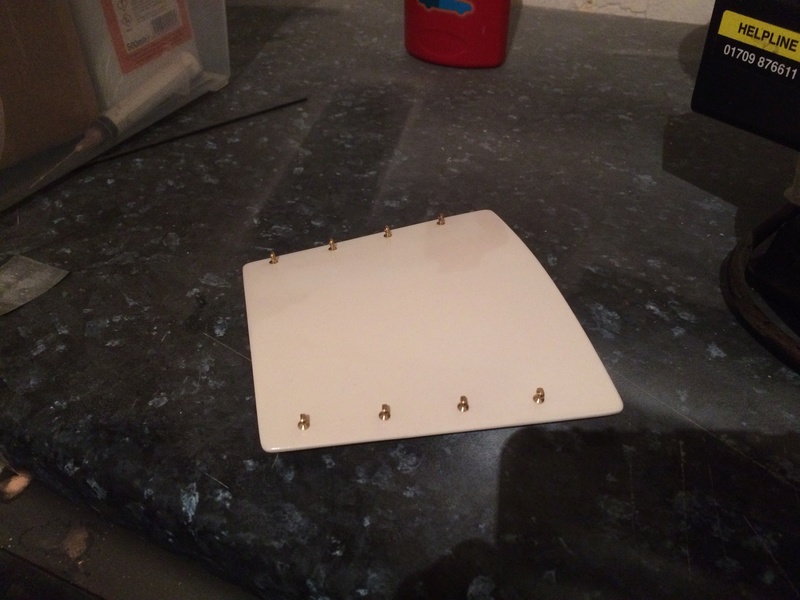
While spraying my fathers one meter yacht I also sprayed up the cabins roof and finished it in lacquer, there won’t be a need to polish the roof as it’s quite glossy and also has a nice flat surface also the boats reasonably small so polishing up the roof will detract from the deck once finished.
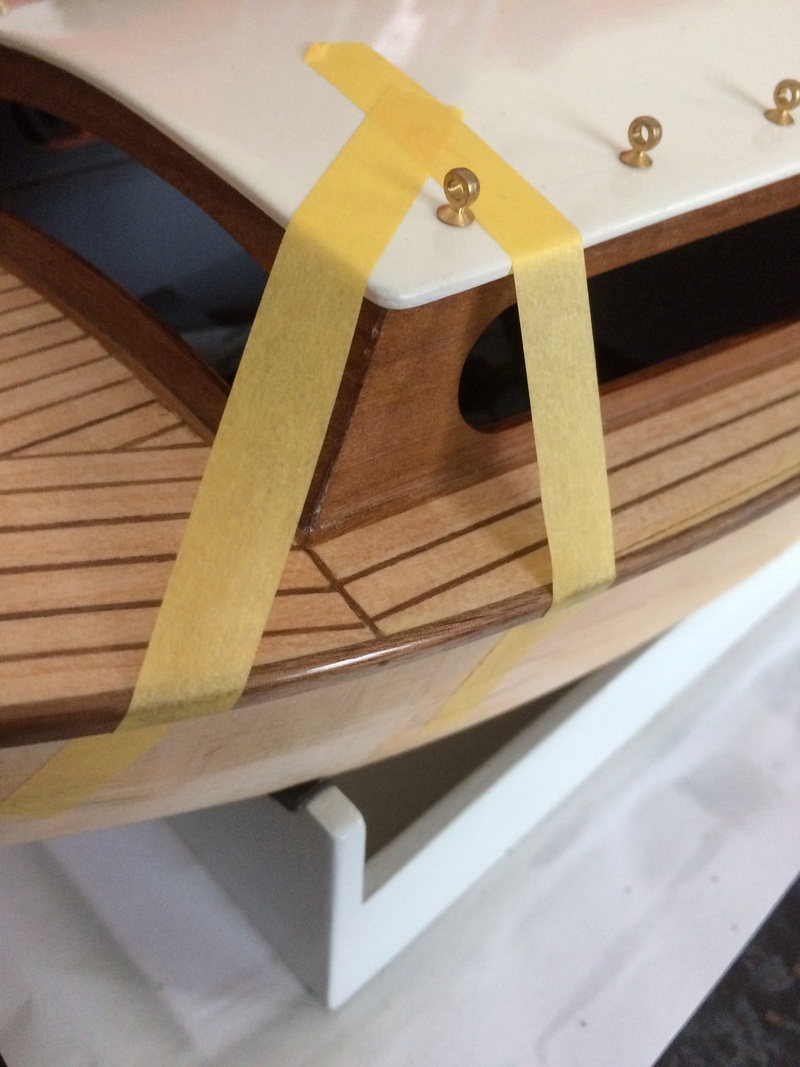
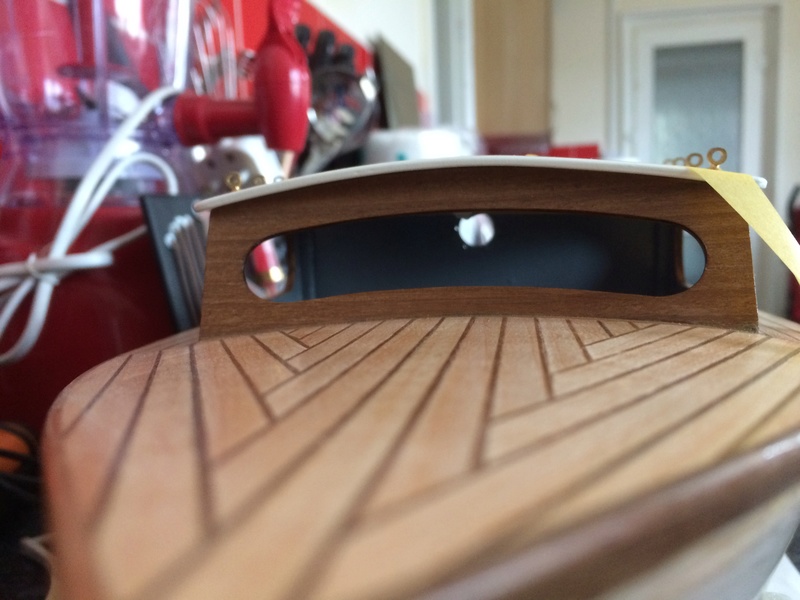
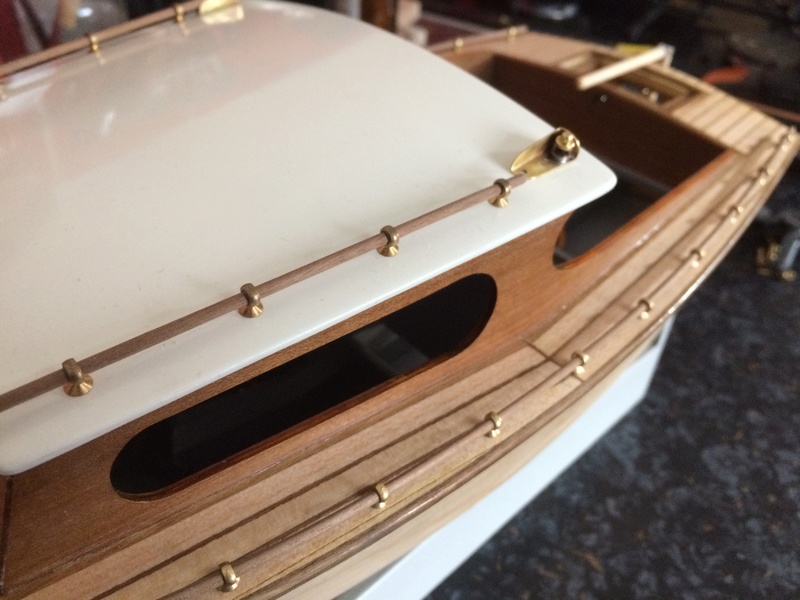
I’ve also added 8 brass hand rail fittings to take a 2mm brass rod to finish as the roof hand rail. It’s an adjustment from the plan as the original rail was supposed to be a singular brass rail Just bent at each end and inserted through the roof, although nothing wrong with that approach I do feel that adding the stansions adds more character along with giving the hand rail more support from bending through years of kiddie fingers!
Over the next few days I’ll start to make effort in smoothing out the boat hull and get a layer of epoxy on to seal it, then onwards with making a stand and painting.
_________________ I'm Not Anti-Social, I'm Anti-Stupid.
Roadrunner Forum Overlord
Posts : 1714 Join date : 2011-06-10
Subject: Re: AeroKits Sea Urchin Sat Mar 31, 2018 8:32 pm
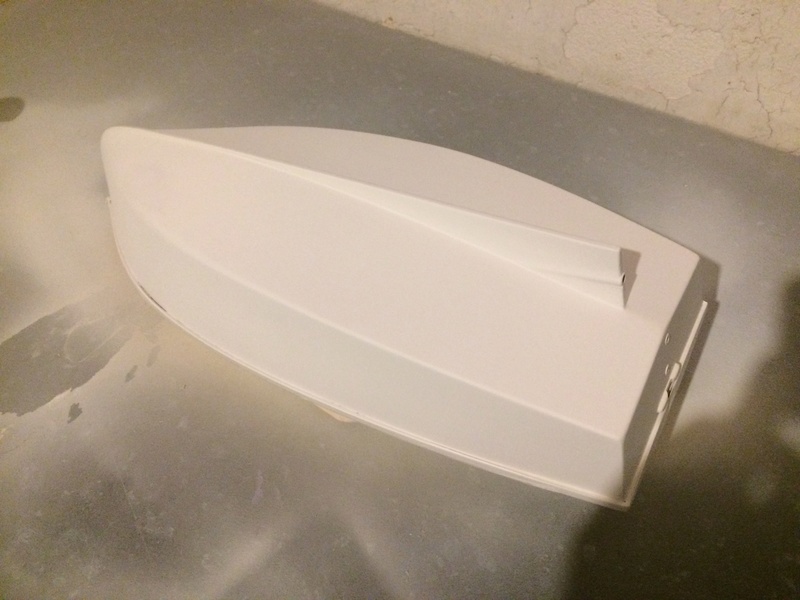
As promised although a bit late, I’ve taken the last couple of days to sand down the hull super smooth, and rounded edges a tad rather than square on ( helps paint stick better) I’ve also trued and faired the hull, filling and sanding, honestly I’ve seen way worse but surprisingly the hull needed very little filler for fairing.
I’ve also coated the hull with 50% thinned epoxy to seal the wood, leaving me in the next 24 hours to sand back the hull smooth and prep for paint.
Once painted I can start the wood varnishing, the boats previously had a sealing coat of epoxy and 2 coats of neat to give me some protection while I did the hull ( knocks and bumps ) to which the boats help up well and I’ve a slight nick on the cabin front corner which was to be expected but again once sanded down flat will be removed. ( thank the sea gods epoxy varnish is like concrete!)
Singular photo tonight more soon.
_________________ I'm Not Anti-Social, I'm Anti-Stupid.
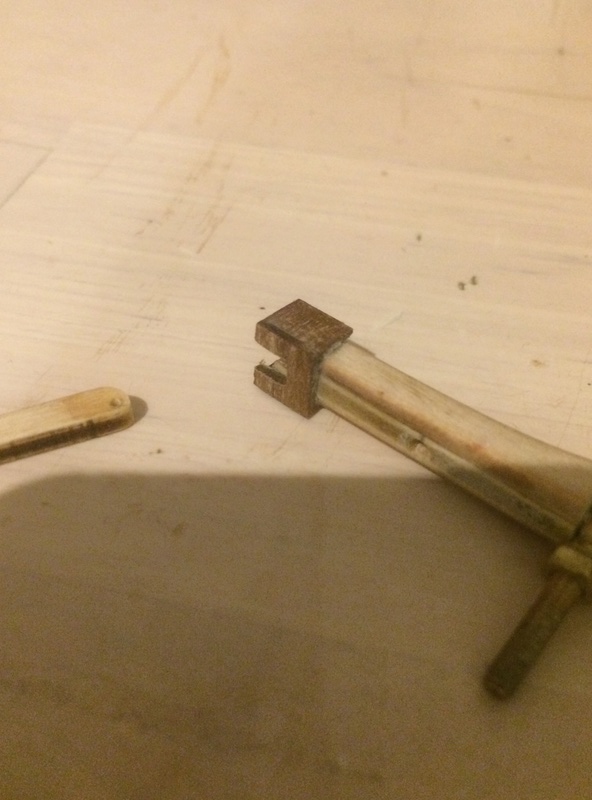
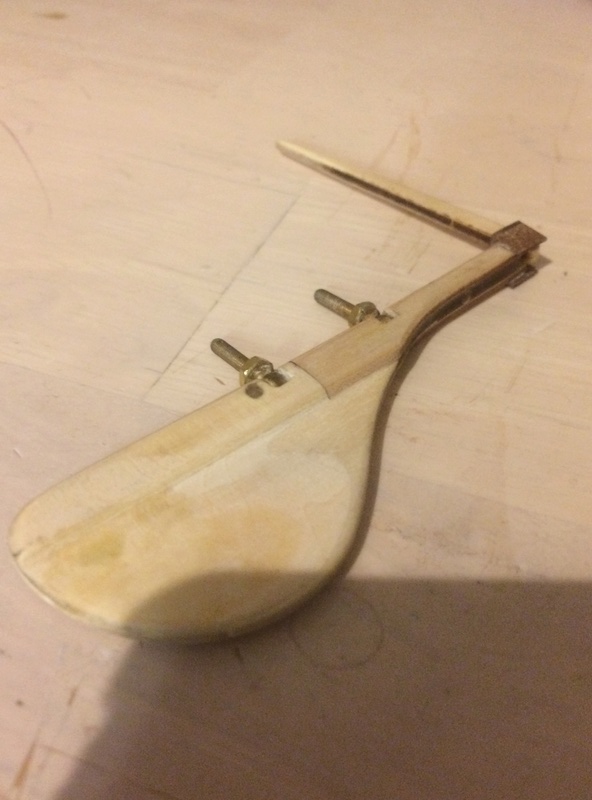
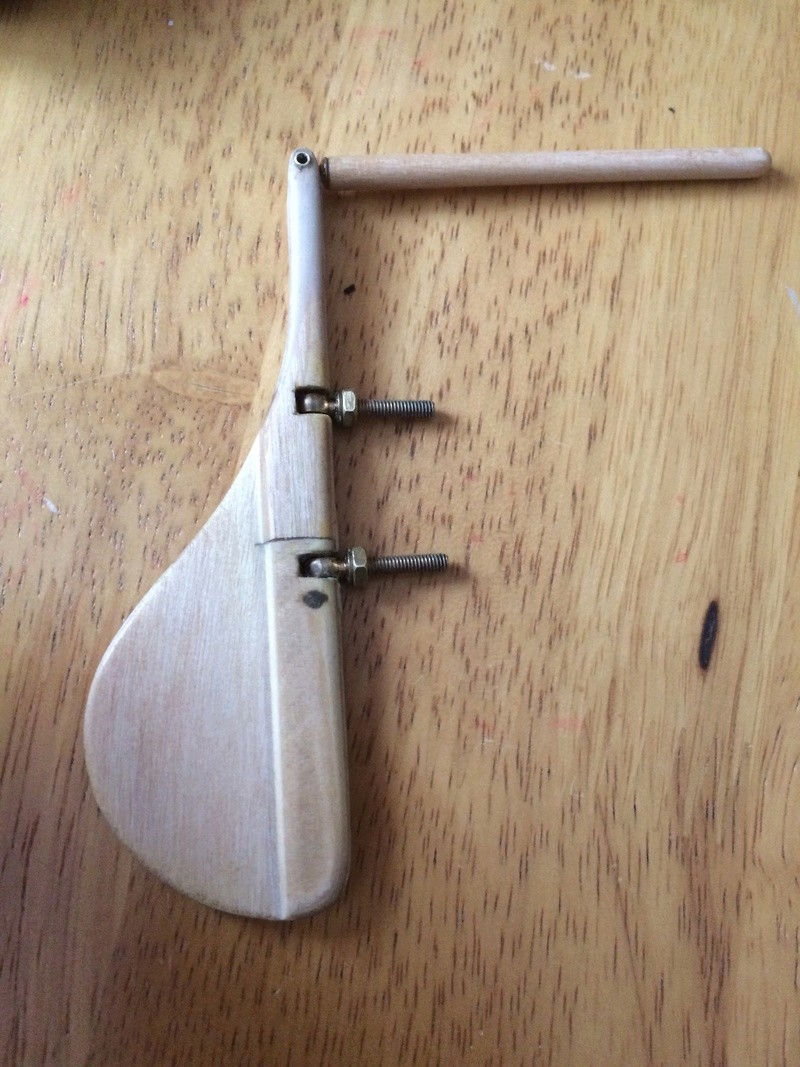
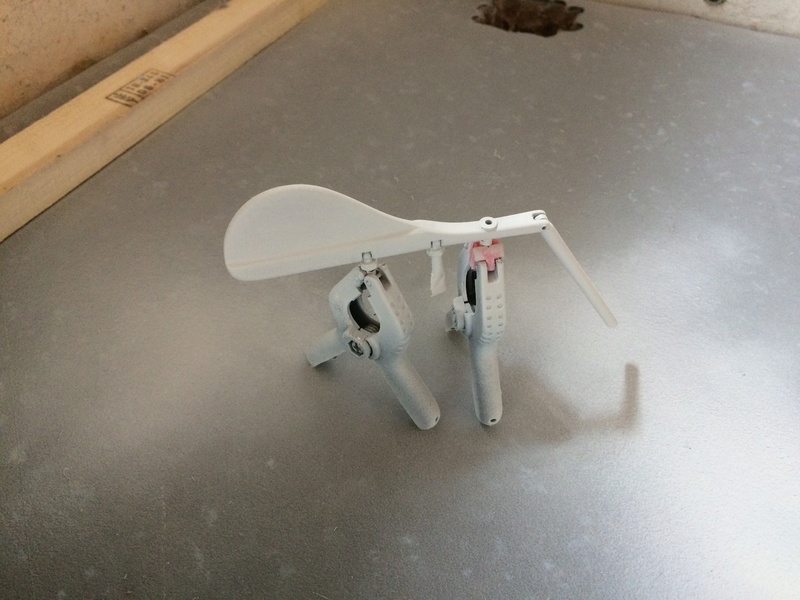
It happened a few days ago when I was dismantling the tiller arm and prepping the parts for paint, I managed to snap the uprights which the tiller attaches to even with my “ reinforced “ block on the top, needless to say at that point I was tempted to cut the rudder down to remove the tiller function completely, however loosing that little quirk got the better of me and I remade the top end of the rudder, it was made of 2 laminations of 2mm lime strip to which I’ve given it’s a side on flare profile and tapered to the original rudder, some filler to help the seam, I’ve then use some .5mm brass tubing as a pivot point and utilised a spare hand rail stansion ( same ones I used for the rudders hinges) and mounted the ball end into a cut down paintbrush handle ( handle of a useless paint brush I had let dry out from using the epoxy varnish) after a bit of work finish result speaks for itself, the tiller is still a lightly fragile part, however is vastly stronger than the original!
Once rudder is mounted to the boat the tiller will slide up and down a brass “Rail track” to keep it secure and hopefully reduce damage, but the new pivot point t allows the tiller to flip a full 270 degrees so I’m able to slip it out the way if required. Should I have another issues In future I will probably cut the top of the rudder and go with an older style mechanical rudder rather than the tiller effect.
It’s now been sealed and sanded awaiting the start of paint work.
Next up is final prep of the hull, paint the. Do the paint for the rudder as this will also be two tone with the water line on, but the boats hull will dictate placements of these colours and markings.
Use this as a warning if ever making this boat to be aware the tiller is fragile and expect a breakaway any time during its life!
_________________ I'm Not Anti-Social, I'm Anti-Stupid.
Last edited by Roadrunner on Sun Apr 01, 2018 5:43 pm; edited 1 time in total (Reason for editing : Added more photos)
A long time ago in a hilly valley somewhere in the shithole of Wales lays a boat in neeed of a stand ...
And so the saga went... apparently....
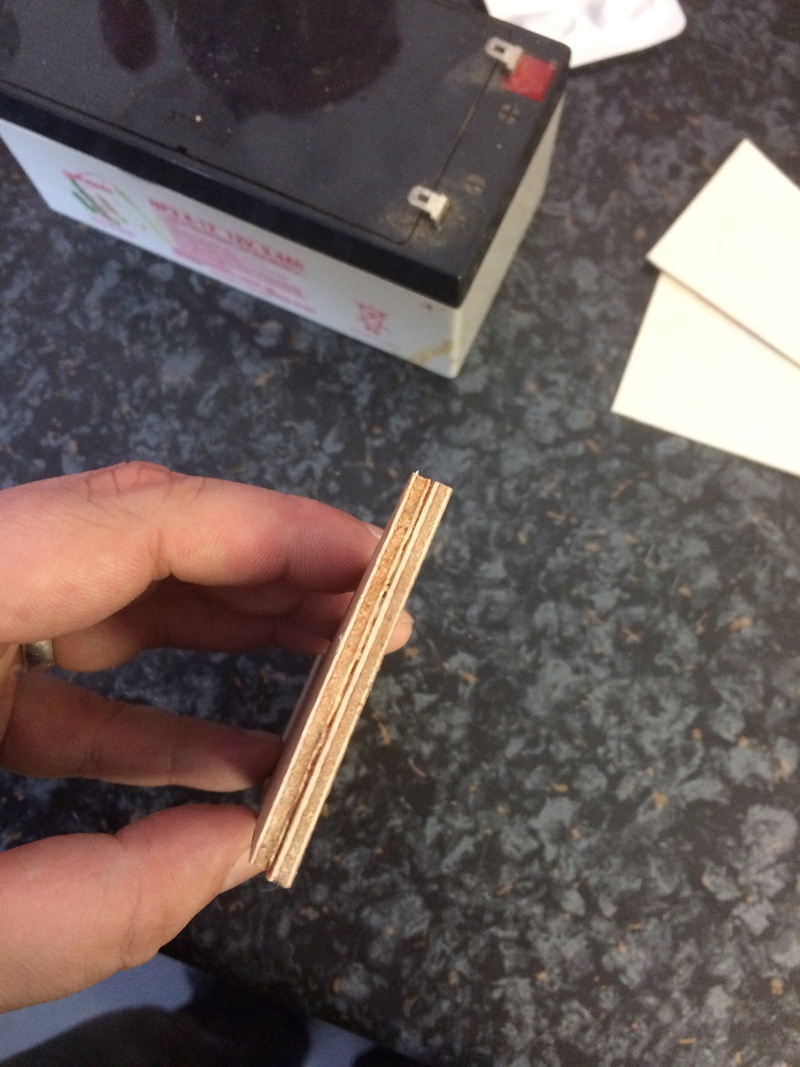
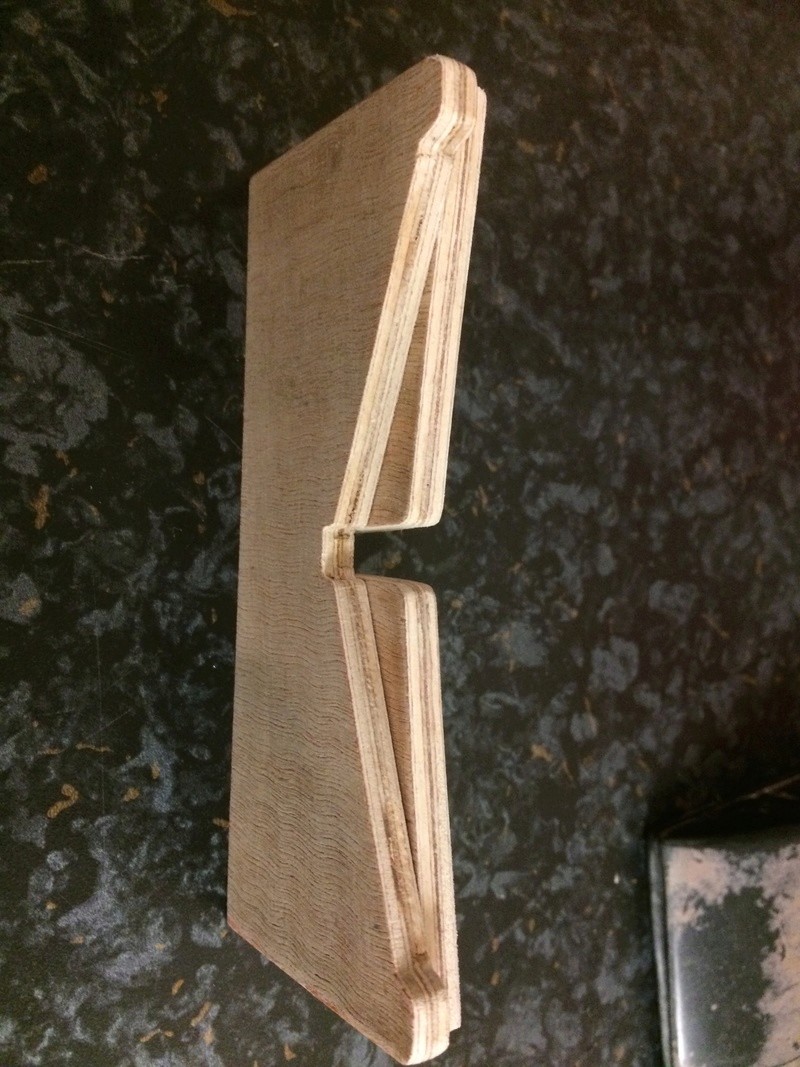
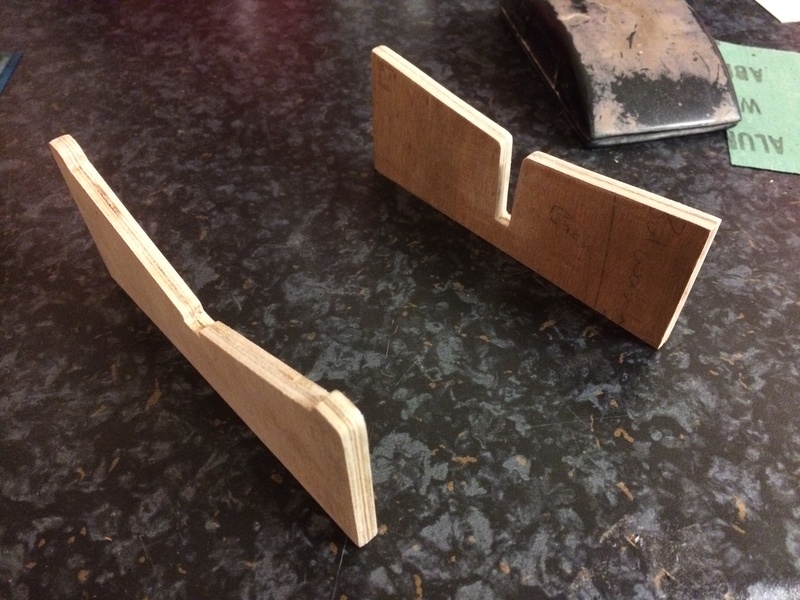
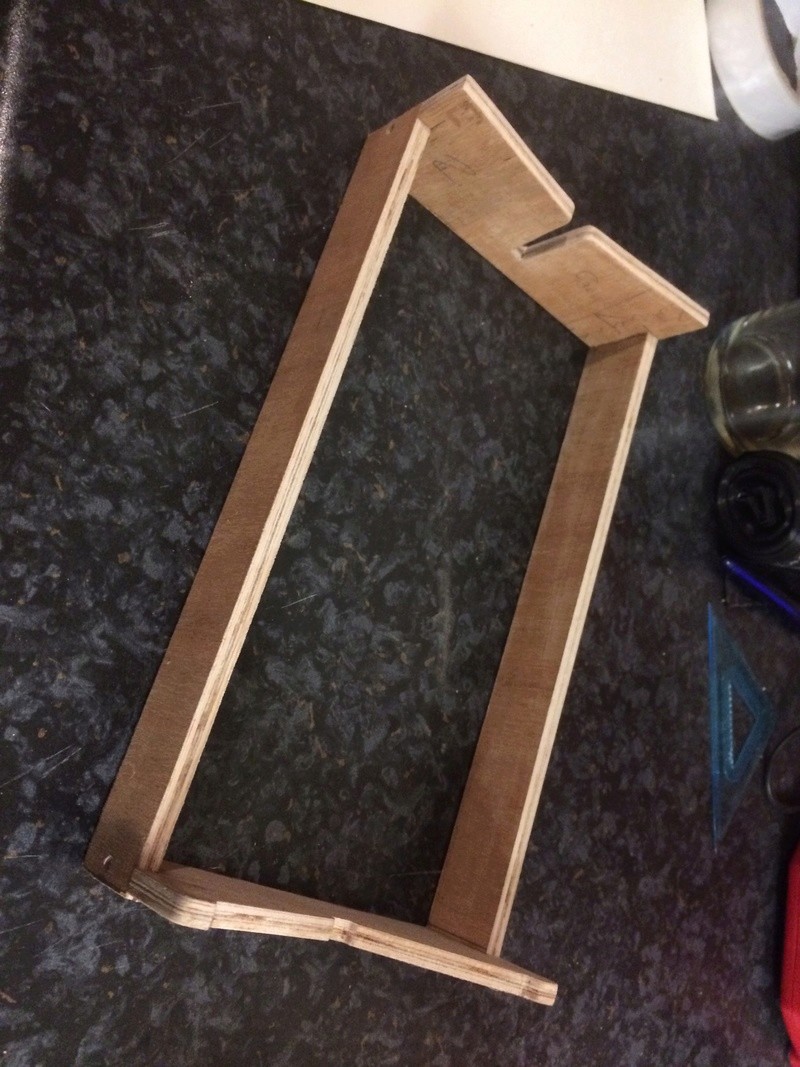
Stand time today, simply made of 2 layers of 3mm junk ply (only thing it’s good for is a stand)
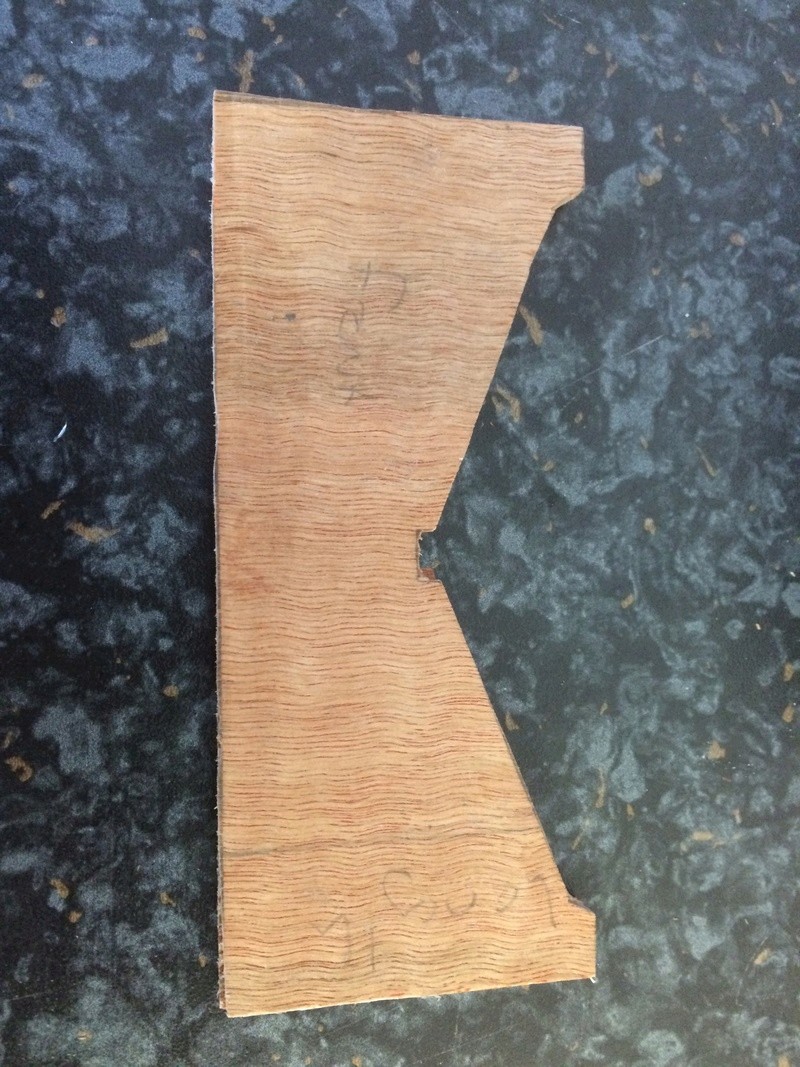
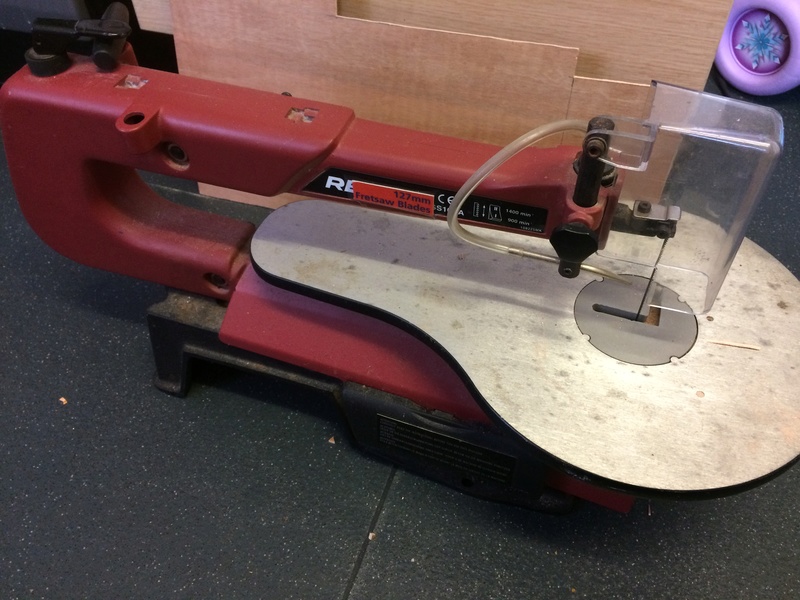
Started with card templates, transferred to ply, cut out on the electric fret saw, glued the laminates together for. 6mm solid standoff’s , afixed laminated 6mm side rails, capped to lipped base for extra strength. Still in need of a solid sand, some filler for a few gaps then paint to seal it.
Photos so far, hopefully I’ll finish it tomorrow.
_________________ I'm Not Anti-Social, I'm Anti-Stupid.
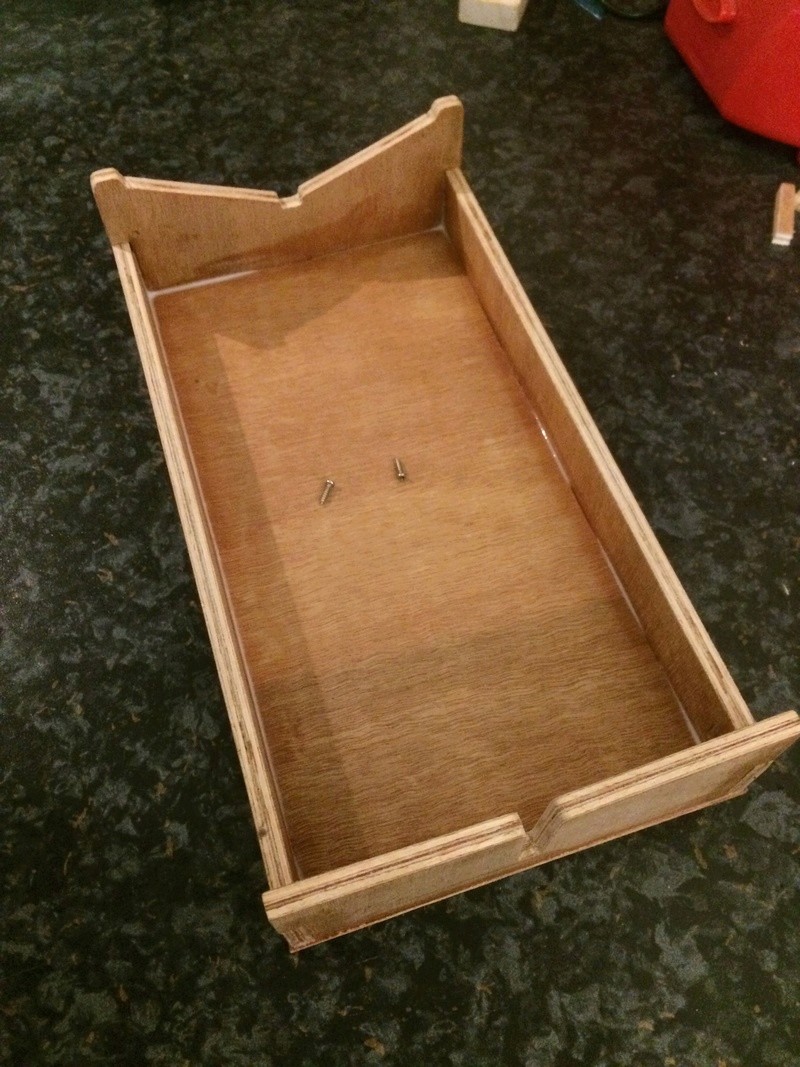
After some filler on the seams and edges, a load of 80-240 grit wet and dry, the stand was finally finished and awaiting paint.
After a confusing moment of the airbrush blocking up, the stand appeared to have a lavish paint job in a light/grey with a blue tint, after 3 more coats the wood grain no longer shows through the surface, an hour later some epoxy came to play and gave the stand a good ole licking to give the stand a glorious smooth shiny finish....
Well it will be super shiny once I give it a quick 1,2 with some rubbing compound and polish...
Once dry I’ll locate some foam for the pads and there ends to two day saga on the boats stand...
For those thinking this stand is a little odd with the higher sides as well as a internal base there was good reason for that, originally I planned to put a draw into the stand to hold the boats parts, however I opted for a lower profile, so scrapping the draw it’s simply a work tray to contain the boats removable parts, remember this boat has a detachable lower sub deck, roof access and the servo/rudder linkage hatch along with 3 screws all of which at any one time will be off the boat and subject to loss or damage, where as putting these parts into a tray under the boat reduces the risk of loosing or damaging these parts.
Good idea right?
_________________ I'm Not Anti-Social, I'm Anti-Stupid.
After I painted the roof I noticed that the front left corner was slightly warped up by about 1.5mm But the remaining 3 corners were still a flush fit to the cabin.
This annoyance I left alone thinking that it may sort itself out over a bit of time sadly after a couple of months it’s no better but not did it get worse, now when I rebuilt the roof I used only the central rail and the front and rear forms from the original frame work, now even the kit did not provide any form of diagonal bracing... however I built the roof using the remaining sections of frame and filled in what was missing and disgarded the use of a brace between corners...
Now it wasn’t a matter I couldn’t be bothered it was simply I remade the frame and it was flush to the work surface and square to the cabins rebate, once I applied the ply top it stiffened up and all corners sat flush to the boat.
This is typical of wood and paintwork, the roof was sealed prior to painting with some varnish from the rattle can, left to set and again fit the roof several times over the course of drilling out the holes for the rail stansions and never noticed an issue.
The paint went on not long after and then varnished to finish, that’s when I noticed the corner lifting, needless to say this annoyance has plaqued me for a while and today I sorted a fix, normally In a situation like this I would simply add a flat sheet of ply the the bottom frame and clamp it all down and that would resolve the issue, in this case however the inside of the roof frame at the front had been trimmed in 2 curves to avoid the roof frame coming past the window opening, and to top that issues the side rails were rebates purposefully to allow for the windows top part to have a more adequate glue joint other wise the tops would be floating... so my only option was as follows..
Now by no means is this a tidy fix it’s a hodge of ply wood braces and a ton of epoxy, fortunatly you can’t see these braces until you take the roof off or have a good peek looking up through the window, but it’s the old story of what ever works...
So I’ll add a couple more photos once the glues dry and can take the roof off but for now a few photos of what’s going on with it...
_________________ I'm Not Anti-Social, I'm Anti-Stupid.
Guest Guest
Subject: Re: AeroKits Sea Urchin Sat Apr 14, 2018 12:08 am
Well I let the epoxy set rock solid for 18 hours or there abouts, roof secured down into its position and all I could do was wait and see... my fear was it was going to spring back up once the tape was off and with the new brace in place there would be nothing I could do because the lid is that stiff you could use it as a shoe horn!
But thankfully...
Nailed it!
As you can see the roof not only sits perfectly on the cabin seamlessly but it now also has no flex in it whatsoever.
Good result, I’ll have to seal the wood braces with some epoxy glue so the wood can’t expand and go out of shape again the. I’ll just give it a quick coat of white to clean up the inside.
Like I said not a tidy fix but it worked and when the roofs in place you wouldn’t know about it.
Just a note on the last photo you can see magnets imbedded into the front supports this originally was to be my securing points, however the windows caused problems and fouled the magnets leaving no where to place the 2nd pair inside for them to lock into. This was again and original plan that didn’t work out no matter the planning.
_________________ I'm Not Anti-Social, I'm Anti-Stupid.
Since this boat only requires painting to finish, to which I can’t add pointers on that finishing work since everyone has their own methods and use different brands I’ll do a run down of the models flaws and highlight areas that if building this should be looked at more closely.
1st would be to secure and check the prop shafts exit point.
It’s a very weak joint until the boat starts to get sknnned. This is where I added material to reinforce this joint, I’m not saying that the boat wouldn’t be strong enough on this area once built but during the process of bending sheet material around these points there is a good chance of breakage leading you to start bodging a repair.
2nd keeping the bulkheads square, this is common on all kits using bulkheads ao Just keep this in mind, always check for square and equal distances between corners both sides even.
3rd make up templates before cutting the side panels now I know the kit provides flat stock which is a good thing, as I found the keel was far from straight, to which that’s point 4.. but making templates first that do fit will save you many headaches!
4th watch for the keel, the ply in my case was very wavy, which lead me to drastic measures of clamping bar stock 1”x1” across the length and adding a hardwood strip to pull it back straight. Again this with point 3 using templates for skinning the hull will save you so many headaches.
5th the bow panels, I had issues with the bow section of the panel, now not everyone will have the same issues and will be able to pull that panel into place, I struggled after many various methods whichcblead me to cut to the bulkhead and plank the gap.
It’s a good option for those who will also struggle with this part, so be aware doing so will require u to hollow out the breast hook for allowance to add some resin inside to reinforce that section. Also be aware that in planking the front in a similar way will require a lot more filler to clean up.
6th watch the breast hook. It’s placment on the plan compared to the part wanted it to shift about, secure or flush to the forward bulkhead and Just trim down the bow once you have your hull panels in place.
7th now I drastically altered the way the rudder worked. This is purely optional and I see no reason why the original plan would not work I’m just not happy with fail points on the tillar.
8th fitting the servo for the rudder, I’ve no idea how others did theirs but clearly they didn’t end up doing what I did! Trial and error here is all I can suggest but keep in mind my changes to the deck which changed how I had to do things!
9th the deck change, I hate full open hatches at deck level especially when the deck joint is open to the water that close to the hull panel, my advice, would be to make a smaller hatch as I did and secure the deck down proper with no fear of water ingress remember this boats splashing water back and up, the original deck I have no doubt would let water into the hull.
10th changing the deck, if you want to use the original deck, go for it! Nothing wrong with it at all however I will say this add a sub deck as I did and glue those 6 parts to that sub deck, or I promise you will have cracks and leaks all over the deck at the butt joints! Save your self that headache and spend some more on some 0.5mm ply and make a one piece sub deck first!
11th the roof... Hahahahahaha good luck! The original roof did not fit the cabin at all it was over sized and wonky and that’s with the original parts, my advice here is to use flat stock and make parts that fit! Also add a bloody diagonal brace to avoid my recent issue!
Want my real advice? Scrap the whole bloody kit roof, if you brought ply for a sub deck cut out two .05mm roof panels fit to a frame and laminate the roof as I did strength and well as you can see a far superior roof than the kit provides, bit of extra work but it pays off!
12th changing the cabin from paint to wood, purely optional, but in my case it suits the boat better to be stained, varnished or in my case veneered and varnished, I honestly belive painting the cabin in any form would have make the boat tacky looking especially when the roof is white, and the hull is what ever colour, You have this chunk of boat, what? White? Cream? Bright neon pink?
13th adding details, the kit has some details but it’s basically a bare shell waiting for your input.
If keeping faithful to the kit using original parts weldone you, but for those wanting to add some details I can only suggest changing the deck, swapping out the hand rails, the boat has a rail across the deck...I actually liked that but couldn’t bring myself to add it on my deck this time around! Add some cleats, and add a door or some fixtures around the cabin to make it a little more realistic.
As I said the boats a blank page do what you want! You don’t need to go nuts nor spend a fortune.
In summary....
Kit for beginners? With some carful thought and pacience I see no reason why not. However this wouldn’t be one I recommend to start with as a first time time boat builder, simply as there are many challenges that a novice will probably not know or understand how to overcome. I didn’t even factor on price it’s one of the cheapest kits out there of reasonable quality, but experience goes a long way!
Boat for those who have some knowledge on kits... Absolutely this kit will test you but it’s worth the effort.
Kit for experts.... yup and I look forward to seeing your variations!
As for the big question do you buy the kit? Well I can safely say yes, buy it! Both my dad and I have built this one and the larger version of this, with success but we both experienced issues to which adding more money and material resolved most. Just be prepared to pay for a lot more than you think.
I didn’t total this boat up in price as I normally do on my projects but it’s safe to say this £60 kit has easily lit the £200 mark ( including paint) with the modifications and all the running gear.
Which makes it quite a pricy little boat! But sometimes you can’t put a price on enjoyment after all I’ve spent more on holidays and had a worse time!
_________________ I'm Not Anti-Social, I'm Anti-Stupid.
First being the paint! However I’ve been let down on the primer not delivered so painting will have to wait and it’s annoyed me as I planned to spend the weekend painting the boat so it would be almost finished within the next couple of weeks, primer wasn’t my fault I ordered with plenty of time and even paid for the. 48 hour delivery but to no avail.
In the mean time that has given me an opportunity to drill some holes in my perfectly good deck!
As you recal from previous post when I highlighted the kits issues I mentioned the boat was supposed to have a rail fitted to the deck both port and starboard,
Now if sticking to the original deck from the kit fitting that part would have been a good addition however my new planked deck not so much, however I really did like the idea of this rail on the deck and I searched around on google for other boats with similar features, turns out this isn’t an uncommon rail on boats and tend to be foot rails for clambering about the sides of the boat while using the roof hand rails.
Originally I wanted to remain faithful to the kit however with my additions and modifications I decided some things needed to be scrapped, but in this case I came across a boat image using wooden hand rails fitted into brass stansions, to which clearly since I’m mentioning it is a tidy idea which I’ve now pinched and subsequently will use for two purposes.
First off is to scrap putting a brass rail into the roof and inserting some walnut dowling ( matches the boat) and then to create tow rails down the length of the deck each side using the same method
I actually liked this rail quirk about the boat but swapping it out for somthing more inkeeping with the boats deck without obscuring it with a chunk of wood just glued to the surface, was needed and this image fixed that. It also removes the need to fix he brass cleats I purchased which I wasn’t happy with just glued into 1mm holes.
I’ll keep you posted but so far I’m working of the roof rails while I churn out placements for the deck rails.
Some photos to keep you entertained..
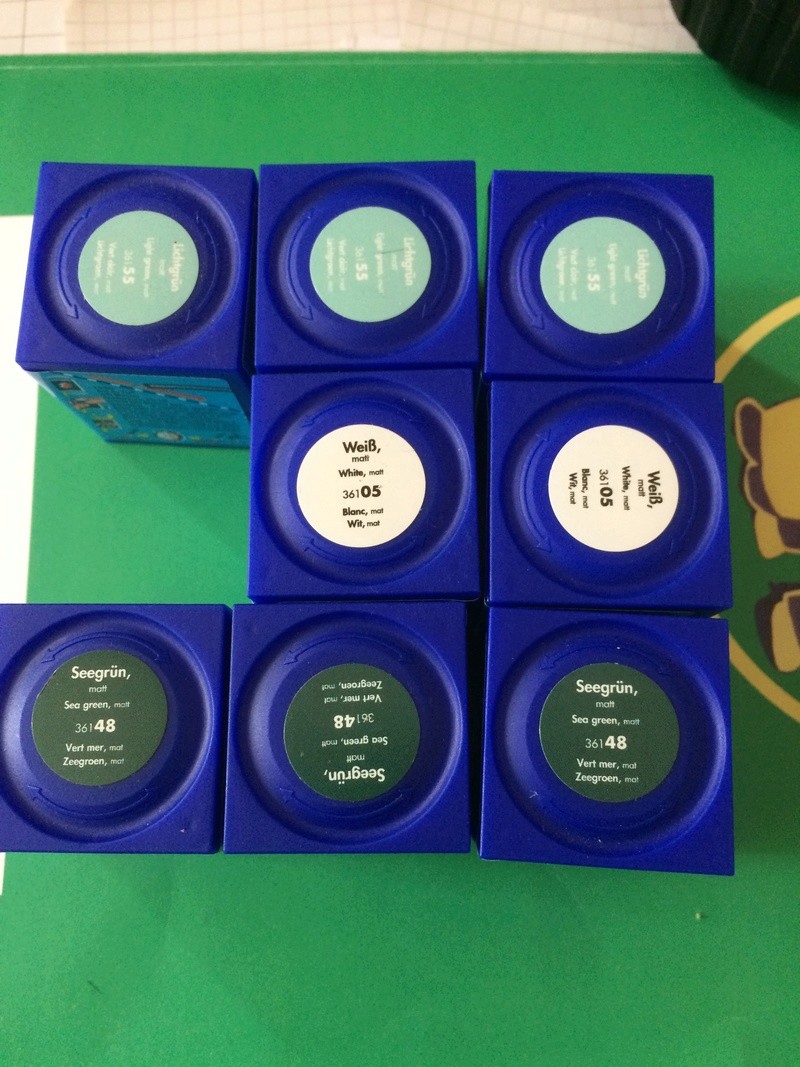
Paint...
Top of hull a light sea green ( vintage green if you like) white boot topping ( water line) and dark green bottoms of hull.
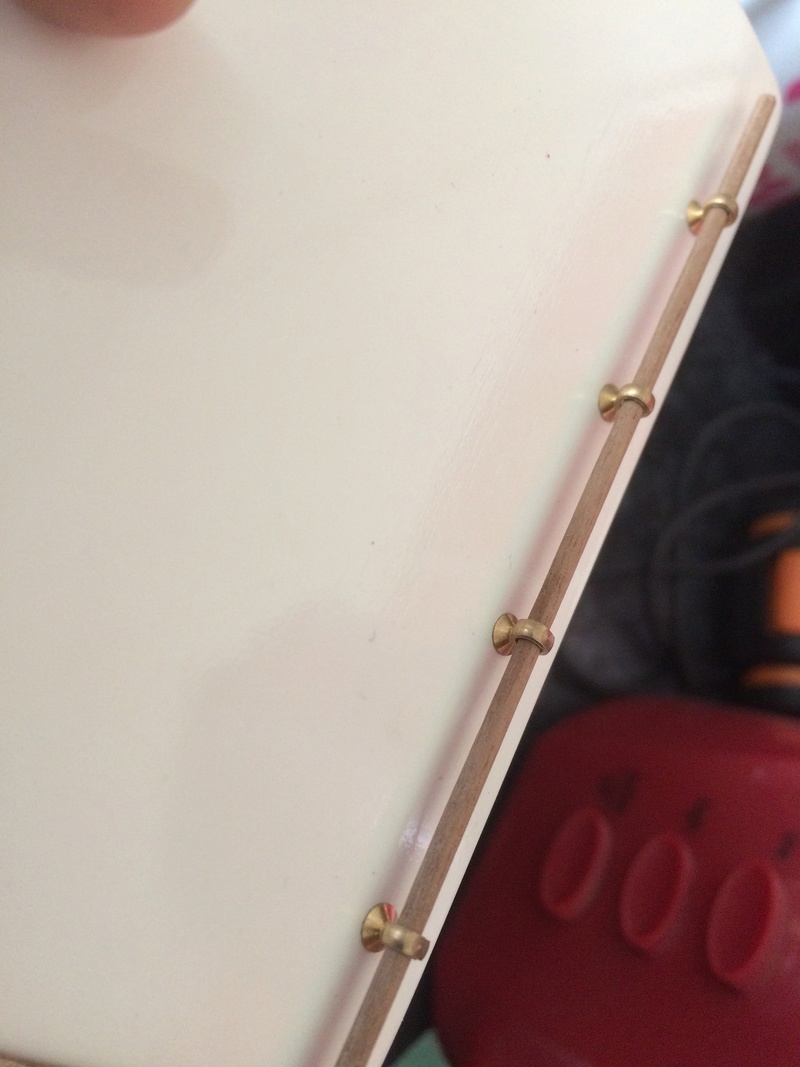
Hand rails had to be re drilled to an actual 2mm dia since they weren’t, 8 done so far 24 to go! And a length of 2mm walnut dowling inserted, dowling needs to be trimmed to exact length sanded and ends rounded, then finally glued in place awaiting some varnish to finish. ( I would normally varnish the rail before final fixing however the epoxy varnish isn’t great as a glue surface for other epoxys so bare wood to brass will grip better and just varnish around the parts no one will be the wiser!
_________________ I'm Not Anti-Social, I'm Anti-Stupid.
Roof rails finished, awaiting varnish, next onto the side deck rails.
_________________ I'm Not Anti-Social, I'm Anti-Stupid.
Roadrunner Forum Overlord
Posts : 1714 Join date : 2011-06-10
Subject: Re: AeroKits Sea Urchin Sun Apr 22, 2018 1:19 am
What sort of twat drills 28 holes in a perfectly good deck hmmm???
Dose anyone else get that whole “let’s hope I didn’t F* that up” moment when drilling stansion holes!
No turning back back now tho, fortunately I spent the time marking up the locations of the stansion rails to which they screw not only though the deck and the sub deck but also bite into the 5mm chine rails, I’ve only clipped two bulkheads so that has reduced my stress levels somewhat worrying about elongated holes!
Wish me luck 14 to go then to re-drill to 2mm.
_________________ I'm Not Anti-Social, I'm Anti-Stupid.
Roadrunner Forum Overlord
Posts : 1714 Join date : 2011-06-10
Subject: Re: AeroKits Sea Urchin Sun Apr 22, 2018 3:18 am
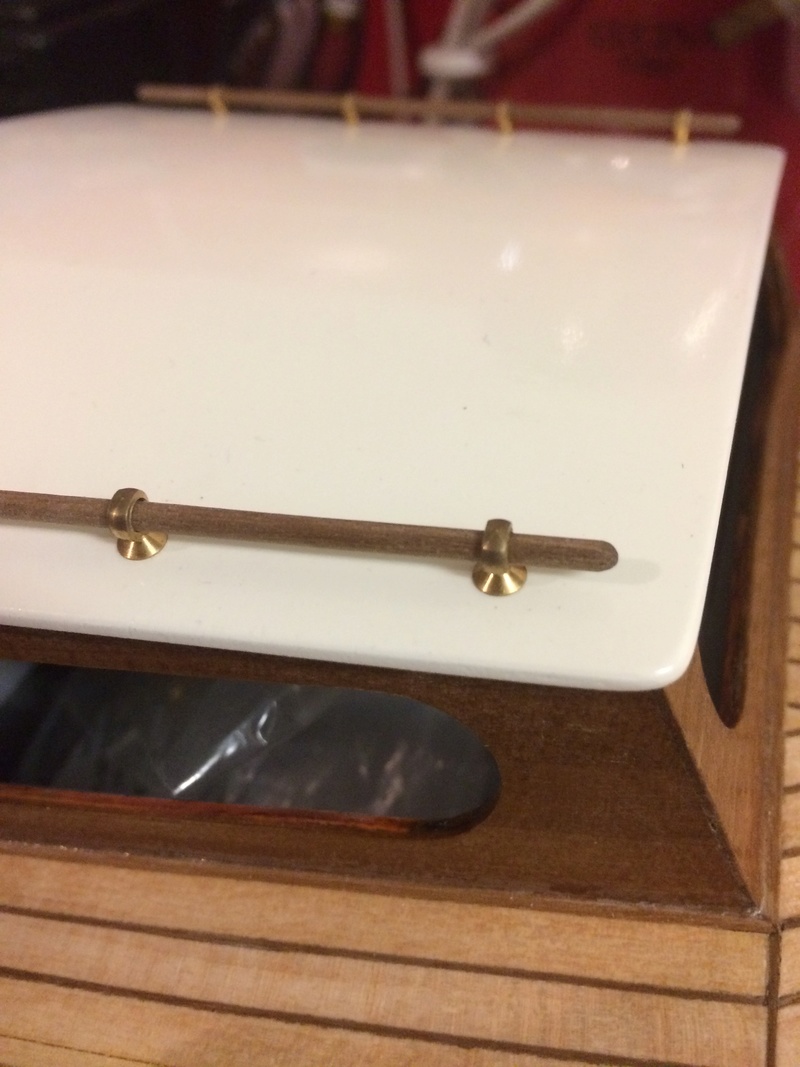
Well all rails fitted loosely for now so forgive some of the uprights being at odd angles in places,( this is due to some of the threaded section being too long so there being defected of the hull skin, shorting a few in places will resolve that) they will be flat to the deck at the end as I still have to remove them and other brass parts for deck varnishing but this is loosely what it will look like.
_________________ I'm Not Anti-Social, I'm Anti-Stupid.
Guest Guest
Subject: Re: AeroKits Sea Urchin Sun Apr 22, 2018 4:24 am
A little ripper Aron.
davidjt Forum Sponsor
Posts : 534 Join date : 2013-01-08 Age : 72 Location : n wales coast
Subject: Re: AeroKits Sea Urchin Sun Apr 22, 2018 8:20 am
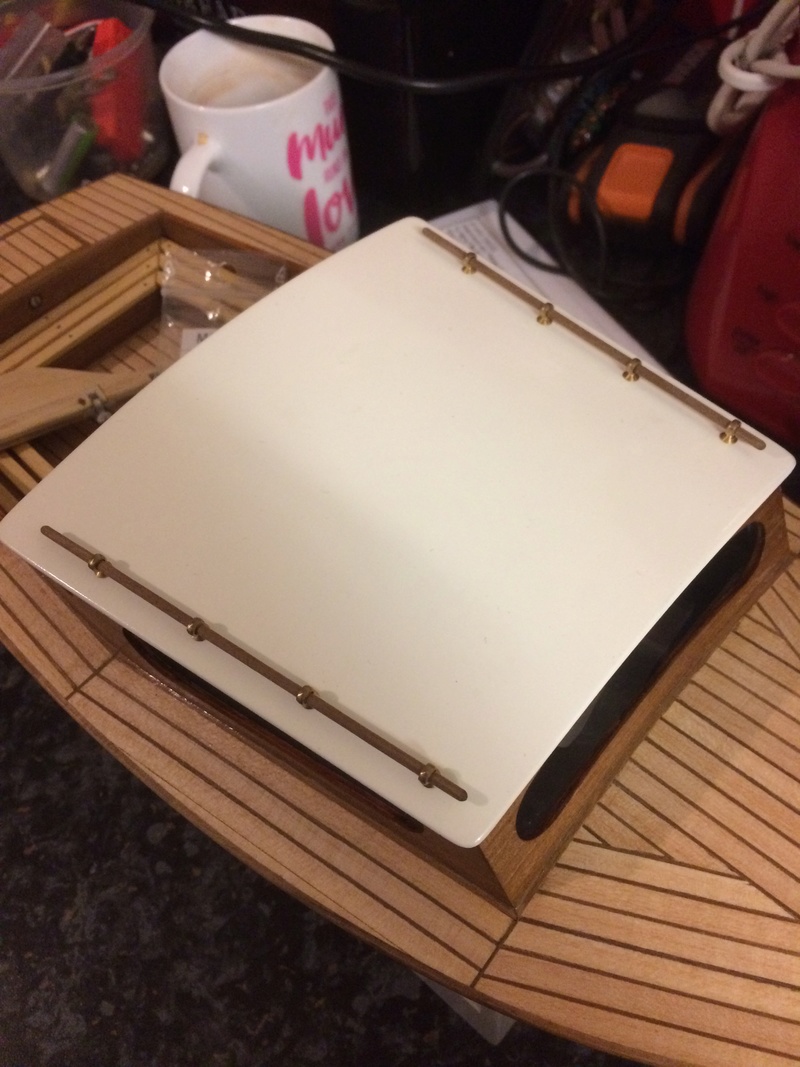
Rails are sanded to final shape and length and everything is loosely fitted to the boat, still have to remove everything sand varnish and paint but right now I can see a decent time line to finish the boat.
Today imma going to research something to sit on the bow as I feel it’s missing somthing, it may be a simple cleat that I’ll make up the same way as the hand rails but it’s clearly missing a finishing touch, I’ll let you know what I come up with after some googling.
But for now I’m pleased with its look overall and those foot rails really have set it apart I’m my oppipnipn so I hope you guys like them!
(Truthfully I bricked it during all 28 holes worrying I just just messed up a perfectly good deck but some 2am courage and a bottle of beer seamed to allow me to pull a rabbit from the hat!)
_________________ I'm Not Anti-Social, I'm Anti-Stupid.
With the great British weather turned yet again priming the hull has to be out on hold till a clear day comes to light, I have no workshop to spray rattle cans so I need clear dry days to do such tasks, but from there indoor painting becomes simple with the airbrush.
Until such time as the sun decides to show its face again I’m stuck with odd jobs to do to the boat, One such job happened to be with the rudder and it’s connecting screw to the linkage, I had found I was getting some slack in the rudder, originally I put this down to the screw hole being a little too wide with it being exaggerated with the linkages not being exactly tuned in, however I discovered on playing with the rudder in my bordom that not only is the screws hole a little too wide ( although a simple fix) I actually found that the screw was being pushed back through the hole of the rudder changing its throw.
To fix this it was clear that I needed a sleeve on the screw that butted up to to the linkage to keep the screw fixed in place, I thought at first a lock nut would do the trick which it would have but the limitations of the build stopped this in its tracks for one simple reason... the slot in which the screw and rudder linkage use is far to slim!
Now I never took into account this as an issue at first and purposefully kept that slot as minimal as would allow since it’s an entry point for water so I’ve had to devise a solution, by creating a new fixing point for the screw through the rudder and a stop for the linkage.
I had laying about some 2.2mm brass tube ( odd size I know) which had a 1mm hole, I’ve honestly not the faintest idea where this length of tubing came from but either way it was a good start to my solution, I had to carefully drill out the tube to 2mm given how thin I made the wall you won’t be surprised to hear I tore through a few times in trying, fortunatly enough by the 3rd time I had drilled enough length before the tear though happen, to which I just snapped off the end and bent it back out with some pliers to accept the screw thread, to clean all this up I took a brass servo sleeve and slotted it to the end of the tube, tight fit but it worked, just to secure it and give me a end to sand flush and clean up the tube end I soldered it to the sleeve, lastly after a clean up I re-drilled the rudder hole to accept the new sleeve and epoxied it in place.
This new sleeve now holds the screw firmly in place and once screwed into the linkage stops the screw being forced out the hole by the linkage movement, I also found quite by luck this has given me a bit more throw on the rudder as the linkage no longer clips the edge of the transom as the linkage is a little further back in the boat.
_________________ I'm Not Anti-Social, I'm Anti-Stupid.
Today I’ve added some additions to the boat, in regards to the rudders fixing point, I simply added some cut down servo screw sleeves to the holes through the boat this has given me not only a water tight hole around the wood so not to start moving anytime after finish but it also holes the rudder perfectly vertical along with be a tight fit on the threads, meaning once full installations finished it would take just a dab of silicon on the thread to insure a good seal but also an area not subject to water damage over time.
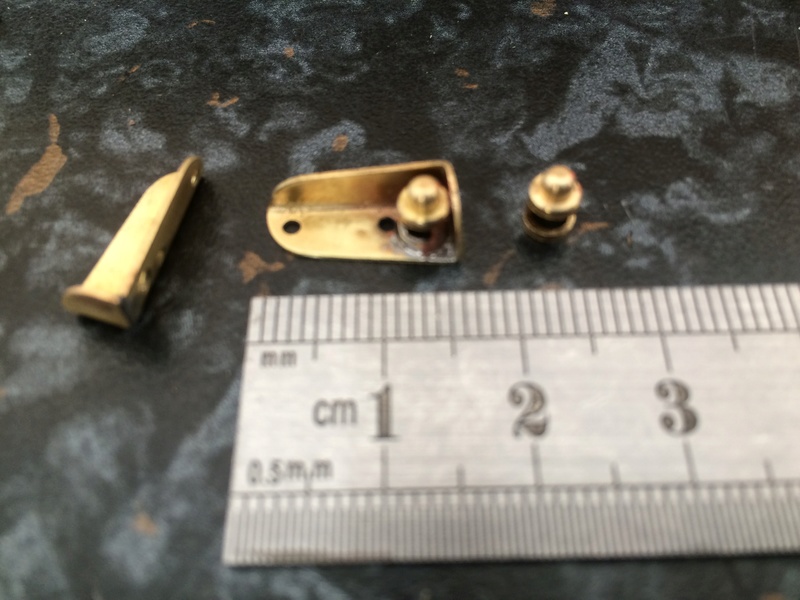
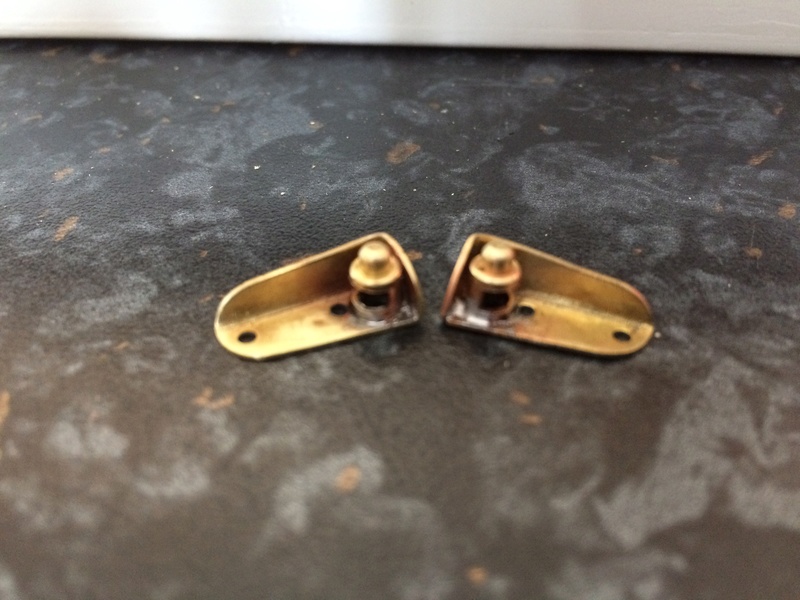
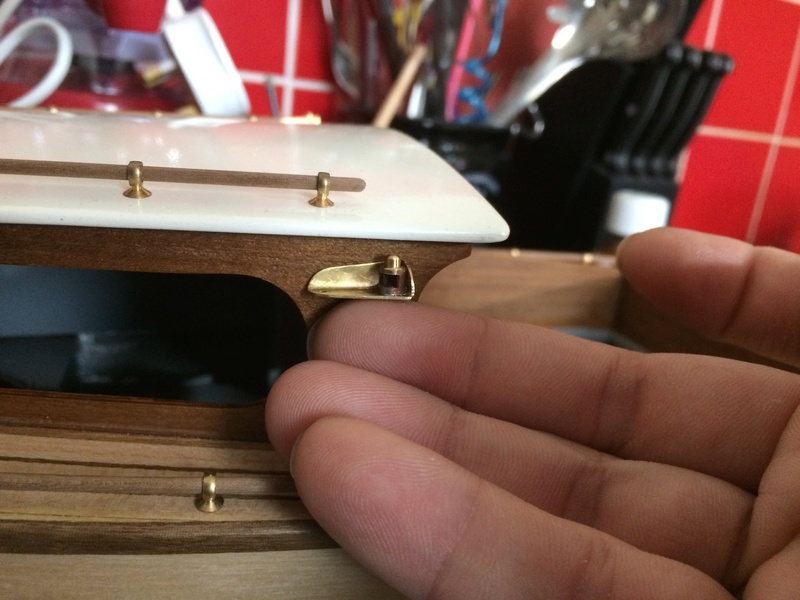
After that I’ve taken the time to start some of the finishing details to the boat namely the navigation lights, I had hoped to find some deck mounted lights at this scale but sadly none exist and I really do not have the patience to make some up at these tiny sizes, I did however find some 15mm back borded navy lights designed for a roof fit, with a slight tweak I will side mount them to the cabin this will require a little shelf to be built of the cabin sides but nothing to dramatic, I was tempted to roof mount the lights but frankly they looked a little odd in that position due to the hand rails being closer to the edge of the roof than I guess would normally be either that or I’m reluctant to cut down the roof rails at the rear to fit the lights.
I did however have to take most the afternoon to clean up these Nav lights by bending the brass in to actual place and refit the little lamp into the correct orientation, being so tiny it’s not hard to see why I had to bend everything into shape, I guess cheap dos this always get you perfect. Some soldering later and pretty much done minus a clean up of the solder joints.
Before I mount the lights suggestions on position would be great wether it be roof or the side.
_________________ I'm Not Anti-Social, I'm Anti-Stupid.
I did a bit more googling about only to confirm mostly what I thought in regards to location of the nav lights, I found most boats of this era or style tended to have the lights in one of 3 places either front deck mounted, roof with no hand rails or top rear corners, generally tho I think they were placed anywhere there was space given most have larger windows.
I’ve stuck to my guns and decided to side mount, using a couple of .5mm brass bolts. It’s not exactly tidy but fortunatly enough without going up close and personal you would never notice, I’ll try to hide this better if possible, I just couldn’t come to make little wooden ledges for these parts that could get easily knocked and crack the epoxy finish where as screwing into the frame with a dab of glue will secure most adaquently.
I’ll start work on polishing up these nav lights which should help remove the solder marks, but I think this is a part I may have to live with not being perfect from close inspections. As for lighting I’m not sure what to do as of yet, there is space for a grain of wheat bulb but I have no confidence in those older style of bulbs so I’ll try to source 2mm leds, I’m not overly happy forcing lighting to the model but in this case it maybe appropriate.
_________________ I'm Not Anti-Social, I'm Anti-Stupid.
Today I stripped the boat down, masked up everything in prep for primer...
Primed the hull and rudder with white, so far so good. Although I do have a tiny patch where the paints wrinkled up but I think this was due to a little bit to much paint on that section, so I’ve left the boat to harden up and I’ll go and give that area a light rub down and respray either this evening or tomorrow depending on how dry the boat is.
Besides that little defect the hull is relatively smooth with only a few of the planks and a few tiny pin holes showing through on the bottom of the hull and base of the bow, I would normally go back sand and fill these little indents and plank lines but since the base of the boat is to be a very dark green they will not be noticed to great extent, but I also belive once I start getting some thicker coats of paint they will diminish over time. The transom is showing a small amount of wood grain so I will give the boat an entire light rub down before continuing get to prime the hull, again nothing to worry about and until some primer hit the boat I would not have been able to see this to avoid in the first place.
_________________ I'm Not Anti-Social, I'm Anti-Stupid.
I’ve given the boat a good rub down and respray the 2nd coat.
Coat went on much better and a lot more of the plank lines have now vanished, the patch that had started to bubble and crack I sanded back down to bare hull, after spraying I now have only 2 tiny maybe a mm or 2 across at the top and bottom of the original issues, not much else I can do to fix this as I spent extra time ensuring the hull was contamination free using some thinners, I expect it’s something to do with the sealing coat on the wood reacting at this section, I’m not sure why but I’ve resolved 99% of it so I’ll simply wait for the paint to dry and feather these parts off and just spray the bottom coat on. I know that the darker colour will hide the primer error but fortunatly the airbrush doesn’t contain odd chemicals to react with anything on the boat so I’ll just work the layers of paint to fill out and feather to a smooth coat, it’s a little annoying but if that’s the worst of my paint issues then it’s one I can live with. Time will tell.. more to come over the next week so keep tuned!
Oh and wish me luck!
_________________ I'm Not Anti-Social, I'm Anti-Stupid.
Roadrunner Forum Overlord
Posts : 1714 Join date : 2011-06-10
Subject: Re: AeroKits Sea Urchin Sun Apr 29, 2018 12:37 am
Well I took a little extra time to fix the odd spots on the bow that we’re giving me some jib earlier, a little perseverance went a long way as now I have a tiny dark mark on the hull in place of any cracking and peeling, which is good news knowing he paint work is now stable to the hull, I’ve come to the conclusion that I doubt this was caused by a reaction to anything in the hull but I expect a simples oversite of my own making and putting a clumsy thumb print in that area moments before spraying, lessons learnt again to be more cautious in future about where I hold a boat during these painting stages.
But as you can see issues resolved, I’ll let this harden off and start marking up the colours and if times allows start laying paint.
This time around I’m spraying with Matt, same way I went with my dads IOM featured during my airbrush review, I had great results using a mix of matts and satins on that project so I’m confident I can achieve another great result this time.
_________________ I'm Not Anti-Social, I'm Anti-Stupid.
Guest Guest
Subject: Re: AeroKits Sea Urchin Sun Apr 29, 2018 1:01 am