| | | A Classic Reboot... |  |
| | | Author | Message |
|---|
Roadrunner
Forum Overlord


Posts : 1708
Join date : 2011-06-10
| | Subject: A Classic Reboot... Wed Apr 24, 2019 9:40 pm | |
| Well it’s defiantly been a while since I’ve made any progress other than a few minor repairs over the last 6months, so before I delve into the cmb to take up the next few years of my life I thought I would revisit and old friend, many of you will instantly recognise my fan fav of a kit, it’s also one I was quite proud of as one of my more upscale smaller kit bashes.... winning 3rd place at a local exhibition even in an unfinished state! Over the years since that was built the original model took quite a pounding 2 full hull re-sprays, and a new shaft installation, those were the result of the physical abuse I laid into the model, finally its resting place is now in the hands of my father and used as a club loaner, it’s still in a good condition but has issues, first being the paintwork which was my own fault during construction using an oiled based stain, needless to say that’s plagued the model over the years and 2nd is the constant flow of water the boat would take on under a run, fortunately as always my boats are epoxy sealed inside and out, so although she likes to have a drink it’s not stopped her showing some who’s the boss... So needless to say a Lot of you are fans of me taking what I would say is a basic kit and bashing them to be something vastly more than people would imagined.. so here we go... lessons from the last built learnt... mistakes not to remake and modification knowing how this little beauty runs to correct... I managed to thank the tax man for a nice rebate and picked this kit up on sale during the Easter weekend... and I have to say aeronaut again surprised me with this kit... together have updated it! The box as u can see compared from my original build years ago has new graphics... and the kit itself has some improvements and additions.... and some I wish they would update... First up the framework seams to have Been later cut better ( it’s taken far less work to clean up the edges than last time), the instructions although again in German, the translations are much better and the original instructions are more detailed... very nice.... There is one big improvement for those looking to get this kit without modifications is aeronaut have scrapped the solid coupling they used to provide with a sprung one... looks very nice.... not sure if it’s going to rust tho... never mind it’s scrap on this project... I’ve already learnt from experience this boat deserves no less than a brushless ( and this time more power than the cheap 1000kv I had last) so right off the bat stainless steal slimline m4 shaft ( you boys know by now I love these shafts... absolutly zero maintenance no corrosion.. no rust.. although the thrust washer needs replacing yearly it is a brass one after all... For now those are the biggest updates I’ve spotted moment I opened the box, but I expect there are a few more.... I’ll let u know what I spot em... So going off past mistakes it’s time to kick this little boat from starter kit to Wtf mode.... Now I would love to promise a speedy build.... we’ll see... but I was allowed into the workshop today for the first time in months so I’ve popped the frames cleaned up the edges and dry fit the lot... I’m letting the material sit overnight to help take some natural shape, 3mm runners had a habit of trying to twist the hull last time... so let’s ease it in... lucky that the stringers are the one that can untwist a hull... I’ve never been a huge fan of the base board but it’s better than nothing! 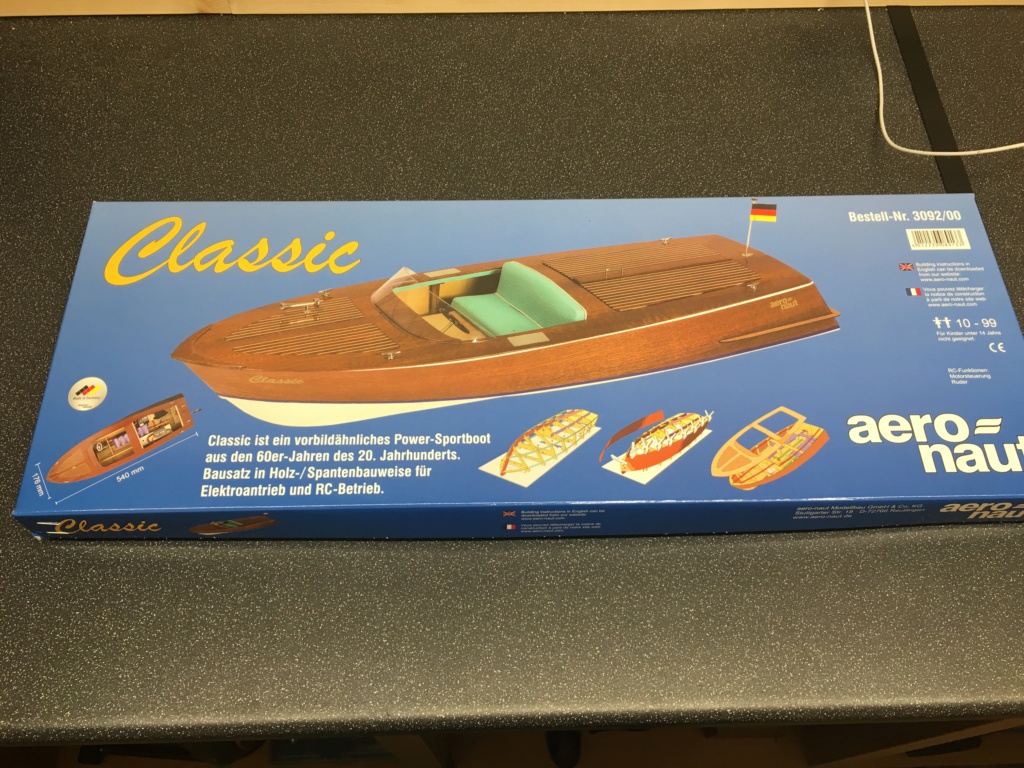 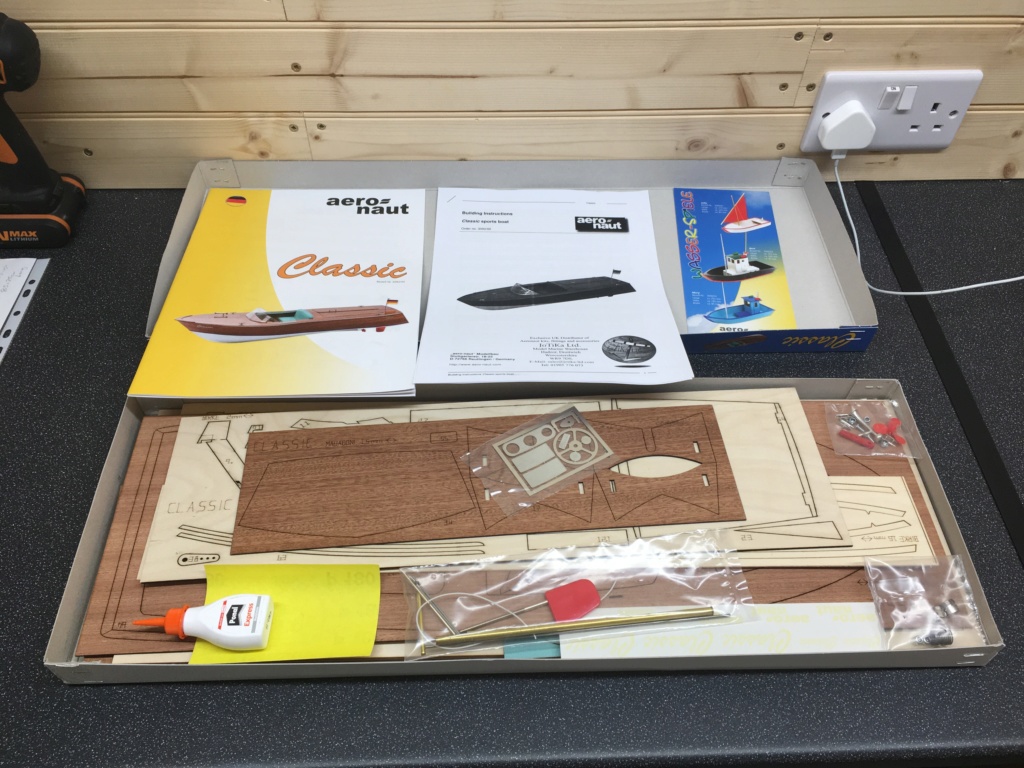   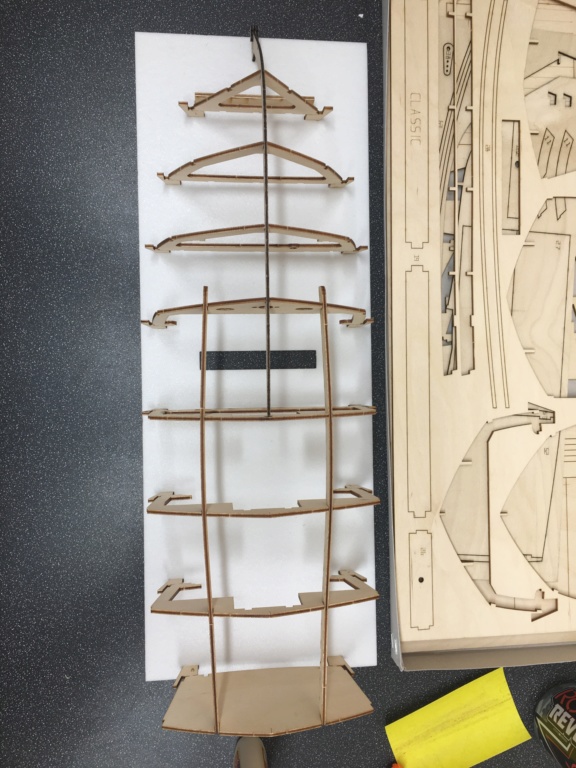 I’m also going to test out the gorilla dedicated water proof wood glue for this one... let’s see how this fairs up.. it was twice the price of the alphatic resin glues... it better be worth it! 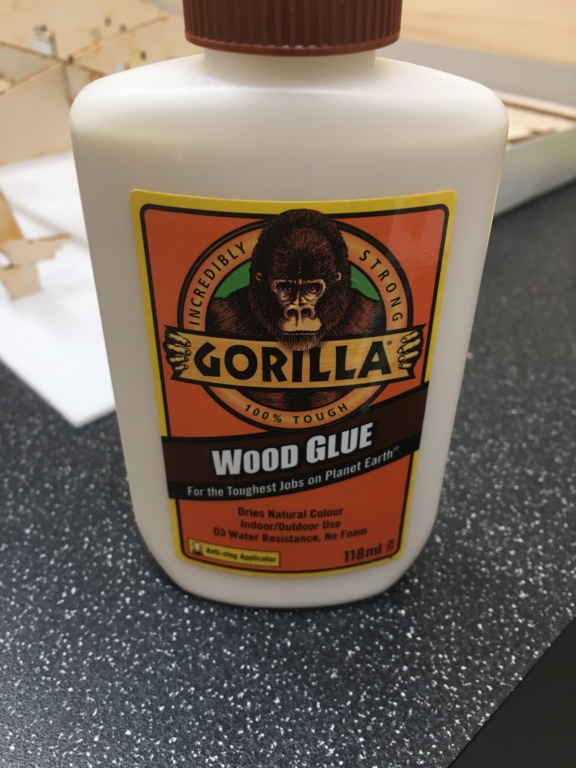
_________________
I'm Not Anti-Social, I'm Anti-Stupid.
| |
| | | | Guest
Guest
| | Subject: Re: A Classic Reboot... Wed Apr 24, 2019 10:13 pm | |
| In my humble opinion Aron...…….that is your first and hopefully only mistake...……….I think ALL gorilla products are crap...…….I've tried that, their supa glue, the water activated, the tape and another ……….oh yes, their epoxy...……….and don't rate any of them..not as good as other stuff on the market and twice price...…….id have stuck to aliphatic mate.....far better and stronger. |
| | | | barriew
Captain (moderator)
Posts : 2629
Join date : 2011-11-26
Age : 83
Location : Thaxted, Essex
| | Subject: Re: A Classic Reboot... Thu Apr 25, 2019 6:14 pm | |
| Aron
I wouldn't go as far as Neil, but I also wouldn't use the Gorilla Glue for wood to wood joins. Its useful for wood to plastic or fibreglass. If you do use it be aware that it foams if you don't clamp it tight.
Barrie | |
| | | | Guest
Guest
| | Subject: Re: A Classic Reboot... Thu Apr 25, 2019 8:50 pm | |
| Nowt at all wrong with Gorilla Glue I use it all the time the superglue,the epoxy glue and the wood glue I find it brill and Ive not been able to break a joint yet
Dave |
| | | | Guest
Guest
| | Subject: Re: A Classic Reboot... Fri Apr 26, 2019 12:55 am | |
| |
| | | | Roadrunner
Forum Overlord
Posts : 1708
Join date : 2011-06-10
| | Subject: Re: A Classic Reboot... Fri Apr 26, 2019 8:42 am | |
| I’ve not used the gorilla foaming glues nor it’s superglue, however my old man has used the foaming glue for a few projects in recent years and those boats haven’t suffered a failure...
I up till now have only used the gorilla 5 min epoxy... which was fine for the job but it did take a little more than 5 mins to cure... but with epoxys if you do t quite mix it right then the set time can be off...
As for the dedicated wood glue... it’s non foaming it’s just a wood glue, it’s quite hard to bugger up a wood glue formula and honestly if 151 can make a wood glue and sell it for a quid then I have some high hopes for this £6.50 bottle...
I was actually swayed by a few videos of it being used on YouTube from independent reviewers all of whome put the glue through more abuse than I ever will.. ( it’s worth looking ) and so far my test pieces seam to be doing the job rather well...
As with all glues it can come down to prep work, with a dedicated wood glue a damp surface on the glue joint will weaken it, any oils or grease etc can stop the glue working or at least grabbing the joint. I’m not saying anyone hasn’t had an issue with these glues, it could would be many factors leading to a failure.. but right now this one hasn’t failed my test pieces which gives me a lot of confidence in the product... but instead of debating the glue let’s wait a little and see how it fairs up as I progress.., I’m only on frames, even superglue can do this job effectively... the real test for the glue will be when I skin the sides!... watch this space...
_________________
I'm Not Anti-Social, I'm Anti-Stupid.
| |
| | | | barriew
Captain (moderator)
Posts : 2629
Join date : 2011-11-26
Age : 83
Location : Thaxted, Essex
| | Subject: Re: A Classic Reboot... Fri Apr 26, 2019 9:06 am | |
| Sorry RR - didn't look closely enough at the bottle! At a glance it looks like the foaming one.
Barrie | |
| | | | Roadrunner
Forum Overlord
Posts : 1708
Join date : 2011-06-10
| | Subject: Re: A Classic Reboot... Mon Apr 29, 2019 1:54 pm | |
| Well with the kids back in school today I’ve been able to set aside a little time to progress on the hull, the frames have been glued.. nothing hard there.. now the awkward job is skinning the boat... this boat the same as the diva and Jenny have all been pigs to get this skin on correctly, so again I’ve deviated from the written plan a little, opting to jig the skins into formers lock down the bow with a few drops of super glue and then only glue up one side.... the other side is clamped to keep the bow in place other than that it’s free to move about the jig, the reason for doing one side is to eliminate any twist that the base board inherently brings, I remember from last time having to make with my old man a specific jig to pull out the twist while we skinned the base of the hull... Honestly that jig was a pain in the ass and constructing a new one is a lot of work for something that I hope gluing-up only one side at a time and weighting the frames will resolve... For now everything seams to be going ok I guess the next 48 hours will tell if that plan worked... The skin going on first is the mahogany veneer... I’m hoping again to be able to vanish this full body however like all plans not everything works out... however that said... should I get any issues and have to sand the boat abruptly I will endeavour to re-skin the boat with another veneer layer... time will tell.... 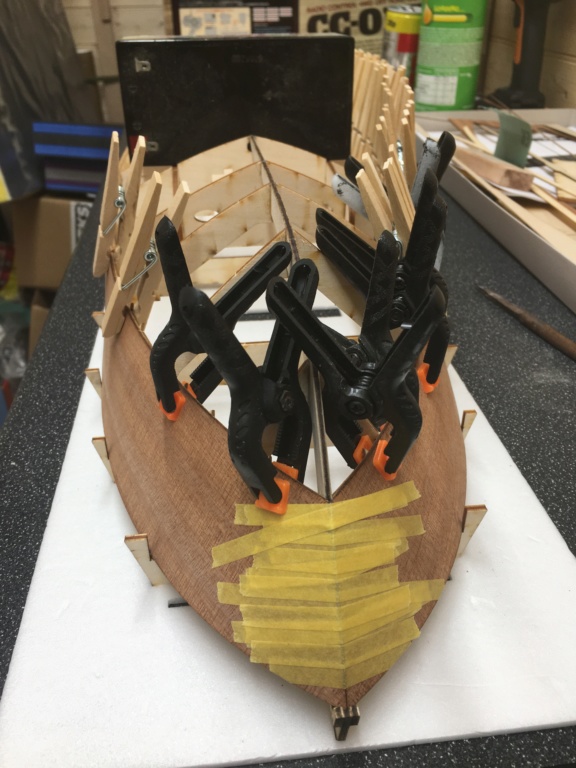 
_________________
I'm Not Anti-Social, I'm Anti-Stupid.
| |
| | | | Guest
Guest
| | Subject: Re: A Classic Reboot... Mon Apr 29, 2019 2:09 pm | |
| looks good...……...nice timber they supply...……...I always remember the crap that Billing used to supply with their early kits...…...wasn't much better than firewood...….
but at least it taught patience even if it didn't teach model boat plank on frame work. lol. |
| | | | Roadrunner
Forum Overlord
Posts : 1708
Join date : 2011-06-10
| | Subject: Re: A Classic Reboot... Mon Apr 29, 2019 4:57 pm | |
| Well I do have to say so far this glue is impressing me... although next time I would look for a smaller glue spout to save on cleaning up a little more.. the glue says I takes 24 hours to fully set but clamps or 20-30 mins will do the job of holding it all in place... after about 2 hours the glue has dried clear and hasn’t left any staining unlike the other glues that seam to leave wood yellow.. on top of that the joint is rock solid already... so taking advantage of this I’ve removed the clamps and glue up the other side... note the two huge LA battery’s holding down the frames.. The boat wants to twist if I let up the pressure... but with the weights on the frames are fully flush to the worktop and once the glue sets that should hold everything in place.. however with this project the upper deck level chines need installing last... that will have to change and be done before I put the base hull panels on to ensure that all frames remain untwisted... once in place I can glue the bulkheads to the skin ( which is what the instructions say to do, I would normally glue the skin to the frames and the chimes at the same time usually but because the way the jig works it allows the skin to move reducing the wavyness that can come from doing such a job... fingers crossed... Oh and the reason I’m using pegs more than clamps is very simple... the plastic clamps take up a lot of space so getting a good bond is hard when there are gaps left, the plastic clamps do the hard work on the stressful curvatures but the pegs can clamp the whole joint more evenly... wooded pegs usually are pretty good and grippy... plastic ones generally are a waste of time... 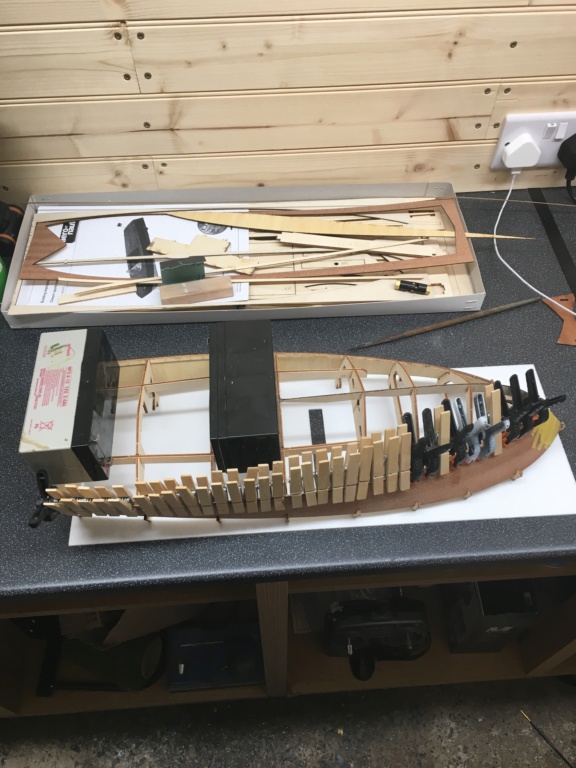
_________________
I'm Not Anti-Social, I'm Anti-Stupid.
| |
| | | | barriew
Captain (moderator)
Posts : 2629
Join date : 2011-11-26
Age : 83
Location : Thaxted, Essex
| | Subject: Re: A Classic Reboot... Thu May 02, 2019 1:34 pm | |
| Hi Aron - I was in my local Aldi this morning. They have the Gorilla Wood Glue at £3.99 which I think makes it a good buy. I didn't buy one as I have more than half a bottle of Aliphatic.
Barrie | |
| | | | Roadrunner
Forum Overlord
Posts : 1708
Join date : 2011-06-10
| | Subject: Re: A Classic Reboot... Sun Jul 07, 2019 12:52 am | |
| A rare achievement today I was finally left alone for a few hours leading me to enjoy the cool workshop and progress with the hull... The gorilla glue used to hold the hull so far proved to be worth the price paid, I have yet to crack a joint doing the worst of the jobs needed for this boat, applying the lower hull skins, Achieving this was no short order, and the use of no jigs or 4 pairs of hands resulted in some forceful bending and holding while glues dried, the reinforcement joints with epoxy, not the preferred method of choice but a successful outcome and strangely didn’t involve a single swear word... My original choice to stitch and glue the base into place was met with failure, which was simply due to the panels not aligning correctly at the seams, I can find no reasons as to why other than they simply did not fit from laser cutting however after gluing one side down starting at the stern and working forwards a light sand of the edges let everything fit (tightly) into place leaving to just progress the other side the same way, This have now achieved the hull panels attached, glued and reinforced, leaving only some filler to true up the bow and hide any seams along with my original holes I made for stitch and glue, those will be done tomorrow providing I’m allowed out again. Overall nothing major and no planking required this time to correct for a pesky skin! 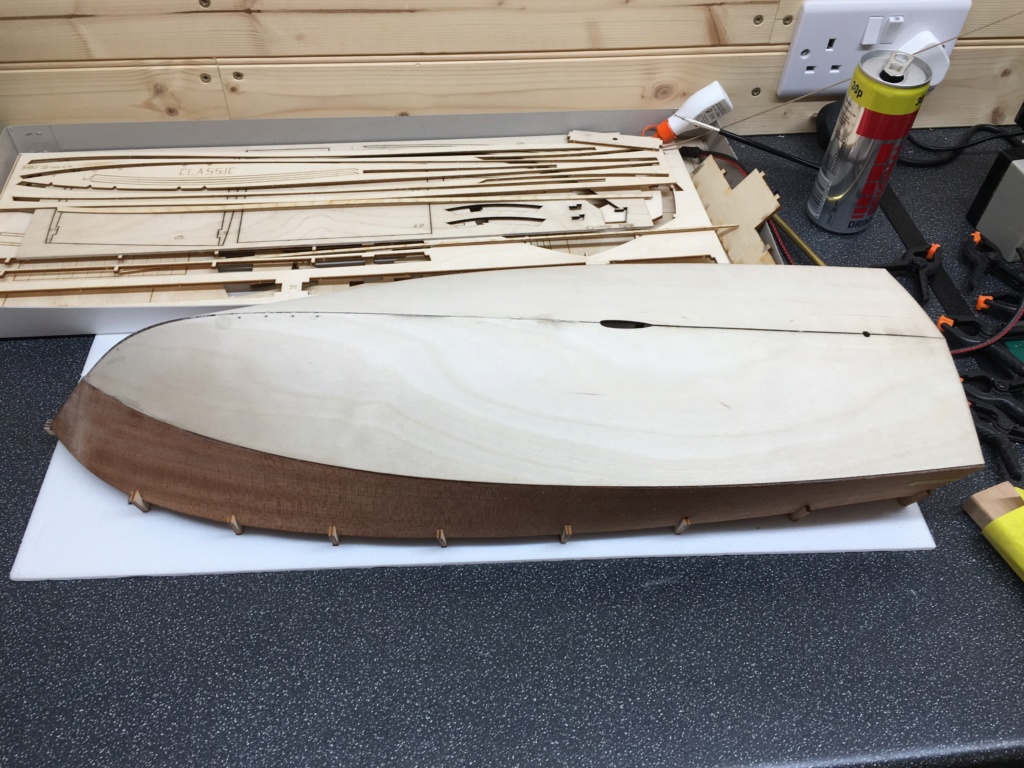 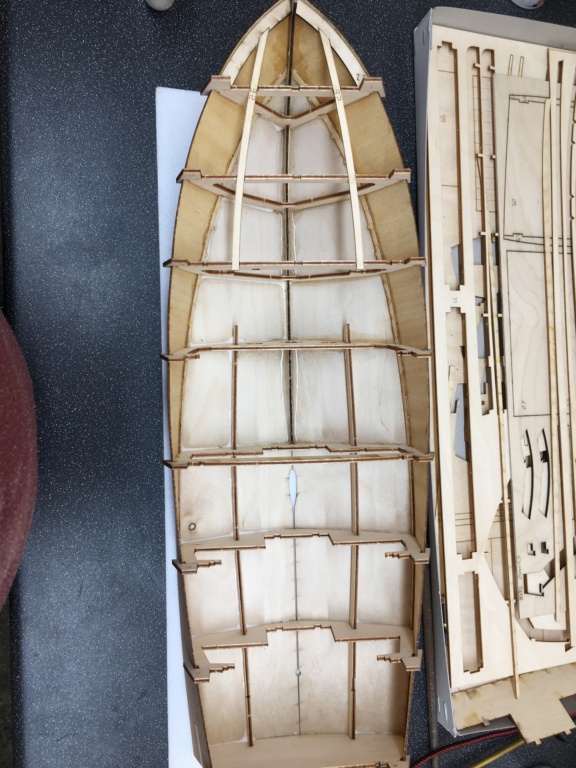
_________________
I'm Not Anti-Social, I'm Anti-Stupid.
| |
| | | | Roadrunner
Forum Overlord
Posts : 1708
Join date : 2011-06-10
| | Subject: Re: A Classic Reboot... Mon Jul 08, 2019 10:26 am | |
| I've been thinking on ways to make this kit better, not just in terms of making it better than the standard kit, but also beating out my last version of this with modifications to suit... This will also work fully as a model boat, although like most of my projects recently however i know for a fact that most of my projects just end up as a display models along with competition entry's, so for that reason, my first adjustment to this kit will be that i will paint the hull completely, leaving the deck as the only exposed wood to finish. I have a few other ' in the works' ideas how to improve this kit further and be different from the last.. although there isnt much more you can do with this kit with out massive alterations (non of which are worth it) .. I have a few reasons for opting to paint the sides, and going of the first kit i did of this and the diva, there were a few things that bugged me in keeping the mahogany exposed and varnished, mostly was that i couldn't true the hull, if i began sanding then i would have rubbed through the veneer of the sides (since its only 1mm), this when it was varnished, you could see the waviness of the sides where the hull had sucked into the frames, this really bugged me for months when i had finished it especially in lower lighting it was more visible than i wanted ( even that mirror finish couldn't save it at times). So in opting to paint the sides allows for a perfectly trued up hull... the problem is now the colour i've picked is probably the worst for hiding imperfections.... so the hull work will be Very extensive! i'll let the photo below inspire you same as me for this project.... 
_________________
I'm Not Anti-Social, I'm Anti-Stupid.
| |
| | | | Roadrunner
Forum Overlord
Posts : 1708
Join date : 2011-06-10
| | Subject: Re: A Classic Reboot... Thu Jul 11, 2019 6:43 pm | |
| last couple of days i've done a few of the boring jobs, the first being test fitting the shaft and motor along with sealing the hull internally. i've also given the inside of the hull a coat of epoxy to seal the wood ( being careful not to seal the wood in specific areas that still require glue ) its easier to do this now while the hull is open and easy to get access to rather than later when there is no space. I would opt at this point usually to glue in the prop shaft and fit its skeg, however as one of the upgrades to the basic kit i've decided to instead fit either a P frame or A frame to the shaft instead as its external support... more on that later.... The Shaft is again another slimline shaft, however i was disappointed to find upon delivery it is a brass shaft rather than a stainless steel one.. i was going to complain about it however i simply do not care this time around since the shaft this time can be polished out for this boat ( lucky?) The motor is another 1100KV outrunner by Overlander, it is in fact the same motor i used in the sea urchin from last year, so i know its got the power to drive this boat as well as being a decent brand ... I've also started to fair & true up the hull, starting with the bow to ensure its perfect, the hull work because its to be painted will be very extensive so i'm just doing the off jobs inside now before i spend the next week or so fairing this hull to be perfect. however the bow is now spot on as it should be so i will spend the next day or so painting the inside of the boat to keep it looking tidy while i work out the rudder shaft, and continue to adjust the model for its on going modifications. 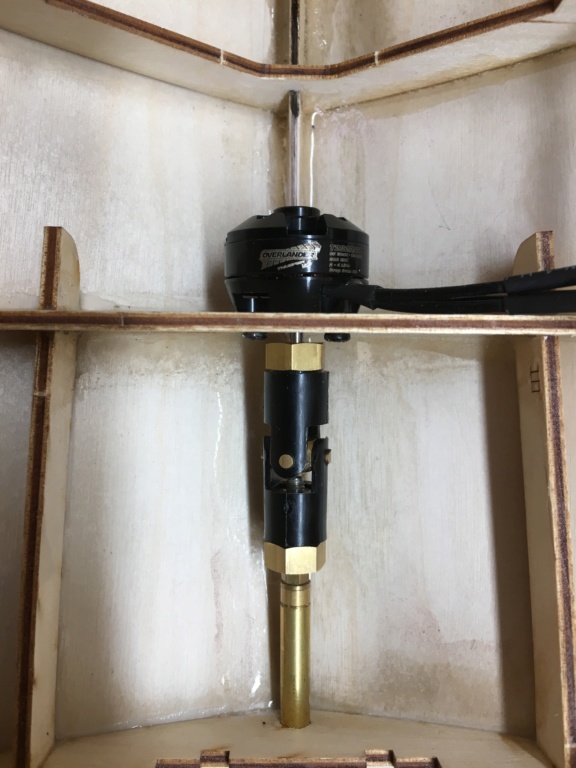 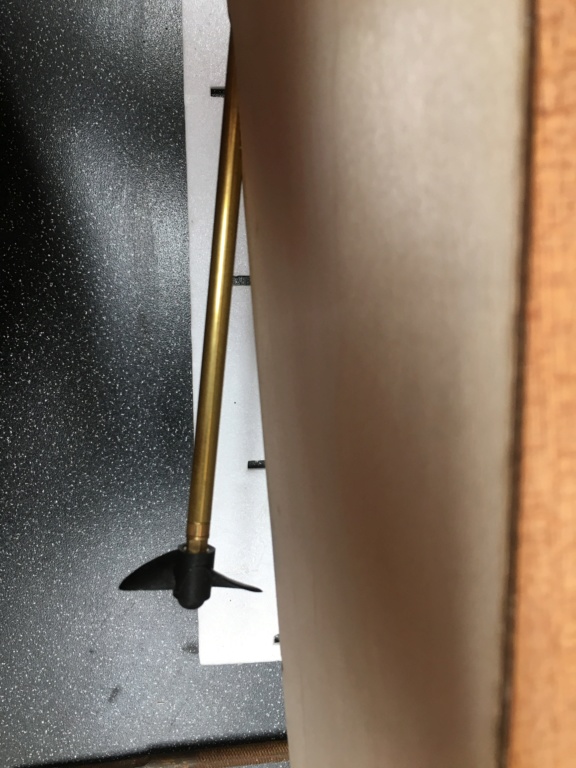 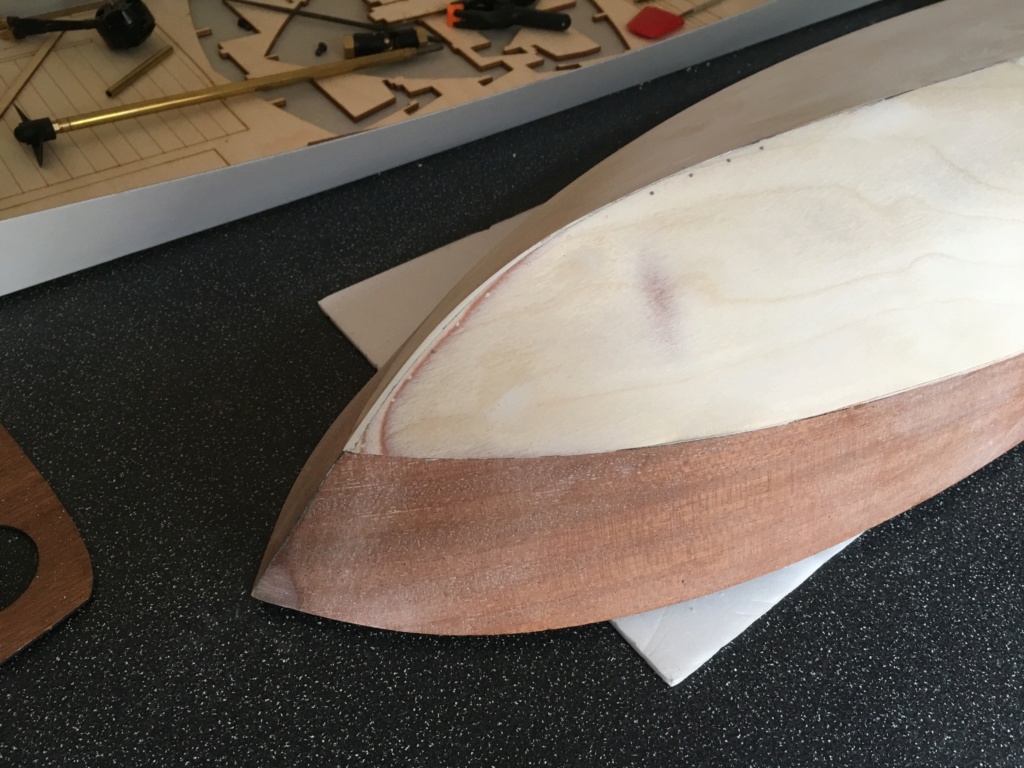 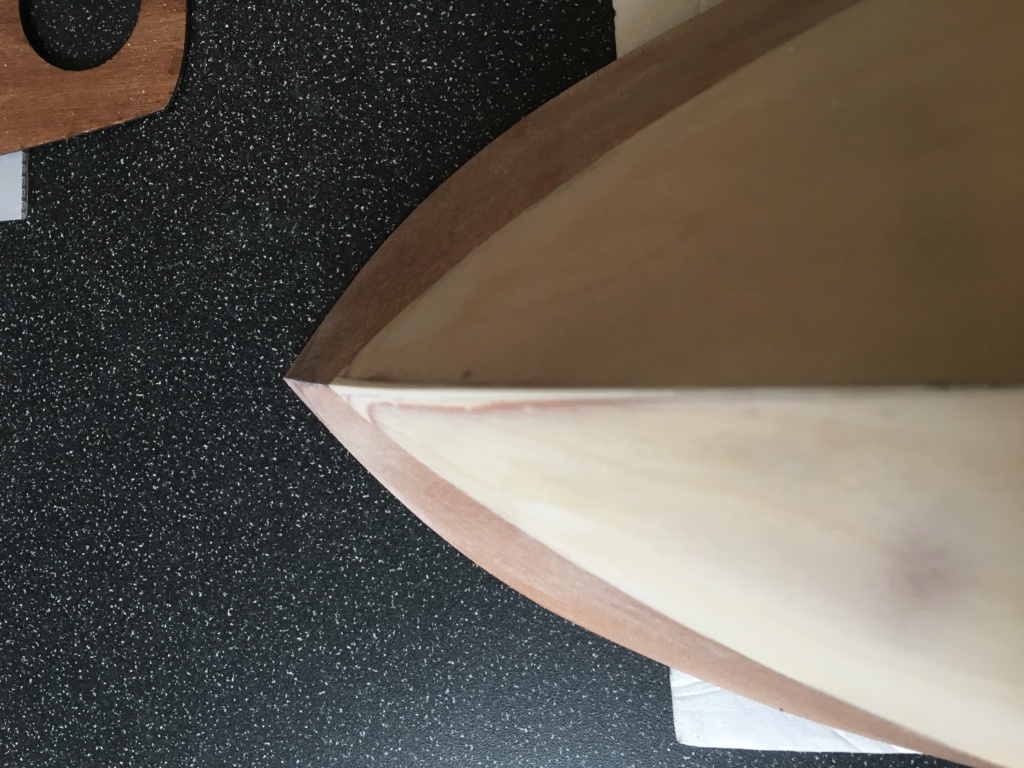
_________________
I'm Not Anti-Social, I'm Anti-Stupid.
| |
| | | | Guest
Guest
| | Subject: Re: A Classic Reboot... Fri Jul 12, 2019 1:01 am | |
| |
| | | | Roadrunner
Forum Overlord
Posts : 1708
Join date : 2011-06-10
| | Subject: Re: A Classic Reboot... Fri Jul 12, 2019 11:23 pm | |
| Little more progress and it’s shifted into some moulding, mainly making a blank for casting in the form of a prop support “p” skeg in a more traditional style for this type of boat, this is an upgrade from the kits “wedge” cutout insert and my original classics version of that which was simply modified to fit the m4 shaft when it was repaired. As you can see it’s a good fit to not only the shaft but the spacing, it’s simply made of a pen lid and some scrap ply from the kit shaped to resemble what a boat like this would traditionally be fitted with, I will clean it up and start to prep it to make a mould for casting over the next week or so...I have not decided at this point what material the cast this from, but at present I’m thinking to use some grp compound so I don’t need to be messing about with melting brass down to cast it as a solid, and I’ve never been a fan of white metal parts.. let’s see how I get on with the mould first... 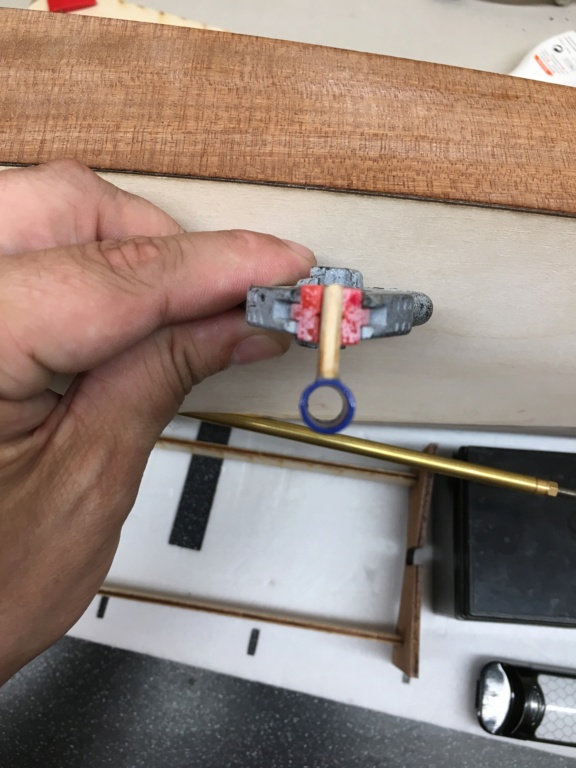 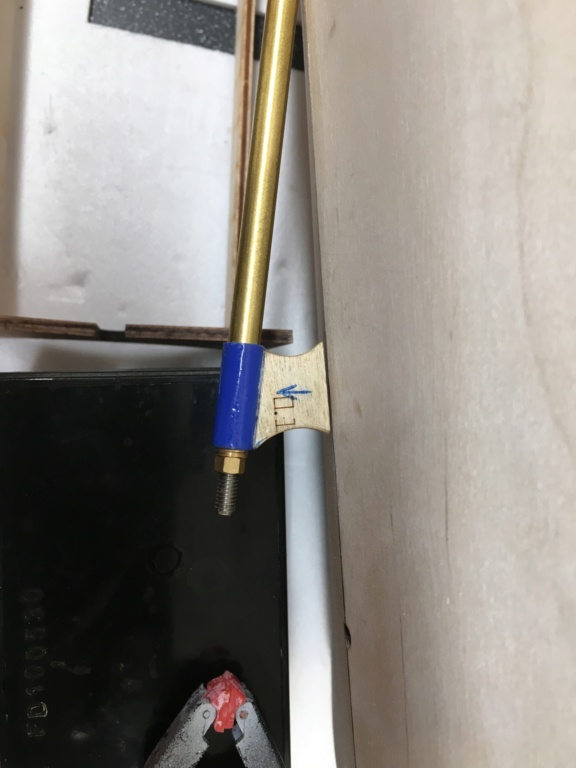 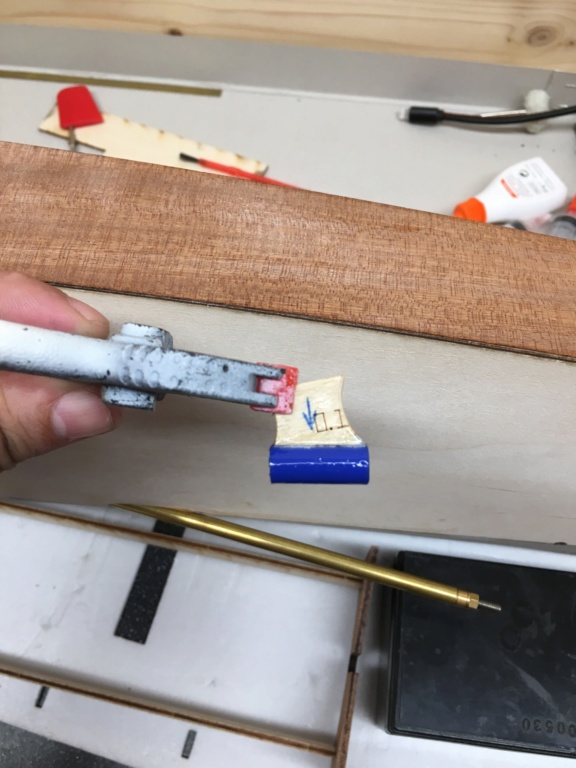
_________________
I'm Not Anti-Social, I'm Anti-Stupid.
| |
| | | | Roadrunner
Forum Overlord
Posts : 1708
Join date : 2011-06-10
| | Subject: Re: A Classic Reboot... Sun Jul 14, 2019 1:08 am | |
| After so messing about today looking to make a mold for the skeg/shaft support I instead opted to not bother, instead I chose to tissue & dope it, since this is a 1 off piece it makes no real sense to go to all that effort to make the same item from a singular material. Instead the tissue and dope method with some sanding, p38 and more sanding yielded the same result pretty much for half the work, now I know a bronze or brass version would have been nicer, but truthfully I always end up painting skegs and frames anyway to simply make it less aggravation later down the line when I come to clean a model. So I’ll just make this a permanent addition to the hull, I still this time also want a better entry for the shaft into the boat (less of a glue and filler job) so I’ll make up a “box stuffing tube” out of the hull to be a more accurate representation of how it should be. 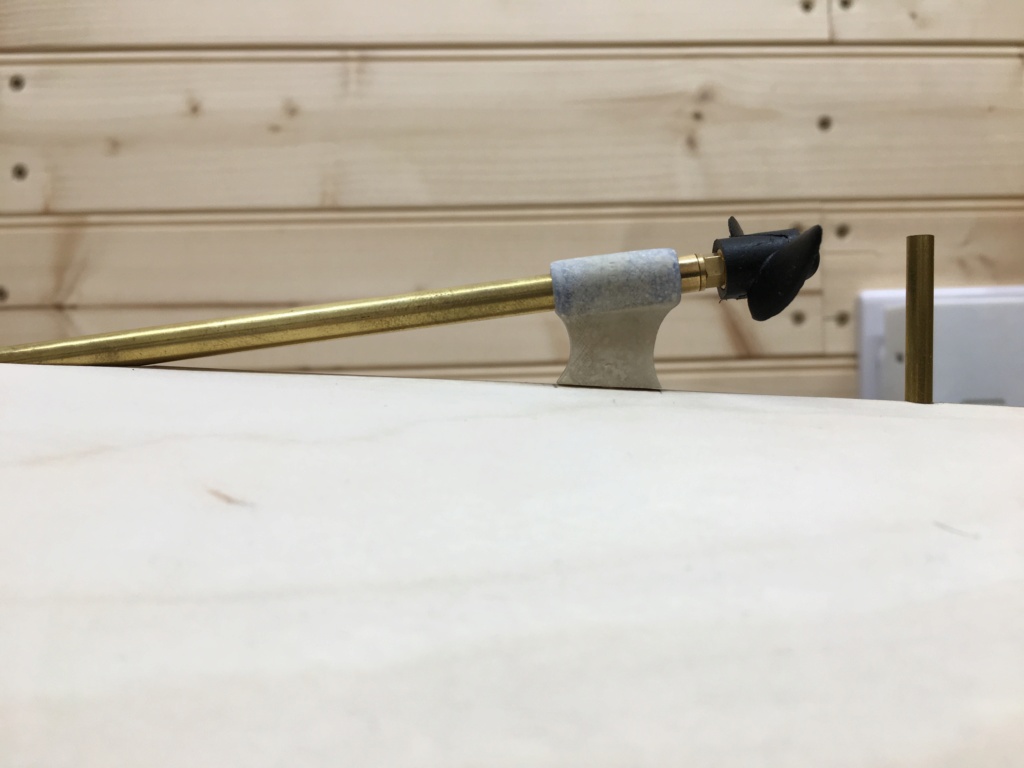 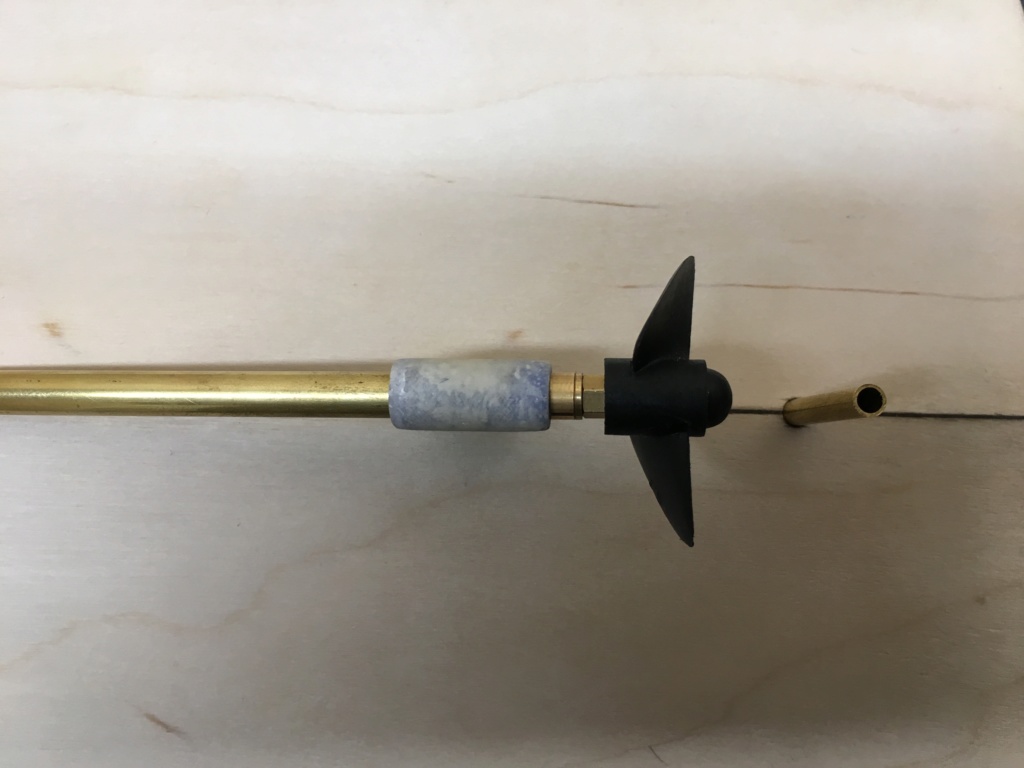
_________________
I'm Not Anti-Social, I'm Anti-Stupid.
| |
| | | | Guest
Guest
| | Subject: Re: A Classic Reboot... Tue Jul 16, 2019 1:07 am | |
| |
| | | | Roadrunner
Forum Overlord
Posts : 1708
Join date : 2011-06-10
| | Subject: Re: A Classic Reboot... Fri Jul 19, 2019 5:11 pm | |
| Back at it again... this damn brain of mine causing some extra headaches.... One thing on this kit that always bugged me was the seating area, my last version I corrected the seat position to be more accurate ( again same this time too) however and believe me I understand this is a basic kit, but it’s a kit with a lot of room for improvement, so here’s one I’m working on to take this boat to he next level and that’s the start of a full interior... right now it’s a lot of template work but this will build up the internal side walls for something to a fix decorative panels to and I’ve also started to create a new flat mount position from the originals making this one longer ( this is just to give me more working space for gadgets) The templates still need a bit more work to get them flush to the hull and cut positions but you get the idea pretty fast. 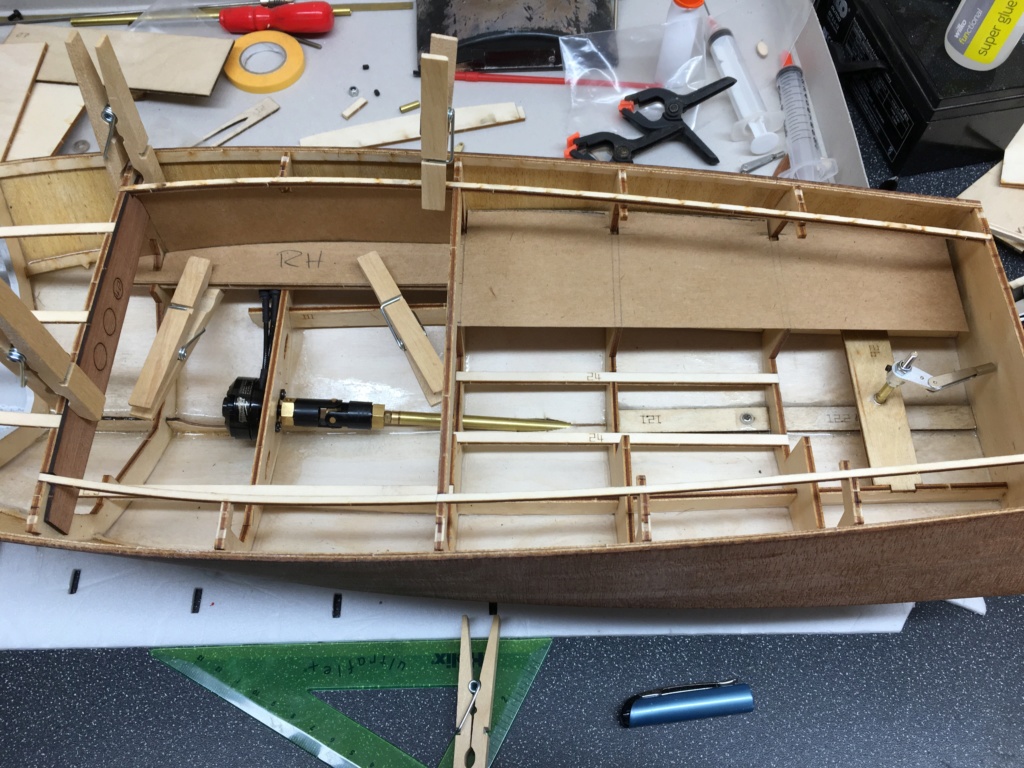 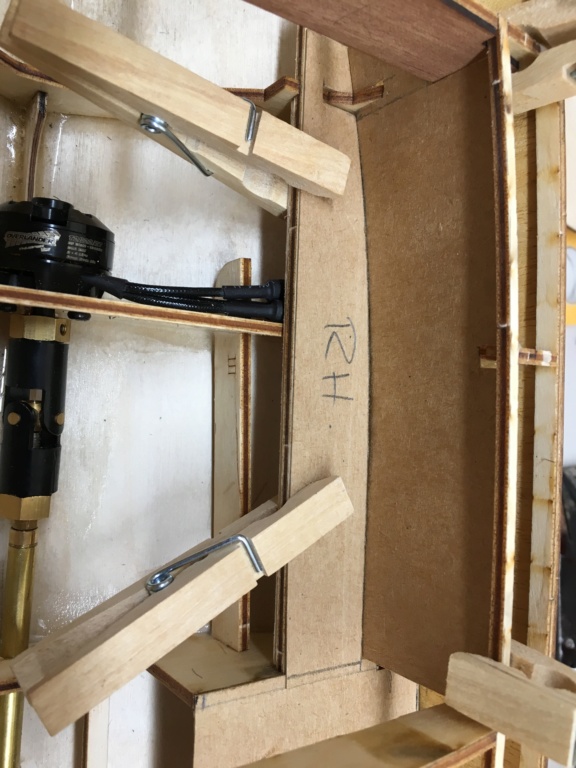
_________________
I'm Not Anti-Social, I'm Anti-Stupid.
| |
| | | | Guest
Guest
| | Subject: Re: A Classic Reboot... Sat Jul 20, 2019 4:26 am | |
| |
| | | | Roadrunner
Forum Overlord
Posts : 1708
Join date : 2011-06-10
| | Subject: Re: A Classic Reboot... Sat Jul 20, 2019 11:01 pm | |
| One set of templates later, transferred to some 4mm lite ply and bingo a front former for the side walls and new electronic shelf’s... next job is to glue and seal them to the hull, and start working on the cockpit walls... 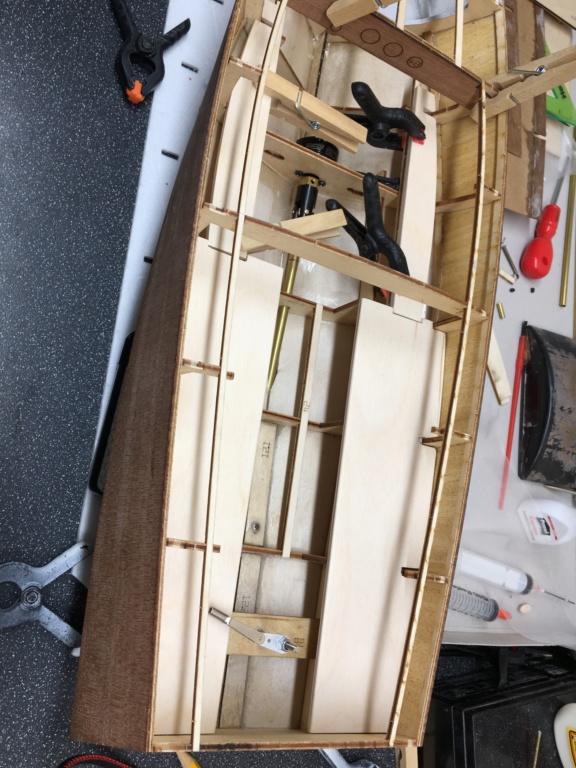 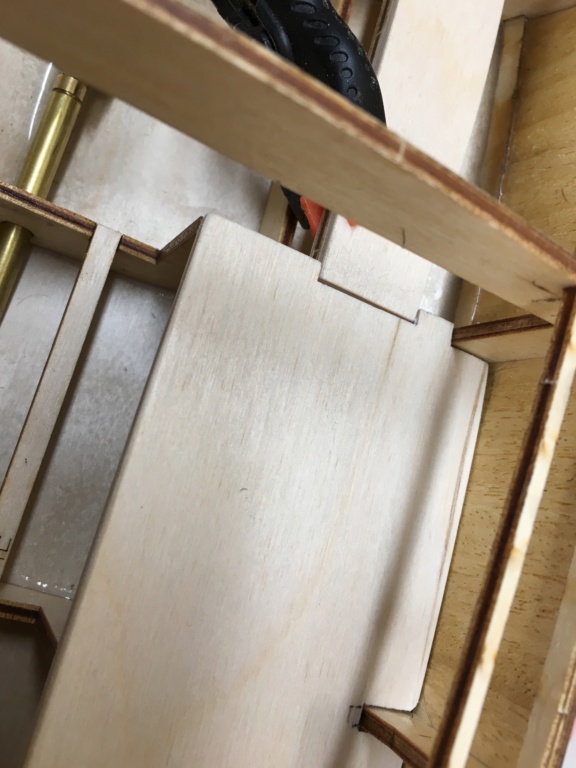
_________________
I'm Not Anti-Social, I'm Anti-Stupid.
| |
| | | | Roadrunner
Forum Overlord
Posts : 1708
Join date : 2011-06-10
| | Subject: Re: A Classic Reboot... Tue Aug 27, 2019 10:15 pm | |
| Don’t panic projects still ongoing... I’ve just had to take a break to teach my son how to paint.. he’s got a model Hobby recently inspired by his mates... only problem is he doesn’t know how to detail a model so dad’s has to set aside some time to paint 3 tanks and 56 army men with him *faceplant* my workshop now looks like a bomb hit it but at least I remembered how to paint a model in detail rather than the last 10 years of masked out block colour! Anyway enjoy “dads handy work” back to boats as soon as kiddo vacated my workshop and has the confidence to do it himself! 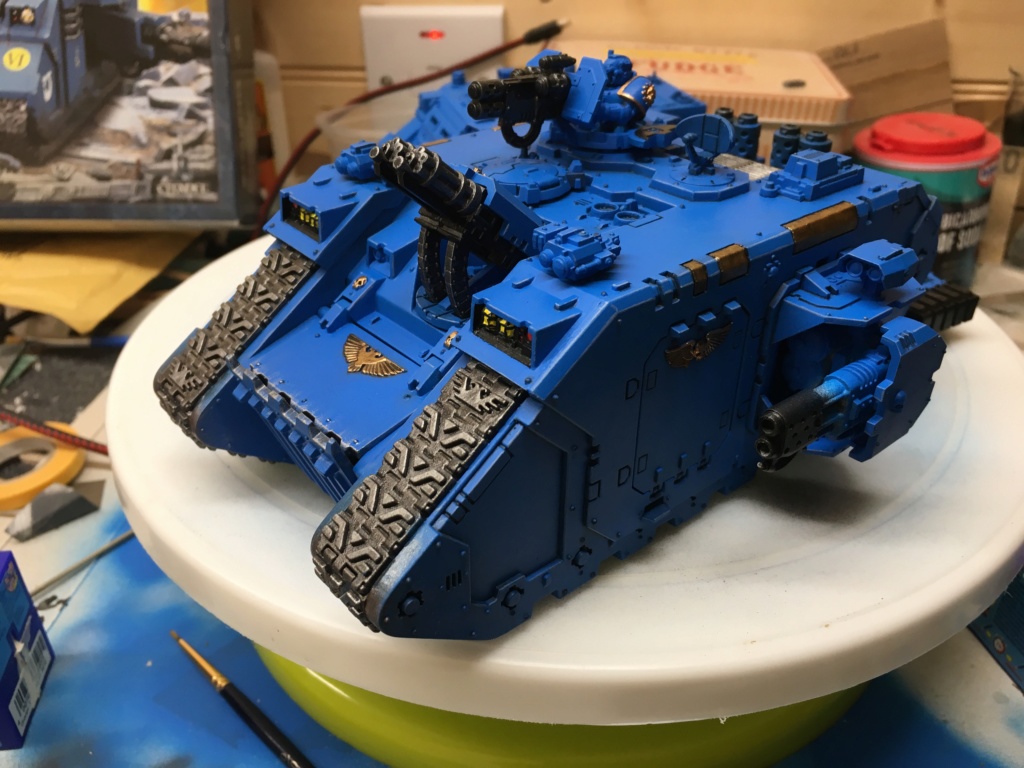 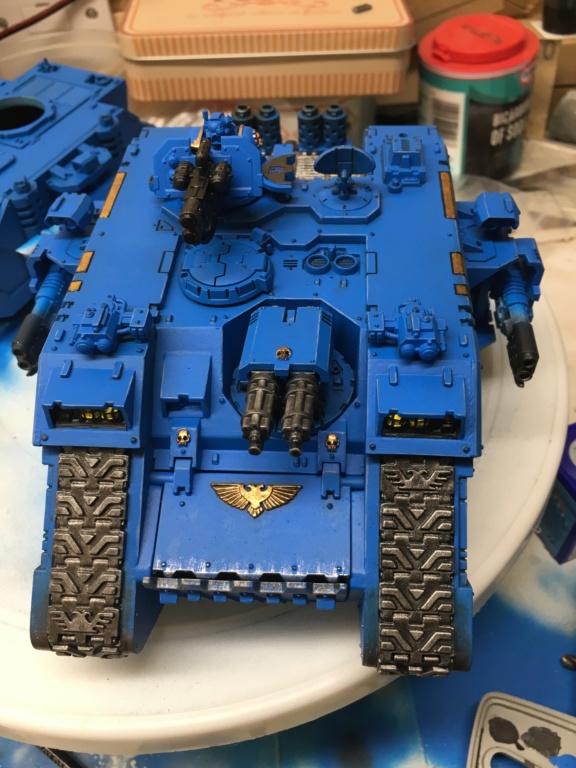
_________________
I'm Not Anti-Social, I'm Anti-Stupid.
| |
| | | | Guest
Guest
| | Subject: Re: A Classic Reboot... Wed Aug 28, 2019 1:15 am | |
| |
| | | | Roadrunner
Forum Overlord
Posts : 1708
Join date : 2011-06-10
| | Subject: Re: A Classic Reboot... Fri Jan 03, 2020 3:35 pm | |
| Back to boating... finally! Over the last couple of days I’ve had a few hours to do some work to the classic, firstly adding the spray rails to the boat... 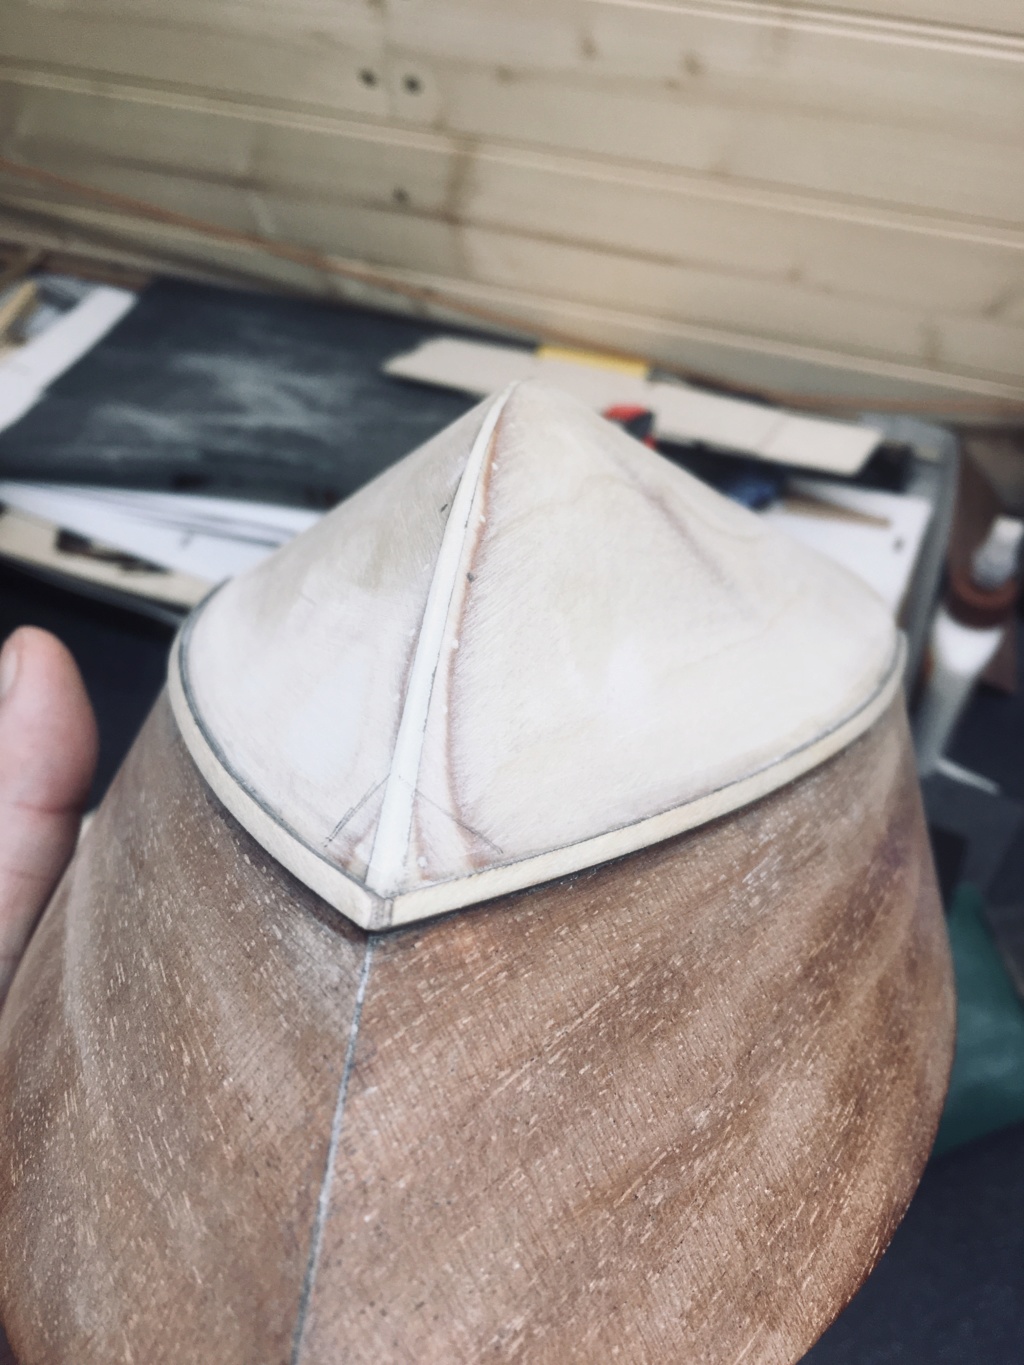 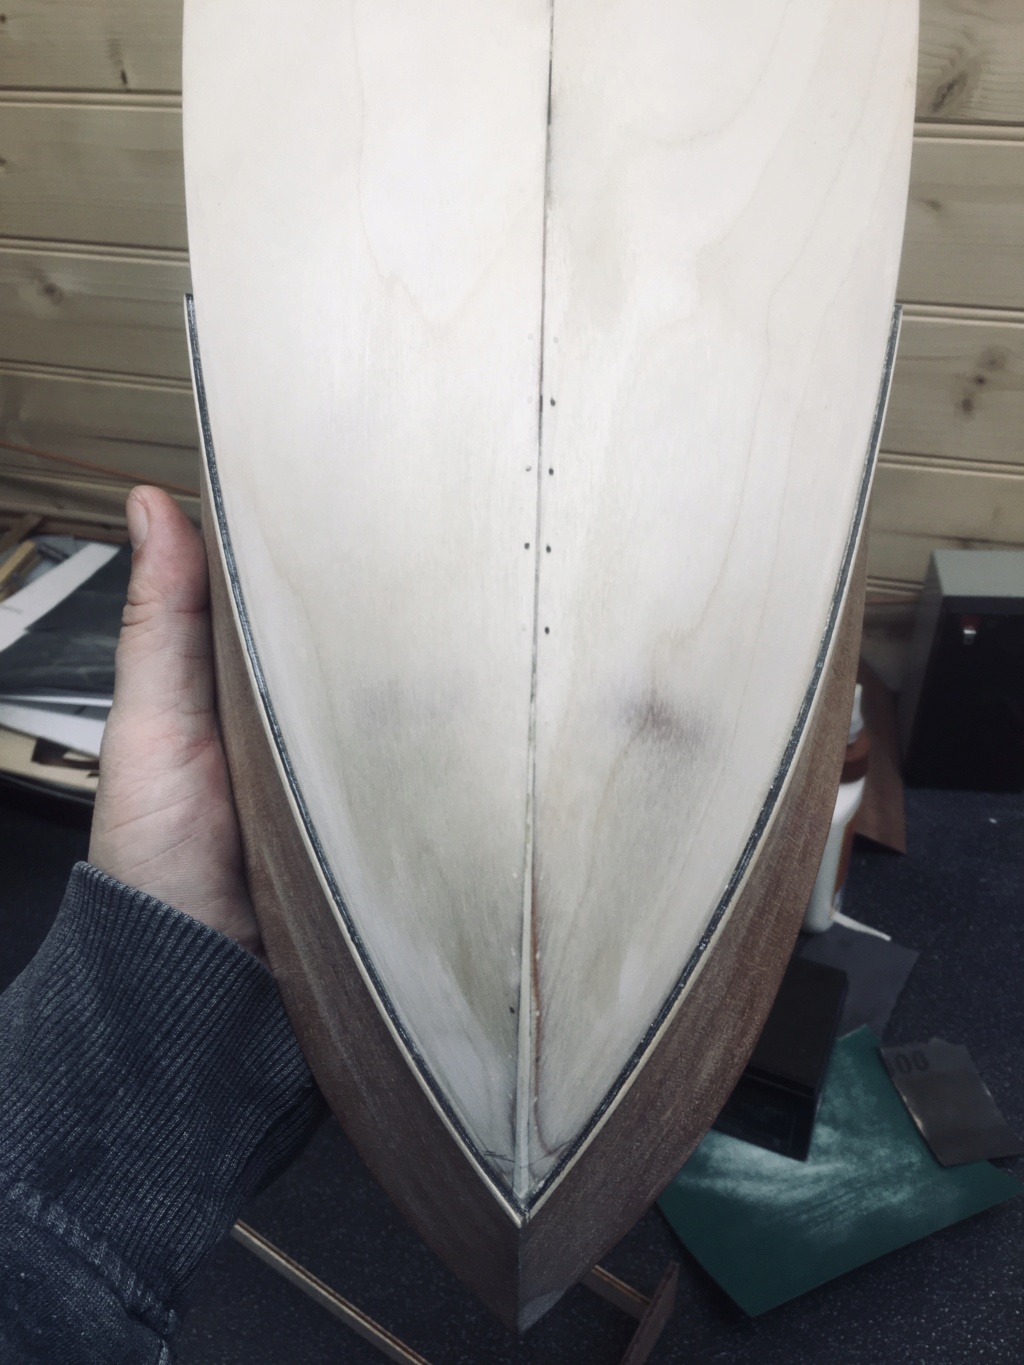 Easy job really no issues there... Next up was a modification to the dash board, in which I’ve created a small box to house the lights behind the dash, which required me to hog out the frame to fit so the rebate on the dials was as intended not seated further back, as part of my ongoing process to up the boat quality I’ll me making up dials from brass to insert so not to use the rubbish face plate that comes with the kit, good thing I have a lathe now! The leds are a strip of 3rbgs wired up for red light and white, red to match what will be the boats interior colour as well as some of the paint, the white I’ve wired up to in case I change my mind later and hate the red! The light box will be glued permanent once I’ve done the dash’s final varnishing or I risk splashing the plastic glass insert! 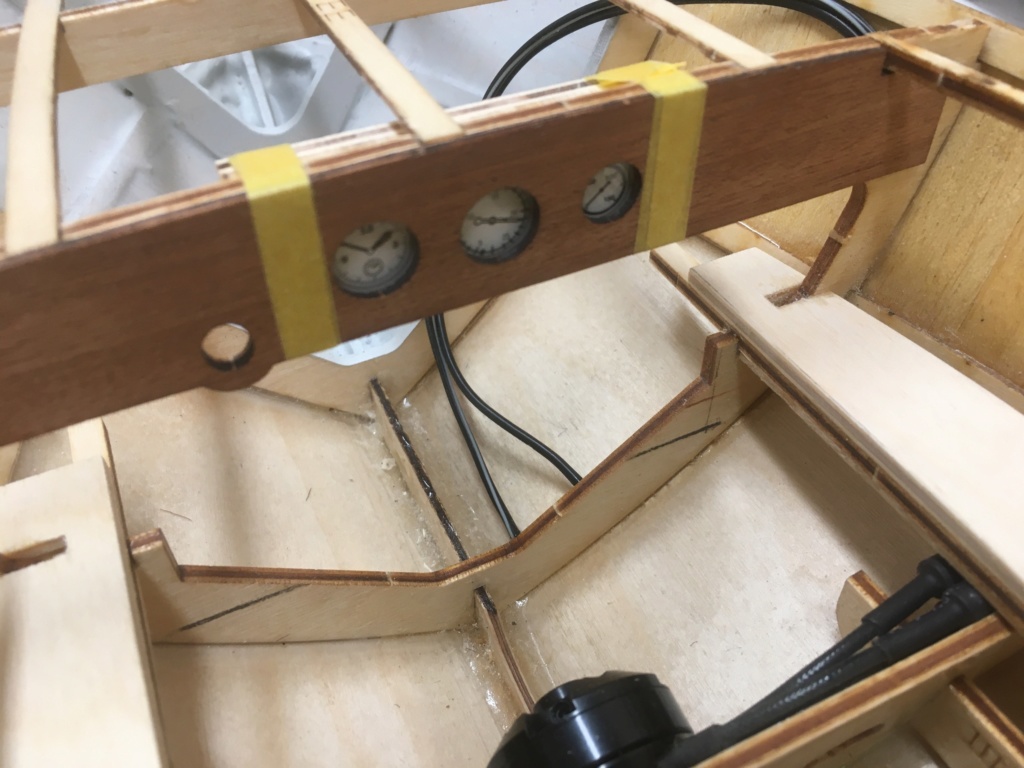   Next up is to fit the servo into place for the rudder, then I can start fixing the deck down so I can work on the rear hatch and cockpit area... fingers crossed I’m allowed more time to play but such is my life with 5 kids, time is but a premium!
_________________
I'm Not Anti-Social, I'm Anti-Stupid.
| |
| | | | Guest
Guest
| | Subject: Re: A Classic Reboot... Sat Jan 04, 2020 1:42 pm | |
| I admire your workmanship, but even more so your electrical wizardry, Aron...……….I just hate it lol...…...still haven't got any of my electrics fitted out in the Shannon...…….may be this year some time lol...…..might ask Mr Milbourn if he'll sort it out for me, lol. |
| | | | Guest
Guest
| | Subject: Re: A Classic Reboot... Sat Jan 04, 2020 3:36 pm | |
| Bring it down on holiday and ill rewire it for you
Dave |
| | | | Guest
Guest
| | Subject: Re: A Classic Reboot... Sat Jan 04, 2020 5:22 pm | |
| |
| | | | Roadrunner
Forum Overlord
Posts : 1708
Join date : 2011-06-10
| | Subject: Re: A Classic Reboot... Sat Jan 04, 2020 5:42 pm | |
| Today I fitted the servo, made up the linkage and a spacer for the tiller, which also acts as a nut to hold the rudder up instead of using a steel lock nut, this is a smaller adjustment from the first build as I found the lock buts that came with the kit rust, so a hex nut plastic spacer was made for the fiction, I just have to notch the top of the rudder post for the tillers grub screw to grip and that’s the rudder finished. 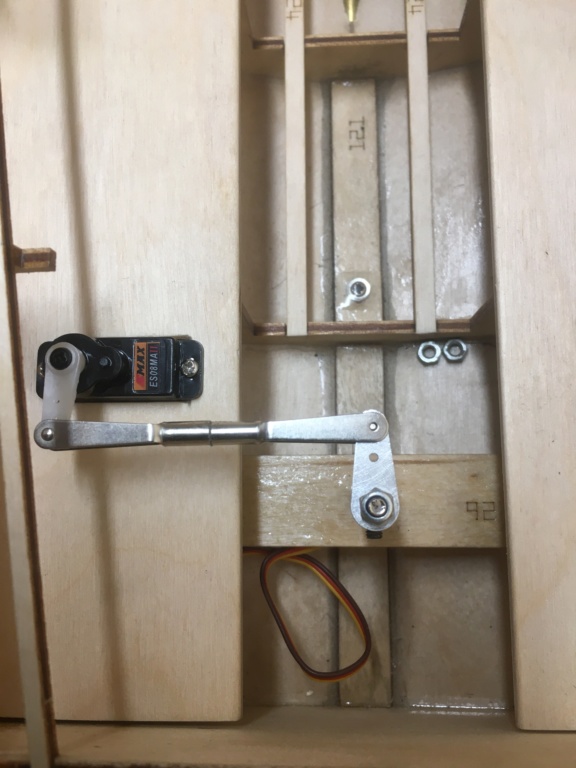 
_________________
I'm Not Anti-Social, I'm Anti-Stupid.
| |
| | | | Guest
Guest
| | Subject: Re: A Classic Reboot... Sat Jan 04, 2020 11:23 pm | |
| beautiful neat work, as usual Aron.superb stuff. |
| | | | Roadrunner
Forum Overlord
Posts : 1708
Join date : 2011-06-10
| | Subject: Re: A Classic Reboot... Tue Jan 07, 2020 3:51 pm | |
|
_________________
I'm Not Anti-Social, I'm Anti-Stupid.
| |
| | | | Roadrunner
Forum Overlord
Posts : 1708
Join date : 2011-06-10
| | Subject: Re: A Classic Reboot... Sun Jan 19, 2020 6:37 pm | |
| After a week of waiting for materials to arrive I’m finally back on the build. Today I tidied up the internal side panels of the cockpit with some 0.4mm ply which will be the base face for all the final wood finishing of that area, using a new template traced out the past to the ply and glued it over all the uprights this gives strength to the uprights with a base that links them ass as the uprights are only glued to the rail at the top and some expoy but no real strength at until this point. Next few days I’ll start to fix the deck to the hull and start to detail the cockpit, along with adding a battery compartment in the bow for the lights, it’s the only free area to hide the battery pack, I don’t fancy making a lipo wiring harness for the lighting when a 6v pack I used in the rowing boat works just fine. Watch this space for that update coming soon! 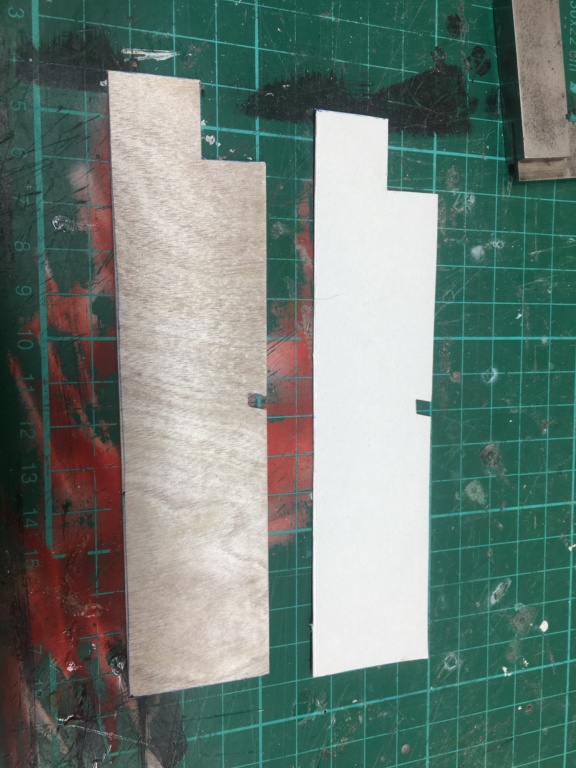 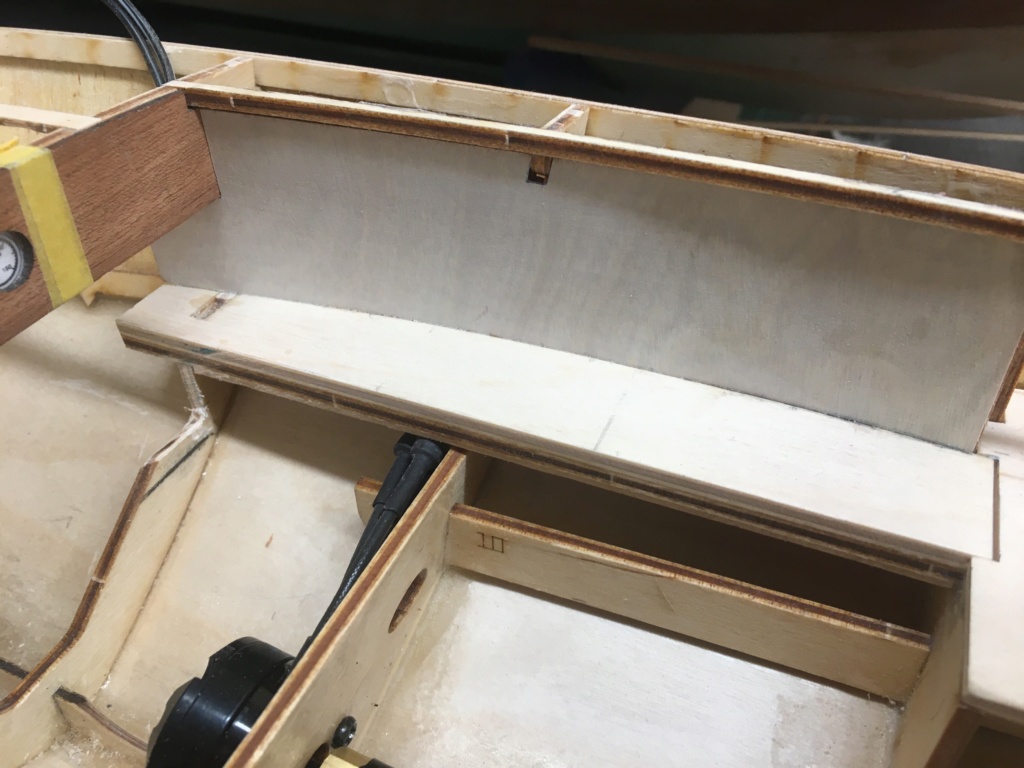 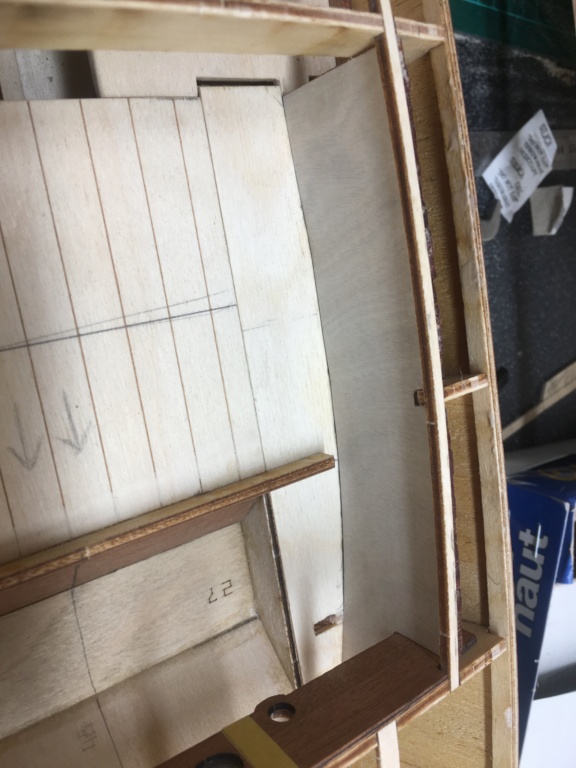
_________________
I'm Not Anti-Social, I'm Anti-Stupid.
| |
| | | | Guest
Guest
| | Subject: Re: A Classic Reboot... Sun Jan 19, 2020 8:24 pm | |
| it looks a very complicated build Aron...…...there are parts upon parts upon parts, all interlocking.....but certainly looks very strong and again another classic. |
| | | | Roadrunner
Forum Overlord
Posts : 1708
Join date : 2011-06-10
| | Subject: Re: A Classic Reboot... Mon Jan 20, 2020 10:57 pm | |
|
_________________
I'm Not Anti-Social, I'm Anti-Stupid.
| |
| | | | Guest
Guest
| | Subject: Re: A Classic Reboot... Tue Jan 21, 2020 8:41 am | |
| |
| | | | Roadrunner
Forum Overlord
Posts : 1708
Join date : 2011-06-10
| | Subject: Re: A Classic Reboot... Tue Feb 11, 2020 2:48 pm | |
| Today I’ve been back on the boat, and glued in the front panel under the dash that holds the battery, along with wiring up the panel lights and a switch under the dash, hot glued the wiring so not to get water in long term but it’s all permanently mounted so once the decks down and issues then I’m screwed! Fingers crossed. Since I’ve now got the lathe tuned in and making a non critical dimensional part I’ve made up a aluminium water cooling outlet in the traditional style of these boats, not a shop purchased one, this ones vastly more accurate in design than any shop brought one, my original plan was to make it of brass and I may still go back and do another but all boats of this period are chromed so for this boat I may well go chrome instead of my usual brass style. I was originally planning to put a M6 thread on the bulk section to screw into the hull and lock nut it in place, sadly I realised that where it’s to position I couldn’t get a m6 nut in place behind as it suppost to sit on the boot topping but even that’s lower than a traditional boat of this style so it’s to sit as close to waterline as possible which means inside I have no room a nut, instead I’ve slotted the bulk section instead with several grooves to which some decent epoxy can grab hold and bond it tight to the hull, just means in this instance the part can not be detached from the hull easily, that said being aluminium it won’t tarnish like brass so removal isn’t a huge deal long term, as cleaning can be done with some thinners and T-cut/aluminium polish. I’ve yet to make the cooling input shaft, truth be told I ran out of aluminium stock when I made the mrs pen, this was all that was left over from that project, I’ll order some more today and get that made up slightly later. All in all a good amount done and finally having a lathe back in my life is a god send to make up these custom parts... 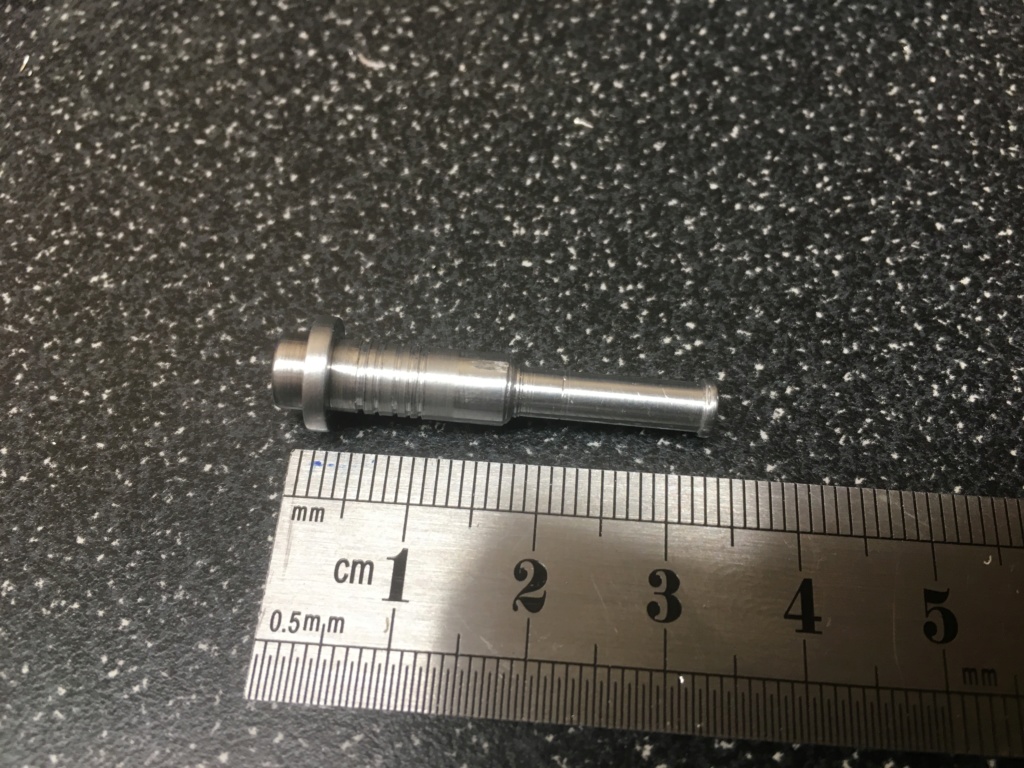 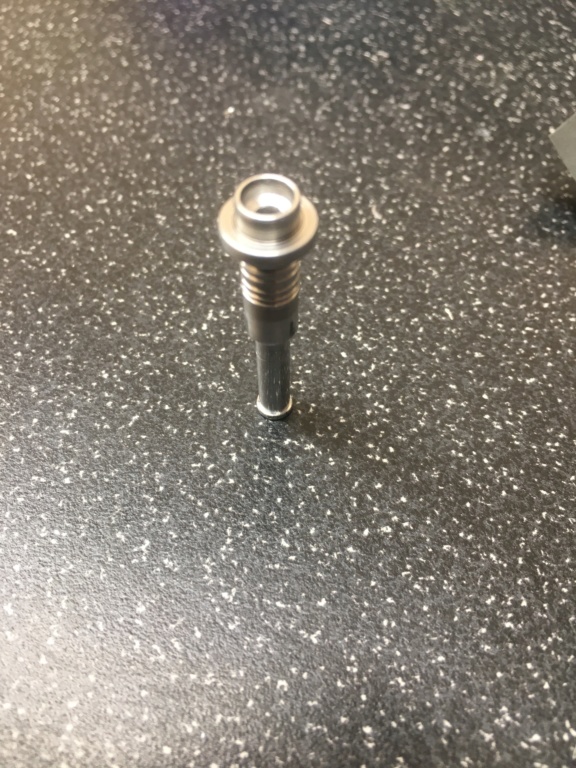 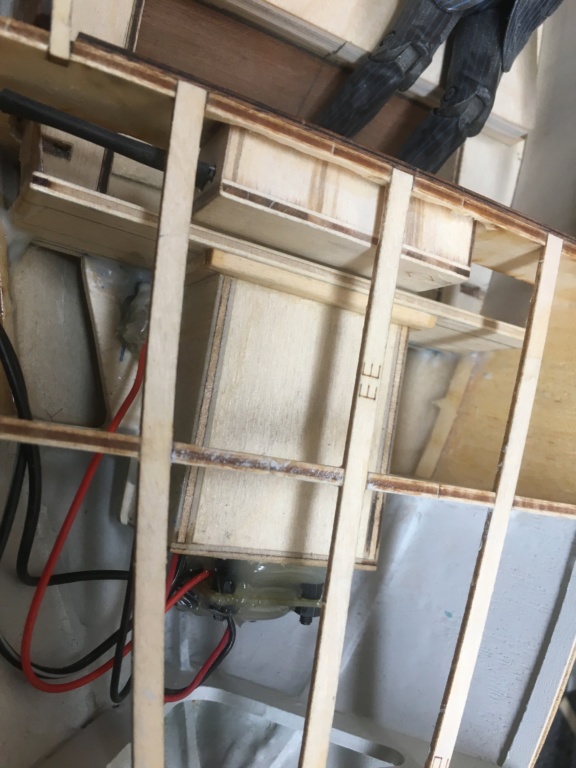
_________________
I'm Not Anti-Social, I'm Anti-Stupid.
| |
| | | | Guest
Guest
| | Subject: Re: A Classic Reboot... Tue Feb 11, 2020 11:04 pm | |
| |
| | | | Roadrunner
Forum Overlord
Posts : 1708
Join date : 2011-06-10
| | Subject: Re: A Classic Reboot... Wed Feb 12, 2020 4:12 pm | |
| I’ve opted to remake the water cooling outlet and then the inlet In stainless steel, the aluminium which is ok as a part has some odd marks on it from machining which I’m not happy about as a finished piece that you will see, also it’s not quite “chrome” being aluminium and there part is very small to buff to a high polish long with that it’s also very soft, as a prototype from the scrap it’s fine but I do think going stainless will give me better results to the look I’m after. That said it’s clear now I’m going for a “chromed” fittings look as per all boats of this period, rather than my usual brass style, that’s not from laziness to machine brass I actually started to rough the parts out in brass last night then changed my mind, I know this boat unlike the urchin I finished last year will actually see some use on the lakes ( I refure to this as the “GT”model for dad to use when he starts his steam launch build, so it will see plenty of salt water lake use) so brass is the wrong material for that abuse since it tarnished and goes green so badly very quickly, I think stainless will be the way to go along with looking almost correct for this type of boat. I will have to make up the horn, hand rails, etc from stainless to now but I think it’s the way to go and saves my lathe having to run at 6000rpm to get a decent rough cut. 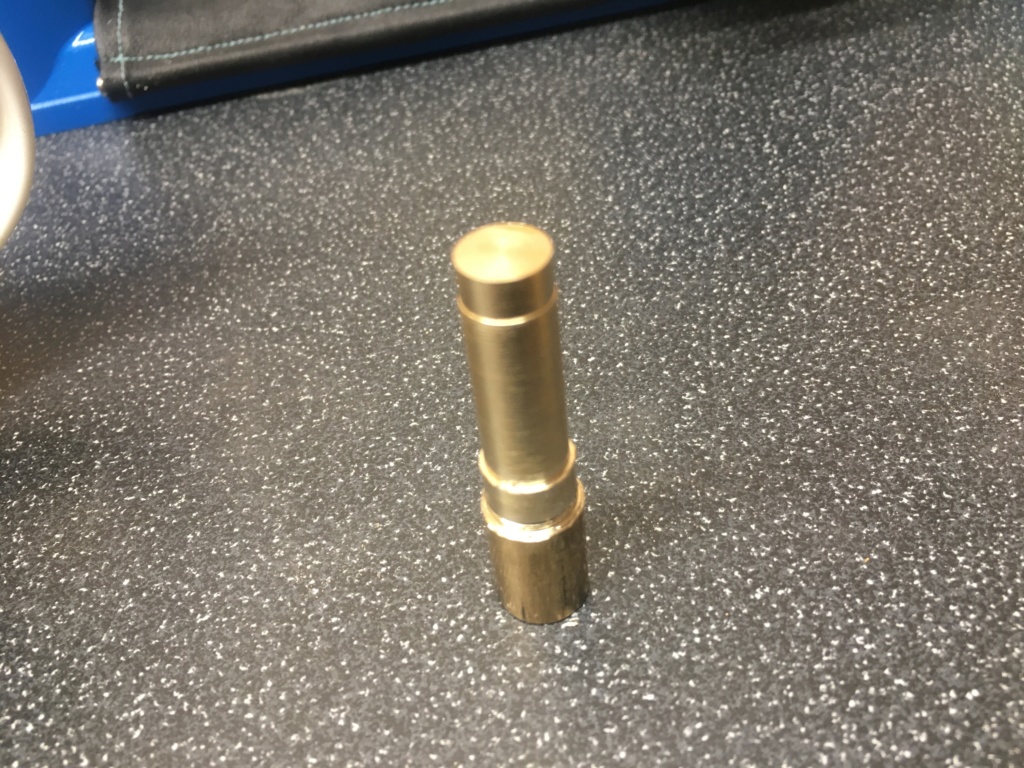
_________________
I'm Not Anti-Social, I'm Anti-Stupid.
| |
| | | | Roadrunner
Forum Overlord
Posts : 1708
Join date : 2011-06-10
| | Subject: Re: A Classic Reboot... Mon Feb 17, 2020 6:47 pm | |
| Today I’ve been busy kinda.... I’m at the point where the deck needs to go down, this part is more complicated than it sounds given the modifications I’m doing to the cockpit, my original build I pulled the seat forward to be more accurate as a seating position and put “storage” behind the seat, again I’m doing the same thing plus the extras of the cockpit inside walls... that is because afterunning the boat for several years it was one of the biggest spots for accepting large volumes of water ingress! So water fighting this area will reduce the issues I had last time... I digress a little.... before the deck can go down I have align the seat and that means align the steering wheel position.... Again going back to the original build when I built that wheel I fixed the wheel to the brass rod and glued the brass tube into place in its new “accurate” angle... this allowed me to slide the steering wheel out to remove the sailor as the wheel would bind up on his legs and also stop the searing unit from coming out giving access to the motor...hence forth crack of the steering wheel of not for this adjustment to the kit... I have to admit.... that steering wheel is still perfect and still to this day works as intended and the glue joint has never broken from having a good 30mm of brass rod stuck out being man handled over the years.... This time around I’ve opted to change this section to something more accurate again and even more robust! Using the lathe which so far is earning its keep I’ve made up a back plate for the wheel fixed with a tiny screw, this back plate slides onto a shaft which will be permanently fixed to the dashboard ( the photos below shows a 1st attempt shaft not the final as I’ve altered my design slightly since making the part) Two little 2mm magnets ( and the firm fitting slot) lock the wheel onto the shaft and allows for easy remove with absolutely no chance of damage to the wheel long term...so far I’ve done the back plate and later this evening I’ll finish the main dash shaft for it... this leads to why the decks not glued in place yet as I will have to drill out the dash hole to accept the new sleeve/shaft and with the deck in place risks serious damage to it should I buffer up with the power drill.... Anyway all parts made with 303 stainless.   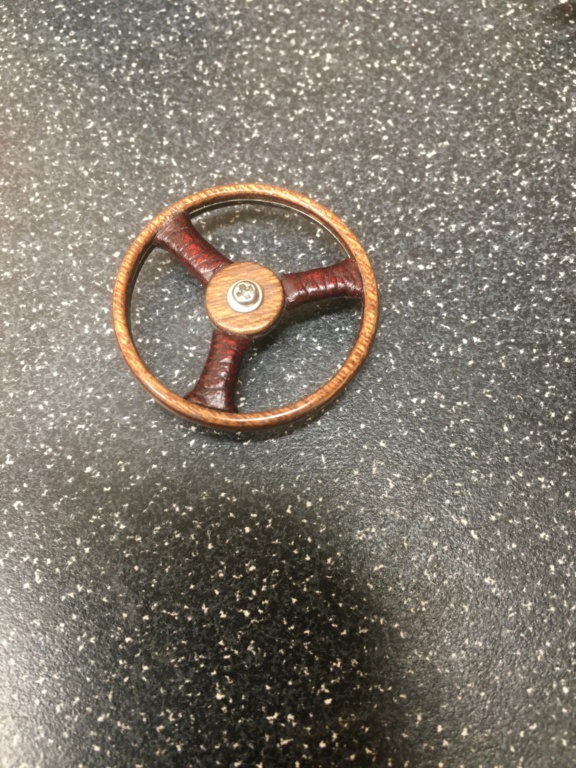 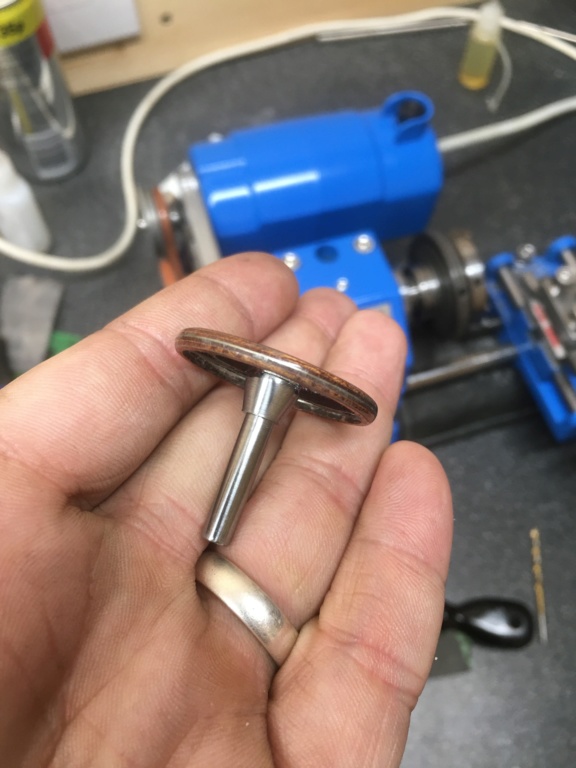
_________________
I'm Not Anti-Social, I'm Anti-Stupid.
| |
| | | | Guest
Guest
| | Subject: Re: A Classic Reboot... Mon Feb 17, 2020 8:13 pm | |
| |
| | | | Roadrunner
Forum Overlord
Posts : 1708
Join date : 2011-06-10
| | Subject: Re: A Classic Reboot... Mon Feb 17, 2020 10:54 pm | |
| And as promised... the main dash board shaft is finished, with a fitted magnet, it’s a tight fit as it is with the wheel back plate but the magnet makes sure, now I have to carefully drill a 7.5mm hole in the dash at a 43 degree angle.... maybe light use of a file  ... Yup the lathe is defiantly earning its keep, it’s the one tool that can help make a model that much better, after all if u want custom parts this is the way!  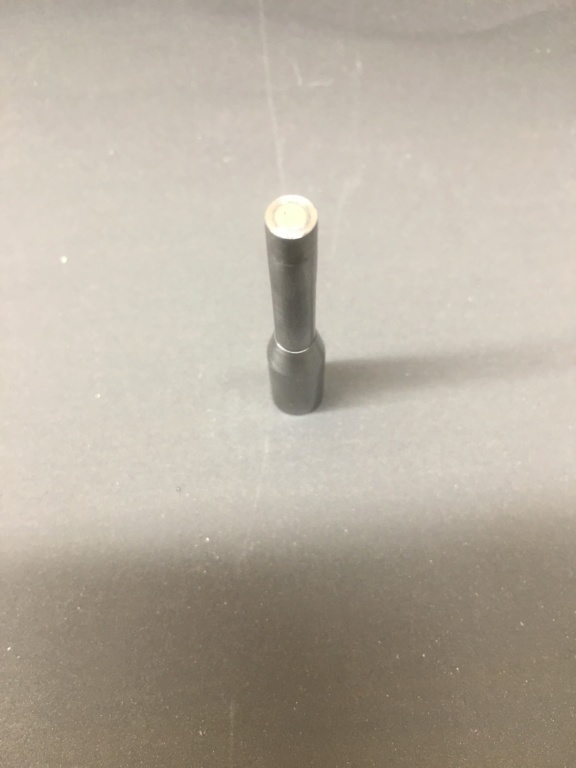 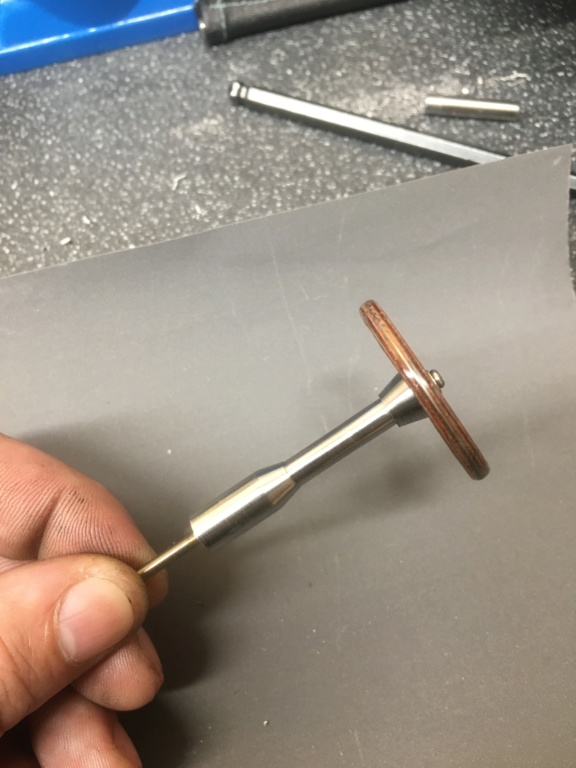
_________________
I'm Not Anti-Social, I'm Anti-Stupid.
| |
| | | | Roadrunner
Forum Overlord
Posts : 1708
Join date : 2011-06-10
| | Subject: Re: A Classic Reboot... Wed Feb 19, 2020 12:23 pm | |
| Today I’ve glued in the steering column, I had to make up a 3mm stainless post for it at the back that goes into the battery back plate, this was more for supporting the steering column than look, however it dose play well looking down as if the steering system dose work and not floating that the “mechanics” are there. The back plate looks very rough at present especially with the holes drilled to get the support shaft in place, not my best work dangling drill bits through a 7.5mm hole trying to align the angles... fortunately this all gets covered with mahogany facia so it looks awful but it’s a short term look, and as you can see with the seat in place and David Tennant driving the effect is complete. I’ve made up a mahogany and wood glue paste to clean up the columns seam from the drilling and filing work in the dash, it requires sanding once dried I think once sanded and varnished the seam will blend well to the rest of the dash, I did my upmost to ensure the hole wasn’t oversize but using a larger round file to keep the right shape while man handling the hull in one hand wasn’t the easiest thing to achieve. At worse case if I’m not happy I will create a surround for the shaft on the dash. But I think this will turn out well. The steering shaft was the last part for the cockpit area that needed fitting before I can complet construction of the whole area but like I said a few days ago some parts were dictating positions of others, a common occurrence when customising any project. More updates coming soon, later today I’ll clean up the filler and start to add the facia to the battery back plate, it’s the one area bugging me and allows me to make up a cover for the battery hole as I end up with some thickness to work with. 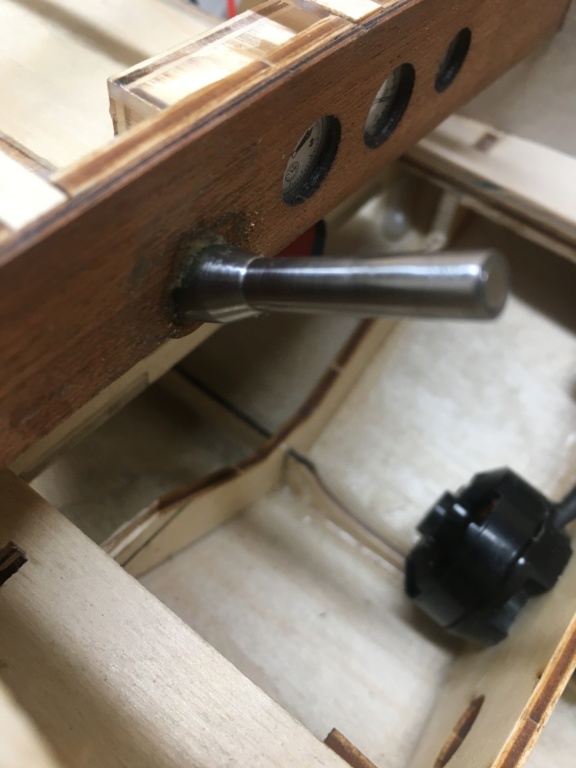 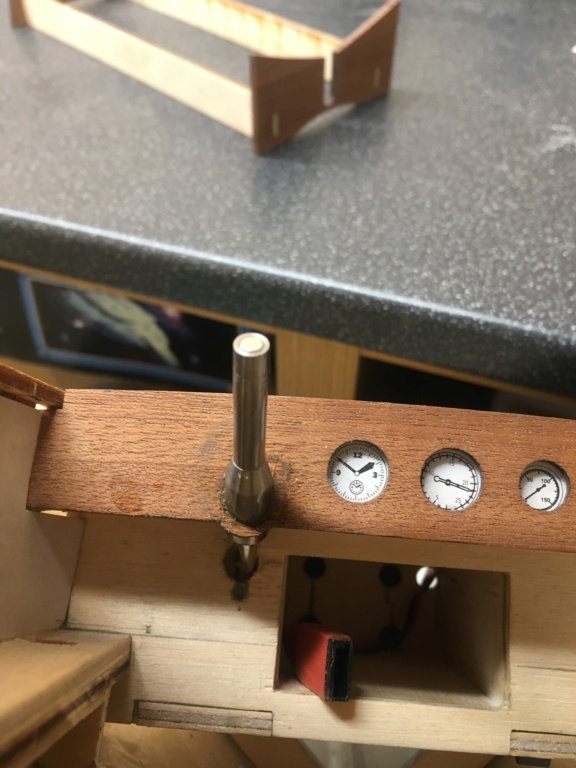 
_________________
I'm Not Anti-Social, I'm Anti-Stupid.
| |
| | | | Roadrunner
Forum Overlord
Posts : 1708
Join date : 2011-06-10
| | Subject: Re: A Classic Reboot... Mon Feb 24, 2020 7:36 pm | |
| Today my insert tool arrived so I cracked on with remaking the water cooling output, this time from stainless steel rather than the aluminium. My hss cutting bits are fine for this type of material however I found they blunt a lot faster so I opted to swap out the every day use knifing tool for insert just to reduce my time regrinding and sharpening tools, I don’t get a massive amount of time in the workshop of an evening, so I don’t want to be constantly wasting half hour re sharpening the one cutting tool that’s in constant use. Lazy maybe but it saves me a ton of time.. Anyway as you can see the new stainless part to the aluminium is defiantly a clear winner in terms of its “chrome look” also a better polished finish. Later this evening I’ll make up the cooling inlet. 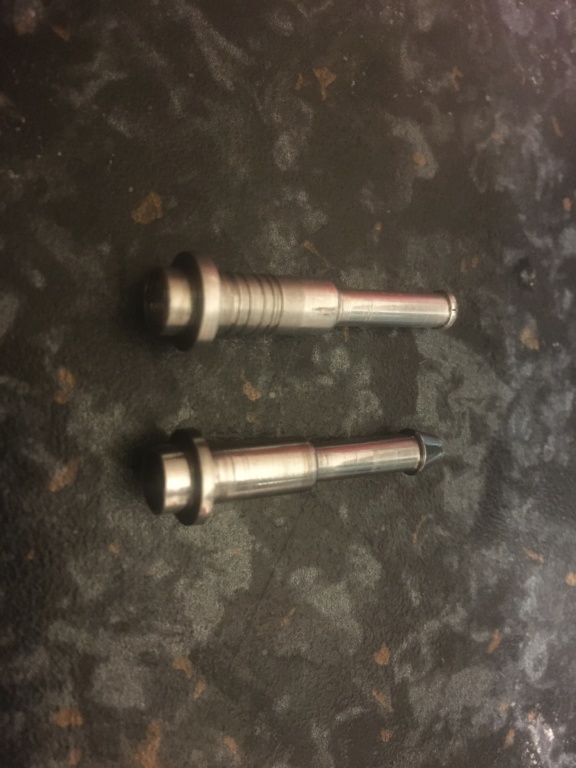 
_________________
I'm Not Anti-Social, I'm Anti-Stupid.
| |
| | | | Roadrunner
Forum Overlord
Posts : 1708
Join date : 2011-06-10
| | Subject: Re: A Classic Reboot... Wed Feb 26, 2020 12:04 pm | |
| I finished up for the most part the water cooling intake, it still requires threading for m6 and the tip angle cut to 45 to finish the pickup, I will thread and cut the part to finish closer to the end of the project as I do t have any m6 bolts laying about the shop to test fit the thread so I’ll just do that job later, the cut off I can do shortly but I need to drill the hull first and fit to determine the point of cut, I’ve made it longer on purpose much like a shop purchased one, however it’s position within the hull to maximise prop thrust up the shaft requires it to be dead center unlike others where it’s possible to side mount to the prop wash, it’s simply a matter of position, I’ll cut the angle with the sanding belt just need to make up a quick jig to mount it in first as the part will get extremely hot and have the secondary function of hardening the tip. I think now I’m at the point of drilling holes in the hull and test fitting parts again easier to do this with the deck off. 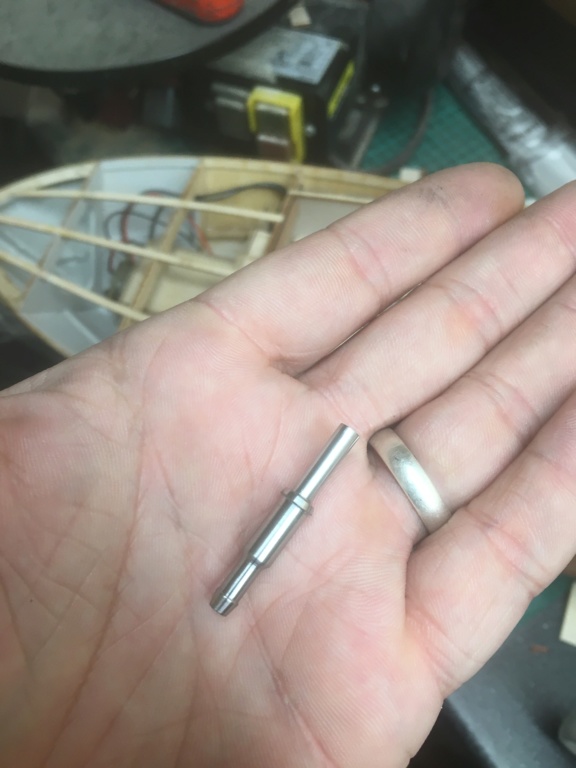
_________________
I'm Not Anti-Social, I'm Anti-Stupid.
| |
| | | | Roadrunner
Forum Overlord
Posts : 1708
Join date : 2011-06-10
| | Subject: Re: A Classic Reboot... Wed Feb 26, 2020 1:12 pm | |
|
_________________
I'm Not Anti-Social, I'm Anti-Stupid.
| |
| | | | Roadrunner
Forum Overlord
Posts : 1708
Join date : 2011-06-10
| | Subject: Re: A Classic Reboot... Wed Feb 26, 2020 4:50 pm | |
| On a roll today, something to be said for a decent nights sleep I guess... I’ve drilled the hole for the cooling outlet in the back of the hull, my original plan was to center it on the water line, however I forgot this boat has freeboards/running boards ( which ever term you like) , so I had to temp tape them in place and then center up the part in its most appropriate place, it’s just above the freeboard/running board, this I was slightly annoyed about as I made the part with some grooves to hold a better glue joint for my original location since where that was it couldn’t be threaded, so becuase of the slots cut in the part I couldn’t thread it after without it looking very poor, and I honestly can’t be arsed to make up a new one so instead I’ve raided my RC car spare parts box and located some 4mm E clips, I took the part back to the lathe and cut a slot suitable for the e clip, which long term when fixed to the boat a drop of epoxy will seal it and the E clip will secure it, this will allow for its removal should it be needed during its life time by just breaking the glue joint and removing the clip. I also due to its new location had to slot the electrical shelf to fit correctly and give spacing for the tubing. I also took a few minutes to fix the rudder spacer, the plastic one works as designed but it’s just ugly, so I drilled some 6mm stainless to accept the brass post, with a smaller finish hole for the rudder itself, it basically looks like a stainless rudder tube since the spacer is now part of the entire unit, I do wish I had thought to wait before fitting the rudder tube now at this point knowing I could have made a very nice stainless one, but fortunately the post is pretty much a flush fit to the under side of the hull, just one of those things, I’ll be sure to etch prim the exposed brass during painting when the time comes. All in all a good days progress, I do think having the lathe there I’m looking for excuses to use it  Always fun to make up parts with a new toy. 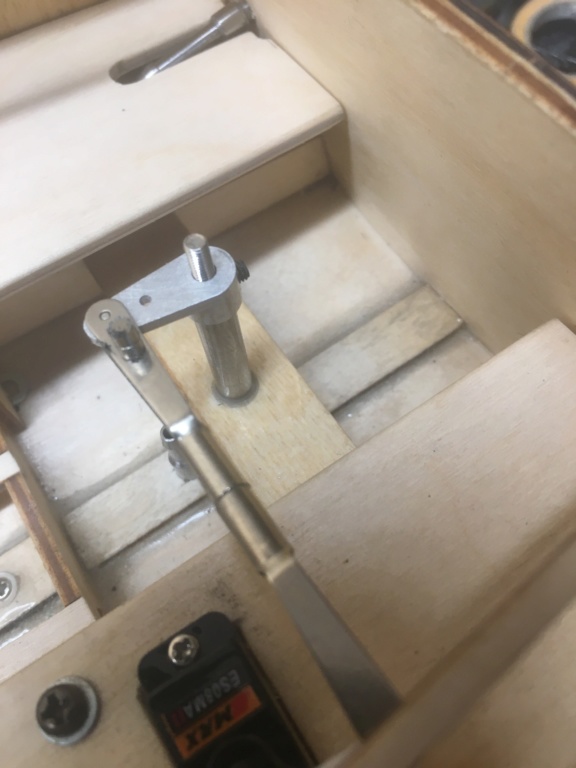 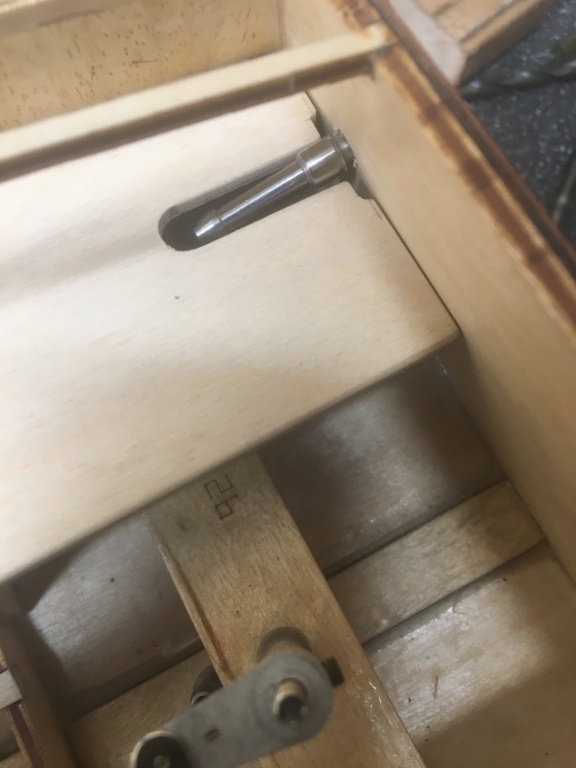 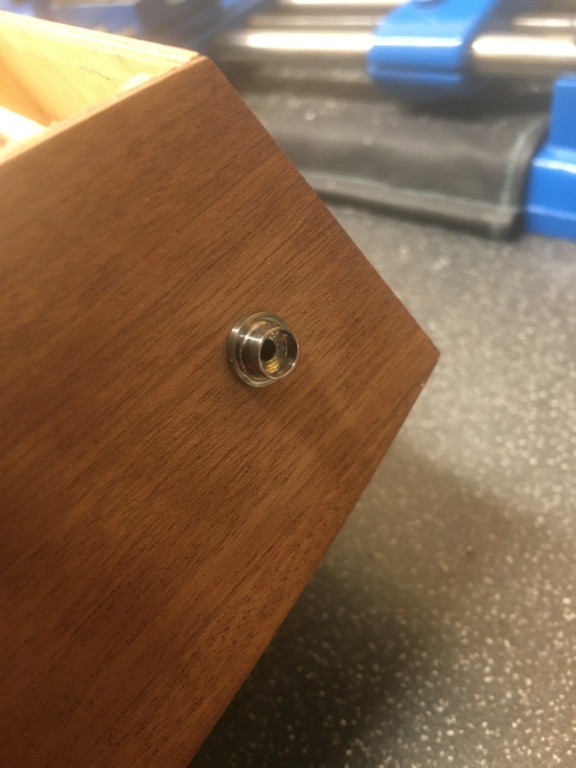
_________________
I'm Not Anti-Social, I'm Anti-Stupid.
| |
| | | | Guest
Guest
| | Subject: Re: A Classic Reboot... Thu Feb 27, 2020 12:43 am | |
| |
| | | | Roadrunner
Forum Overlord
Posts : 1708
Join date : 2011-06-10
| | Subject: Re: A Classic Reboot... Thu Feb 27, 2020 10:47 pm | |
| It’s that time, getting the deck down, I have a issue with the bow yet again on this kit... funny that it’s an aeronaut trait I swear all bows are never perfectly alighted to the deck part no matter how square you get things.... Sigh.... So my plan to get things best aligned and hope that shits not hit the fan after like the Jenny was where I had to take the whole god damn side off and GRP it to correct, is to get the bow and the rear hatch best aligned as possible, after some adjustments to get it almost right or best possible, I did the one thing you shouldn’t do and drilled a hole at the bow through the deck chines and use it as a pivot point to align the cockpit and rear hatch with equal overhang, now when I go to glue it which will be tomorrow so I can monitor it for an hour, I have a fixed point for the deck to engage to and the rest is done by a few measurements, then tape and rubber band it to hell and just pray! Now for those freaking out about a hole in the deck at the bow, don’t panic there’s a cover piece that sits right there, which will be my saving grace, not only to hide a bloody hole, but I can use that part to tweek the bows central position with it being offset to one side, this then at a good glance will look like the bows spot on without noticing the offset, I guess it’s OCD mode right now, last time I had this issues with an aeronaut kit I sanded out half the bow on one side and GRP’ed it to be correct... Jenny build log anyone!!?!? Not wishing to do that again unless it bugs the living hell out of me this is my plan... of mice and men Or it all goes horribly wrong and you watch me put this model down for a year + like others that aggravate me 🤪 🤪 🤪 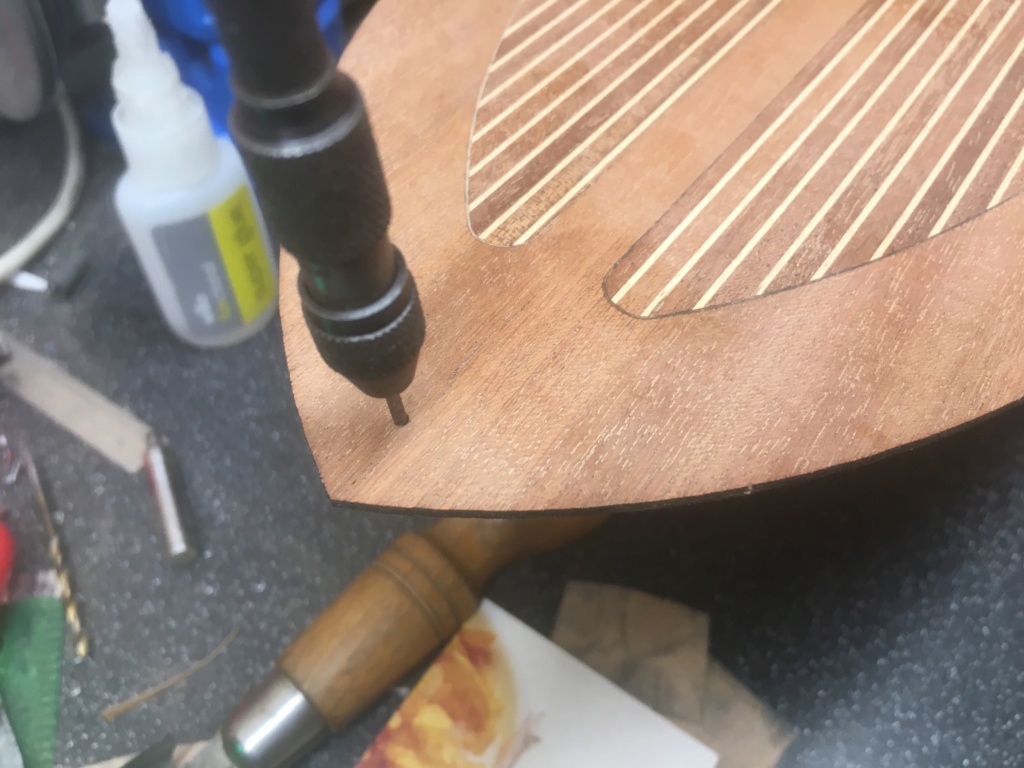  
_________________
I'm Not Anti-Social, I'm Anti-Stupid.
| |
| | | | Roadrunner
Forum Overlord
Posts : 1708
Join date : 2011-06-10
| | Subject: Re: A Classic Reboot... Fri Mar 06, 2020 10:01 pm | |
| Not much achieved much this week ended up with a bug running through the kids spoilt play, but this evening I was able to get to the shop for an hour so decided to make up something small For the boat which was the flag staff deck insert, it replaces the etched part from the kit to a more solid unit to take a detachable flag staff, the original classic I built had a brass one, but it was the biggest point of damage on the boat, between me and my dad we broke that component 3 times and had it replaced, until it broke h e 4th time to which I just glued on a brass washer to the deck, it was never an ideal part although nice and effective as a staff insert just very fragile, so learning from that mistake the new one is a deck insert with the flag able to seat into it through the deck itself, thy is should once glued in place with a full deck support block take one hell of a whack, so much so that I will make up a custom flag pole with a snap point, I can easily make up more flag poles with a snap point than damaging the deck from tear out of the holder. Like I said nothing complex, 2mm hollow shaft with a half radius button head, leaving only the dash board, horn and a few odd parts I’ve yet to think off to knock out on the lathe, all these parts since are just cosmetic have the luxury of not needing to be “accurate” in terms of precision, but they are pretty much spot on with minimal run off given I’ve still not make up the dial indicator setup yet for it. Like I said nothing much this week but one less part to make up, hopefully I’ll get the deck down over the weekend depending on the wife and kids. 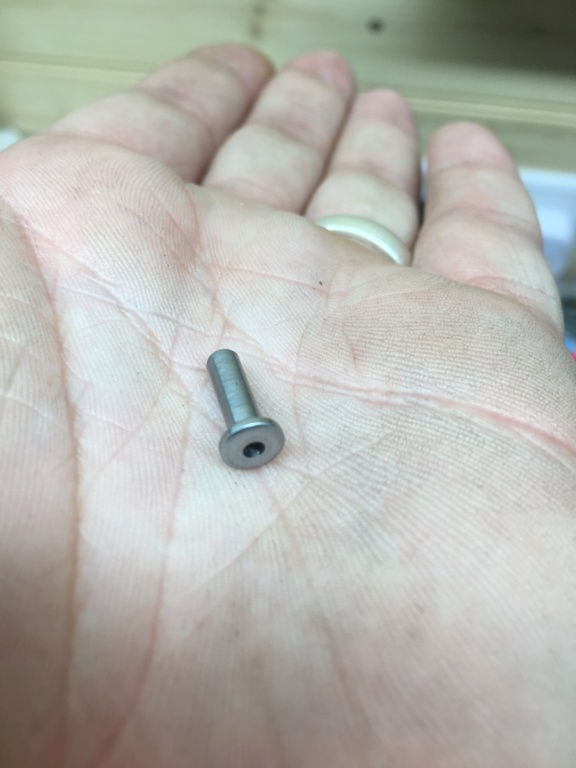
_________________
I'm Not Anti-Social, I'm Anti-Stupid.
| |
| | | | Guest
Guest
| | Subject: Re: A Classic Reboot... Sat Mar 07, 2020 1:50 am | |
| |
| | | | Sponsored content
| | Subject: Re: A Classic Reboot... | |
| |
| | | | | | A Classic Reboot... | |
|
Similar topics | |
|
| | Permissions in this forum: | You cannot reply to topics in this forum
| |
| |
| |


