| | | LESRO ATLANTIC 21 KIT. |  |
| | | Author | Message |
|---|
Guest
Guest
 |  Subject: LESRO ATLANTIC 21 KIT. Subject: LESRO ATLANTIC 21 KIT.  Sat Dec 30, 2017 2:39 pm Sat Dec 30, 2017 2:39 pm | |
| some might have seen the lesro Atlantic 21 hotch potch of parts for spare or repair, that sold on Ebay just before Christmas for £249.00p inc. postage and thought that the buyer must have been insane..............well, to be honest I thought the same when I pressed the buy button with three seconds to go................but with a deep intake of breath I resigned myself to the fact that I had committed myself [ some probably believe that I should be committed] to buying it and told the seller that I would do a cash transfer to my daughters ebay/paypal account on Wednesday when the banks opened............the "spares/repair" box of "junk" that looked on the advert as though it had been dropped from about 3000 feet was opened this afternoon, and I found to my great satisfaction, joy and glee that it was, although in parts, absolutely complete......the plans, instructions and eve the small slip from Duplex models stating the blackening of some plastic was due to electrolysis discharge was still in the box. All plastic parts are there, motor prop shaft, linkages, etc..........just all there...even the original tube of glue supplied with the kit, and the small screw driver.sadly it looks as though someone built it to an extent but could never take the plunge of joining the sponson halves together in order to finish the model, and in lying around it has suffered some damage. I have ideas and intentions for this beauty..............so a good 250 sobs well spent.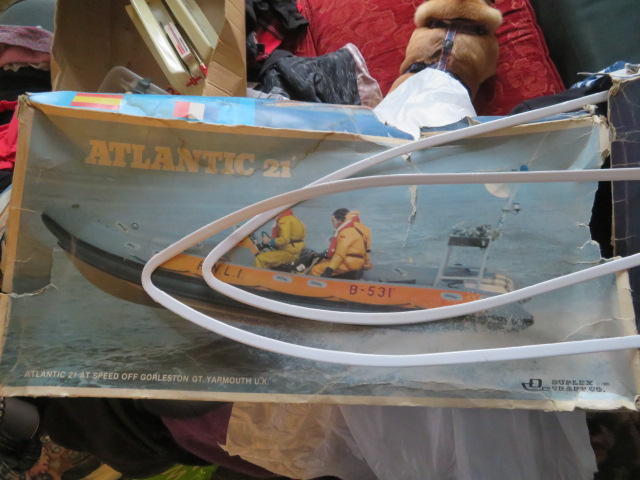 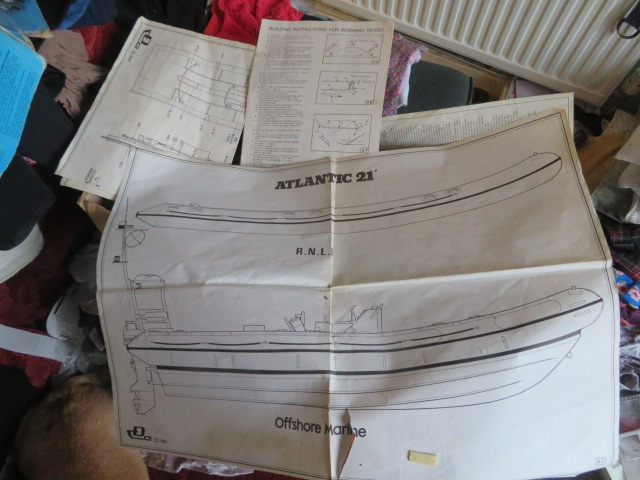 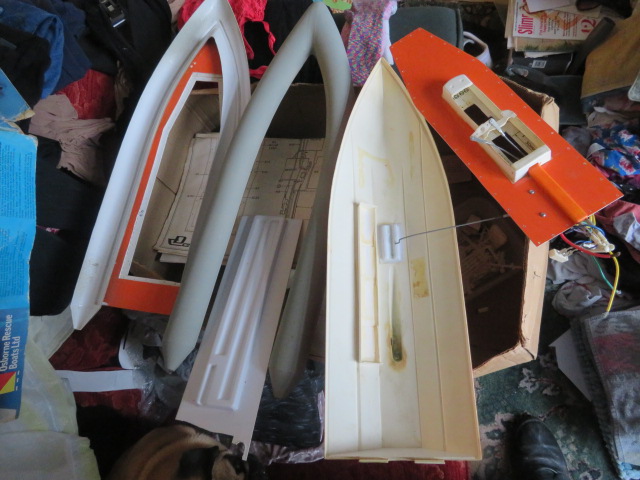
Last edited by nhp651 on Tue Oct 15, 2019 9:16 am; edited 2 times in total |
|   | | Guest
Guest
 |  Subject: Re: LESRO ATLANTIC 21 KIT. Subject: Re: LESRO ATLANTIC 21 KIT.  Sun Dec 31, 2017 7:34 am Sun Dec 31, 2017 7:34 am | |
| |
|   | | Guest
Guest
 |  Subject: i just couldn't resist.......lol Subject: i just couldn't resist.......lol  Wed Mar 07, 2018 8:08 pm Wed Mar 07, 2018 8:08 pm | |
| I decided to take a look at the kit, after it didn't sell on ebay with thoughts of building it myself...............I WISH I HADN'T!!!.........who ever originally put it together was either blind or a monkey in training to work for peanuts. the bottom half of the sponson was not glued to the deck properly, the transom was not glued to the deck, the underdeck was not glued level to the deck, the raised seating part didn't fit the deck at all and to get even worse, the bottom sponson left gaps between the sponson and the deck with holes in the bottom of the sponson to allow water ingress.......a complete botch job......no wonder it was dumped in a shed for years..........as for the painted deck and surrounds..............it looked as though it had been applied with a stiff toothbrush............oh yeh........and the deck was 3mm too short for the access hole, lol............OH I DO LOVE A CHALLENGE!!!So, first job was to sand off the majority of the deck orange as I don't know whether it is enamel or cellulose..........ready for strengthening the structure..........next was to glue the ridged hull onto the sponson and deck, plus re glue the transom to the deck as this was coming away from the deck.........and finally before I start cutting out the w/t sectioning for the sponson supports I decided to run a fillet of silicon rubber between the deck and the sponson bottom half to give total waterproof barrier and more support.....let the rebuild begin. I made the joint between the latter using the tail end of a small teaspoon.......i'll clean off the residue once it has all cured.  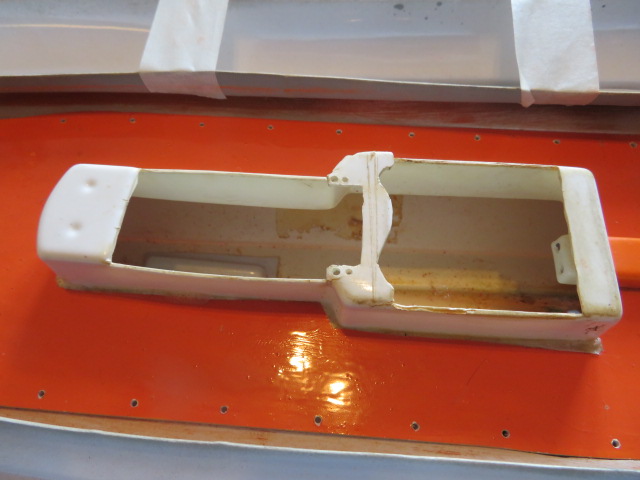 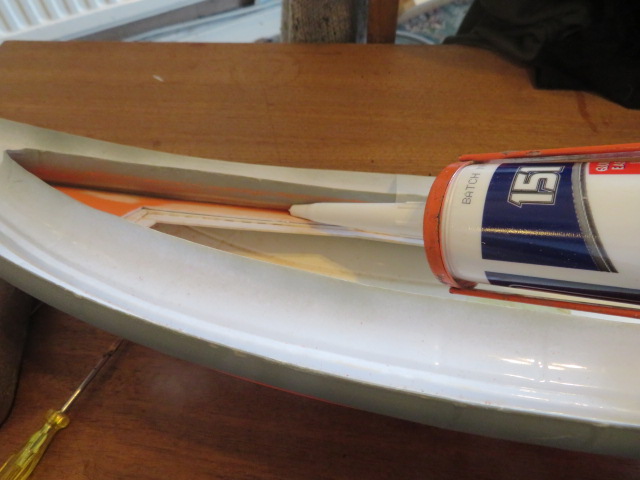 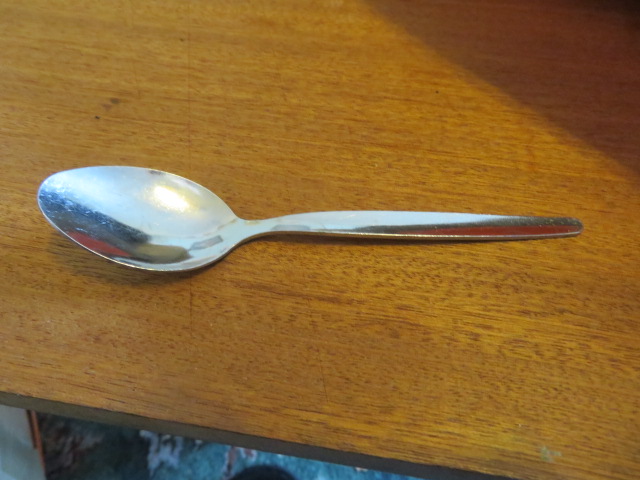  I cut and trimmed the internal "bulkheads" for joining and supporting the top and bottom halves of the sponsons. however over the years the bottom sponson half has "collapsed" outwards a little and so along the long length of the structure I have cut 2 more bulkhead strengtheners in addition to those 8 supplied. they are held in place using masking tape. I cut and trimmed the internal "bulkheads" for joining and supporting the top and bottom halves of the sponsons. however over the years the bottom sponson half has "collapsed" outwards a little and so along the long length of the structure I have cut 2 more bulkhead strengtheners in addition to those 8 supplied. they are held in place using masking tape.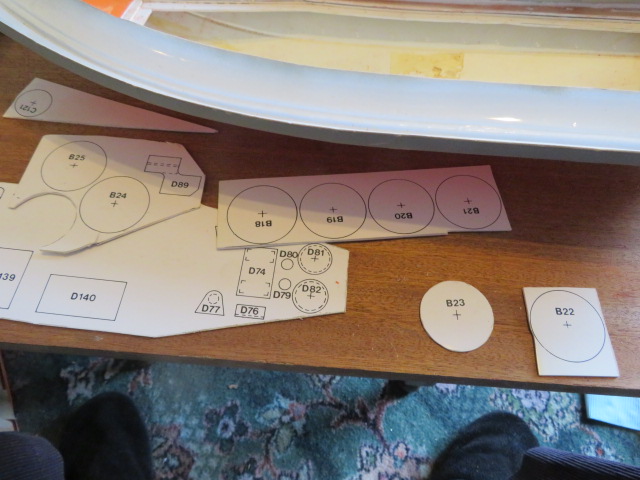 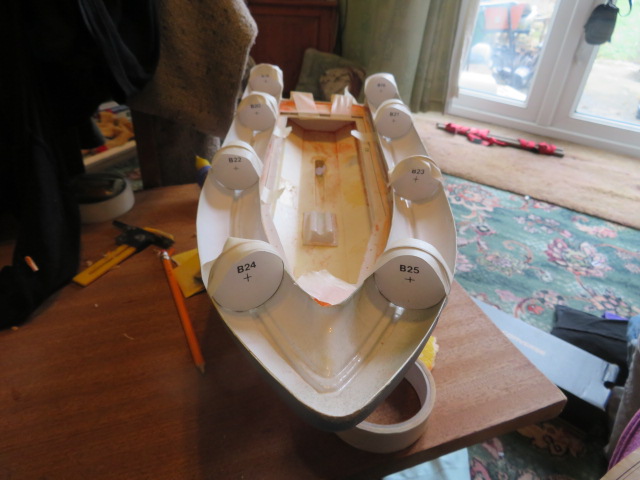 The "bulkheads" have been reinforced with buttresses fore and aft and I have started to add a reinforcing strip on the insides of the lower sponson as the only lip on the upper sponson to join both together is about 2.5mm in depth.......not enough for me......I like building mine strongly, lol. The "bulkheads" have been reinforced with buttresses fore and aft and I have started to add a reinforcing strip on the insides of the lower sponson as the only lip on the upper sponson to join both together is about 2.5mm in depth.......not enough for me......I like building mine strongly, lol. 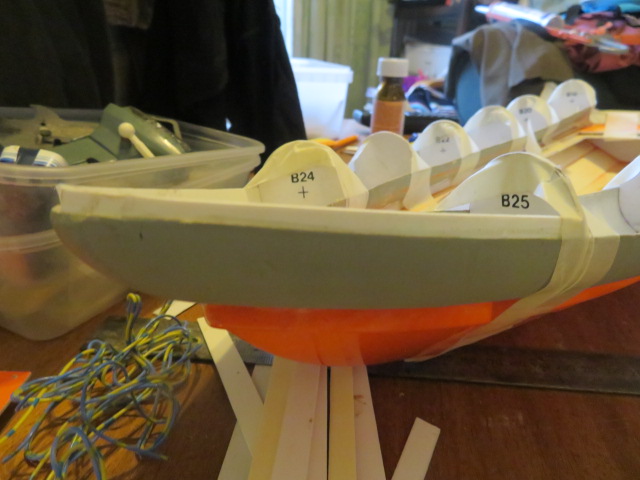 well...........the workshop is full of steam lifeboat, moulds and plugs, and heaters that just can't cope with this extraordinary weather..........so I was having withdrawal symptoms from building, so I thought I could build this sitting on the sofa watching TV........and going together reasonably well.......but it was a very good kit in its day.the supportive strip to help join the two halves of the sponsons has been added and the top half was dry fitted.......it actually went together very well with no adjustment, surprise surprise!!........so, using some plumbers hard plastic glue for this one I ran a seam of it right round the lip of the moulding, applied it to the bottom half and taped it up...........gone has the fragility of the thing when I first started this morning ant it's now looking like a worthwhile contestant for entry into my collection of lifeboats.........and all in the warmth of my back TV room, overlooking a very cold and snowless garden..............still bl***y cold though, lol.and that's about it on the hull for tonight......wait till it all sets firmly. well...........the workshop is full of steam lifeboat, moulds and plugs, and heaters that just can't cope with this extraordinary weather..........so I was having withdrawal symptoms from building, so I thought I could build this sitting on the sofa watching TV........and going together reasonably well.......but it was a very good kit in its day.the supportive strip to help join the two halves of the sponsons has been added and the top half was dry fitted.......it actually went together very well with no adjustment, surprise surprise!!........so, using some plumbers hard plastic glue for this one I ran a seam of it right round the lip of the moulding, applied it to the bottom half and taped it up...........gone has the fragility of the thing when I first started this morning ant it's now looking like a worthwhile contestant for entry into my collection of lifeboats.........and all in the warmth of my back TV room, overlooking a very cold and snowless garden..............still bl***y cold though, lol.and that's about it on the hull for tonight......wait till it all sets firmly. 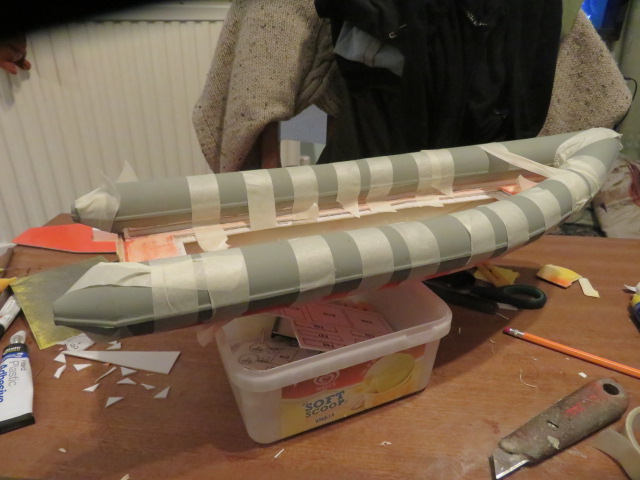 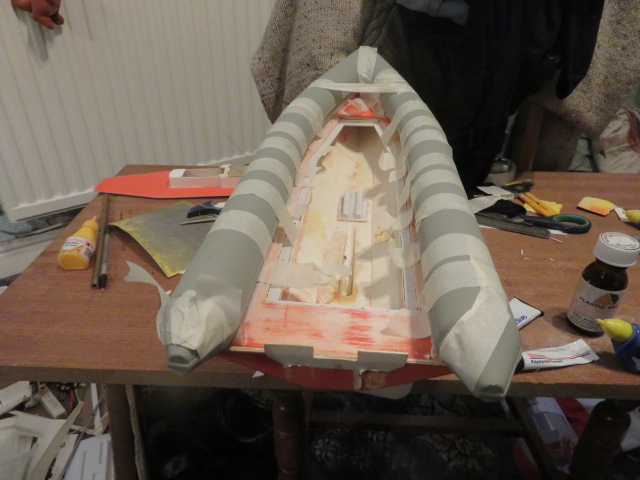 |
|   | | Guest
Guest
 |  Subject: Re: LESRO ATLANTIC 21 KIT. Subject: Re: LESRO ATLANTIC 21 KIT.  Wed Mar 07, 2018 8:24 pm Wed Mar 07, 2018 8:24 pm | |
| using a little modellers licence..........no rivet counters here...........I stripped the paint off the deck and then removed the old uprights for the seat which was originally a vac formed unit, as the original builder had made the hole in the deck too large. on removing the vac formed seat the rest of the forming fell off from lac of spittle.........won't use the term glue anymore as i'm convinced there wasn't any in the build,   I trimmed back to the size of the hole in the deck which made the new structure a total of 5mm wider, and 2mm longer in total.............but it gives these old arthritic fingers of mine easier access to the under deck without need to remove the deck... I trimmed back to the size of the hole in the deck which made the new structure a total of 5mm wider, and 2mm longer in total.............but it gives these old arthritic fingers of mine easier access to the under deck without need to remove the deck...B ut there in lies another tale.........I have decided to use a Vaseline bond between the outer and inner deck to hold in place, rather than the 39 tiny screws that originally held the inner deck and seating control pod in place, wit possibility of just 6 screws in th corners and mid deck to hold it..........the screw holes that are there will be masked with dummy bolt heads.Then I made the seat pod to slip over the permanent structure to give quick access to the motor/servo/receiver section..I am also thinking of shortening the prop shaft/tube to give more space in the hull for electrics/batteries etc.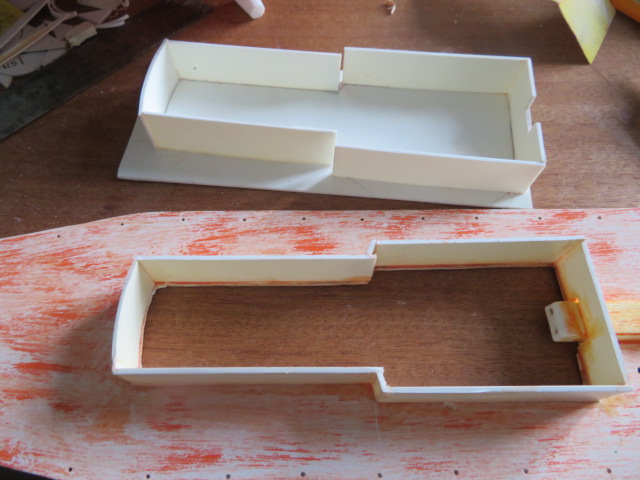 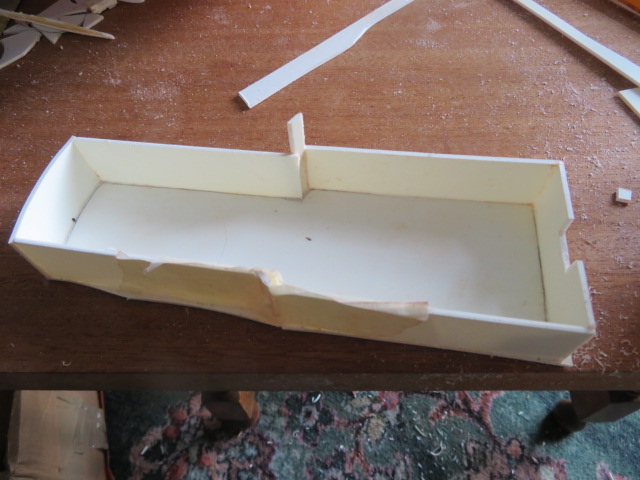 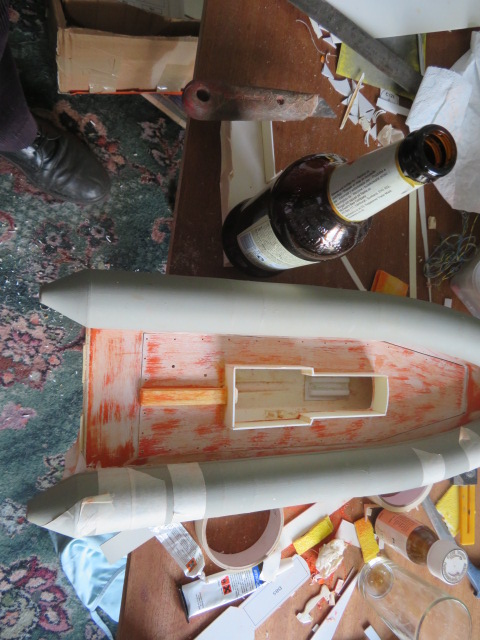 the seating and console has been put onto the "superstructure", ad the transom extension and the bracket plate for the outboards has been restored with scrap plastic..............all will be sanded smooth tomorrow once the glue has set. the seating and console has been put onto the "superstructure", ad the transom extension and the bracket plate for the outboards has been restored with scrap plastic..............all will be sanded smooth tomorrow once the glue has set.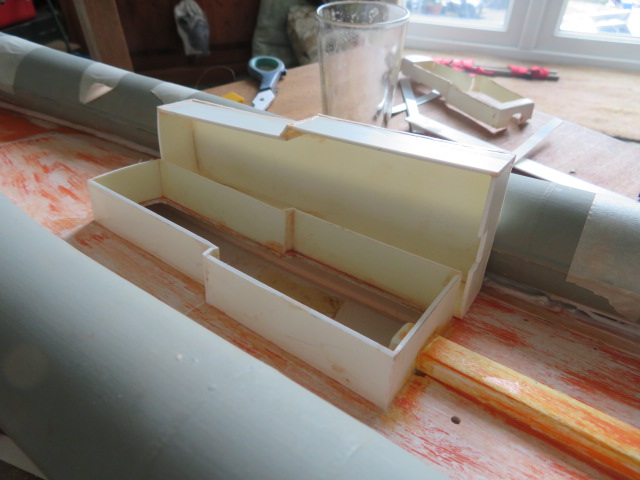 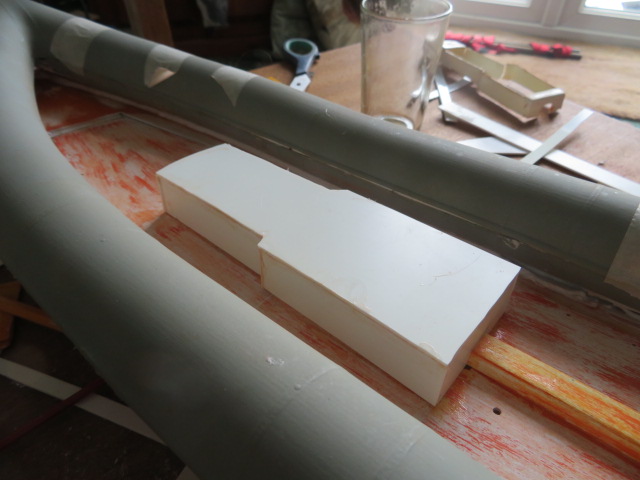 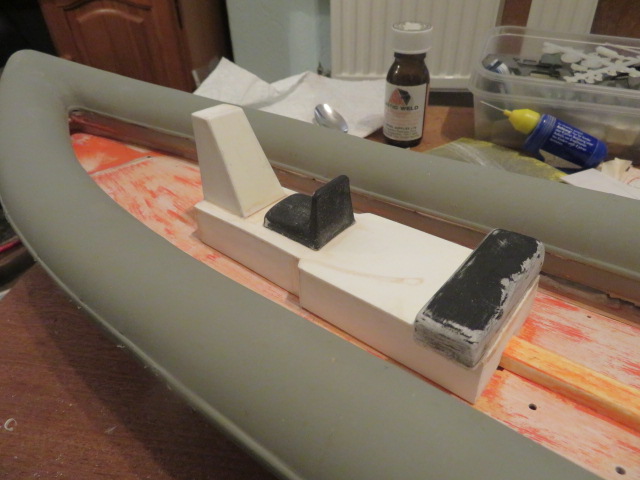  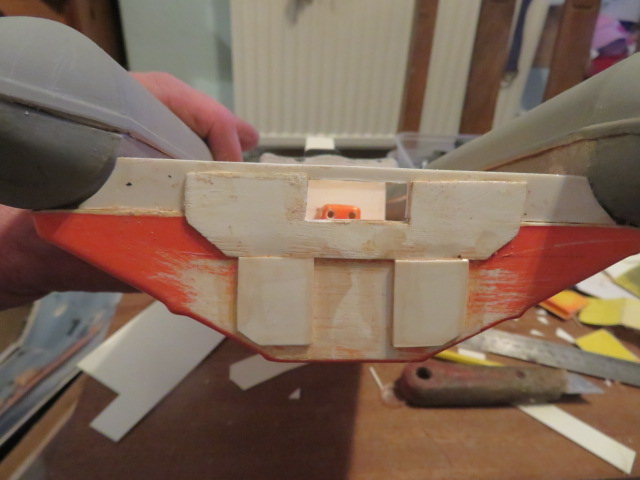 The brackets for the outboards were completely kaput [for want of a more polite word], with moulding missing and cracks across the holes supporting the outboards, so clearly I had to strengthen and rebuild them so that they can support "working" as in steering outboards............this I have done with 0.5mm plasticard, all round.this will mean enlarging the recesses in the actual outboard motors to take the now thicker bracket lugs, but hardly seen when the boat is in the water.......... the brackets now just need to be sanded and then filled to make good.............just undecided whether to use polyester filler or milliput white for this.........but two days in to the restoration and I'm enjoying it more than I thought, as I normally hate trying to rectify or restore or even alter a model that someone else has built. The brackets for the outboards were completely kaput [for want of a more polite word], with moulding missing and cracks across the holes supporting the outboards, so clearly I had to strengthen and rebuild them so that they can support "working" as in steering outboards............this I have done with 0.5mm plasticard, all round.this will mean enlarging the recesses in the actual outboard motors to take the now thicker bracket lugs, but hardly seen when the boat is in the water.......... the brackets now just need to be sanded and then filled to make good.............just undecided whether to use polyester filler or milliput white for this.........but two days in to the restoration and I'm enjoying it more than I thought, as I normally hate trying to rectify or restore or even alter a model that someone else has built.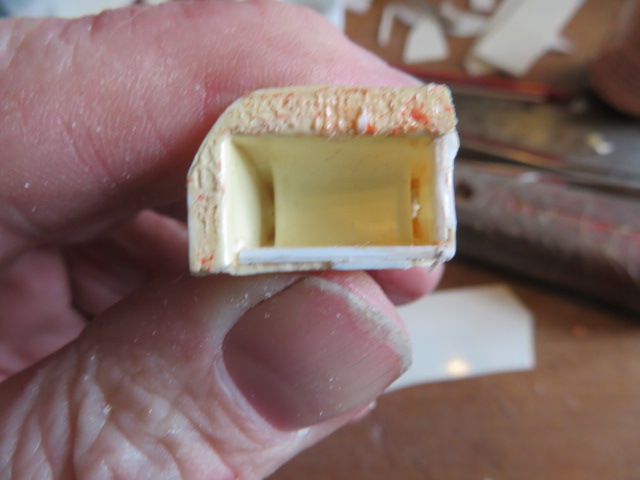 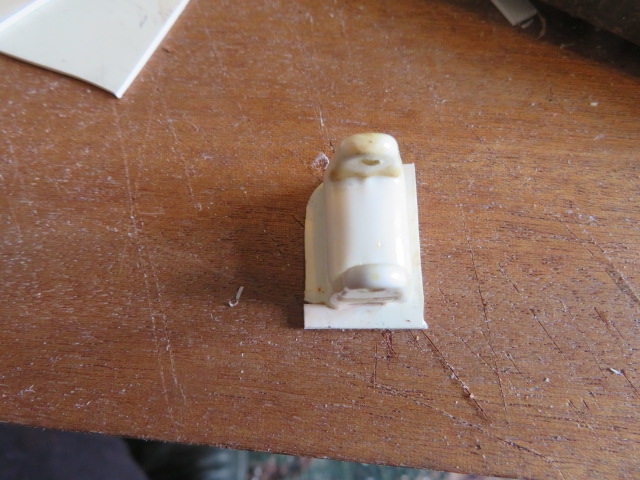 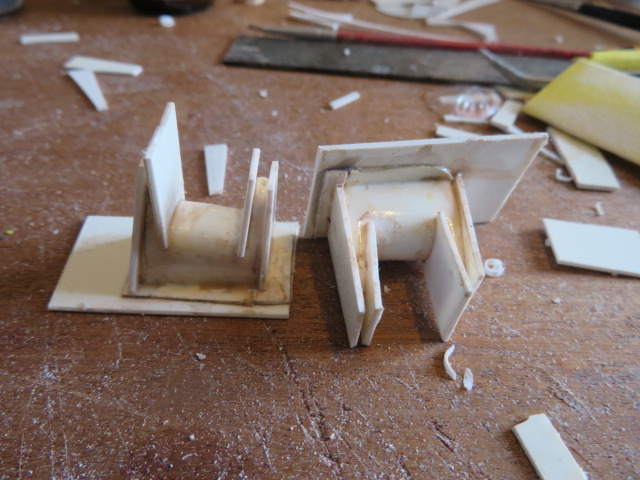 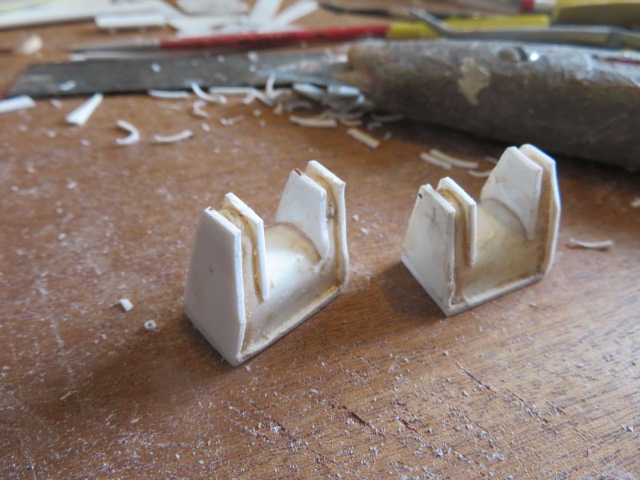 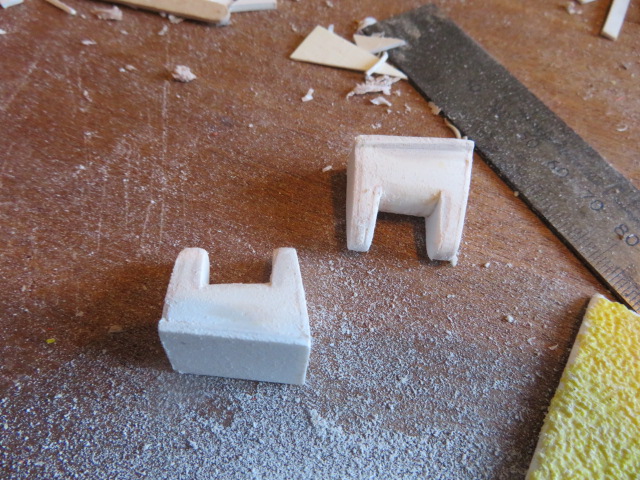 |
|   | | Guest
Guest
 |  Subject: Re: LESRO ATLANTIC 21 KIT. Subject: Re: LESRO ATLANTIC 21 KIT.  Wed Mar 07, 2018 10:10 pm Wed Mar 07, 2018 10:10 pm | |
| The outboard brackets have been filled, sanded and glued onto the transom ready for the dummy motors to be glued together, but before do that I think i'm going to mould one for future use......can make some rubber moulds and cast in polyurethane resin.And they were also drilled for taking the locating pin for the outboards, plus at the advice of a friend on facebook, Richard Hale, I will be putting brass inserts into the plastic brackets to save wear and tear on the from the continual movement of the outboard motors which will be used for steering the boat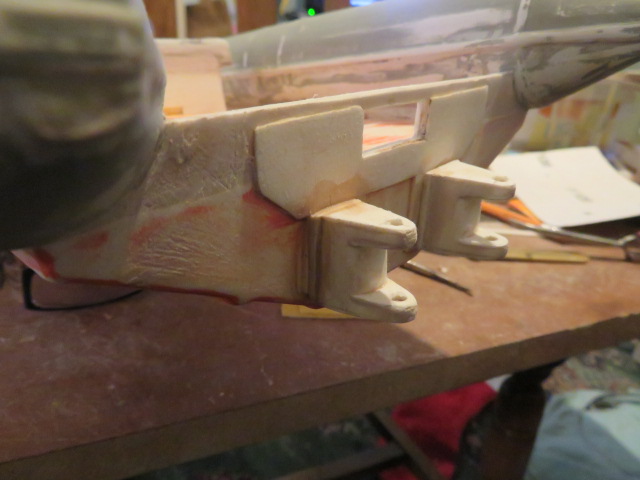 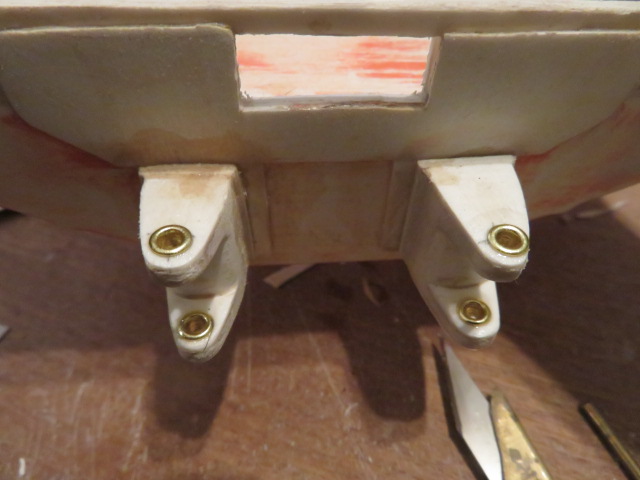 done a bit more detailing to the centre consol area.....cut in the foot well for the rear crew members, the bracket for the throttles, access panels on the fore port side, the echo sounder body and the face for the consol controls, plus the brackets for the rear towing drum, plus the spare propeller bags onto the sponsons. done a bit more detailing to the centre consol area.....cut in the foot well for the rear crew members, the bracket for the throttles, access panels on the fore port side, the echo sounder body and the face for the consol controls, plus the brackets for the rear towing drum, plus the spare propeller bags onto the sponsons.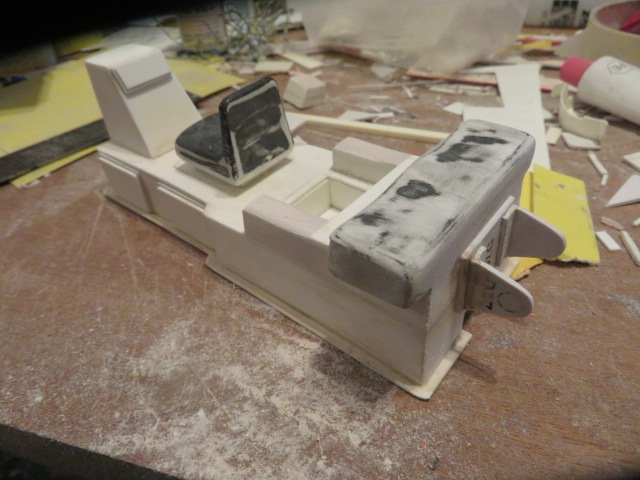 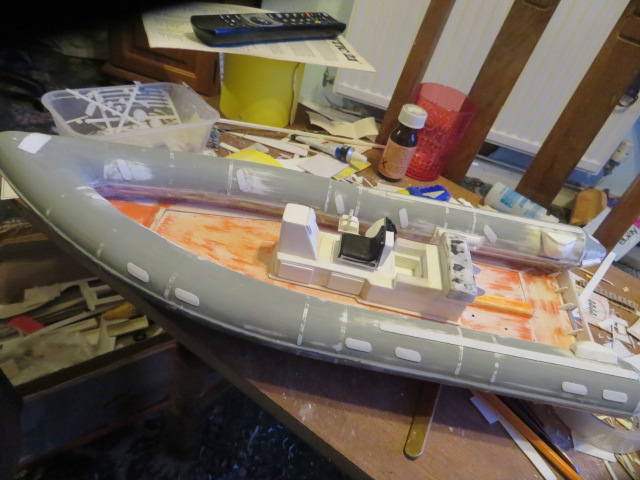 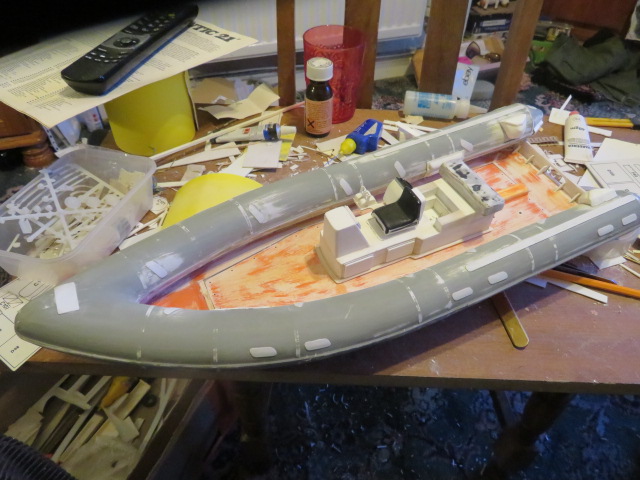 |
|   | | Guest
Guest
 |  Subject: Re: LESRO ATLANTIC 21 KIT. Subject: Re: LESRO ATLANTIC 21 KIT.  Fri Mar 09, 2018 11:44 pm Fri Mar 09, 2018 11:44 pm | |
| I am coming close now to the last 25% of the build and have been amazed at how comprehensive the kit has been and would have been had all the parts been there and not lost over the period of time that it lay unwanted........in fact very few parts were missing and those that were can be fabricated easily. the only major parts are the structure for the rear flotation bag "mast" and the flotation bag itself, which will be fabricated from some milliput, plastic tubing that I am waiting fore and scraps of plasticard that are offcuts from the main kit vac formings.The level of detailing on this kit is amazing, and after fabricating the rear mast, I just have to make the facias for the main controls, the rear "compartment radio transmitter facia, and then install the prop shaft..............oh yes and reconstruct and repaint the outboards after I have made a mould for replicating them..............you never know when one might drop off, knowing my building. lol.and then it'll be to the paint shop.......my workshop for spraying.. below are some shots of the detailing including the brackets on the outer transom wall to take the legs of the mast, and all the other detailing...first shot is however, a strip of angled plastic to clean up the meeting of the deck and the silicon rubber seal under the sponson.......glued in place for a little neatness, and the best I can do after what I had been left with by a previous builder...........looks ok from 10 paces though, 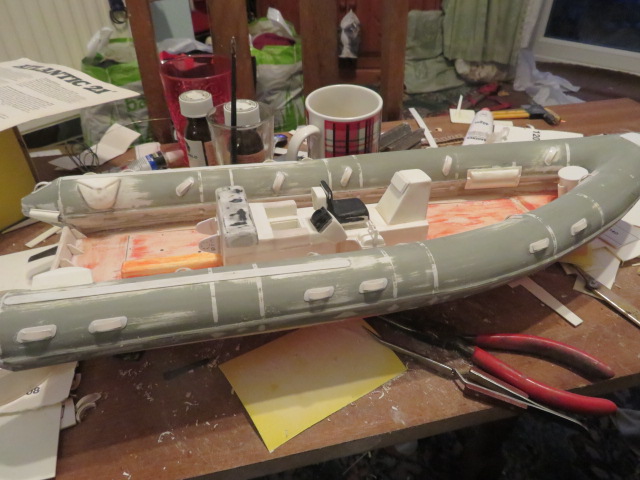 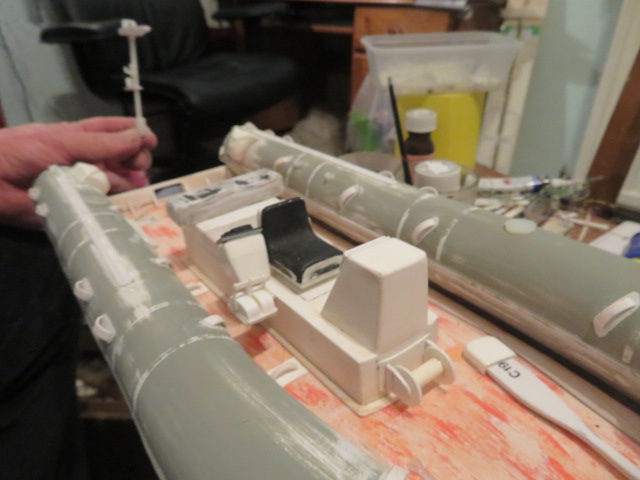 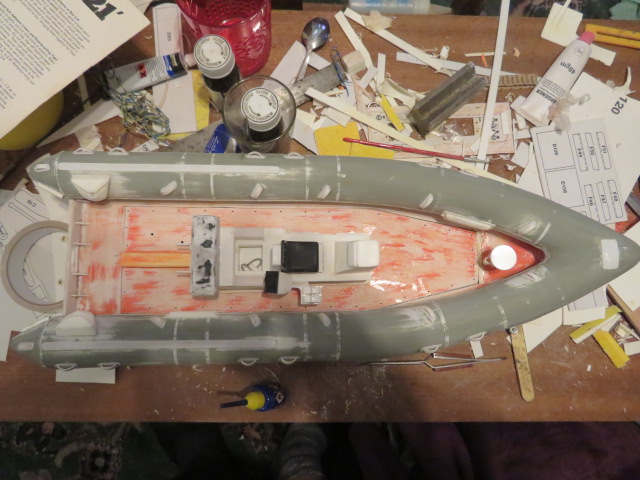 |
|   | | gribeauval
Master


Posts : 499
Join date : 2011-06-11
Age : 73
Location : West Yorkshire
 |  Subject: Re: LESRO ATLANTIC 21 KIT. Subject: Re: LESRO ATLANTIC 21 KIT.  Mon Mar 12, 2018 7:44 pm Mon Mar 12, 2018 7:44 pm | |
| Nice one Neil. Must get mine finished.  | |
|   | | Guest
Guest
 |  Subject: Re: LESRO ATLANTIC 21 KIT. Subject: Re: LESRO ATLANTIC 21 KIT.  Mon Mar 12, 2018 10:08 pm Mon Mar 12, 2018 10:08 pm | |
| I am really enjoying resurrecting it mate............it would probably have gone for scrap once upon a time, and has needed a little modellers licencing but don't care.......my model, my solutions to someone else's mistakes when building it the first time lol.......got a few updates later tonight as it's come on a little since last photos........but charging my phone at mo, and have only one cable so can't download from the camera as well, lol |
|   | | Guest
Guest
 |  Subject: Re: LESRO ATLANTIC 21 KIT. Subject: Re: LESRO ATLANTIC 21 KIT.  Thu Mar 15, 2018 11:07 pm Thu Mar 15, 2018 11:07 pm | |
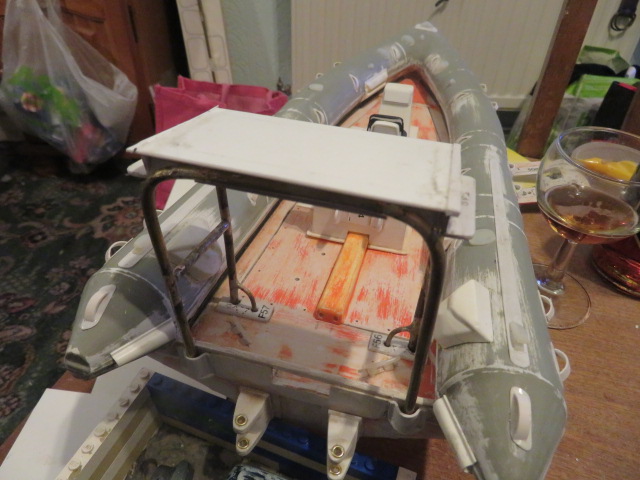
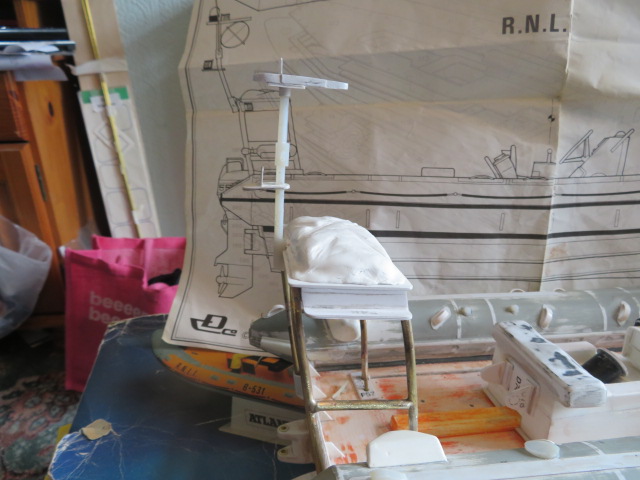
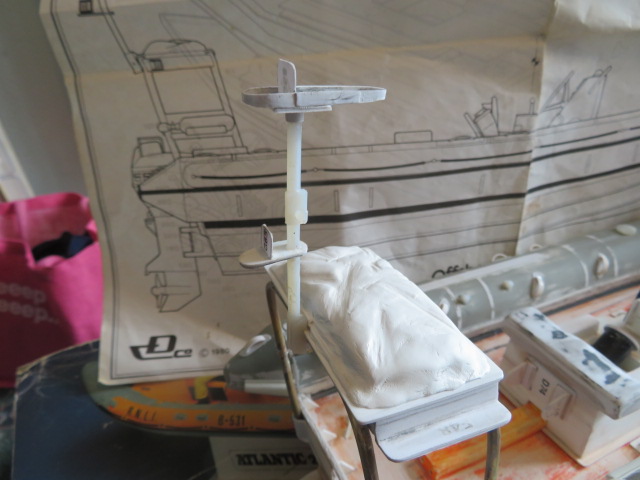
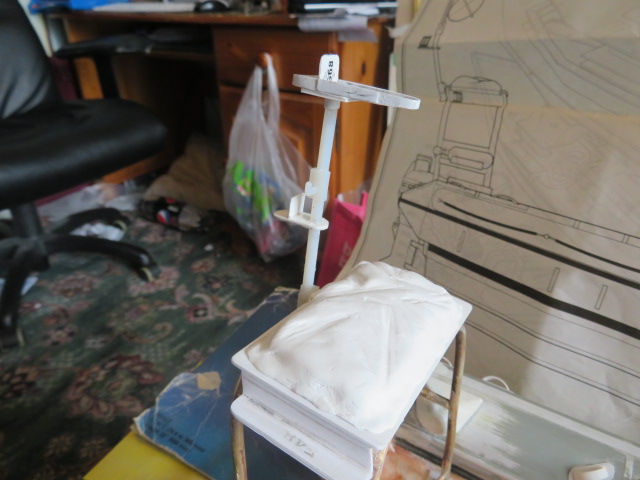
| and if you haven't got one of these in your tool box, it's invaluable..........probably now costing about 7 quid......inflation from when I bought mine 15 years ago at £3.35....a compass cutter..............cuts plasticard, paper, lithoplate and makes nice little circles for anything you desire...........don't use it often, but when I do, perfect for the job.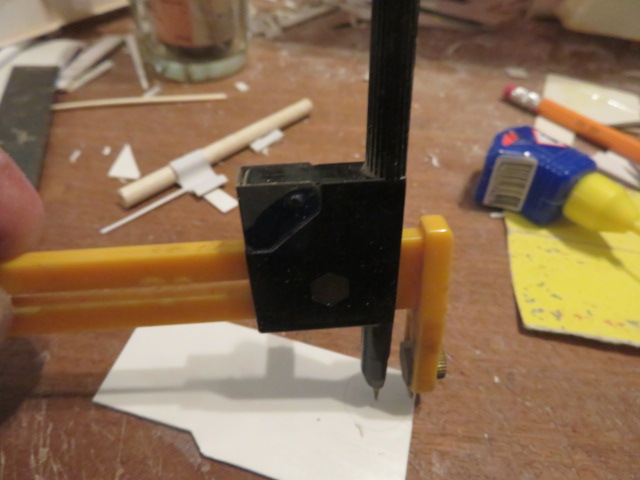 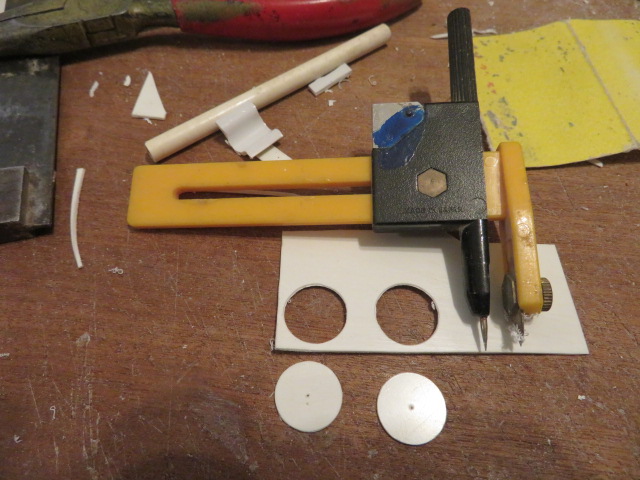  the plastic tubing I ordered turned up 5 days late so in the meantime I decided to make the roll bar from bras and made a jig to bend it on. now!!......back to the rear framework, or as they call it in the instructions."rollbar"..........I have always got better results by using brass tube, and at a members recommendation this evening I went to B&Q and bought the last two small bore brass tube at 4mm and 5.5mm x 1mtre length, for £5.95 a tube.....cheaper as well than K&S tubing....... I have used the 4mm tube, annealed it on the gass cooker bent it and cut to length, and ready tomorrow for the cross members cutting and then silver soldering. I prefer silver solder to soft soldering as it is much stronger, and after a little practice with the torch and liquid flux, far easier than soft soldering also.....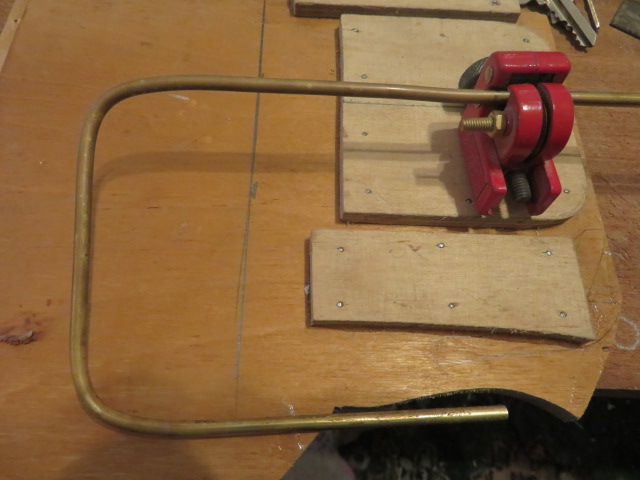 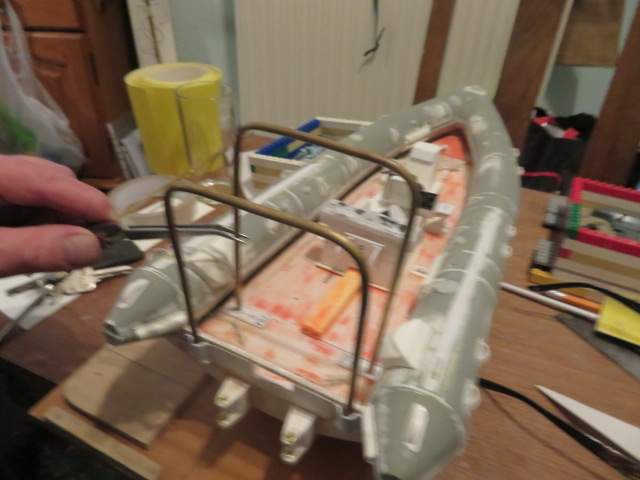 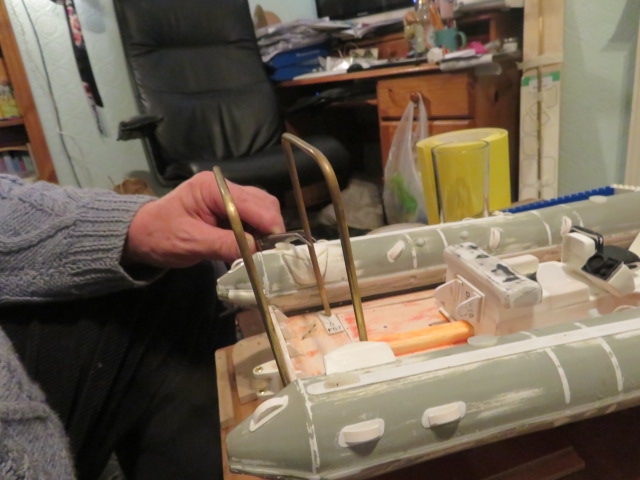 frames were jigged up and held by my "extra hands" clamps, placed on my portable brazing "hearth", cross members cut to length, and the torch lit........got my silver solder and flux powder ready.......and happily soldered away.......prefer silver soldering to soft solder.......much greater strength in it. frames were jigged up and held by my "extra hands" clamps, placed on my portable brazing "hearth", cross members cut to length, and the torch lit........got my silver solder and flux powder ready.......and happily soldered away.......prefer silver soldering to soft solder.......much greater strength in it.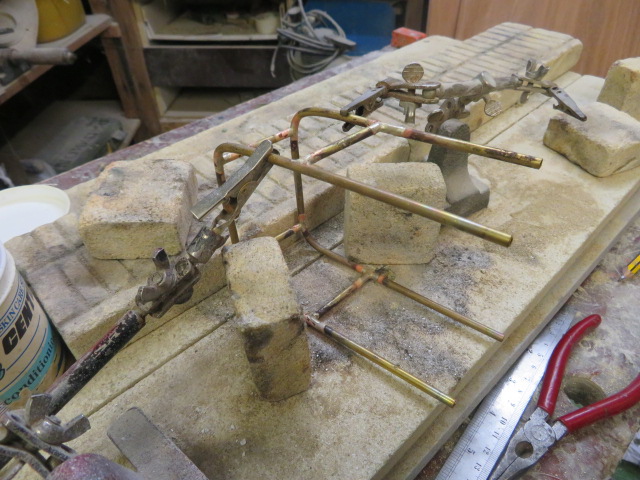 the legs have been cut to length now and the support legs to the front uprights have also been silver soldered in place, and deck drilled to take the uprights........now on to the airbag platform. this will be fabricated in plasticard. the legs have been cut to length now and the support legs to the front uprights have also been silver soldered in place, and deck drilled to take the uprights........now on to the airbag platform. this will be fabricated in plasticard.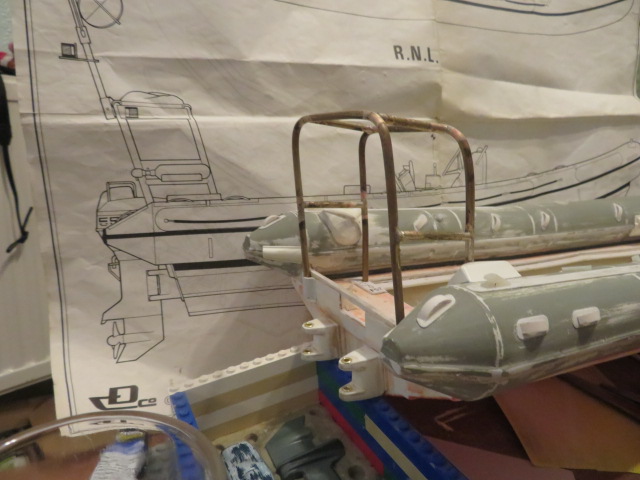 do my most innovative work, after a good strong beer...........not the neatest, I grant you, but a little filler and some abrasive paper always sorts that out, lol..........the airbag platform has been fabricated, and needs cleaning up....the airbag itself will be fabricated from milliput. do my most innovative work, after a good strong beer...........not the neatest, I grant you, but a little filler and some abrasive paper always sorts that out, lol..........the airbag platform has been fabricated, and needs cleaning up....the airbag itself will be fabricated from milliput.
the nav light boxes have also been added to the platform.
    |
|   | | Guest
Guest
 |  Subject: Re: LESRO ATLANTIC 21 KIT. Subject: Re: LESRO ATLANTIC 21 KIT.  Thu Mar 15, 2018 11:22 pm Thu Mar 15, 2018 11:22 pm | |
| Just tidying up little missing bits now before I take it into the spray booth, and made the radar defector tonight, but I am still a small fitting missing from the kit.........the steering wheel...........I need a 3 spoke wheel around 20mm diameter........looked on line but can't find one anywhere.and then, I have a problem with preference.......because of the extra weight on the stern because I used brass and milliput for the roll over bars and the air bag I would like to put the batteries further forward than aft or on the sides of the prop shaft...........but if I were to do so, I would need to shorten the prop tube and shaft.........that's no problem, but just wondering..........I really need to get it in the test tank, but then I would need to seal the broken skeg and hole in it before hand..............what are the consensus of opinion please.also, instead of running it on the 585 that was supplied I want to run on a brushless.........but not having a clue, can anyone suggest what set up I would need, motor esc, batteries etc. thanks.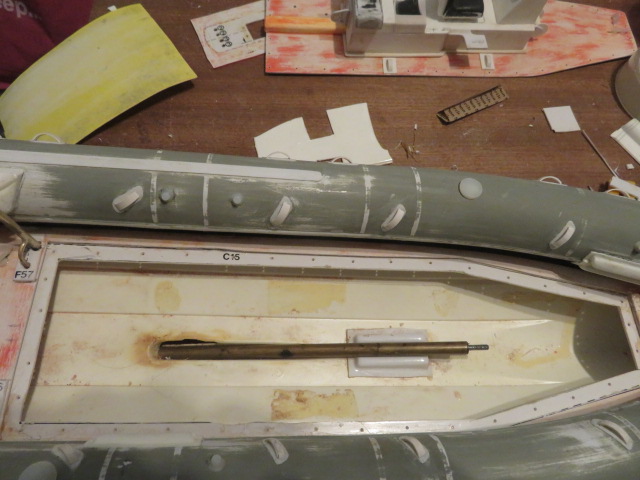 Now commeth the time to start thinking of fitting the innards .....one of my problems is the weight of the aft roll bars and air bag and so I am going to put my batteries as far forward as possible to counter the weight back stern. as such, I needed tore position the motor aft somewhat. to do this I had to shorten the prop shaft and tube.I finally found my vice under more stored junk and got to work, shortening by about 100mm. instead of re tapping the shaft, I filed a flat onto it.......not as though I don't have any spare couplings.Then it was time to take out the shaft support from the original position.........luckily it had been glued in , in the same way as the original kit had been built..4 spots of glue one in each corner, and not plastic glue either, lol.....it pinged offeasily, and positioning the shaft/tube with propeller fitted so that it doesn't hit the underside of the boat was easy enough using the shaft support temporarily I used 2 part epoxy to glue. once it has set and cured I will surround it with some milliput to make secure and seal in position. some might question my wisdom at shortening the shaft because of ingress of water in a short shaft/tube, but the proof is in the "pudding" in that all my classic lifeboats have short tubes and exposed shafts f very similar to what I have just fitted, and with a mixture of Vaseline and carbon powder mixed in, I have never had any leaks through my short tubes ever.and finally I bought these nihm batteries to power my Flying Christine ambulance launch a few years ago and never really sailed the boat, and so I am now charging them as they haven't been used in yonks, separate them as they are wired in parallel and then see if one fits in the bow to power a small brushless. Now commeth the time to start thinking of fitting the innards .....one of my problems is the weight of the aft roll bars and air bag and so I am going to put my batteries as far forward as possible to counter the weight back stern. as such, I needed tore position the motor aft somewhat. to do this I had to shorten the prop shaft and tube.I finally found my vice under more stored junk and got to work, shortening by about 100mm. instead of re tapping the shaft, I filed a flat onto it.......not as though I don't have any spare couplings.Then it was time to take out the shaft support from the original position.........luckily it had been glued in , in the same way as the original kit had been built..4 spots of glue one in each corner, and not plastic glue either, lol.....it pinged offeasily, and positioning the shaft/tube with propeller fitted so that it doesn't hit the underside of the boat was easy enough using the shaft support temporarily I used 2 part epoxy to glue. once it has set and cured I will surround it with some milliput to make secure and seal in position. some might question my wisdom at shortening the shaft because of ingress of water in a short shaft/tube, but the proof is in the "pudding" in that all my classic lifeboats have short tubes and exposed shafts f very similar to what I have just fitted, and with a mixture of Vaseline and carbon powder mixed in, I have never had any leaks through my short tubes ever.and finally I bought these nihm batteries to power my Flying Christine ambulance launch a few years ago and never really sailed the boat, and so I am now charging them as they haven't been used in yonks, separate them as they are wired in parallel and then see if one fits in the bow to power a small brushless.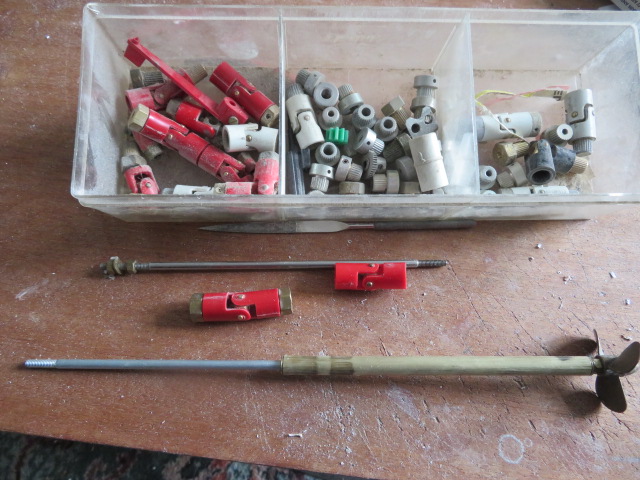 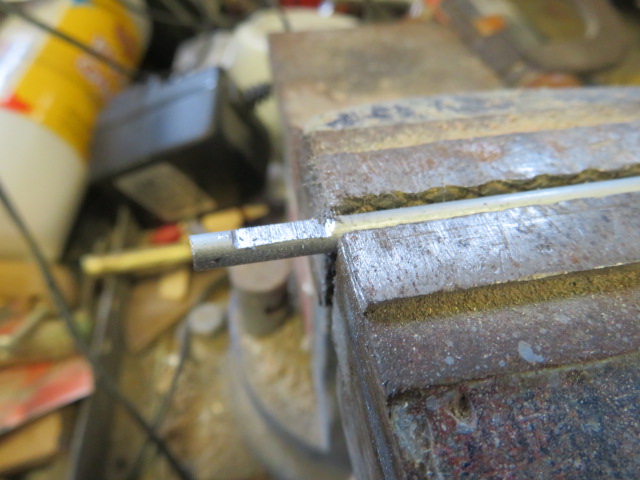 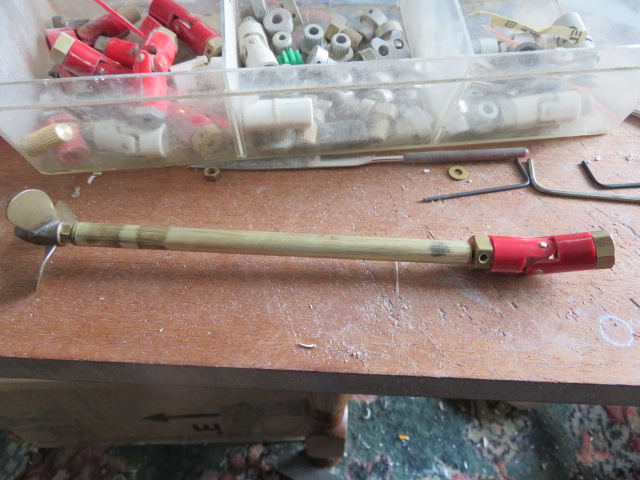 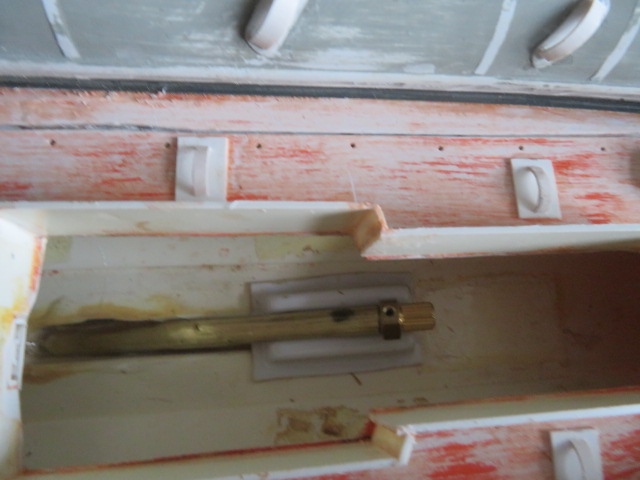  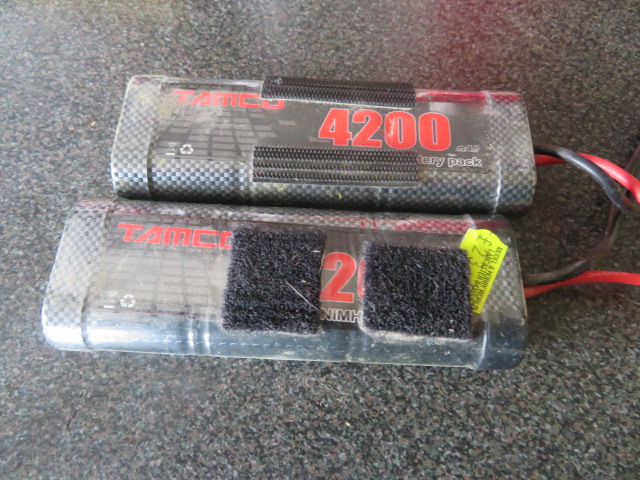 well, it was exactly two weeks ago today [this lunchtime to be precise] that I started to resurrect this box of bits, and I thought that I would have to fabricate a lot more than I have done, and contrary to what I said about wishing I hadn't done, I have actually really enjoyed it very much. the prop tube has now been set in milliput and the tube support has been added, and so should be no vibration from the brushless motor revving its nuts off......I have put it on the radiator to set it off a little quicker, and hopefully tonight I can put it in the bath.......errr I mean test tank with the roll bar on, and control/seating centre to see about weight distribution well, it was exactly two weeks ago today [this lunchtime to be precise] that I started to resurrect this box of bits, and I thought that I would have to fabricate a lot more than I have done, and contrary to what I said about wishing I hadn't done, I have actually really enjoyed it very much. the prop tube has now been set in milliput and the tube support has been added, and so should be no vibration from the brushless motor revving its nuts off......I have put it on the radiator to set it off a little quicker, and hopefully tonight I can put it in the bath.......errr I mean test tank with the roll bar on, and control/seating centre to see about weight distribution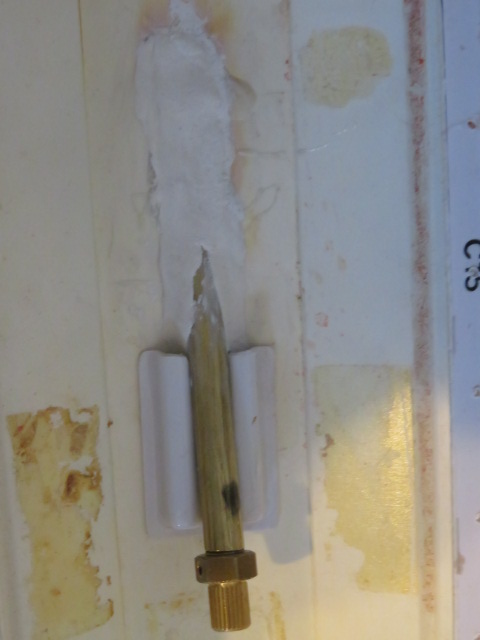  How much it might have taken me to draw n time and then take along to the 3Dprint shop, god only knows, but my little servo retaining box for the steering links, took me 35minutes and some scraps of 2.5mm plasticard to make and fit into the stern over prop tube.....it was glued in place using both plastic weld and silicon [in different places I might add, and access to it is easy for removal of the main deck if needed. silicon added to glue to the prop shaftAnd the supports underneath raise it to the correct level for linking up to the steering rods from the outboards.The slot in the front is for the lead to the receiver.Good access to the servo from the seat access hole.How much it might have taken me to draw n time and then take along to the 3Dprint shop, god only knows, but my little servo retaining box for the steering links, took me 35minutes and some scraps of 2.5mm plasticard to make and fit into the stern over prop tube.....it was glued in place using both plastic weld and silicon [in different places I might add, and access to it is easy for removal of the main deck if needed. silicon added to glue to the prop shaftAnd the supports underneath raise it to the correct level for linking up to the steering rods from the outboards.The slot in the front is for the lead to the receiver.Good access to the servo from the seat access hole. How much it might have taken me to draw n time and then take along to the 3Dprint shop, god only knows, but my little servo retaining box for the steering links, took me 35minutes and some scraps of 2.5mm plasticard to make and fit into the stern over prop tube.....it was glued in place using both plastic weld and silicon [in different places I might add, and access to it is easy for removal of the main deck if needed. silicon added to glue to the prop shaftAnd the supports underneath raise it to the correct level for linking up to the steering rods from the outboards.The slot in the front is for the lead to the receiver.Good access to the servo from the seat access hole.How much it might have taken me to draw n time and then take along to the 3Dprint shop, god only knows, but my little servo retaining box for the steering links, took me 35minutes and some scraps of 2.5mm plasticard to make and fit into the stern over prop tube.....it was glued in place using both plastic weld and silicon [in different places I might add, and access to it is easy for removal of the main deck if needed. silicon added to glue to the prop shaftAnd the supports underneath raise it to the correct level for linking up to the steering rods from the outboards.The slot in the front is for the lead to the receiver.Good access to the servo from the seat access hole.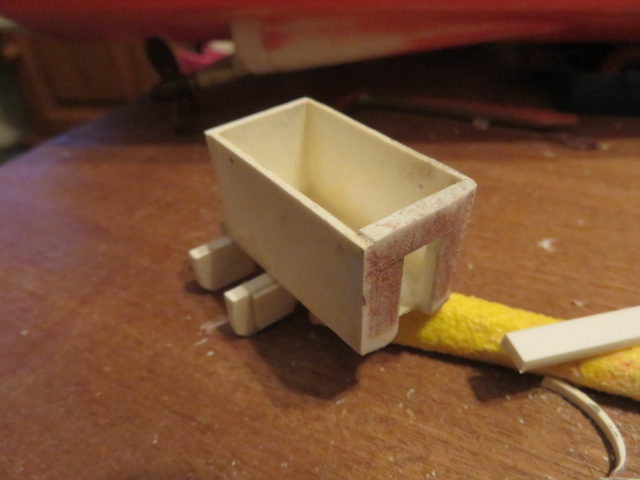 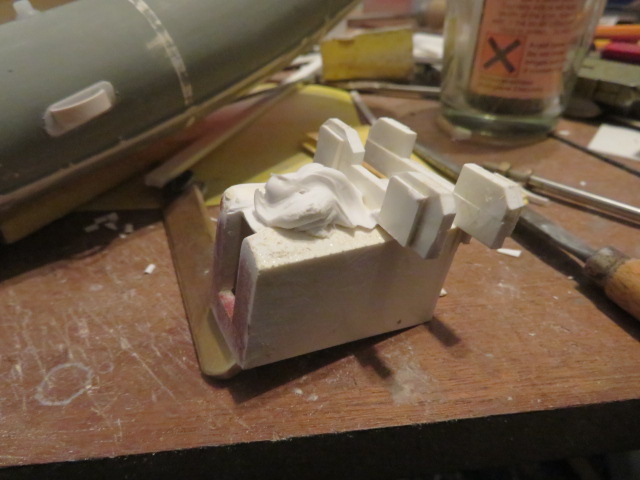 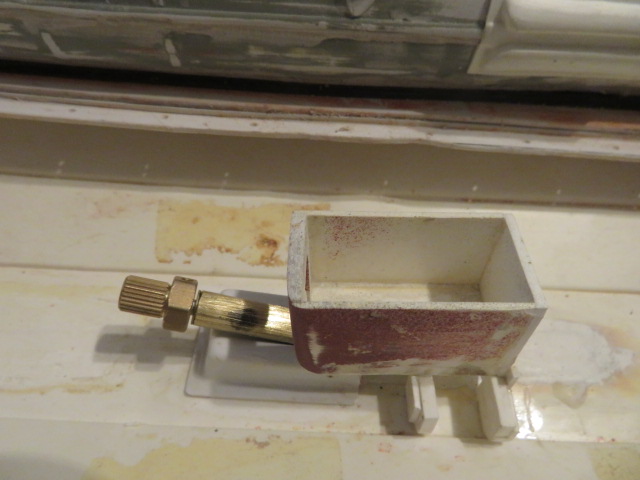 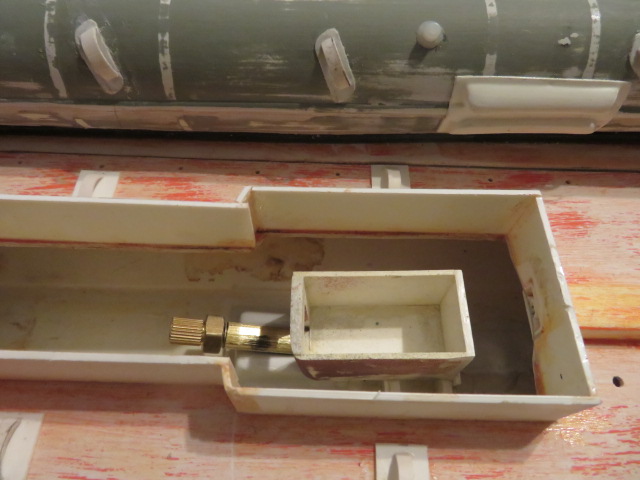 |
|   | | Guest
Guest
 |  Subject: Re: LESRO ATLANTIC 21 KIT. Subject: Re: LESRO ATLANTIC 21 KIT.  Fri Mar 16, 2018 1:46 am Fri Mar 16, 2018 1:46 am | |
| |
|   | | Guest
Guest
 |  Subject: Re: LESRO ATLANTIC 21 KIT. Subject: Re: LESRO ATLANTIC 21 KIT.  Fri Mar 16, 2018 3:28 pm Fri Mar 16, 2018 3:28 pm | |
| well.......it was sixteen days and two hours exactly from start of this resurrection to fixing in principal, the last of the parts of this lifeboat.......and it has been very enjoyable too.....this lunch time I made a jig, drilled the holes and dry fitted the grab lines to the side of the hull. just a case of now stripping it down, painting all of the parts and then buying and fitting a motor, esc and servo links to the outboards, and off she'll go........
I'll wait a week or so for the weather to warm up a little and for my workshop heaters to gain on the colder weather to spray the old girl........so, until it's all painted, this is probably my last post on this, unless any questions about moulding, etc, and on to my next project/s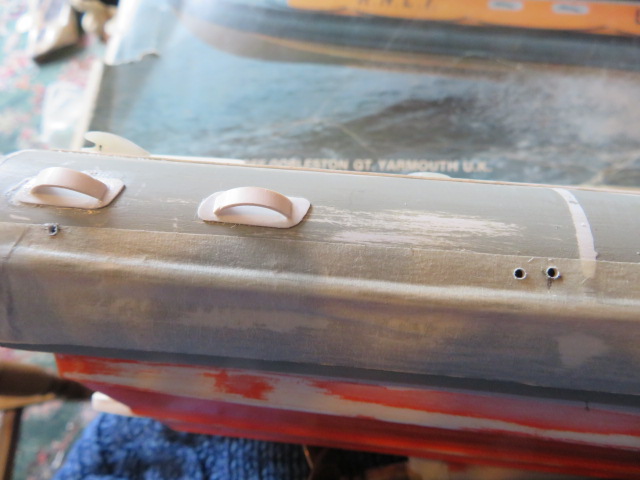 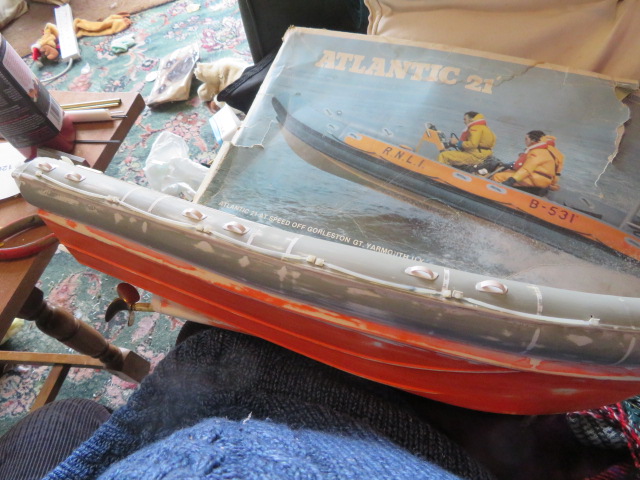 |
|   | | Guest
Guest
 |  Subject: Re: LESRO ATLANTIC 21 KIT. Subject: Re: LESRO ATLANTIC 21 KIT.  Sun Mar 25, 2018 4:06 pm Sun Mar 25, 2018 4:06 pm | |
| someone asked me whether it is easy to mould fittings from ones they have made, and I said.....very easy, and very gratifying and satisfying......I made this set of moulds for one of my cracked outboards on the Atlantic 2, and as it is going to be used for steering the boat I didn't want to have it break on me.
if any one wants a step by step low down on my methods of making moulds......just look on any of my build threads, as it gives them and the materials i use, but just a few shots of getting a mould box ready and moulding an object.
the Vaseline is used as a release agent between the two layers of rubber..........imperative if you want the two halves to separate and far cheaper than spray on release agent. I had, when I said earlier that I had finished the build other than painting the boat, it wasn't quite true...big blunder...i had forgotten to glue the outboards back together and fit them temporarily to the brackets on the transom........anyway that has been corrected but I've found that one outboard doesn't line up with the other in the vertical plain, and so, as it's even noticeable to my eye, it'll stand out like a sore thumb to others, and so am going to remove the bracket and trim it so that both outboards sit the same. I had, when I said earlier that I had finished the build other than painting the boat, it wasn't quite true...big blunder...i had forgotten to glue the outboards back together and fit them temporarily to the brackets on the transom........anyway that has been corrected but I've found that one outboard doesn't line up with the other in the vertical plain, and so, as it's even noticeable to my eye, it'll stand out like a sore thumb to others, and so am going to remove the bracket and trim it so that both outboards sit the same. slight adjustment to the base of the bracket to move the top out by 3/32" by using a tapered wedge of pasticard and both outboards now line up fine and dandy.the joys of building in plasticard medium......so easy to correct my mistakes. slight adjustment to the base of the bracket to move the top out by 3/32" by using a tapered wedge of pasticard and both outboards now line up fine and dandy.the joys of building in plasticard medium......so easy to correct my mistakes.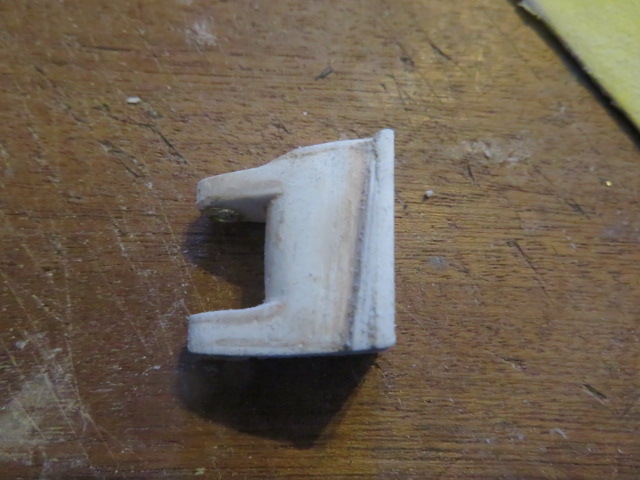 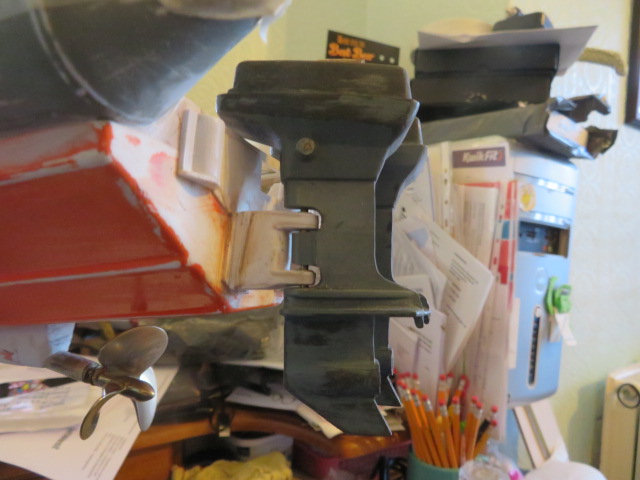 And then managed to take a few shots of the finished building of the boat...............just before our sojourn to the Clyde today.......this is before I start painting it....quite pleased with it......just looking forward to getting some paint on it.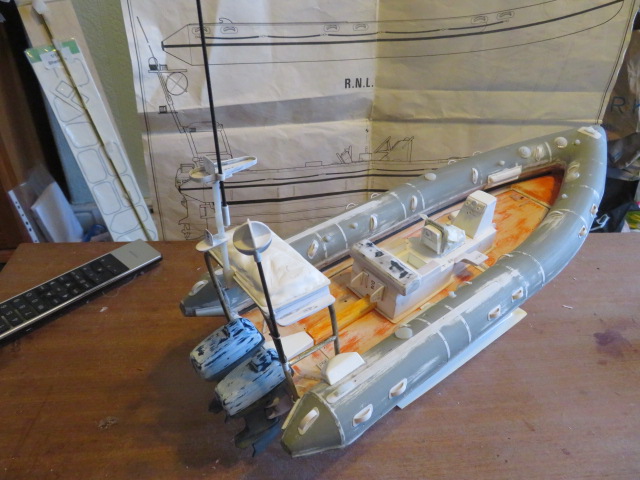 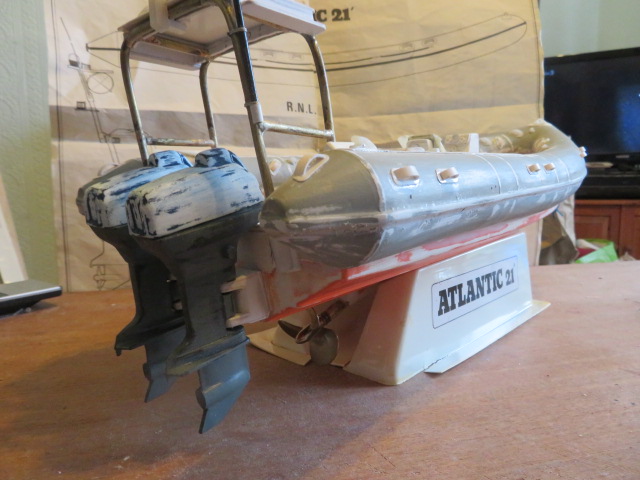 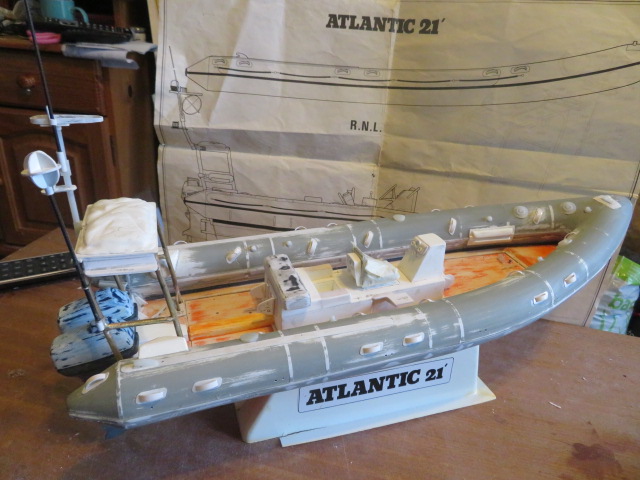 |
|   | | Guest
Guest
 |  Subject: Re: LESRO ATLANTIC 21 KIT. Subject: Re: LESRO ATLANTIC 21 KIT.  Sun Mar 25, 2018 4:20 pm Sun Mar 25, 2018 4:20 pm | |
| |
|   | | Guest
Guest
 |  Subject: Re: LESRO ATLANTIC 21 KIT. Subject: Re: LESRO ATLANTIC 21 KIT.  Sun Mar 25, 2018 6:54 pm Sun Mar 25, 2018 6:54 pm | |
| |
|   | | Guest
Guest
 | |   | | barriew
Captain (moderator)

Posts : 2631
Join date : 2011-11-26
Age : 83
Location : Thaxted, Essex
 |  Subject: Re: LESRO ATLANTIC 21 KIT. Subject: Re: LESRO ATLANTIC 21 KIT.  Mon Nov 05, 2018 5:57 pm Mon Nov 05, 2018 5:57 pm | |
| Looks. Very good Neil, at least what I can see on my tab!let! My computer is out of action while I reconfigure the room I use for it. No modeling for me this week - but some DIY.
Barrie | |
|   | | Guest
Guest
 |  Subject: Re: LESRO ATLANTIC 21 KIT. Subject: Re: LESRO ATLANTIC 21 KIT.  Mon Nov 05, 2018 8:06 pm Mon Nov 05, 2018 8:06 pm | |
| DIY...……..I HATE IT...….WONKEY SHELVES, RAWEL PLUGS THAT WOULDN'T HOL AN ANT, PAINT WITH RUNS, EVEN WITH NONE DRIP PAINT...………….AHH GIVE ME A MODEL TO BUILD......and i'm at peace, lol. |
|   | | Guest
Guest
 |  Subject: Re: LESRO ATLANTIC 21 KIT. Subject: Re: LESRO ATLANTIC 21 KIT.  Tue Nov 06, 2018 11:18 pm Tue Nov 06, 2018 11:18 pm | |
| |
|   | | Guest
Guest
 |  Subject: Re: LESRO ATLANTIC 21 KIT. Subject: Re: LESRO ATLANTIC 21 KIT.  Wed Nov 07, 2018 12:09 am Wed Nov 07, 2018 12:09 am | |
| |
|   | | Guest
Guest
 |  Subject: Re: LESRO ATLANTIC 21 KIT. Subject: Re: LESRO ATLANTIC 21 KIT.  Wed Nov 07, 2018 12:16 am Wed Nov 07, 2018 12:16 am | |
| |
|   | | Sponsored content
 |  Subject: Re: LESRO ATLANTIC 21 KIT. Subject: Re: LESRO ATLANTIC 21 KIT.  | |
| |
|   | | | | LESRO ATLANTIC 21 KIT. |  |
|
Similar topics |  |
|
| | Permissions in this forum: | You cannot reply to topics in this forum
| |
| |
| |
